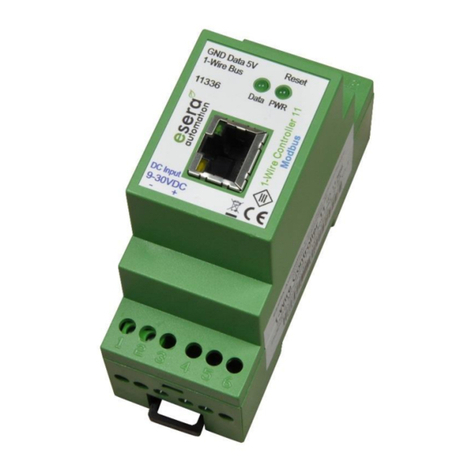
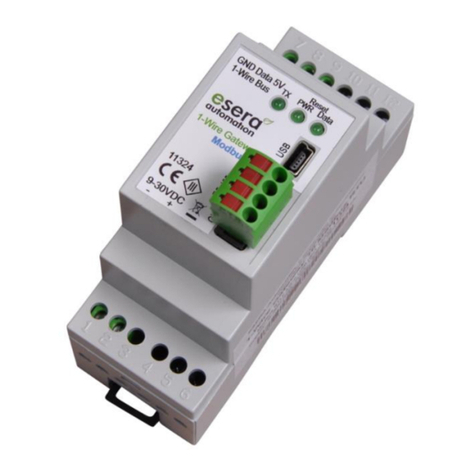
esera automation 1-Wire Gateway 20 Modbus TCP User manual

Art. No. 11337
All rights reserved. Reproduction as well as electronic duplication of this user guide, complete or in part, requires the written consent of
ESERA GmbH. Errors and technical modification subject to change. ESERA GmbH, ESERA-Automation 2020
www.esera.de 11337 V2.0 R1.0 Manual Page 1 of 10
User Guide
1-Wire Gateway 20 Modbus TCP
1-Wire Gateway for self-communication
between PLC and a 1-Wire sensor and
actuator Network
Data evaluation of all 1-Wire modules in 1 - 2
seconds increments
Modbus data output as TCP protocol
Edited sensor- and actuator data
Status updates for all sensors and actuators
Easy configuration
No extra drivers needed
Data storage in case of loss of communication
to the host system (optional)
Power supply for 1-Wire network
Designed for all dimensions of 1-Wire
networks
DIN rail housing for switchboard assembly
Wide range of power voltage
Management of all ESERA-Automation 1-Wire
modules and many of standard 1-Wire
sensors and actuators (e.g. switch-modules)
1 Introduction
Before you start assembling the 1-Wire Gateway 20 Modbus TCP and before you take the device into
operation, please read this assembly and operating instruction carefully to the end, especially the section
referring to the safety notes.
We recommend to use Config-Tool 3 for all kind of setup and configuration tasks. Please find the latest
release on our website at, www.esera.de. Please also refer to the Help/Support section to find the user guide
for Config-Tool 3.
2 Product description
Standard Modbus TCP protocol
You can use your industrial controller, e.g. PLC and standard TCP protocol to connect to the 1-Wire
Gateway 20. Addressing is similar to other Modbus systems and easy to handle. You can use addresses
for system data, sensor data and actuator devices. A complete address list including all available data
points is available for download on our webpage. These addresses are also available within the
ESERA configuration software Config-Tool 3.
Standalone controller
The 1-Wire Gateway 20 Modbus is designed to control 1-Wire Networks. You no longer have to worry
about 1-Wire commands or algorithms to analyze sensor data. 1-Wire Gateway 20 Modbus scans 1-Wire
Networks by itself in order to identify new sensors or actuator devices. All data found were automatically
provided in a ready to use Modbus protocol format.

All rights reserved. Reproduction as well as electronic duplication of this user guide, complete or in part, requires the written consent of
ESERA GmbH. Errors and technical modification subject to change. ESERA GmbH, ESERA-Automation 2020
www.esera.de 11337 V2.0 R1.0 Manual Page 2 of 10
Formatted data output
1-Wire Gateway 20 Modbus provides plausibility checked sensor and actuator data in a ready to use format.
E.g. temperature sensor provides values in Celsius degrees with 2 decimal places. You only need to divide
this number by 100. Within the 1-Wire Gateway a product specific transformation table is available for most of
our selling 1-Wire sensor and actuator products.
Designed for all 1-Wire Networks
The 1-Wire interface of the 1-Wire Gateway 20 Modbus is specially designed to securely support all sizes
of 1-Wire networks. 1-Wire sensor devices can be operated in parasitic or normal mode at the same time.
The latest available most powerful 1-Wire interface for a maximum level of data security has been used.
This includes complex network structures as well.
1-Wire Gateway 20 Modbus configuration
Free configuration software (Config-Tool 3) is provided. When using Config-Tool 3, the latest
documentation is available at any time hence it automatically updates via internet. This software is
available for download on our webpage. Communication to Modbus TCP is parallel with no switching.
System time / real time clock
No real time clock with battery buffering available in your system? No problem at all. Our 1-Wire Gateway
20 Modbus is providing time and date as real time clock including an integrated backup battery. Data
plausibility check is possible at any time.
Power supply
Input voltage for 1-Wire Gateway 20 Modbus is 9 –30 VDC. Therefore it can be used for 12 V as well as
24 VDC (industrial applications). Appropriate hat-rail mounted power supplies or power plugs can be
found in our webshop.
3 Auto-E-Connect® Support
The ESERA Auto-E-Connect® 1-Wire Plug and Play system will be used for the
1-Wire Bus supported. This enables fully automatic configurations of 1-Wire sensors
and actuators on the 1-Wire bus. It is optimized for industrial applications and
enables significant added value beyond the sensor and chip data.
The Auto-E-Connect function automatically recognizes ESERA chips, sensors and actuators, starts suitable
libraries and outputs fully formatted data.
The Auto-E-Connect functionality will be available from mid-2020 via 1-Wire Controllers, 1-Wire Gateways and
1-Wire ECO from ESERA available.
Further information on ESERA Auto-E-Connect can be found on the ESERA website, ESERA Config-Tool 3,
or in the download area for this article in the ESERA Webshop.
4 Technical data
Data Interface: Modbus TCP and ESERA ASCII text protocol
Ethernet Interface: TCP/IP or UDP
- 10/100 MBit Ethernet Interface (RJ45)
- Auto Negotiation (Full-duplex and Half-duplex)
- Auto MDI/MDIX
- Support for DHCP and fix IP-address
- DNS support
- DYN-DNS server sSupport
Firmware Update: via ESERA Config-Tool 3
Power supply: 15 –30 VDC
Power consumption: maximum 1 A
1-Wire interface: 1-Wire bus (12 V, 5 V, GND and data)
Protective circuits: ESD protection and polarity protection
Connection: Screw terminals (up to 2,5 qmm wire cross section)
Output voltage: 12 V maximum 250 mA (+/- 10 %), 5 V maximum 200 mA (+/- 10 %)
overload-proof and short-circuit-proof
Isolation: Galvanic separation among data and 1-Wire interface

Art. No. 11337
All rights reserved. Reproduction as well as electronic duplication of this user guide, complete or in part, requires the written consent of
ESERA GmbH. Errors and technical modification subject to change. ESERA GmbH, ESERA-Automation 2020
www.esera.de 11337 V2.0 R1.0 Manual Page 3 of 10
5 Ambient conditions
Temperature, operation -10 °C up to +55 °C (extended temperature range available upon request)
Air humidity: 10 –92 % (non-condensing)
Protection system: IP20
Protection class: III
Dimensions: 35 x 90 x 70mm (WxHxD)
6 Conformity
EN 50090-2-2
EN 61000-4-2, ESD
EN 61000-4-3, HF
EN 61000-4-4, Burst
EN 61000-4-5, Surge
EN 61000-6-1, Fault-free operation
EN 61000-6-3, Stray radiation
RoHS
7 LED indicators
The module status will be displayed by various LEDs. Please refer to the following table for their functions:
LED status
Description
Function
LED Green
PWR
power indicator
LED Green
DATA
LED flashes 3 times after power on
Flashes at 1-Wire activity
Flashes while transferring data by the data interface
Flashes rapidly if "KAL Receive" has been activated and no
“KAL messages" received.
LED Green
Data Interface
Network Link LED
Is lit when connected
LED Yellow
Data interface
Network activity LED
Is lit while data submission by data interface

All rights reserved. Reproduction as well as electronic duplication of this user guide, complete or in part, requires the written consent of
ESERA GmbH. Errors and technical modification subject to change. ESERA GmbH, ESERA-Automation 2020
www.esera.de 11337 V2.0 R1.0 Manual Page 4 of 10
8 Connection
www.esera.de

Art. No. 11337
All rights reserved. Reproduction as well as electronic duplication of this user guide, complete or in part, requires the written consent of
ESERA GmbH. Errors and technical modification subject to change. ESERA GmbH, ESERA-Automation 2020
www.esera.de 11337 V2.0 R1.0 Manual Page 5 of 10
Module bottom side (power supply, digital input and analog output)
1 = GND/negative digital input isolated to negative supply
2 = digital input 1 10 –30 VDC
3 = digital input 2 10 –30 VDC
4 = digital input 3 10 –30 VDC
5 = digital input 4 10 –30 VDC
6 = GND/ negative analog output isolated to negative supply
7 = analog output 0 –10 VDC
8 - 15 = not assigned
16 = GND/ negative supply voltage
17 = Positive supply voltage
Module top side (Digital Output and 1-Wire Bus)
18 = main supply for digital output 1+2
19 = digital output 1, max. 8 A
20 = digital output 2, max. 8 A
21 = main supply for digital output 3+4
22 = digital output 3, max. 8 A
23 = digital output 4, max. 8 A
24 = digital output 5 break contact, max. 5A
25 = main supply for digital output 5
26 = digital output 5 make contact, max. 5A
30 = Reset Button inside
32 = GND/ negative 1-Wire Bus
33 = 1-Wire Data
34 = 5 V voltage supply for 1-Wire Bus, max. 200 mA
35 = 12 V voltage supply for 1-Wire Bus, max. 250 mA
Basics and tips for 1-Wire Bus systems can be found in our webshop (https://www.esera.de/1-wire-rundlagen/)
or in our e-book which is also available in our webshop (https://www.esera.de/service-
support/dokumentation/352/grundlagen-1-wire-bus-ebook?number=11901).

All rights reserved. Reproduction as well as electronic duplication of this user guide, complete or in part, requires the written consent of
ESERA GmbH. Errors and technical modification subject to change. ESERA GmbH, ESERA-Automation 2020
www.esera.de 11337 V2.0 R1.0 Manual Page 6 of 10
9 Connection - Example 1-Wire Gateway, sensors and actuators
www.esera.de

Art. No. 11337
All rights reserved. Reproduction as well as electronic duplication of this user guide, complete or in part, requires the written consent of
ESERA GmbH. Errors and technical modification subject to change. ESERA GmbH, ESERA-Automation 2020
www.esera.de 11337 V2.0 R1.0 Manual Page 7 of 10
10 Data interface Modbus TCP and ESERA ASCII text protocol
The Ethernet interface is configured using the Windows ESERA program "Config-Tool 3".
You can find this program in the download area of the ESERA online shop.
11 Integration in IP-Symcon / ESERA-Station
ESERA IP-Symcon software modules are provided at our webpage for easy integration of the 4-fold analog
input in IP-Symcon by using a 1-Wire Controller / 1-Wire Gateway. Using software scripts are no longer
necessary. Further details can be found on our webpage: https://www.esera.de/kompatible-steuerungen-
zentralen/ip-symcon-integration/.
A script for regular connections by 1-Wire Bus Coupler is also available for download on our webpage.
Further details can be found in the sample script.
12 Integration in Loxone
We provide a sample project e.g. for read out analog voltages by 4-fold analog input via
1-Wire Controller 1 in our webshop.
Further details can be found here: https://www.esera.de/kompatible-steuerungen-zentralen/loxone-
integration/demo-1-wire-controller-1-loxone-integration/
13 Integration in FHEM
We provide a software module for easy integration in the Open Source automation software FHEM of the
4-fold analog input into FHEM by 1-Wire Controller / 1-Wire Gateway. Using this software scripts are no
longer necessary. Further details can be found on our webpage: https://www.esera.de/kompatible-
steuerungen-zentralen/fhem-integration/
14 Configuration and communication with 1-Wire Gateway 20
1-Wire Gateway 20 offers various configuration and formatting options. All options can be read out and
controlled by the ESERA Config-Tool 3. 1-Wire Gateway and Config-Tool 3 communication is based on
an open ESERA ASCII text protocol. Therefore configuration and data transfer with any terminal program
(such as Hercules or Putty) by UDP/TCPIP and 1-Wire Gateway 20 is possible at any time. For detailed
communication commands please refer to the “Programming Manual” which is available for download in
our webshop.
15 Firmware-Update
Firmware will be updated by using a Config-Tool
3 software which can be found at the
“DEBUG/DATA” tab. By clicking the button
“DOWNLOAD FIRMWARE” a new window
opens to download new software (firmware) for
the 1-Wire Controller / 1-Wire Gateway.
This firmware is compatible with all releases of
the 1-Wire Controller and 1-Wire Gateways. The
features are individually unlocked at the installed
device. Starting with firmware version V1.18_38
the reset button of the 1-Wire Controller / 1-Wire
Gateway does not need to be pressed for
updates anymore.

All rights reserved. Reproduction as well as electronic duplication of this user guide, complete or in part, requires the written consent of
ESERA GmbH. Errors and technical modification subject to change. ESERA GmbH, ESERA-Automation 2020
www.esera.de 11337 V2.0 R1.0 Manual Page 8 of 10
Recovery function Firmware-update
Should an error occur during the firmware update e.g. losing power while updating the
firmware, a recovery function can be started. Press and hold the reset button (the reset
button is located beneath hole no. 30 at module top side). Then start the update in Config-
Tool 3 and release the reset button after 1 second after the update has been started. The
update should start now.
When the updated is completed we recommend to disconnect the 1-Wire Controller /
1-Wire Gateway for approx. 30 seconds, then restart again. If any issues should occur
when installing the update, please contact the ESERA support team: E-Mail:
16 Communication
16.1 ESERA ASCII text protocol / programming manual
The 1-Wire Gateway 20 Modbus provides two types of protocols. The ESERA text protocol in ASCII format
easily supports configuration and analysis whereas the ESERA text protocol runs on “GET” and “SET”
commands. The ESERA text protocol is totally open and documented. The latest version of the ESERA
protocol description is available for download in our webshop
(https://www.esera.de/produkte/software/downloads-firmware-1-wire-controller-1-wire-gateway/) as well as in
the ESERA Config-Tool 3 download area.
16.2 Modbus TCP protocol
1-Wire Gateway 20 Modbus communication to ESERA text protocol or Modbus TCP protocol is parallel with
no switching. For communication any IP address and any port can be chosen. Default is set to port 5000 and
CHCP mode.
The Modbus protocol is standardized configured. Please refer to the following table for a partial address-
overview. A complete address overview is available for download in EXCEL format at the download area of
the 1-Wire Gateway 20 Modbus.
Partial Modbus address specification
Specification
Reading address
number of words
(16Bit)
type of data
Gateway No.
60000
1
word
Article-No.
60001
1
word
Firmware Version
61000
4
string
Hardware
61010
3
string
Serial number
61020
9
string
Time
61030
4
string
Date
61035
4
string
…
1-Wire bus sensors
and actuators
OWD 1/1-Wire module
40100
1
Integer
40101, 40102
2
DWord1
40103, 40104
2
DWord2
40105, 40106
2
DWord3
40107, 40108
2
DWord4
40109, 40110
2
DWord5
40111, 40112
2
DWord6
40113, 40114
2
DWord7
40115, 40116
2
DWord8
OWD 2/1-Wire module
40200
1
Integer
40201, 40202
2
DWord1
40203, 40204
2
DWord2
…
1-Wire Controller 1

Art. No. 11337
All rights reserved. Reproduction as well as electronic duplication of this user guide, complete or in part, requires the written consent of
ESERA GmbH. Errors and technical modification subject to change. ESERA GmbH, ESERA-Automation 2020
www.esera.de 11337 V2.0 R1.0 Manual Page 9 of 10
17 Operating conditions
The operation of the assembly group can take place only on condition of observing the required voltage
and the ambient conditions. The operating position of the device is irrelevant. The device is meant to be
used in dry and dust-free areas.
Should condensed water build up, an acclimatization period of at least 2 hours must pass.
Assembly groups and components do not belong into the hands of children!
The building group can be operated only under the supervision of an electrically skilled person.
In industrial facilities, the accident prevention regulations of the federation of industrial professional
associations for electrical installations and equipments must be observed.
Do not operate the assembly group in an environment with inflammable gases, vapours or dusts or in an
environment where such gases, vapours or dusts may be found.
18 Assembly
The location of the assembly must be protected against humidity. The device may be used only in dry
inside spaces and protected outside areas. The device is designed to be assembled as a fixed device
within a switchboard.
19 Disposal note
Do not dispose of the device within the household waste!
According to the directive concerning old electrical and electronic appliances,
electronic devices must be disposed of via the collecting points for old electronic
appliances!
20 Safety instructions
When using products that come into contact with electrical voltage, the valid VDE regulations must be observed,
especially VDE 0100, VDE 0550/0551, VDE 0700, VDE 0711 and VDE 0860
All final or wiring work must be carried out with the power turned off.
Before opening the device, always unplug or make sure that the unit is disconnected from the mains.
Components, modules or devices may only be put into service if they are mounted in a contact proof housing.
During installation they must not have power applied.
Tools may only be used on devices, components or assemblies when it is certain that the devices are
disconnected from the power supply and electrical charges stored in the components inside the device have
been discharged.
Live cables or wires to which the device or an assembly is connected, must always be tested for insulation faults
or breaks.
If an error is detected in the supply line, the device must be immediately taken out of operation until the faulty
cable has been replaced.
When using components or modules it is absolutely necessary to comply with the requirements set out in the
accompanying description specifications for electrical quantities.
If the available description is not clear to the non-commercial end-user what the applicable electrical
characteristics for a part or assembly are, how to connect an external circuit, which external components or
additional devices can be connected or which values these external components may have, a qualified
electrician must be consulted.
It must be examined generally before the commissioning of a device, whether this device or module is basically
suitable for the application in which it is to be used.
In case of doubt, consultation with experts or the manufacturer of the components used is absolutely necessary.
For operational and connection errors outside of our control, we assume no liability of any kind for any resulting
damage.
Kits should be returned without their housing when not functional with an exact error description and the
accompanying instructions. Without an error description it is not possible to repair. For time-consuming assembly
or disassembly of cases charges will be invoiced.
During installation and handling of components which later have mains potential on their parts, the relevant VDE
regulations must be observed.
Devices that are to be operated at a voltage greater than 35 VDC / 12mA, may only be connected by a qualified
electrician and put into operation.

All rights reserved. Reproduction as well as electronic duplication of this user guide, complete or in part, requires the written consent of
ESERA GmbH. Errors and technical modification subject to change. ESERA GmbH, ESERA-Automation 2020
www.esera.de 11337 V2.0 R1.0 Manual Page 10 of 10
Commissioning may only be realized if the circuit is built into a contact proof housing.
If measurements with an open housing are unavoidable, for safety reasons an isolating transformer must be
installed upstream or a suitable power supply can be used.
After installing the required tests according to DGUV / regulation 3 (German statutory accident insurance,
https://en.wikipedia.org/wiki/German_Statutory_Accident_Insurance) must be carried
21 Warranty
ESERA GmbH guarantees that the goods sold at the time of transfer of risk to be free from material and workmanship
defects and have the contractually assured characteristics. The statutory warranty period of two years begins from date
of invoice. The warranty does not extend to the normal operational wear and normal wear and tear. Customer claims
for damages, for example, for non-performance, fault in contracting, breach of secondary contractual obligations,
consequential damages, damages resulting from unauthorized usage and other legal grounds are excluded. Excepting
to this, ESERA GmbH accepts liability for the absence of a guaranteed quality resulting from intent or gross negligence.
Claims made under the Product Liability Act are not affected.
If defects occur for which the ESERA GmbH is responsible, and in the case of replacement goods, the replacement is
faulty, the buyer has the right to have the original purchase price refunded or a reduction of the purchase price.
ESERA GmbH accepts liability neither for the constant and uninterrupted availability of the ESERA GmbH or for
technical or electronic errors in the online offer.
We develop our products further and we reserve the right to make changes and improvements to any of the products
described in this documentation without prior notice. If you need documentation or information about older product
22 Trademarks
All mentioned designations, logos, names and trademarks (including those which are not explicitly marked) are
trademarks, registered trademarks or other copyright or trademarks or titles or legally protected designations of their
respective owners and are hereby expressly recognized as such by us. The mention of these designations, logos,
names and trademarks is made for identification purposes only and does not represent a claim of any kind on the part
of ESERA GmbH on these designations, logos, names and trademarks. Moreover, from their appearance on
ESERA GmbH webpages it cannot be concluded that designations, logos, names and trademarks are free of
commercial property rights.
ESERA and Auto-E-Connect are registered trademarks of ESERA GmbH.
23 Contact
ESERA GmbH
Adelindastrasse 20
87600 Kaufbeuren
GERMANY
Tel.: +49 8341 999 80-0
Fax: +49 8341 999 80-10
www.esera.de
WEEE-Number: DE30249510
This manual suits for next models
1
Table of contents
Other esera automation Gateway manuals
Popular Gateway manuals by other brands
SmartSavy
SmartSavy Serial GSM Gateway Software configuration guide
D-Link
D-Link DVG-3104MS - VoiceCenter PSTN Gateway user manual

Ericsson
Ericsson EDACS Jessica Operator's manual
Lütze
Lütze LOCC-Box-GWPN 0-6457 operating instructions

Sygonix
Sygonix 1898921 operating instructions
RTA
RTA 460ETCMC-N700 Product user guide
