Operating Instructions
Solar PIR Wall Spotlight „Power 500“
1. Introduction
Dear customer, we thank you for purchasing the Solar Globelight.
With this Solar Light you have purchased a product that complies with the
latest and most up-to-date technology.
This product complies with the European and National
Standards. The relevant certificates of conformity are depo-
sited with the manufacturer.
To preserve this standard and in order to maintain safety
you must adhere to the use instructions!
2. Security Instructions
In the event of any problems arising or damage occurring
from not following these instructions, the warranty is
deemed cancelled. The manufacturer will not be held res-
ponsible for any claims or damages arising from the misuse
of this product.
- For safety reasons and in order to maintain standards (CE) you are pro-
hibited from altering or changing any component in the product.
- Please follow the instructions very carefully.
- For commercial applications due care and attention must be paid to the
Health and Safety Standards in your jurisdiction.
3. Intended Use and Function
The PIR solar spotlight is suitable for the illumination of forecourts, drives,
entrances and a lot of other things. It is designed for year-round outdoor use.
The product is designed splash-water-proof and must not be exposed to any
direct water jet (e.g. garden hose or high-pressure cleaner) or immersed in
water.
The switching time, nightfall and sensitivity of the PIR sensor may be adjusted
via rotary controllers. The PIR motion sensor responds to temperature variations,
it switches the LED spotlight on and off after a detected motion.
The solar module and the spotlight may be installed on a pole or screwed to a
wall.
By means of electronics, the integrated battery pack is protected against any
harmful overcharging and deep discharge. In longer periods without sufcient
sun it may therefore happen that spotlight is not switched on automatically.
The spotlight may optionally be operated with a second solar module. This
second module will provide for a better utilization of the sun even in case of days
when the sun is shining only for a short time.
The second solar module is delivered wired ready for connection including a Y-
adapter cable (manufacturer art. No.: 102514, www.esotec.de)
Please make sure that the solar module is preferably directed to the South
and that shadows are avoided. When directing the module to the North it is not
possible to use the product. The solar module shall always be free of snow in
the winter. The battery pack has to be exchanged every 2 years at the latest.
Note: Please avoid unnecessary faulty switching. The PIR spotlight is e.g.
activated by free ranging pets because the PIR sensor responds to temperature
variations! Please take this fact into account when looking for the place of
installation.
4. Assembly and Putting into Operation
1. Please carefully take all parts out of the package and unwrap the accessories.
2. Choose an appropriate assembly site for the spotlight and the solar module.
The spotlight and the module may be screwed to a wall or installed on a pole,
3. Assembly of the solar module.
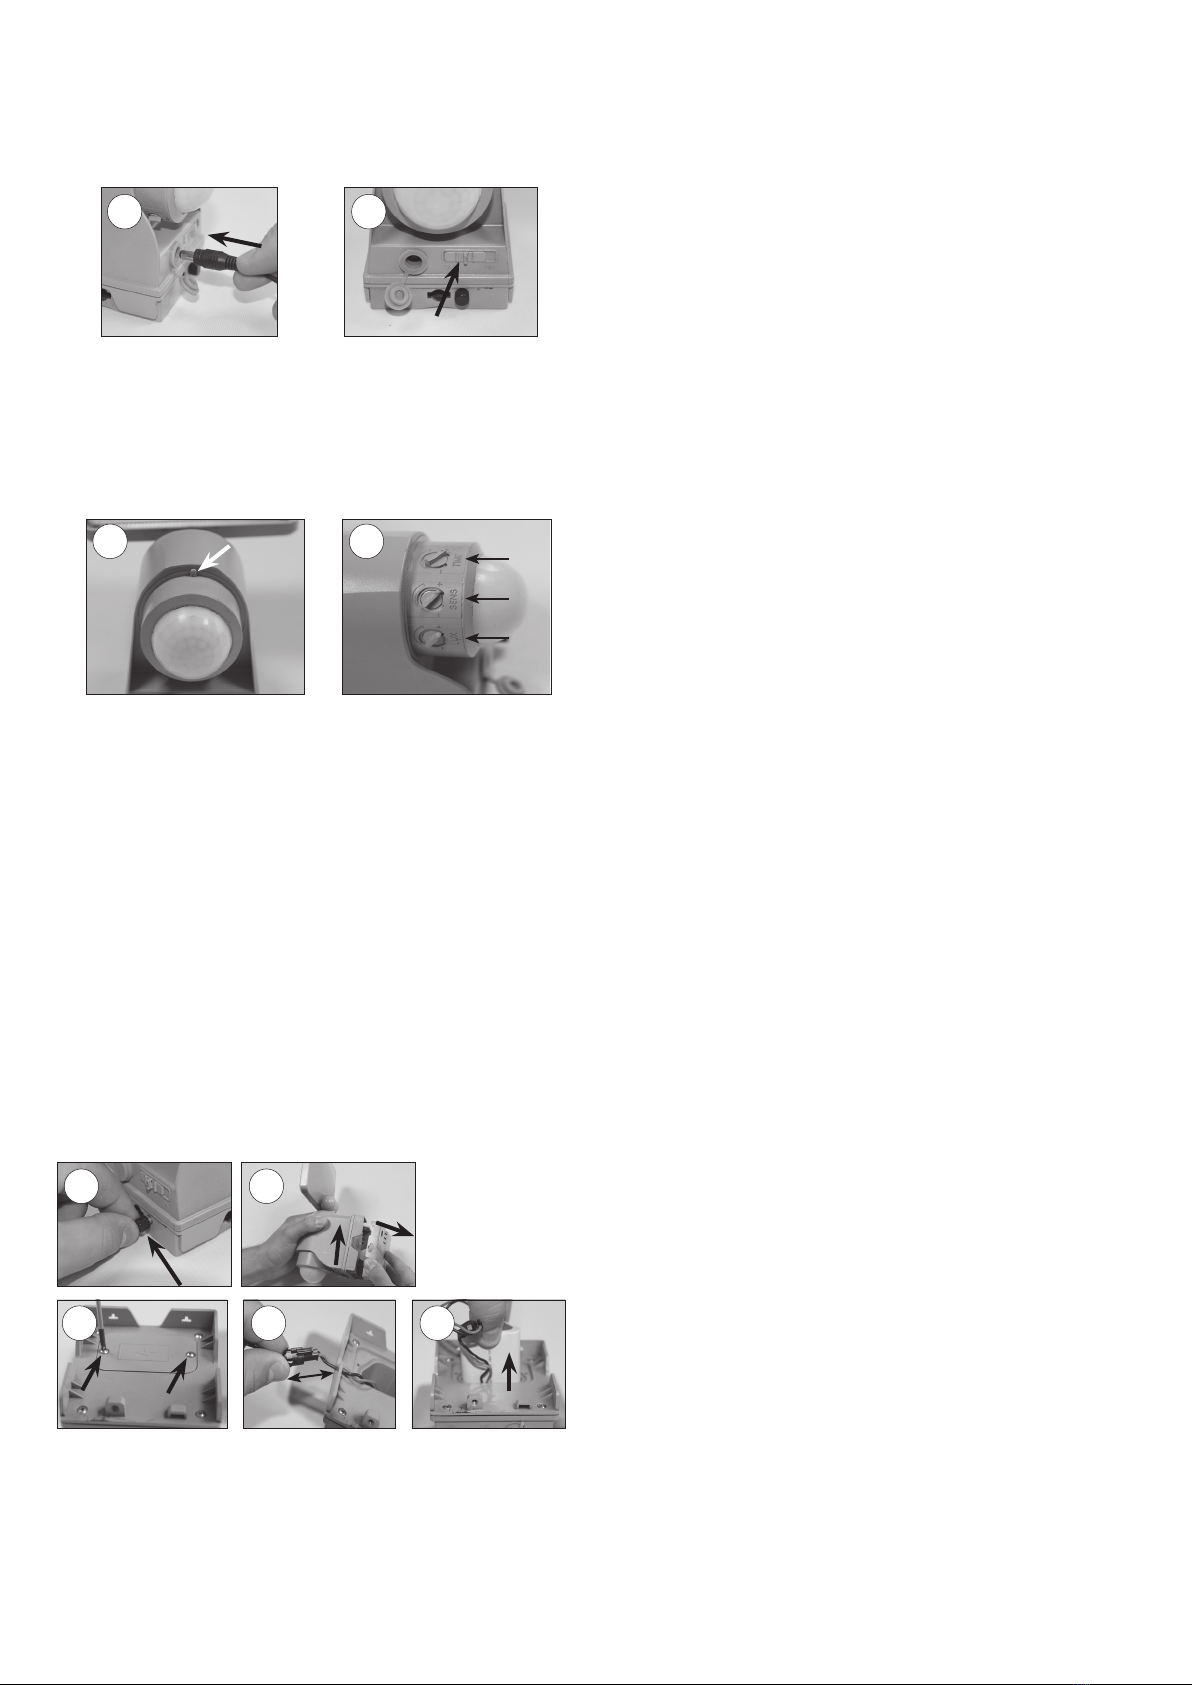
4.1 Mounting of the LED spotlight on the wall
Unscrew the safety screw at the bottom of the spotlight (illustration 3).
1. Remove the rear panel of the spotlight (illustration 4).
2. Now assemble the rear panel with 2 screws and snap the spotlight back onto
the rear panel (illustration 5).
3. Now screw the safety screw back in.
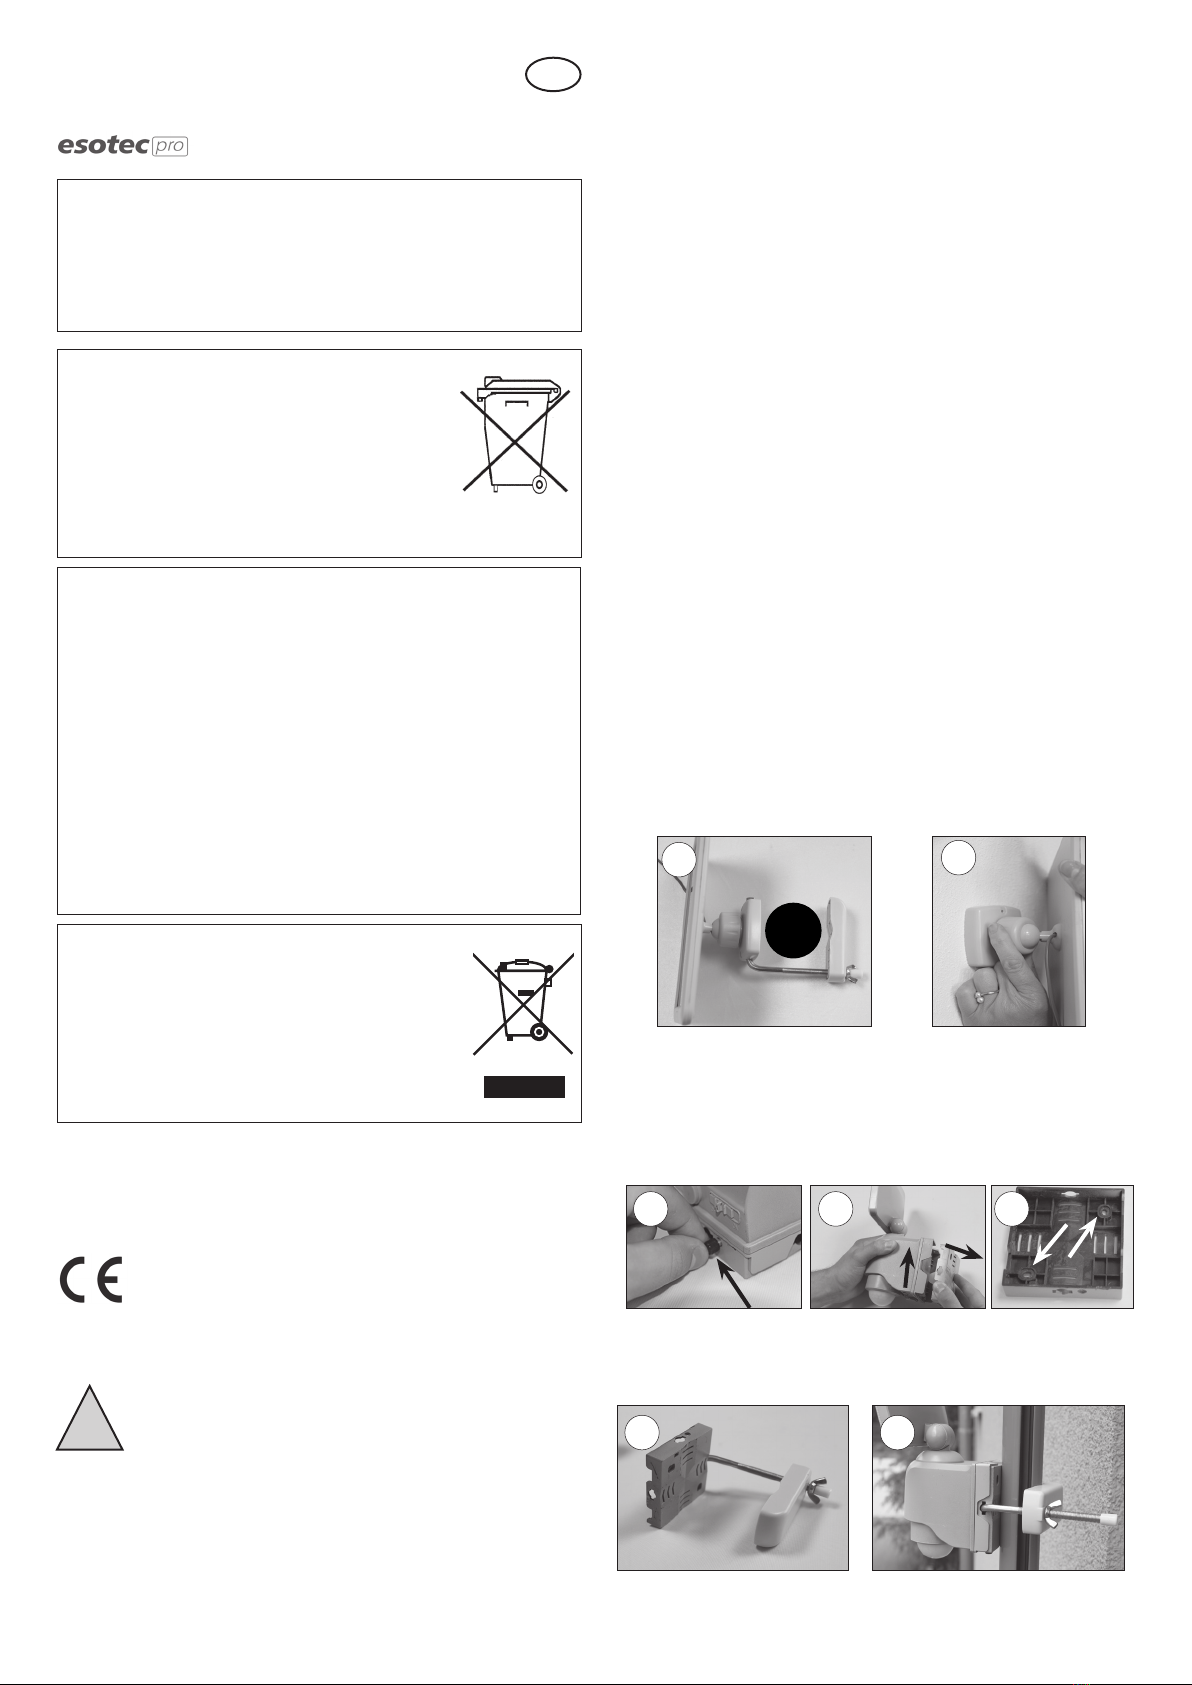
4.2 Assembly of the LED spotlight on a pole or post
1. By means of the xing rod it is possible to horizontally or vertically install the
spotlight on a pole or post.
GB
!
pole mounting wall mounting
12
67
345
Customer support:
If you have problems or questions regarding this product, simply contact us!
esotec GmbH, Industriegebiet Weberschlag 9, D-92729 Weiherhammer
Monday to Friday 9 am to 12 noon and 1 pm to 4 pm.
By phone: +49 9605-92206-0
Product: Manufacturer Item No.: 102510
Rechargeable battery notes
- Rechargeable batteries should not be played with by children. Never
leave rechargeable batteries lying around; they could be swallowed
by children or pets.
- Rechargeable batteries must never be short-circuited, disassembled
or thrown into fire. This leads to a danger of explosion!
- Leaking or damaged rechargeable batteries can cause chemical
burns when they come into contact with skin. For this reason, please
make use of suitable protective gloves.
- Rechargeable batteries should only be replaced by structurally iden-
tical rechargeable batteries from the same manufacturer. Normal
batteries must not be used since these are not rechargeable.
- Make sure the rechargeable batteries are inserted with the correct
polarity.
- For long periods of time of non-use (for example, storage), remove
the inserted rechargeable batteries to avoid damages via the leaking
rechargeable batteries.
Disposal:
Dear customer,
please cooperate in avoiding waste. When you intend
to dispose of the product in future, please consider that
it contains valuable raw materials suited for recycling.
Therefore, do not dispose it of with domestic waste but
bring it to a collection point for the recycling of waste
electrical and electronic equipment.
Thank you very much for your cooperation!
Battery take-back
- Batteries must not be discarded into domestic waste.
- The consumer is legally required to return batteries
after use, e.g. to public collecting centers or to battery
distributors.
- Contaminant-containing batteries are labeled with the
sign “crossed-out trashcan“ and one of the chemical
symbols. Used batteries should be disposed environ-
mentally friendly and should not be discarded into
domestic waste. Your dealer is legally required to take
back old batteries.
NiMh