Espressif ESP8266 Series User manual

ESP8266 Weather Station
User Guide
V 1.0 Mar 2017

Contents
1.
Introduction...................................................................................................................4
2.
Assembly......................................................................................................................5
A.
ESP8266 Module ..................................................................................................5
B.
OLED Display........................................................................................................6
C.
DHT11 Humidity & Temperature Sensor ..............................................................7
D.
Wires & Cables......................................................................................................8
3.
Tool Setup ....................................................................................................................9
A.
Download and Install theSerial Driver................................................................10
B.
The Arduino IDE..................................................................................................11
C.
Install the ESP8266 tool chain ............................................................................12
D.
Selecting the Correct Board................................................................................13
E.
Setting the Correct Port.......................................................................................14
F.
Testing the Setup:WiFi Scanner ........................................................................15
G.
Summary.............................................................................................................16
4.
ESP8266 Programming Basics..................................................................................17
A.
Preparation..........................................................................................................17
B.
The Arduino Sketch.............................................................................................18
C.
Hello World: The serial console ..........................................................................19
D.
Input/Output: GPIO pins......................................................................................21
E.
Interrupts.............................................................................................................23
F.
Measuring analog signals ...................................................................................24
G.
WiFi .....................................................................................................................25
H.
HTTP...................................................................................................................26
5.
The ESP8266 WeatherStation...................................................................................30
A.
Installing the libraries...........................................................................................30
B.
Open the Weather Station Example....................................................................32
C.
Getting the OpenWeatherMap API Key..............................................................33
D.
Configuring the Weather Station.........................................................................34
E.
Connecting the Hardware ...................................................................................35
F.
First Run..............................................................................................................37
G.
Summary.............................................................................................................38
6.
The WeatherStation Code Explained.........................................................................39
A.
The JSON Streaming Parser...............................................................................39

B.
The Grammar......................................................................................................41
C.
The JSON StreamingParser Library...................................................................42
D.
Conclusion...........................................................................................................44
7.
Collecting and Displaying Local Data.........................................................................45
A.
The Climate Node Setup.....................................................................................45
B.
Thingspeak Setup ...............................................................................................46
C.
Programming the Climate Node..........................................................................48
8.
More Projects..............................................................................................................49
A.
The ESP8266 PlaneSpotter................................................................................49
B.
The ESP8266 WorldClock ..................................................................................50

1.Introduction
TheESP8266WeatherStationisoneeasywaytogetstartedwiththeESP8266andIoT.The
includedguidehelpsyou step-by-steptosetup aninternetconnectedweatherstationwhich
shows current and forecasted weatherinformation.
TheUctronicsESP8266WeatherStationKithas the advantagethateverythingfitstogether,
but you can of course also get the components from your preferred supplier. In this chapter
I will quickly go through the minimal requirements and the options you have to build your
first WeatherStation.

2.Assembly
A. ESP8266 Module
There are many different modules available based on ESP8266s, they differ in a number of
aspects such as the quantity of available GPIO pins or if they can be programmed easily
withoutneedof anadditionalSerial-to-USBconverter.IfyouareabeginerIsuggestyouuse
adeveloper-friendlymoduleliketheNodeMCUV1.0ortheWemosD1mini.Theycome with
aUSBconnectorandhavethemaximumnumberofavailablepinsreadyforyourusage.The
absoluteminimal requirement isthat your ESP8266 module has atleast twofree GPIOpins
to connect it to the OLEDdisplay.

B.OLEDDisplay
With the display, you also have many options: do you want the pixels to be white or blue, or
doyouevenpreferatwo-colordisplaywherethefooterisinonecolorandtherestinanother?
What really matters is the driver chip and the protocol. The OLED library currently supports
I2CandSPIforboththeSSD1306and theSH1106chip.Thefirstisoftenusedfor0.96” inch
displays while the second one is used for 0.96” displays. Displays with SPI interface will
consume more of your free GPIOpins.

C.DHT11Humidity&TemperatureSensor
This DHT11 Temperature & Humidity Sensor features a temperature & humidity sensor
complex with a calibrated digital signal output. By using the exclusive digital-signal-
acquisition technique and temperature & humidity sensing technology, it ensures high
reliability and excellent long-term stability. This sensor includes a resistive-type humidity
measurementcomponentandanNTCtemperaturemeasurementcomponent,andconnects
to a high-performance 8-bit microcontroller, offering excellent quality, fast response, anti-
interference ability and cost-effectiveness.

D.Wires&Cables
You will also need some wires to connect the display to the ESP8266. In case you want to
connect the display directly to the NodeMCU you will need at least four female-to-female
jumper wires, since both the display and the NodeMCU have male pin headers. The wires
don’t need to be long, 7.87” (20cm) is usuallyenough.
To program the ESP8266 module you will also need a micro USB cable. In case of the
NodeMCU this cable should have a micro-USB connector on the module side and a normal
USB connector for your PC orMac.

3.
Tool Setup
In this chapter, we will prepare your development environment by installing all the tools
necessary.DriversareneededtocommunicatewiththeESP8266,atoolcalled“Arduino IDE”
will let us write code, and a sample project will prove that the components are working well
together.

A.DownloadandInstalltheSerialDriver
ToprogramtheNodeMCUV1.0,yourdevelopmentplatform(PC,Mac,Linux)needstodetect
theSerial-To-USBadaptersolderedontotheESP8266module.ThisESP8266development
modulehasbuiltinahigh-qualityLabsCP2102Single-ChipUSBtoUARTBridgewithMicro-
USB connector that baud rates up to 921600. You can download and install the driver from
here:
https://www.silabs.com/products/mcu/Pages/USBtoUARTBridgeVCPDrivers.aspx

B.TheArduinoIDE
The Arduino Integrated Development Environment (IDE) is the tool you will use to program
the ESP8266. IDEs are more than just editors; they help you with various tasks duringthe
development process.
ToinstalltheArduinoIDE,gotohttps://www.arduino.cc/en/Main/Softwareanddownloadthe
latest version matching your operatingsystem:
⚫For Mac OS X, you can download a ZIP file which you then have to extract. Take the
extracted application “Arduino” and move it to your Applications folder.
⚫ForWindows,youhavetheoptionbetweenanexecutableinstallerandaZIPfile.TheZIP
file might be the better option if you do not have administrator permissions on your
system. The installer on the other hand can put the libraries in the proper places.

C.InstalltheESP8266toolchain
Atoolchainisthe setof toolsthatletsyoucompileandcreate binariesfor a certainplatform.
SincewewanttocreatebinariesfortheESP8266weneedadifferenttoolchainthantheone
thatcomeswiththeplainvanillaArduinoIDE.TheArduinoIDEhasawonderfulfeature,Board
Manager, to save you the hassle of downloading many different files and copying them into
obscure locations. It lets you install support for many different chips and boards with just a
few clicks. But first of all we have to tell the Arduino IDE where it should look for board
definitions:
⚫Open the Arduino IDE
⚫Gotoyourpreferences/settingsandinthetextboxAdditionalBoardManagerURLsenter
this URL:http://arduino.esp8266.com/stable/package_esp8266com_index.json
⚫NowgotoTools>Board:…>BoardsManager…,searchfortheESP8266boardandclick
Install.
⚫Get a coffee and wait until itfinishes.
From time to time you want to come back to the Board Manager and make sure that you
have the latest version of the ESP8266 tool chain installed. To do that simply click on the
ESP8266 entry and select the latest version from the dropdown. Then click Update.

D.Selecting the Correct Board
Now your Arduino IDE knows about ESP8266 boards in general. But not all the ESP8266
boards are the same; there are subtle but important differences in available Flash Memory
andhowtheycanbeprogrammed.Theselectionofthecorrectboardalsodefinesthenames
of the GPIO pins: the designers of the NodeMCU decided to introduce a completely new
naming scheme forthe pins. Instead of calling them GPIO1,GPIO2 etc theydecided togive
them different numbers byusing a “D”- prefix. SoD0 isGPIO16, D1 isGPIO5 and so on. By
selectingaNodeMCUboardyouautomaticallyhavetheDnamingschemeavailable,andthis
helps a lot since these names are also printed on the module board.
So, let’s pick the correct board. If you bought the original Squix Starter Kit you will have to
chooseaNodeMCU1.0:Go toTools>Board:*>NodeMCU1.0(ESP-12EModule)Thereis
aplentitudeofmodulesavailable.Pleasemakesurethatyouhavethecorrectboardselected
before you continue.

E.SettingtheCorrectPort
Serialinterface:AtthehardwareleveltheESP8266isprogrammedthroughaserialinterface.
In short this isa very common communication interface which normally requires three lines:
transmit(TX),receive(RX) and ground (GND).Both devices involved inthecommunication
needtoagreeontheratethecharactersaresentoverthewire.This rateisusuallymeasured
inBAUD.10BAUDisequalto1characterpersecond.YouraveragePC orMacdoesn’t have
suchaserialinterface,sohowcanweprogramtheESP8266?Thisis donethroughaSerial-
to-USBconverter.SomeESPsalreadycomewithabuilt-inconverter;othersneedanexternal
one for programming.
In an earlier step, you already installed the drivers for this converter. If everything went well
and the board is plugged into your computer you should now be able to select the serial
connection. It should show up in the Menu under Tools > Port. On my Mac the device is
called/dev/cu.SLAB_-USBtoUART.OnaPCitshouldbelistedasaCOMportlabelledCOM#
(where # is somenumber).
If you cannot see a device that looks like the NodeMCU, try to unplug the ESP module and
re-plug it after a few seconds. Also try a different USB socket. If that doesn’t help consider
restartingyourcomputer…Makesurethatyouinstalledthedriverasmentionedinthechapter
about drivers.

F. Testing the Setup: WiFi Scanner
Thanks for bearing with the complicated preparation until getting to the really cool part.We
are going to run our first program on the NodeMCU! In the Menu of the Arduino IDE go to
File>Examples>ESP8266WifiandselectWiFiScan.Anewwindowwillopenup.Thiswindow
isyourcurrentprojectandisalsocalleda“Sketch”. Tocompileand transferthebinaryto the
ESP8266 click on the green circle that contains an arrow on the very top of the window. If
everything went well this will compile the sketch andupload the binary to the ESP. It might
look something like this:
Wifi Scanner Output
If youseeDone uploading.inthe window, then click on the magnifying glassonthe top right
of the window. This is the serial console that you can use to see output from the NodeMCU
module, or to send commands to the device. Make sure that the baud rate is set to 115200.
This rate is also set in the example code, and if you have a different setting the ESP will talk
with a different speed than your PC listens. You can set the baud rate on the bottom left of
the serial monitor. My output looks likethis:
Serial Console of the Wifi Scanner
If you see something similar: congratulations! You have just set all the preconditions to run
the WeatherStation code.

G.Summary
Before we continue to the WeatherStation project let’s have a closer look at what we just
accomplished:
⚫WeinstalledadriverwhichletsusprogramtheESP8266withcustomcodethatwewrote.
WhichdriverneedstobeinstalleddependsontheSerial-to-USBconverterweuse.Some
ESP modules alreadyhavesuch a converter;others will need an additional one.
⚫Wedownloaded and installed the Arduino IDE. In the IDE we write the code, compile it
andtransferittotheembeddeddevice.IfourcodesupportsitwecanevenusetheSerial
Monitor to communicate with the device.
⚫Weusedanexampleproject,calledaSketch,totestoursetup.Thesampleprojectinstalls
firmware which uses the WiFi module to scan for available WiFi access points. It
repeatedly writes this data to the serial line, and we can display it by opening the Serial
Monitor tool. Remember, in a serial communication both parties need to agree on the
speedthecharactersaregettingtransmitted.Theexamplesetsthisto115200baud.

4.
ESP8266 ProgrammingBasics
In this chapter, we will have a look at the building blocks of an Arduino sketch. This will help
you to understand and modify the Weather Station which we will build inthe next chapter. If
you just want to get the WeatherStation running you can skip this chapter.
A.
Preparation
Inthischapter,wewillworkwithexerciseswhichyoucandownloadfromGitHub.Theycontain
several Arduino projects for the ESP8266. For an exercise open the related project in your
Arduino IDE and try to solve the given task. If you get stuck or want to see an alternative
solution open the project which ends with“_Solution”:
⚫Exercise_04_01: contains the first exercise in chapter 4
⚫Exercise_04_01_Solution: contains a possiblesolution
Now download the Zip file from GitHub and extract itin a place you will find it later. There is
a green “Clone or download” button which lets you download a Zip file:
https://github.com/squix78/esp8266-getting-started

B. The ArduinoSketch
The Arduino platform wasbuilt with the beginner inmind. Compared to a normal C program
theArduinoIDE hides a fewthings from you tosimplifythesetup.Firstof allyoudonothave
to create a makefile to build your code into an executable binary. The Arduino IDE also
includes a default header file for you: #include "Arduino.h". This contains all definitions
needed for a regular Arduino program.
Another important change compared to a regular C/C++ program are the two default
functionssetup() andloop().The firstwill be only called onceduringstartup,while the loop()
method will be called repeatedly. On a normal Arduino hardware (ATmega chip) you can
theoretically write code and never leave the loop() method again. The ESP8266 is a bit
different here. If your operations run for too much time a so-called watchdog will reset the
ESP8266. You can prevent this by allowing the controller to do important operationswhile
you are still in the main loop. Calling yield() or delay(ms) will do this.

C. Hello World: The serial console
Every self-respecting programming tutorial starts with a “Hello World” program. And I don’t
want to break with this tradition here. A Hello-World program usually does no more than
printing these two words somewhere on the screen. But we are programming a
microcontrollerwhichdoesnothavea screen yet.Sowherecanwedisplaythetext?Wewill
use the Serial object to do that. While you are developing a program on the ESP8266,the
microcontrolleris connectedto the computerthattheArduinoIDEisrunningon.Weusethis
connection to write a new binary onto the flash memory of the ESP8266. And while our
program is running we can also use it to write messages from the ESP8266 back to our
computer.
UsingtheSerialobjectisfairlyeasy.Youhavetoinitializeitfirst:
Serial.begin(115200);
This tells the Serial object that you want to communicate with a baud rate of 115200.
Remember to set the same transfer rate later in the serial console on your computer. Both
partners in the communication need to have the same speed settings or you will just see
garbage. If you want to send a message from your program to your computer you just do
this:
Serial.print("Hello ");
Serial.println("World");
Pleasehavealookatthelittledifferencebetweenthefirstandthesecondline.Thefirstuses
a method called print() and the second println(). The only difference is that the latter adds a
line break to the output.
Exercise 04.01: Hello world!
Nowitistimetowriteourfirstprogram.OpentheprojectExercise_04_01inyourArduinoIDE
and fill in the required code to print “1. Hello World”, “2. Hello World” etc. Remember that
you only need to initialize the Serial object once, while you’ll have to print “<number>. Hello
world” as longas the coderuns. Once you arehappywith your solution upload the sketch to
your Arduino by clicking
If that was successful open the serial console by clicking on the magnifying glass:

Now your output should look something like this:
If you want to learn more about the Serial object you can find more in the following link:
http://esp8266.github.io/Arduino/versions/2.3.0/doc/reference.html#serial
Theexercisecontainsanotherimportantbuilt-infunction:
delay(1000);
This instructs the processor to wait1000 milliseconds (1 second) before continuing with the
execution.Asmentionedearlierwiththiscommanditalsogivestheprocessortimetohandle
other tasks, such asreceiving orsending network packets overWiFi. In this context a call to
yield() does the same asdelay(0).
Other manuals for ESP8266 Series
4
Table of contents
Popular Weather Station manuals by other brands

Hama
Hama 00136263 EWS-3300 operating instructions
Oregon Scientific
Oregon Scientific RMR203HG user manual

Auriol
Auriol Z31743A Operation and safety notes
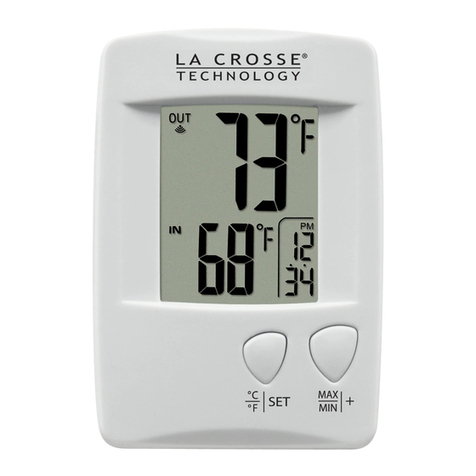
La Crosse Technology
La Crosse Technology WS-9006U instruction manual

Oregon Scientific
Oregon Scientific BAR206X user manual
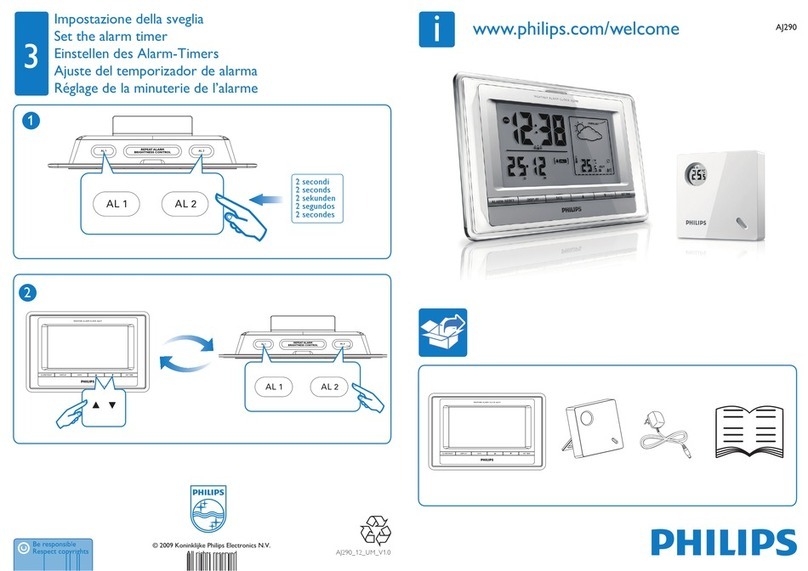
Philips
Philips AJ290 quick start guide
