3
Warning – Batteries
• Immediately remove and dispose of dead batteries from
the product.
• Only use batteries (or rechargeable batteries) that match
the specified type.
• Do not mix old and new batteries or batteries of a
different type or make.
• When inserting batteries, note the correct polarity
(+ and - markings) and insert the batteries accordingly.
Failure to do so could result in the batteries leaking or
exploding.
• Do not overcharge batteries.
• Keep batteries out of the reach of children.
• Do not short circuit the batteries/rechargeable batteries
and keep them away from uncoated metal objects.
4. Getting Started
Note
Always make sure to start the measuring station first and then
the base station.
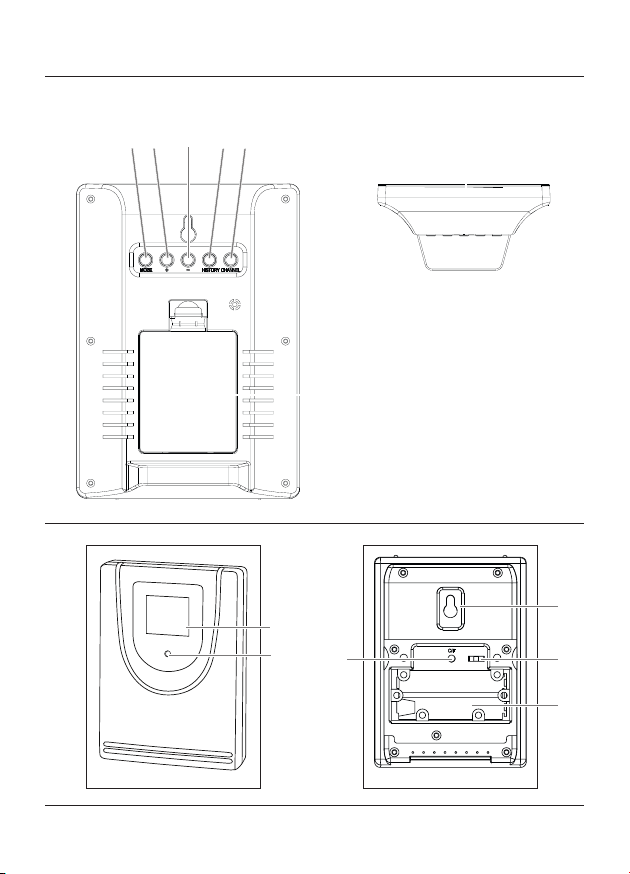
4.1. Measuring station
• Open the battery compartment (43), remove the contact
breaker and then close the battery compartment (43).
• Press the CH button (40) repeatedly to select the channel
the measuring station is to use for transmission. CH1, CH2
or CH3 is shown on the display.
• Press the °C/°F button (42) to choose between °C and °F
for the temperature display.
• Then close the battery compartment cover.
4.2.
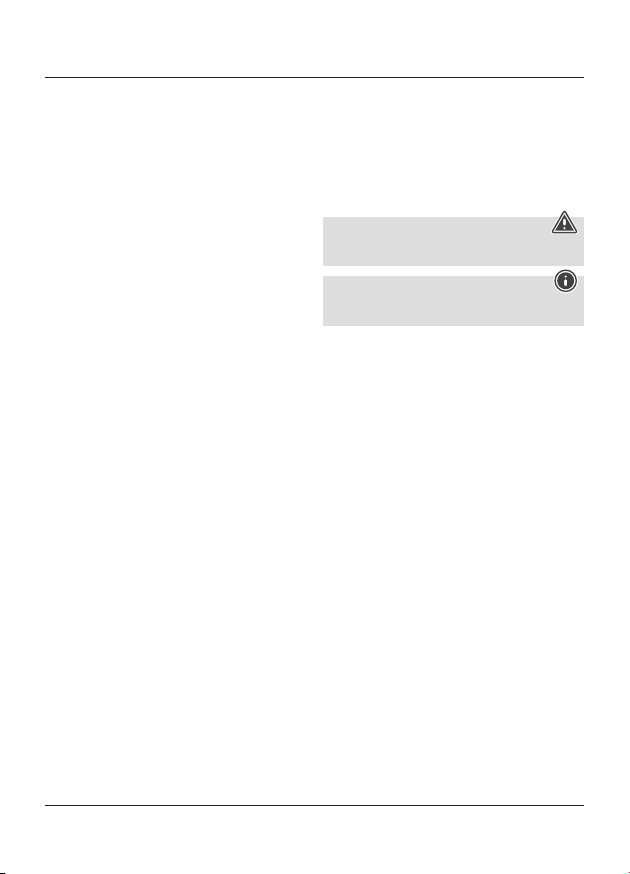
Base station
• Open the battery compartment (36) and insert three
AA batteries with the correct polarity into the battery
compartment (36). Then close the battery compartment
cover.
4.3.
Replacing the batteries
Note – Replacing the batteries
• Note that the stations have to be resynchronised each
time after you change the batteries in the measuring or
base station.
• To do this, remove the batteries from the other station
and then reinsert them, or change them as required.
Measuring station
• When the symbol (26) appears, replace the 2 AAA
batteries for the measuring station with 2 new ones.
• Open the battery compartment (43), remove and properly
dispose of the depleted batteries, and insert two new AAA
batteries with the correct polarity. Then close the battery
compartment cover.
Base station
• When the symbol (22) appears, replace the 3 AA
batteries for the base station with 3 new ones.
• Open the battery compartment (36), remove and properly
dispose of the dead batteries and insert 3 new AA
batteries with the correct polarity. Then close the battery
compartment cover (36).
5. Installation
Note – Installation
• We recommend initially placing the base and measuring
stations in the intended locations without installing
them and making all the settings described in 6.
Operation – to do.
• Only install the stations once the appropriate settings
have been made and a stable wireless connection is
established.
Note – Installation
• The wireless transmission range between the measuring
and base stations is up to 30 m in open spaces.
• Before installation, ensure that wireless transmission
will not be disrupted by interference or obstacles like
buildings, trees, vehicles, high-voltage lines, etc.
• Before the final installation, ensure that there is
sucient reception between the intended installation
locations.
• When installing the measuring station, ensure that it is
protected from direct sunlight and rain.
• The international standard height for measuring air
temperature is 1.25 m (4 ft) above ground.
Warning
• Buy special or suitable installation material from a
specialised dealer for wall-mounting.
• Ensure that no faulty or damaged parts are installed.
• Never apply force during installation. This could damage
the product.
• Before installation, ensure that the chosen wall is
suitable for the weight to be mounted, and make sure
that there are no electrical wires, water, gas or other
lines at the installation site on the wall.
5.1.
Base station
• Use the base to position the base station on a level surface.
• Alternatively, you can install the base station on a wall
using the opening on the back.
5.2.
Measuring station
• You can also position the measuring station on a level
outdoor surface.
• We recommend installing the measuring station securely on
an outdoor wall using the recess (41).