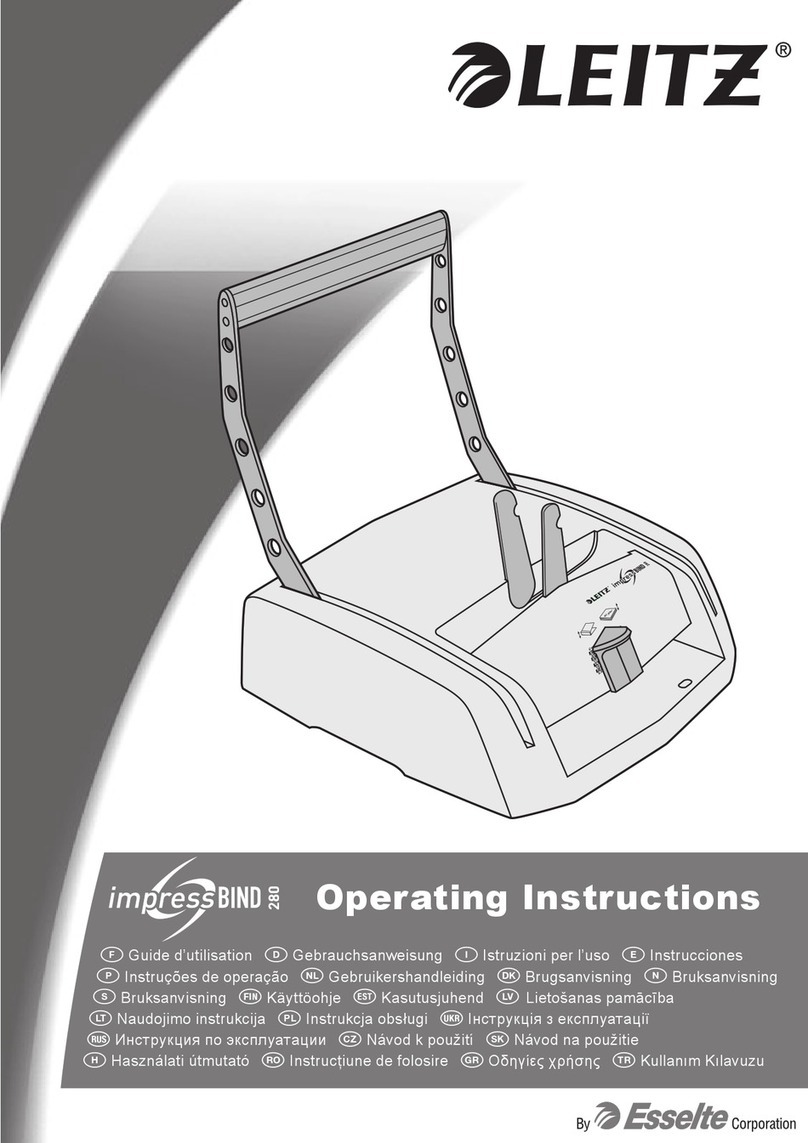
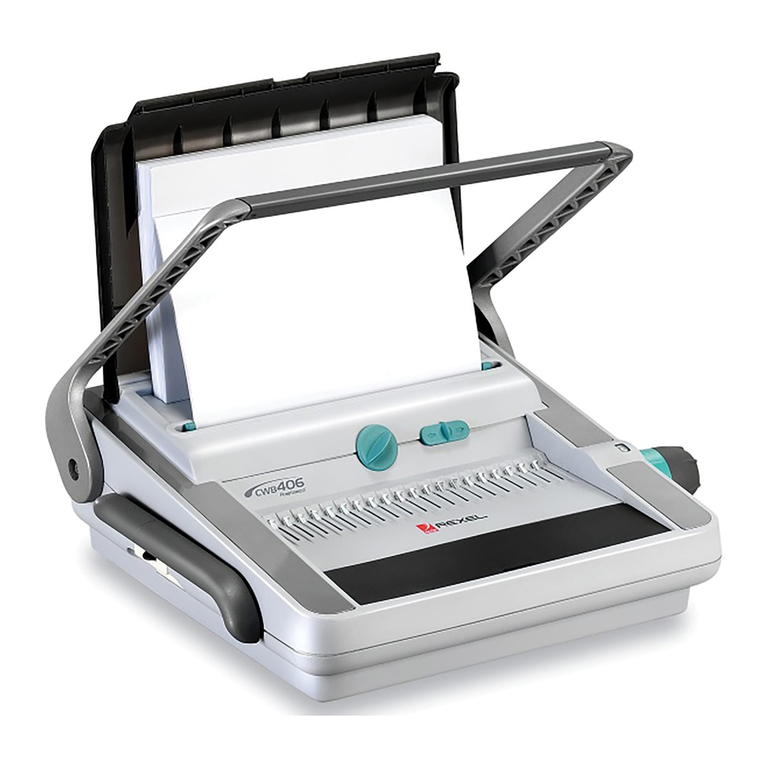
Esselte LEITZ comBIND 500 User manual

<— Fold here <— Fold here
<— Fold here <— Fold here
Operating instructions ..........................................................5
Guarantee.............................................................................9
FGuide d’utilisation ..............................................................11
Garantie..............................................................................15
DGebrauchsanweisung .........................................................17
Umweltinformationen, Garantie...........................................21
IIstruzioni per l’uso ..............................................................23
Garanzia .............................................................................27
EInstrucciones ......................................................................29
Garantía..............................................................................33
PInstruções de operação ......................................................35
Garantia..............................................................................39
Gebruikershandleiding .......................................................41
Garantie..............................................................................45
Brugsanvisning ..................................................................47
Garanti................................................................................51
NBruksanvisning ...................................................................53
Garanti................................................................................57
SBruksanvisning ...................................................................59
Garanti................................................................................63
Käyttöohje ..........................................................................65
Takuu ..................................................................................69
Kasutusjuhend ....................................................................71
Garantii ...............................................................................75
Lietošanas pamācība..........................................................77
Garantija .............................................................................81
GNaudojimo instrukcija..........................................................83
Garantija .............................................................................87
Instrukcja obsługi................................................................89
Gwarancja...........................................................................93
Инструкция по эксплуатации.........................................95
Гaрантия ...........................................................................99
Návod k použití .................................................................101
Záruka...............................................................................105
Návod na použitie .............................................................107
Záruka............................................................................... 111
HHasználati útmutató .......................................................... 113
Jótállás ............................................................................. 117
Instrucţiuni de utilizare...................................................... 119
Garanţie............................................................................123
Kullanım Kılavuzu .............................................................126
Garanti..............................................................................129
© LEITZ 2014 20140819
www.esselte.com www.leitz.com
comBIND 500
Operating Instructions
FGuide d’utilisation DGebrauchsanweisung IIstruzioni per l’uso EInstrucciones
PInstruções de operação Gebruikershandleiding Brugsanvisning NBruksanvisning
SBruksanvisning Käyttöohje Kasutusjuhend Lietošanas pamācība
GNaudojimo instrukcija Instrukcja obsługi Інструкція з експлуатації
Инструкция по эксплуатации Návod k použití Návod na použitie
HHasználati útmutató Instrucţiuni de utilizare Kullanım Kılavuzu

<— Fold here <— Fold here
<— Fold here <— Fold here
Operating instructions ..........................................................5
Guarantee.............................................................................9
FGuide d’utilisation ..............................................................11
Garantie..............................................................................15
DGebrauchsanweisung .........................................................17
Umweltinformationen, Garantie...........................................21
IIstruzioni per l’uso ..............................................................23
Garanzia .............................................................................27
EInstrucciones ......................................................................29
Garantía..............................................................................33
PInstruções de operação ......................................................35
Garantia..............................................................................39
Gebruikershandleiding .......................................................41
Garantie..............................................................................45
Brugsanvisning ..................................................................47
Garanti................................................................................51
NBruksanvisning ...................................................................53
Garanti................................................................................57
SBruksanvisning ...................................................................59
Garanti................................................................................63
Käyttöohje ..........................................................................65
Takuu ..................................................................................69
Kasutusjuhend ....................................................................71
Garantii ...............................................................................75
Lietošanas pamācība..........................................................77
Garantija .............................................................................81
GNaudojimo instrukcija..........................................................83
Garantija .............................................................................87
Instrukcja obsługi................................................................89
Gwarancja...........................................................................93
Инструкция по эксплуатации.........................................95
Гaрантия ...........................................................................99
Návod k použití .................................................................101
Záruka...............................................................................105
Návod na použitie .............................................................107
Záruka............................................................................... 111
HHasználati útmutató .......................................................... 113
Jótállás ............................................................................. 117
Instrucţiuni de utilizare...................................................... 119
Garanţie............................................................................123
Kullanım Kılavuzu .............................................................125
Garanti..............................................................................129

<— Fold here <— Fold here
comBIND 500


5
Dear customer
Thank you for choosing a Leitz punching and binding
machine. Please read this operation manual carefully in
order to understand how to use the unit correctly. Keep
this manual with the unit at all times.
Safety precautions
Intended use
• This unit has been designed for punching paper,
cardboard and plastic lms as well as binding
such materials using plastic combs. Use the unit
only for its intended use as described in these
operating instructions.
General precautions
• Place the unit on a at, stable surface (e. g.
table).
• Risk of squeezing ngers between punching
lever and casing: When punching, take hold
of the lever with both hands in the middle of
the grip plate. Keep other persons away when
punching.
• Keep unit away from children – risk of injury.
• To prevent damage to the punching mechanism,
remove all metal parts (staples etc.) from the
document before punching and empty the
cuttings tray regularly.
• Never use attachments not authorised by the
manufacturer.
• Only use original Leitz accessories.
Contents
Safety precautions........................................................... 5
Recommended materials for punching ........................... 5
Recommended comb size and punching depth.............. 5
Functional parts of your comBIND 500........................... 6
Unpacking and installing the unit .................................... 6
Punching and binding with plastic combs ....................... 7
Two-hole punching .......................................................... 8
Transporting the unit........................................................ 8
Maintenance and care..................................................... 8
Specications .................................................................. 8
2 year guarantee.............................................................. 9
Recommended materials for punching
Paper – The unit is designed for a maximum of 25 sheets of 80 g/m² paper to be punched at the
same time (standard copying paper). When using thinner paper, more sheets can be punched at
the same time. When using thicker paper, fewer sheets can be punched at the same time.
Transparent lm (front covers) – You can punch at the same time up to two transparent lms
with a thickness of 0.2 mm each. Do not punch them together with paper or cardboard. Punch
lms individually.
Cardboard (rear covers) – Punch sheets of cardboard individually. Do not punch them together
with your document sheets or transparent lms.
Recommended comb size and punching depth
The table shows the comb size and punching depth setting required for a certain number of sheets.
80 g/m² 25 45 65 95 125 145 175 210 240 270 310 375 440 500
80 g/m²
6 8 10 12 14 16 19 22 25 28 32 38 44 51
F

6
Functional parts of your comBIND 500
F Punching depth switch – Set to the comb
diameter used. With the correct punching depth
set, your sheets will turn with ease.
G Binding mechanism – Opens and closes the
plastic combs with help of the binding lever I.
H Comb size scale – Shows the comb size needed
for the amount of sheets to be bound.
I Binding lever – Used to open and close
the plastic comb inserted into the binding
mechanism G.
J Cuttings tray – Empty regularly to avoid damage
to the punching mechanism.
A Lid/paper stand – When opened, the lid acts as
a paper stand to ease punching.
B Adjustable paper stop – Set to the paper format
used: A4, US letter or A5.
C Front slot for two-hole punching – Place
sheets here for standard two-hole punching.
D Rear slot for punching (21 holes) – Place
sheets here to punch for binding with plastic
combs.
E Punching lever – Used to punch sheets placed
in the front or rear punching slots. Pull down with
both hands in the middle of the grip plate.
Unpacking and installing the unit
1. Unpacking / scope of supply
• Carefully unpack the unit and inspect it for damage.
• The packaging should contain the following items:
– the comBIND 500,
– the punching lever and two screws,
– a starter set (choice of plastic combs and front/rear covers),
– this operation manual.
• Keep the packaging material at least until the guarantee has expired.
2. Mounting the punching lever
The punching lever must be mounted in such way that marking Lis on the left and
marking Ris on the right side of the unit.
• Carefully bend the lever a little apart and place it onto the axis.
• Secure the lever with both screws.
3. Installing the unit
• Place the unit on a stable, level surface (e. g. table).
• Fold back the lid (paper stand) A.
The punching dies were coated with protecting oil during manufacture.
• Punch several sheets of scrap paper in order to clean the punching
dies.
The unit is now ready for operation.
1
2
3

7
Punching and binding with plastic combs
1. Preparations
• Set the paper stop Bto the paper format used.
• Determine the comb size needed by holding the document
(including front and rear cover) in position on the comb size
scale H.
You may also use the table on page 5 for this purpose.
• Set the punching depth Faccording to the comb size determined.
2. Inserting and opening the comb
• Place the plastic comb with the side to be opened facing upwards
into the binding mechanism G.
• Pull the binding lever Iso far until the comb is opened enough so
that the sheets can be easily inserted.
3. Punching the sheets
Tip: We recommend testing the punch setting using a blank sheet of paper
before punching the original document.
Caution! To prevent damage to the punching mechanism,
remove all metal parts (staples etc.) from the document before
punching. Do not punch more than 25 sheets of 80g/m² paper or
two lms of 0.2 mm at the same time. Also, empty the cuttings
tray regularly.
Caution! Risk of squeezing ngers. Take hold of the punching
lever with both hands in the middle of the grip plate. Keep other
people away from unit when punching.
• Insert the sheets into the rear slot D.
• Pull the punching lever Eall the way down.
• Push the lever up again and remove the punched sheets.
4. Inserting the sheets
• Insert the punched sheets into the opened comb.
It is now possible to punch all remaining sheets (step 3) and insert them into
the opened comb.
5. Removing the nished document
• Push the binding lever Ibackwards to close the comb.
• Remove the nished document.
3
5
4
2
1

8
Two-hole punching
Caution! To prevent damage to the punching mechanism, do not
punch more than 25 sheets of 80-gramm paper or two lms of 0.2 mm
at the same time. Also, empty the cuttings tray regularly.
Caution! Risk of squeezing ngers. Take hold of the punching lever
with both hands in the middle of the grip plate.
• Set the paper stop to the paper format used.
• Insert the sheets into the front slot C.
• Pull the punching lever Eall the way down.
• Push the lever up again and remove the punched sheets.
Maintenance and care
• To prevent damage to the punching mechanism, empty the cuttings tray Jregularly.
• In case of defects: Do not attempt to repair the unit yourself. Contact the manufacturer for any
required repairs. Read guarantee declaration for further information.
• To clean the housing, wipe the outside with a damp cloth. Do not use any chemicals for
cleaning.
Specications
Operating method Manual
Paper size A4, US letter, A5
Punching dies 21 rectangular (US pitch), 2 round
Punching depth Adjustable in two steps (2.5 mm, 4.5 mm)
Punching capacity 25 sheets (80 g/m² paper) or 2 transparent 0.2-mm lms
Plastic comb size 6–51 mm (up to 500 sheets)
Net weight 13 kg
Dimensions (W x D x H) 450 mm x 550 mm x 170 mm
Subject to technical changes without prior notice.
Transporting the unit
• Carry the unit with both hands. To prevent damage, do not use the
punching lever as a carrying handle.

9
2 year guarantee
To be returned with the unit if defective.
LEITZ units are sold with a 2 year guarantee.
The conditions of the guarantee period of 2 years are as
follows:
1. Each unit is guaranteed against all defects in material
and/or workmanship for a period of 2 years from the
date of purchase.
2. No unit will be accepted without written notication
from the customer giving details of the problem that
has occurred, and proof of the date of purchase.
3. All units for repair are to be returned to Esselte with
adequate packaging. No liability will be accepted
by Esselte for goods damaged in transit from the
customer, due to inadequate attention to packaging.
4. The supplier will be responsible for all parts and labour
charges as necessary to the unit. The 2 year guarantee
is subject to the following conditions:
a) That the unit has been used strictly in accordance
with the operating instructions supplied with the
unit.
b) That if the benet of this guarantee is sought, the
unit must be returned, carriage paid to Esselte.
Esselte does not accept responsibility for loss or
damage in transit.
c) That the guarantee is invalid if the defects are
found to be caused by accident, misuse, alteration
or neglect.
d) That no liability of Esselte is to be implied here
for damage, loss or expense of any kind resulting
from, consequence upon, or in any way due
to any fault whatsoever in the instrument or its
accessories.
e) That this guarantee does not affect you statutory
rights as a consumer.
Date of Purchase:
Model No. Serial No.:
Company Name:
Contact person:
Address:
Telephone/Fax No:
UK & Ireland
ESSELTE UK Ltd.
Waterside House, Cowley Business Park,
Uxbridge, Middlesex UB8 2HP
UNITED KINGDOM
Tel.: 0845 678 1801
Fax: 01895 878901
www.esselte.co.uk

10
Notes
A

11
Chère cliente, cher client,
Merci d‘avoir opté pour un perforelieur de Leitz.
Veuillez lire ce mode d‘emploi attentivement pour vous
familiariser avec son utilisation conforme. Cet appareil
ne doit être remis à des tiers qu‘accompagné de son
mode d‘emploi spécique.
Consignes de sécurité
Utilisation conforme
• Cet appareil est conçu pour perforer du papier
et des lms plastique et pour relier de tels
matériaux par des peignes plastique. Utilisez
l’appareil exclusivement à ces ns et comme
décrit dans le mode d’emploi.
Mesures de précaution générales
• Lorsque vous utilisez l’appareil, il doit toujours
être posé sur une surface plane et stable (par
ex. table).
• Risque d’écrasement des doigts/mains :
maintenez le levier des deux mains au milieu
de la coquille poignée lorsque vous perforez le
sujet et veillez à ce que personne ne soit dans
la zone dangereuse.
• Eloignez les enfants de l’appareil – risque de
blessures.
• Pour éviter des endommagements du
mécanisme de perforation, enlevez toutes
les pièces métalliques (agrafes, trombones et
semblable) des feuilles et videz régulièrement le
compartiment à confettis.
• N’utilisez pas d’accessoires qui ne sont pas
homologués par le constructeur.
• N’utilisez que des pièces originales Leitz.
Sommaire
Consignes de sécurité................................................... 11
Quels matériaux est-ce que je peux perforer ? ............ 11
Taille de peigne recommandée et profondeur de
perforation...................................................................... 11
Les éléments fonctionnels de votre comBIND 500 ...... 12
Déballer et installer l’appareil........................................ 12
Perforer et relier au moyen de peignes plastique......... 13
Perforer .......................................................................... 14
Transporter l’appareil..................................................... 14
Entretien et nettoyage.................................................... 14
Caractéristiques techniques.......................................... 14
2 ans de garantie ........................................................... 15
Quels matériaux est-ce que je peux perforer ?
Le papier – Vous pouvez perforer une pile de jusqu‘à 25 feuilles de papier d’un grammage de
80 grammes (le papier copie normal présente ce grammage). Si votre papier est plus mince,
vous pouvez perforer davantage de feuilles empilées. Si, toutefois, votre papier est plus épais,
moins de feuilles se laissent traiter à la fois.
Les lms en plastique transparent (page de garde) – Vous pouvez perforer à la fois au
maximum deux lms plastique de 0,2 mm chacun. Ne le perforez pas simultanément avec du
papier ou du carton prévu comme page de garde. Les lms doivent être perforés séparément.
Le carton (page de couverture) – Les pages en carton doivent également être perforées
séparément. Ne les perforez pas avec les lms plastique ou feuilles de votre document.
Taille de peigne recommandée et profondeur de perforation
Le tableau vous informe de la taille de peigne appropriée et de la profondeur de perforation pour un nombre de feuilles
déterminé.
80 g/m² 25 45 65 95 125 145 175 210 240 270 310 375 440 500
80 g/m²
6 8 10 12 14 16 19 22 25 28 32 38 44 51
F
F

12
Les éléments fonctionnels de votre comBIND 500
taille du peigne utilisé est la condition pour un
feuilletage optimal.
G Mécanisme de peigne – Ouverture et fermeture
du peigne plastique par actionnement du levier
de reliure I.
H Guide de la dimension des reliures – Indique
la taille de peigne requise pour la pile à relier
actuelle.
I Levier de reliure – Manœuvre du mécanisme
d'ouverture / de fermeture de peigne G.
J Compartiment à confettis – Videz ce
compartiment régulièrement pour éviter un
endommagement du mécanisme de perforation.
A Couvercle/guide-papier – Le couvercle ouvert
fait ofce également de soutien de papier, ce qui
facilite la perforation.
B Butée papier réglable – Pour ajuster l‘appareil
au format de papier inséré : A4, lettre US ou A5.
C Fente de perforation (avant) – Pour les feuilles
qui doivent être pourvues de 2 trous.
D Fente de perforeliage (arrière) – Pour les
feuilles qui doivent être pourvues de 21 trous puis
être reliées par un peigne plastique.
E Levier de perforation – Manipulez ce levier
toujours des deux mains et saisissez-le au milieu
de la coquille poignée.
F Coulisseau de réglage de la profondeur de
perforation – le réglage correct en fonction de la
Déballer et installer l’appareil
1. Matériel fourni
• Déballez l’appareil avec précaution et vériez l’absence de dommages
de transport.
• Le carton doit contenir les éléments suivants :
– le comBIND 500,
– le levier de perforation et deux vis appropriées,
– un kit de démarrage englobant plusieurs peignes et pages de couverture,
– ce mode d’emploi.
• Conservez le matériau d’emballage au moins jusqu’à la n de la
garantie de l’appareil.
2. Monter le levier de perforation
Le levier de perforation doit être monté de sorte que le marquage L se trouve du
côté gauche et que le marquage R se trouve du côté droit de l’appareil.
• Ouvrez quelque peu le levier de perforation avec prudence puis
emmanchez-le sur l’axe.
• Vissez le levier de perforation à fond avec les deux vis fournies.
3. Installer l’appareil
• Posez l’appareil sur une surface stable et plane (par ex. table).
• Repliez le couvercle (pour qu’il devienne le guide-papier) A.
Les lames de perforation ont été huilées en usine pour les protéger contre la
corrosion.
• Procédez à une perforation initiale avec de l’ancien papier et répétez
cette opération plusieurs fois an de nettoyer les lames de perforation.
L’appareil est dès lors prêt à l’emploi.
1
2
3
FF F

13
Perforer et relier au moyen de peignes
plastique
1. Préparatifs
• Réglez la butée de papier Ben fonction du papier utilisé.
• Pour trouver la taille de peigne appropriée : posez la pile de
feuilles à relier (avec les 2 pages de couverture) contre le guide de
dimension Het lisez la taille qui y est assignée.
A cette n, vous pouvez également compulser le tableau à la page 11.
• Réglez ensuite la profondeur de perforation Een fonction de la
taille du peigne.
2. Insérer et ouvrir le peigne
• Insérez le peigne plastique dans le mécanisme G; le côté
ouvrable doit être dirigé vers le haut.
• Tirez sur le levier de reliure Ijusqu’à ce que le peigne soit
sufsamment ouvert pour y placer facilement les feuilles.
3. Perforer
Astuce : Réalisez un test de perforation à l’aide d’une feuille de papier
vierge avant de perforer l’original.
Attention ! Pour éviter un endommagement du mécanisme
de perforation, enlevez du papier tout ce qui est en métal
(agrafes, trombones, etc.). Ne perforez jamais plus de 25 feuilles
de 80 grammes à la fois ni plus de deux lms en plastique
transparent de 0,2 mm chacun. Videz le compartiment à confettis
régulièrement.
Attention ! Risque d’écrasement des doigts/mains. Saisissez le
levier toujours des deux mains au milieu de la coquille poignée.
Lorsque vous perforez, personne ne doit séjourner autour de
l’appareil.
• Placez les feuilles dans la fente arrière D.
• Tirez le levier de perforation Eentièrement vers le bas.
• Repoussez le levier vers le haut et enlevez les feuilles dès lors
perforées.
4. Relier les feuilles perforées
• Mettez les feuilles perforées dans le peigne ouvert.
Vous pouvez alors poursuivre avec les autres feuilles (étape 3) puis les
mettre dans le peigne.
5. Enlever le document relié
• Poussez le levier de reliure Ivers l’arrière pour fermer le peigne.
• Enlevez le document dès lors relié.
2
3
4
5
1
FF

14
Perforer
Attention ! Pour éviter des dommages du mécanisme de perforation,
ne perforez jamais plus de 25 feuilles d’un grammage de 80 à la fois.
Nettoyez le compartiment à confettis régulièrement.
Attention ! Risque d’écrasement des doigts/mains. Saisissez le
levier des deux mains au milieu de la coquille poignée.
• Adaptéz la butée de papier Bau format utilisé.
• Posez les feuilles dans la fente avant C.
• Tirez le levier de perforation Eentièrement vers le bas.
• Repoussez le levier vers le haut et enlevez les feuilles perforées.
Entretien et nettoyage
• Pour éviter des dommages du mécanisme de perforation, videz le compartiment à confettis Jrégulièrement.
• Ne tentez pas de réparer un appareil endommagé mais expédiez-le. Pour plus de détails, veuillez compulser la
déclaration de garantie.
• Pour un nettoyage extérieur de l’appareil, utilisez un chiffon humecté pour l’essuyer. Il est interdit d’utiliser des
produits chimiques à ces ns.
Caractéristiques techniques
Mode de fonctionnement manuel
Formats de papier A4, letter US, A5
Lames de perforation 21 rectangulaires (US-Pitch), 2 rondes
Profondeur de perforation réglable en deux pas (2,5 / 4,5 mm)
Capacité de perforation 25 feuilles de papier (80 g/m²) ou 2 lms plastique transparent (0,2 mm)
Taille des peignes 6 à 51 mm (au plus 500 feuilles)
Poids net 13 kg
Dimensions (l x p x h) 450 mm x 550 mm x 170 mm
Sous réserve de modications techniques.
Transporter l’appareil
• Pour transporter l’appareil, il est indispensable de le saisir des deux
mains. Pour éviter une détérioration, ne soulevez jamais l’appareil en
tirant sur son levier de perforation.
FF F

15
Date d’achat :
Série No. / Modèle No. :
Nom de la rme/société :
Personne à contacter/Département :
Adresse :
No de téléphone :
ESSELTE
Service après-vente ESSELTE
1 route de Gérardmer Service clientèle
Le syndicat Industriepark-Noord 30
88125 VAGNEY CEDEX B-9100 Sint-Niklaas
FRANCE BELGIQUE
Tel 03 29 23 43 00 Tel: 03/760 33 11
Fax: 03 44 08 22 50 Fax: 03/777 47 98
2 ans de garantie
A retourner avec l’appareil en cas de panne.
Tous les appareils LEITZ sont garantis 2 ans. Les clauses
de cette garantie sont les suivantes:
1. Chaque appareil est garanti 2 ans à partir de la date
d’achat contre tous les risques de défauts de fabrica-
tion.
2. Aucun appareil ne pourra être accepté en retour sans
un courrier du client spéciant le(s) défaut(s) de l’appa-
reil et prouvant la date d’achat.
3. Tout appareil défectueux devra être retourné à
ESSELTE dans son emballage d’origine. Les appareils
endommagés lors du transport à cause d’un emballage
non approprié ne seront pas acceptés.
4. ESSELTE sera responsable des pièces de rechange
et de la main d’oeuvre nécessaires à la réparation
de l’appareil. La garantie de 2 ans est valable sous
réserve des conditions suivantes:
a) L’appareil devra toujours avoir été utilisé conformé-
ment au mode d’emploi.
b) Pour bénécier de cette garantie, l’appareil devra
être renvoyé en port payé à ESSELTE. ESSELTE
n’acceptera aucune responsabilité en cas de perte
ou détérioration pendant le transport.
c) Cette garantie ne sera pas valable si la
défectuosité est due à un accident, à un usage
abusif, à une transformation ou à une négligence.
d) ESSELTE n’acceptera aucune responsabilité
en cas de détérioration, perte ou frais dus à des
erreurs, quelles qu’elles soient, de manipulation de
l’appareil ou des accessoires.
e) Cette garantie n’aura pas d’effet sur les droits
statutaires du consommateur.
FF

16
Notes
F A

17
Sehr geehrter Kunde
Danke, dass Sie sich für ein Stanz- und Bindegerät
von Leitz entschieden haben. Bitte lesen Sie diese
Gebrauchsanweisung sorgfältig durch, um sich mit
seiner Benutzung vertraut zu machen. Geben Sie das
Gerät nicht ohne diese Gebrauchsanweisung weiter.
Sicherheitshinweise
Bestimmungsgemäße Verwendung
• Dieses Gerät wurde zum Stanzen von Papier
und Kunststofffolien sowie zum Binden solcher
Materialien mit Plastikbinderücken entwickelt.
Verwenden Sie es ausschließlich zu diesem
Zweck und wie in dieser Gebrauchsanweisung
beschrieben.
Allgemeine Vorsichtsmaßnahmen
• Gerät nur auf einer stabilen, ebenen Unterlage
benutzen (z. B. Tisch).
• Quetschgefahr für Finger/Hände: Beim Stanzen
den Hebel mit beiden Händen in der Mitte
der Griffschale fassen. Beim Stanzen andere
Personen vom Gerät fernhalten.
• Kinder vom Gerät fernhalten –
Verletzungsgefahr.
• Um Schäden am Stanzmechanismus zu
vermeiden, vor dem Stanzen Metallteile
(Heftklammern usw.) aus den Blättern entfernen
und den Behälter für Stanzabfälle regelmäßig
leeren.
• Keine Zusatzteile verwenden, die nicht vom
Hersteller zugelassen sind.
• Nur Originalzubehör von Leitz verwenden.
Inhalt
Sicherheitshinweise....................................................... 17
Welche Materialien kann ich stanzen und lochen?....... 17
Empfohlene Binderückengröße und Stanztiefe............ 17
Funktionselemente Ihrer comBIND 500........................ 18
Das Gerät auspacken und aufstellen............................ 18
Stanzen und Binden mit Plastikbinderücken ................ 19
Lochen ...........................................................................20
Das Gerät transportieren............................................... 20
Wartung und Pege....................................................... 20
Technische Daten..........................................................20
2 Jahre Garantie ............................................................ 21
Welche Materialien kann ich stanzen und lochen?
Papier – Sie können bis zu 25 Blatt 80-Gramm-Papier gleichzeitig stanzen (normales
Kopierpapier hat dieses Gewicht). Wenn Ihr Papier dünner ist, können Sie mehr Blätter
gleichzeitig stanzen. Wenn Ihr Papier dicker ist, können Sie weniger Blätter gleichzeitig stanzen.
Klarsichtfolien (Deckblatt vorne) – Sie können bis zu zwei Klarsichtfolien à 0,2 mm
gleichzeitig stanzen. Stanzen Sie sie nicht zusammen mit Papier oder Deckblatt-Karton. Folien
müssen einzeln gestanzt werden.
Karton (Deckblatt hinten) – Deckblätter aus Karton müssen ebenfalls einzeln gestanzt
werden. Stanzen Sie sie nicht zusammen mit Klarsichtfolien oder Blättern Ihres Dokuments.
Empfohlene Binderückengröße und Stanztiefe
Die Tabelle zeigt die geeignete Binderückengröße und Stanztiefe für eine bestimmte Anzahl Blätter.
80 g/m² 25 45 65 95 125 145 175 210 240 270 310 375 440 500
80 g/m²
6 8 10 12 14 16 19 22 25 28 32 38 44 51
F
D

18
Funktionselemente Ihrer comBIND 500
gewählter Stanztiefe lassen sich die Seiten leicht
umblättern.
G Bindemechanismus – Öffnet und schließt
den Plastikbinderücken durch Betätigen des
Bindehebels I.
H Skala – Zeigt, welche Binderückengröße für die
zu bindende Papiermenge erforderlich ist.
I Bindehebel – Betätigt den Bindemechanismus
G, der den Binderücken öffnet und schließt.
J Behälter für Stanzabfälle – Diesen Behälter
regelmäßig ausleeren, um Schäden am
Stanzmechanismus zu vermeiden.
A Deckel/Papierstütze – Der geöffnete Deckel
dient als Papierstütze, um das Stanzen/Lochen
zu vereinfachen.
B Verstellbarer Papieranschlag – Auf das
verwendete Papierformat einstellen: A4, US-Brief
oder A5.
C Lochschacht (vorne) – Nimmt die Blätter auf,
die Sie mit einer normalen 2-fach-Lochung
versehen wollen.
D Stanzschacht (hinten) – Nimmt die Blätter auf,
die Sie mit 21 Löchern für eine Plastikbindung
stanzen wollen.
E Stanzhebel – Den Hebel immer mit beiden
Händen in der Mitte der Griffschale fassen.
F Schalter für Stanztiefe – Auf die verwendete
Binderückengröße einstellen. Bei richtig
Das Gerät auspacken und aufstellen
1. Lieferumfang
• Das Gerät vorsichtig auspacken und auf mögliche Transportschäden
überprüfen.
• Der Karton sollte folgenden Inhalt haben:
– die comBIND 500,
– den Stanzhebel mit zwei Schrauben,
– ein Starterset mit verschiedenen Binderücken und Deckblättern,
– diese Bedienungsanleitung.
• Das Verpackungsmaterial mindestens bis zum Ende der Garantiezeit
aufbewahren.
2. Den Stanzhebel anbringen
Der Stanzhebel muss so montiert werden, dass die Markierung Lsich auf der
linken Seite und die Markierung R sich auf der rechten Seite des Geräts benden.
• Den Stanzhebel vorsichtig ein kleines Stück weit auseinander biegen
und auf die Achse aufstecken.
• Den Stanzhebel mit den beiden Schrauben sichern.
3. Gerät aufstellen
• Gerät auf eine stabile, ebene Unterlage stellen (z. B. Tisch).
• Den Deckel (die Papierstütze) Aaufklappen.
Die Stanzmesser wurden bei der Fertigung geölt, um sie vor Korrosion zu
schützen.
• Stanzen und lochen Sie mehrmals mit altem Papier, um die
Stanzmesser zu reinigen.
Das Gerät ist jetzt einsatzbereit.
1
2
3
DD D

19
Stanzen und Binden mit Plastikbinderücken
1. Vorbereitung
• Den Papieranschlag Bauf das verwendete Papierformat
einstellen.
• Die erforderliche Binderückengröße ermitteln: Die zu bindenden
Blätter (einschließlich Deckblatt und Rücken) an die Skala H
halten und die Binderückengröße ablesen.
Zu diesem Zweck können Sie auch die Tabelle auf Seite 17 nutzen.
• Die Stanztiefe Fentsprechend der Binderückengröße einstellen.
2. Binderücken einlegen und öffnen
• Den Plastikbinderücken mit der zu öffnenden Seite nach oben in
den Bindemechanismus Geinlegen.
• Den Bindehebel Iso weit heran ziehen, bis der Binderücken weit
genug geöffnet ist, um die Blätter bequem einlegen zu können.
3. Stanzen
Tip: Testen Sie das Stanzergebnis zunächst mit einem leeren Blatt Papier,
bevor Sie das Original stanzen.
Vorsicht! Um Schäden am Stanzmechanismus vorzubeugen,
alle Metallteile (Heftklammern usw.) aus den Blättern
entfernen. Nicht mehr als 25 Blatt 80-Gramm-Papier oder zwei
Klarsichtfolien à 0.2 mm gleichzeitig stanzen. Den Behälter für
Stanzabfälle regelmäßig leeren.
Vorsicht! Quetschgefahr für Finger/Hände. Den Hebel mit
beiden Händen in der Mitte der Griffschale fassen. Beim Stanzen
andere Personen vom Gerät fernhalten.
• Die Blätter in den hinteren Schacht Dstellen.
• Den Stanzhebel Eganz nach unten ziehen.
• Den Hebel wieder nach oben drücken und die gestanzten Blätter
entnehmen.
4. Gestanzte Blätter einlegen
• Die gestanzten Blätter in den geöffneten Binderücken einlegen.
Sie können nun alle weiteren Blätter stanzen (Schritt 3) und in den
Binderücken einlegen.
5. Gebundenes Dokument heraus nehmen
• Den Bindehebel Inach hinten drücken, um den Binderücken zu
schließen.
• Das gebundene Dokument heraus nehmen.
2
3
4
5
1
DD

20
Lochen
Vorsicht! Um Schäden am Stanzmechanismus vorzubeugen, nicht
mehr als 25 Blatt 80-Gramm-Papier gleichzeitig lochen. Den Behälter
für Stanzabfälle regelmäßig leeren.
Vorsicht! Quetschgefahr für Finger/Hände. Den Hebel mit beiden
Händen in der Mitte der Griffschale fassen.
• Den Papieranschlag Bauf das verwendete Papierformat einstellen.
• Die Blätter in den vorderen Schacht Cstellen.
• Den Stanzhebel Eganz nach unten ziehen.
• Den Hebel wieder nach oben drücken und die gelochten Blätter
entnehmen.
Wartung und Pege
• Um Schäden am Stanzmechanismus vorzubeugen, den Behälter für Stanzabfälle J
regelmäßig leeren.
• Ein beschädigtes Gerät nicht selbst reparieren, sondern einschicken. Einzelheiten dazu in der
Garantieerklärung.
• Um das Gehäuse zu reinigen, das Äußere mit einem feuchten Tuch abwischen. Niemals Chemikalien für die
Reinigung verwenden.
Technische Daten
Arbeitsweise Manuell
Papiegrößen A4, US-Brief, A5
Stanzmesser 21 rechteckige (US-Pitch), 2 runde
Stanztiefe einstellbar in zwei Schritten (2,5 / 4,5 mm)
Stanzkapazität 25 Blatt Papier (80 g/m²) oder 2 Klarsichtfolien (0.2 mm)
Binderückengröße 6–51 mm (bis zu 500 Blatt)
Nettogewicht 13 kg
Abmessungen (B x T x H) 450 mm x 550 mm x 170 mm
Technische Änderungen vorbehalten.
Das Gerät transportieren
• Beim Transportieren das Gerät mit beiden Händen fassen. Um
Schäden zu vermeiden, Gerät nicht am Stanzhebel anheben.
DD D
Table of contents
Languages:
Other Esselte Binding Machine manuals
