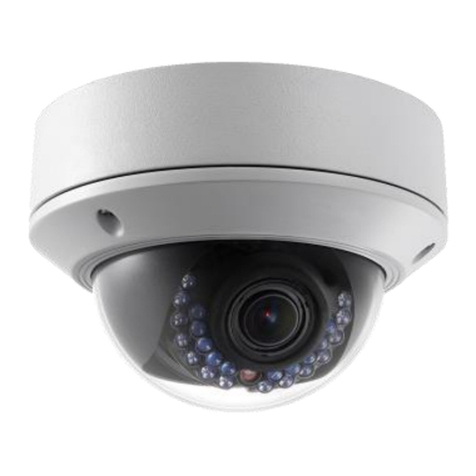
Esunstar Technology P03 Series User manual

1
P03 Series PTZ IP Camera Quick Start Guide
Part 1【P6SLite mobile APP Quick Start Guide】
Model:P03Z91LW4
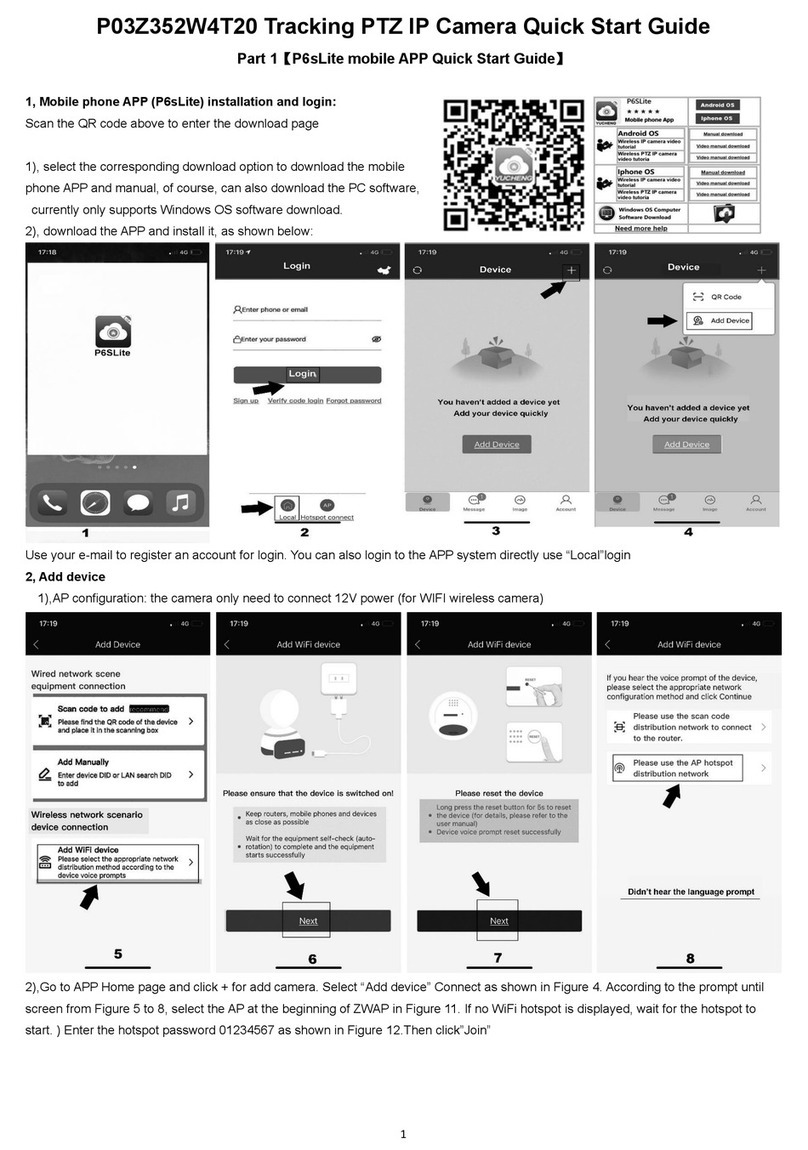
1. Go to the app store and download the free P6SLite app for your mobile device,available for both Android and iOS. Alternatively you
can scan the QR code below to access the download page directly(1-1).Click on either the Android OS or iPhone OS button to
download the appropriate version for your device(1-2).You can also download a Windows version to run on a Windows PC.
1-1 1-2
2. Launch the P6SLite app and following the instructions on the screen.
3. Account registration and server selection;Users can use your e-mail to register an account level. You can also log in to the APP
system directly using aTwitter account or use “Local”login.The user registration is as shown in Figure. Click on the first step in the
figure, select the second step of the lnternational, and then select the third step to register. As shown in Figure, the user can select the
region according to the actual geographical location. Select area (Foreign users can only register by email)
3-1
3-2
4.Add cameras
1),AP configuration:
① The camera only need to connect 12V power (for WIFI wireless camera)
②,Open APP Home page, click the icon in the upper right corner. Select “AP configure” Connect as shown in Figure 4-1. According
to the prompt until the wifi search screen, select the AP at the beginning of ZWAP. If no WiFi hotspot is displayed, wait for the hotspot to
start. ) Enter the hotspot password 01234567 as shown in Figure 4-2.
4-1 4-2 4-3

2
③, Click on the back button APP of the mobile device to show that it is connected as shown in Figure 2-3.(Note: If the
configuration fails in the interface of Figure 4-3, it will return to the interface of Figure 4-2(This indicates that your WIFI password is
entered incorrectly.); this is the wifi hotspot connection! ! !
④, If the hotspot connection is successful, it will enter the wifi configuration mode as shown in Figure 4-4. Select the known WiFi network
to configure. If the configuration succeeds, the message “Setting the device's WiFi information successful” is displayed, as shown in
Figure 4-5. At this time, the APP will automatically return to the home screen asshown in Figure 4-6. The WiFi of the camera has been
configured successfully.
⑤,Click on the home page list to show the
connected devices. The camera will enter the
preview interface
4-4 4-5 4-6
2)QR code added(The camera has been wired to your router)
①,Open APP Home page, click the icon in the upper right corner, select the QR code (you can also click on the
sweep) as shown in Figure 4-7. QR code recognition will enter the Add Device interface as shown in Figure 4-8.
4-7 4-8 4-9 4-10
②Add a successful APP will return to the device home page interface, click the home page list to show the connected device. Will
enter the camera preview interface as shown in Figure 4-9.
3)Add LAN device(The camera has been connected to the wide area network)
The camera must be connected with 12V power supply and network cable (Note: The camera has enabled the DHCP function by
default. Please ensure that your network is normal, and the device to be added by the APP must be in the same network environment. If
it cannot be added, please check Your network is not a product quality issue)
①Open APP Home page, click the icon in the upper right corner, and select Add LAN Device as shown in Figure 4-11.
②Click to search for the device as shown in Figure 4-12
Please choose your router wifi
SSID,and input password of
router wifi

3
4-11 4-12 4-13 4-14
③As shown in Figure 4-13, click “Save” in the upper right corner of the device (the password is empty). If the application is
successfully saved, the device will return to the device management interface. Click the Home page to display the connected device.
Will enter the camera preview interface as shown in Figure 4-14
3)manually add
Open APP Home page, click + the icon in
the upper right corner and select “Add manually”
as shown in Figure 4-15. As shown in Figure 4-16,
the name can be entered according to your needs;
the UID number can be found on the airframe or
the outer package as shown in Figure 4-17. Note
the case when entering the UID. User name and
password are the default for the first time.
4-15 4-16 4-18
Complete the operation of Figure 4-16. Click Save. Adding a successful .APP will return to the device's home page. Clicking on the home
page list will display the successfully connected devices. Will enter the camera preview interface as shown in Figure 4-18
5, Home page interface, real-time preview and function description
1), home icon uses as shown in Figure 5-1
Part 2【APP Quick button function introduction】
1,Control zoom function:Figure 2-1
2-1 2-2

4
Click the on the APP interface, and the APP will pop up function button. Click + for ZOOM+,Click - for ZOOM-
2,Manual Focus,If some scene cameras cannot complete auto focus, users can use manual focus to get a clearer image.:Figure 2-2
Click the on the APP interface, and the APP will pop up function button. Click + for Focus +,Click - for Focus -
3,Set and Call preset:
3-1
4,Open Cruise and Close Crouse:Figure 4-1
4-1 4-2
Before using the cruise function, you first need to set some presets. The camera will perform the cruise according to some preset positions
you set.
Example: Set 4 preset positions. We rotate the camera to the first position, Figure 4-1 ,enter 1, then click , rotate to the
second position, enter 2, then click , rotate to the third position, enter 3, then click . Rotate to the fourth
position, enter 4, then click . Thus 4 preset positions are set.
Then click the cruise button, turn it on, and the camera will cruise at these 4 positions to execute the cruise command.
5,How to use Watch position(home postion) :Figure 4-2 ;
The position where the camera returns when the camera
is in standby mode .Rotate the camera to the position you want, then Click
(Figure 4-2),
and the current position is the watch position, and Open this feature. When the
camera is in standby, the camera will automatically rotate to this position.
6,How control PTZ
Click Image pan/tilt direction button in the video box.
6-1
Please follow these direction buttons to operate the direction
of rotation of the gimbal
Click the on the APP interface, and the
APP will pop up Numeric keypad button. You
can use this numeric keypad to set presets, call
presets and turn on some special features.If we
need to set the 1 th preset , we need to Click 1
on the keyboard, then click the
button to set 1th preset successfully.

5
Part 3【PTZ Speed Dome Camera Features】
The PTZ Speed Dome camera has many advanced features.
1. Automatic cruise
The camera can automatically cruise between two to sixteen preset views. After setting the presets for up to sixteen different views,
the camera can automatically cycle through the set views.
2. Full circle rotation
The camera can repeatedly rotate through a full 360° circle. The speed of the scan can be adjusted.
3. Left-right scan
The camera can repeatedly scan back and forth between two set points. The speed of the scan can be adjusted.
4. Zoom and focus
Users can zoom in to get a close-up detail view or zoom out for a panoramic view. When zooming, the camera will automatically focus
on the center of the view. Under certain circumstances such as the object is not in the center of the view, the object is too dark, too
bright, or moving too fast, the user can adjust the focus manually.
5. Automatic rotation speed adjustment
The rotation speed can automatically adjust based on the zoom level. The rotation speed is slower when zoomed in and faster when it
is zoomed out.
6. Watch Home position
Automatic return to home position or start scanning after a given amount of idle time.
Part 4 【PTZ Speed Dome Camera Operation】
The operation of the PTZ Speed Dome Camera can be controlled using either the PC client software, a mobile phone running the
P6SLite app, or with an internet browser connected directly to the IP address of the camera.
For internet browser
Regardless of which of the three methods you use to connect to the camera, the actual controlling of the camera is the same. The
operation of the camera is controlled by either setting or calling a preset number. There are a total of 256 preset numbers. For
example, to make the camera continuously rotate clockwise in a complete 360° circle, you would first select preset number 120 and
then press CALL . As another example, to save the settings of the current camera position and zoom, you would first select preset
number 1 and then press SET . Afterwards, if you change the camera position, you can easily go back to the saved position by
selecting preset number 1 and then press CALL. We will use the following format to describe the setting and calling of a preset
number:
Set one Preset number
[n]+[SET] where n is one of the 256 preset numbers. In this case, you would first select the preset number (or enter it in on the
keyboard) that you want and then press the SET button.
Call one preset number
[n]+[CALL] where n is one of the 256 preset numbers. In this case, you would first select the preset number (or enter it in on the
keyboard) that you want and then press the CALL button.

6
Detailed description of function settings
1. Individual custom view presets. The horizontal and vertical positions of the camera, the zoom, and the focus of a view can be
saved in any of the custom preset numbers 1 to 80. First rotate and zoom the camera to the position that you want and then press
[N]+[SET] where N is any preset numbers from 1 to 80.
To go back to the saved preset position, you would press [N]+[CALL] where N is the preset number where you have saved the
position.
2. Automatic Cruise control
Preset numbers 1 to 48 are divided into groups for the special cruise control function.
Group one contains preset numbers 1 to 16. Group two contains preset numbers 17 to 32.
Group three contains preset numbers 33 to 48.
Pressing [98]+[CALL] will cause the camera to cruise sequentially between the preset numbers in group one.
Pressing [97]+[CALL] will cause the camera to cruise sequentially between the preset numbers in group two.
Pressing [96]+[CALL] will cause the camera to cruise sequentially between the preset numbers in group three.
Pressing any of the PTZ operations will stop the cruise.
To change the speed of the cruise, press [115]+[SET]+[D]+[SET] where D is a percentage between 1 and 100, Indicate the
percentage of the rotation speed to the maximum speed. The default is D=8=80%.
To change the pause time at each preset view, press [123]+[SET]+[s]+[SET] where s is a number between 1 and 10 which
represents the number of seconds. The default is 5 seconds.
3. Left-right scan
Make the camera continuously scan back and forth between two horizontal points. First move the camera to the leftmost point and
then press [81]+[SET]. Then move the camera to the rightmost point and then press [82]+[SET]. Press [83]+[CALL] to start the
left-right scan.
To change the speed of the scan, press [141]+[SET]+[d]+[CALL] where D is a percentage between 1 and 10, Indicate the
percentage of the rotation speed to the maximum speed. The default is D=5=50%. Pressing any of the PTZ operations will stop the
cruise.
4. Continuous full 355° circle rotation.
[120]+[CALL] to start rotating in a clockwise direction.
To change the speed of the rotation
[121] +[SET]+[d]+[SET] where D is a percentage between 1 and 10, Indicate the percentage of the rotation speed to the maximum
speed. The default is D=8=80%.. Pressing any of the PTZ operations will stop the cruise.
If you wanto to change speed of auto scan to 50%;Setting method: [121]+[Set] +[5]+[Set]
5. Delete all user saved presets
[100]+[CALL] will delete all settings saved by the user.
6. Infrared (IR) light control.
[137]+[CALL] to automatically turn on and off IR for night and day mode(Defaults).
[138]+[CALL] to manually turn on the IR.
[139]+[CALL] to manually turn off the IR.
The brightness settings for all lamp: [122]+ [set] +[ N]+[ set]; (N=1-10; default is 8=80%);Setting method: [122]+[SET]+[N]+[SET]
An infrared detection threshold setting:[91]+[SET]+[N]+[SETt] (N=1-10;N represents Ambient light brightness,1-10=0.1Lux-1LUX )
Setting method: [91]+[preset]+[N]+[preset]
If you want the IR light to turn on at 0.5LUX,Setting method: [91]+[preset]+[5]+[SET]
7. Automatic return to home position or start scan
After the camera is idled for a set amount of time, it can be made to automatically return to a home position, or start scanning.
Press [125]+[SET] to setup the automatic return to home position,It will automatically move the camera to 125 position after a given
amount of idle time.
To set up the amount of idle time before the camera returns to the home position or start scanning, press [126]+[SET]+[N]+[SET]
where N is the number of minutes between 1 and 10 of idle time to wait.default is N=5(5 minutes)
Press [125]+[CALL] to Clear automatic return to home position.
8.Restore factory settings (only for PTZ speed dome,Does not include the IPC itself)
[106]+[Call]+[64]+[CALL] for restore PTZ speed dome to factory setting;Setting method:[106]+[Call]+[64]+[CALL]
This manual suits for next models
1
Table of contents
Other Esunstar Technology Security Camera manuals

