manuals.online logo
Brands
  1. Home
  2. •
  3. Brands
  4. •
  5. EtroVISION
  6. •
  7. Security Camera
  8. •
  9. EtroVISION EV8781 Series User manual

EtroVISION EV8781 Series User manual

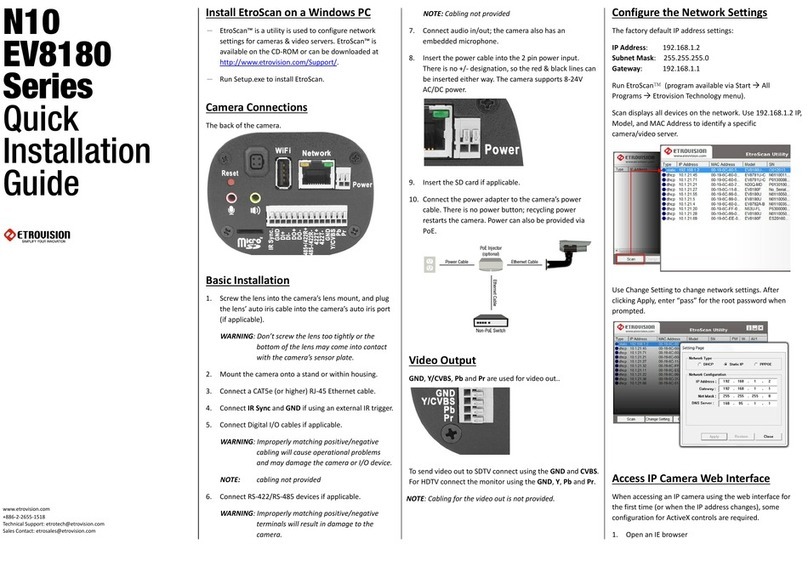
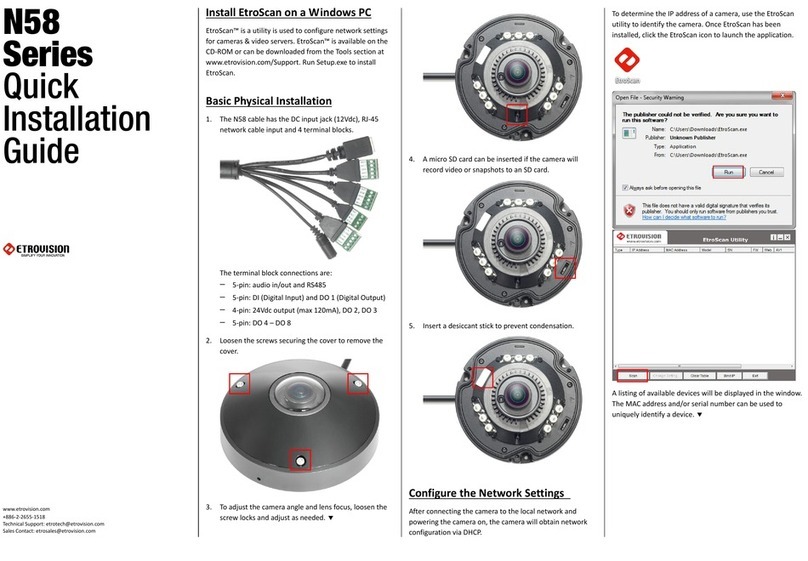
1 Install EtroScan™on a Windows PC
EtroScan™ is a utility is used to configure network settings for cameras & video servers. EtroScan™
is available on the CD-ROM or can be downloaded from the Tools section at
http://www.etrovision.com/Download_list.aspx?no=5
Run Setup.exe to install EtroScan™.
2 Basic Physical installation
Please review the steps before starting.
The steps outlined below are the suggested installation path, but certain steps may need to be
switched depending on the installation environment.
1. Apply sticker to mounting surface and
drill holes.
www.etrovision.com www.etrovision.com
2. Fix mounting plate to the surface using the 3 screws,
washers and wall anchors.
3. Mount arm support on to mounting plate. 4. Unscrew the back cover of camera.
6. Remove spindle fork by pushing in the
spindle. Screw spindle fork on to camera.
7. Set camera on to arm by pushing in the
spindle and placing the fork on to the spindle.
5. Run cable through arm and connect to
camera. Power can be connected via the
power terminal block or a 12V DC adapter.
8. Tighten the screws on the other side of the spindle
to lock the camera on to the arm.
9. To adjust the pan & tilt of the camera, loosen the
pan & tilt screw locks and adjust.
10. Connect power; there is no power button,
recycling power restarts the camera. Power can also
be provided via PoE.
11. Screw on the back cover.
12. To adjust lens or use video out, unscrew the front
cover and adjust the lens.
E41000001300
www.etrovision.com www.etrovision.com
For fixed type cameras:
13. Connect the video out dongle if
necessary. To use video out, enable the
Video Out in the Video Settings page.
14. After adjusting lens and using video out,
remove drying agent pack from one of the
silver packages stored inside the
accessories package.
15. Remove the sticker from the drying agent pack
and insert in the front under the lens as shown
below.
NOTE: The drying agent pack should be replaced
each time the camera is opened (front or back).
NOTE: Be sure to complete all work before
inserting drying agent pack & replacing the cover.
Drying agent packs will become ineffective if
exposed to open air for more than 10min.
16. Screw the front cover back on to the camera.
17. If using wide angle, shift the camera hood back
to avoid blocking view. Loosen screws and shift back
or forward as necessary
Click on the add-on message, and choose Run Add-on
Repeat the above until all ActiveX controls
have been initiated. Once the process is
complete, the Live View will be displayed
in IE.
omplete,
5 Restoring Factory Default Settings
There are 2 methods for restoring the factory default settings:
1. Power on the camera, push and hold down the reset button for 6 seconds. The camera will
revert to factory default settings (e.g. IP will reset to 192.168.1.2).
2. The web UI Setup (System -> Factory Default) ; network and user account data can be saved
if desired. Please refer to the User’s Manual for more information on the web UI Factory Default
functionality.
For Vari-Focal type cameras:
Pop-up windows and messages for download/run Active X controls (examples below) will likely
be displayed. Select Install or Run to all such messages.
4 Access IP Camera Web Interface
When accessing an IP camera using the web interface for the first time
(or when the IP address changes), some configuration for ActiveX controls are required.
1. Open an IE browser
2. Type in the IP address in the URL: http://<IP ADDRESS> (e.g. http://10.1.21.53)
3 Configure the Network
Settings
The factory default IP address settings:
IP Address 192.168.1.2
Subnet Mask 255.255.255.0
Gateway 192.168.1.1
Run EtroScan™ (program available via Start ->
All Programs -> Etrovision Technology menu)
Other EtroVISION Security Camera manuals

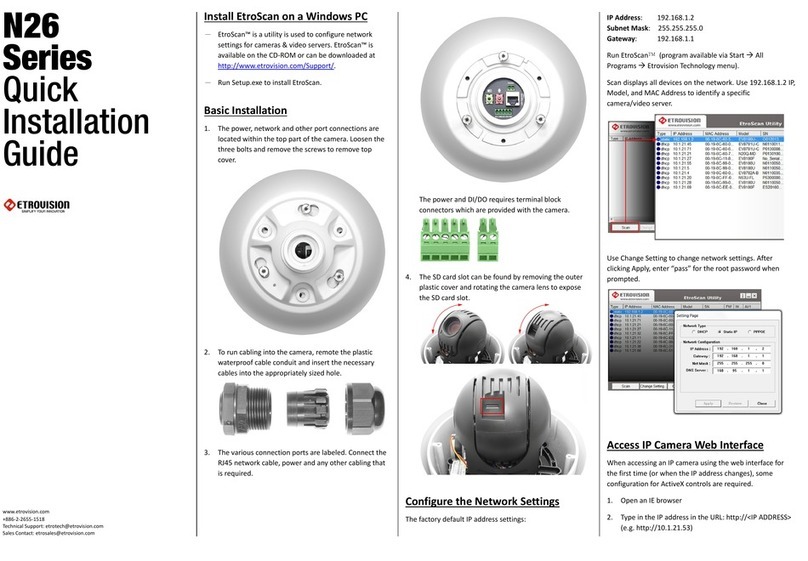
EtroVISION N73 User manual

EtroVISION

EtroVISION N73 User manual

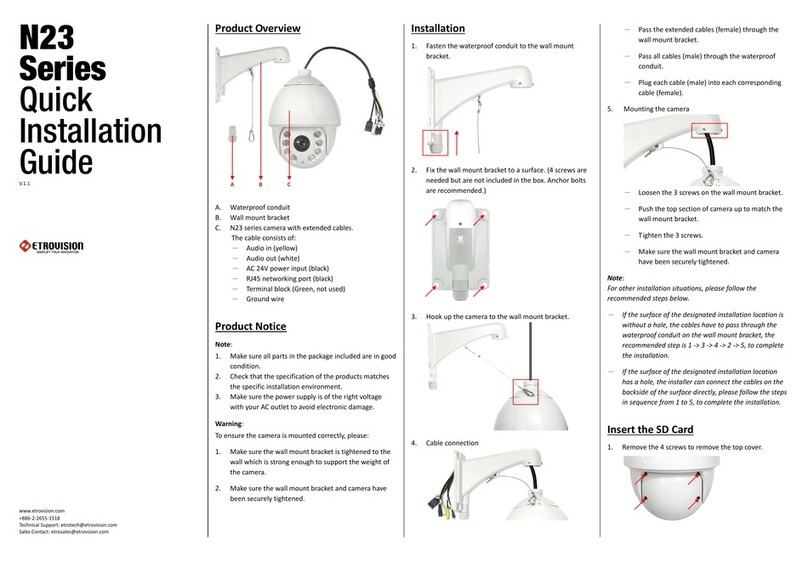
EtroVISION N10 EV8180 Series User manual

EtroVISION

EtroVISION N10 EV8180 Series User manual

EtroVISION EV8580F User manual

EtroVISION

EtroVISION EV8580F User manual

EtroVISION EV8180F User manual

EtroVISION

EtroVISION EV8180F User manual

EtroVISION N26 Series User manual

EtroVISION

EtroVISION N26 Series User manual

EtroVISION N50 User manual

EtroVISION

EtroVISION N50 User manual

EtroVISION N58 Series User manual

EtroVISION

EtroVISION N58 Series User manual

EtroVISION EV8582U-BL User manual

EtroVISION

EtroVISION EV8582U-BL User manual

EtroVISION M23 Series User manual

EtroVISION

EtroVISION M23 Series User manual

Popular Security Camera manuals by other brands

Vivotek MD7530 Quick installation guide

Vivotek

Vivotek MD7530 Quick installation guide

clare Varifocal Series installation guide

clare

clare Varifocal Series installation guide

American Dynamics SpeedDome Ultra VIIE Operator's manual supplement

American Dynamics

American Dynamics SpeedDome Ultra VIIE Operator's manual supplement

Milesight MS-C2942-PB user manual

Milesight

Milesight MS-C2942-PB user manual

Canon VB-M40 Specifications

Canon

Canon VB-M40 Specifications

Uniden Guardian GC45 Guide d'utilisation

Uniden

Uniden Guardian GC45 Guide d'utilisation

Vicon XX258-50-01 Roughneck Series Operation guide

Vicon

Vicon XX258-50-01 Roughneck Series Operation guide

IMAGO ICN-11P1 NW 2.8 Quick installation guide

IMAGO

IMAGO ICN-11P1 NW 2.8 Quick installation guide

JVC VN-H657WPBU instructions

JVC

JVC VN-H657WPBU instructions

D-Link DCS-3710 Quick installation guide

D-Link

D-Link DCS-3710 Quick installation guide

CleverCam 1335U3HS manual

CleverCam

CleverCam 1335U3HS manual

eufy Security E340 quick start guide

eufy Security

eufy Security E340 quick start guide

Axis P5635-E installation guide

Axis

Axis P5635-E installation guide

Motorola MOTOMESH 1.2 Setup and configuration guide

Motorola

Motorola MOTOMESH 1.2 Setup and configuration guide

Wansview Q7 installation guide

Wansview

Wansview Q7 installation guide

Bosch FLEXIDOME HD VR Quick install

Bosch

Bosch FLEXIDOME HD VR Quick install

Grundig GU-CI-AC8616V quick start guide

Grundig

Grundig GU-CI-AC8616V quick start guide

Vimar ELVOX 46526.212.01 user manual

Vimar

Vimar ELVOX 46526.212.01 user manual

manuals.online logo
manuals.online logoBrands
  • About & Mission
  • Contact us
  • Privacy Policy
  • Terms and Conditions

Copyright 2025 Manuals.Online. All Rights Reserved.