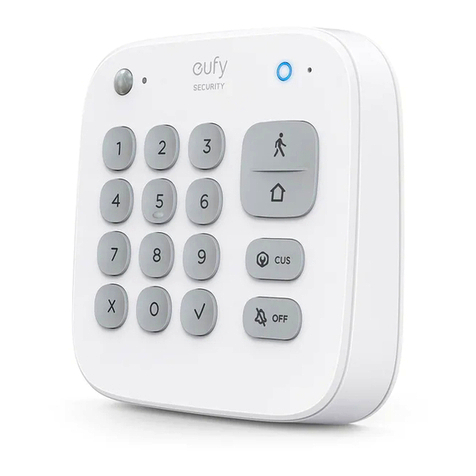
eufy Security T8960 User manual

Anker Innovations Limited. All rights reserved. eufy Security and eufy
Security Logo are trademarks of Anker Innovations Limited, registered in the
United States and other countries. All other trademarks are the property of
their respective owners.
Model:T8960
51005002528 V01
User Manual
Keypad
1
23
4
56
7
8
9
X
0
CUS
OFF

English 01
Deutsch 17
Español 31
Français 44
Italiano 57
Nederlands 70
Português 83
96
TABLE OF
CONTENTS
What’s Included 02 12 ChargingYour Keypad
Product Overview 03 12 OTA Update
Adding the Keypad to the System 04 13 ResettingYour Keypad
MountingYour Keypad 05 13 Specication
Using the Keypad 07 13 Troubleshooting
Operating on the eufy Security App 11 14 Notice

02 English English 03
WHAT’S INCLUDED
For Keypad Installation
Keypad T8960
Charging Cable
Mounting Screws
3M Adhesive
Sticker * 2
User Manual
Welcome Card
1
23
4
56
7
8
9
X
0
CUS
OFF
QSG
1
23
4
56
7
8
9
X
0
CUS
OFF
QSG
PRODUCT OVERVIEW
Keypad
1
23
4
56
7
8
9
X
0
CUS
OFF
1
2
3
4
5
8
9
7
6
①Panic Button
• Press and hold for 3 seconds to trigger the alarm
②SYNC Button
• Press and hold for 2 seconds to pair with HomeBase
③Reset
④LED Indicator
⑤Buzzer
⑥Power Indicator
⑦Micro-USB Charging Port
⑧Keypad Buttons
⑨Motion Sensor
User Manual

04 English English 05
ADDING THE KEYPAD TO THE
SYSTEM
Note: • Make sure you’ve first completed the setup of your eufy Security
HomeBase.
• Make sure the keypad is fully charged.A fully-charged keypad’s battery
can last for 6 months per charge.
1. Go to Add Device, and then select Keypad to add it to your system.
1
23
4
56
7
8
9
X
0
CUS
OFF
2. Press and hold the SYNC button for 2 seconds until the LED indicator blinks
blue.This indicates that The Keypad is waiting to pair.
The LED indicator turns solid blue for 5 seconds to indicate the pairing is
completed.
3. Follow the on-screen instructions to complete the setup process.
Note: You can add up to 3 keypads to your HomeBase.
LED Indicator Description
Blinking blue Pairing to HomeBase
Solid blue Paired with HomeBase
Blinking red Not connected to HomeBase
Off Standby or pairing failed
MOUNTING YOUR KEYPAD
Mount the Keypad
To mount the keypad:
Option 1: Use the adhesive strips
1. Stick the adhesive strips on the keypad, and then tear off the removable lm.
2. Stick the keypad onto the wall.
Option 2: Use the mounting screws
1. Slide the mounting bracket off.

06 English English 07
2. Place the mounting plate against the wall, matching UP and Down as indicated
on the back of the mounting bracket. Push a pencil tip through the holes on the
mounting bracket to mark the location for mounting the keypad.
3. Drill holes with a drill bit (15/64” / 6 mm) at each marking.
4. Insert anchors into the holes, and x the mounting bracket onto the wall with the
provided screws. No anchors are needed on wooden walls.
5. Slide the keypad down until it snaps perfectly onto the mounting bracket.
1
2
3
4
5
6
7
8
9
X
0
CUS
OFF
USING THE KEYPAD
Keypad Mode Introduction
The Keypad features four modes: Away, Home, Customized and OFF, which are
associated with four Keypad buttons respectively.
Away mode: All sensors will be activated and your house will be
monitored.The system is armed. Any movement will be detected and
an alarm will be triggered. Recommended using when you are away
from home.
Home mode: Interior sensors are disabled, while the exterior sensors
are activated. Recommended using when you are at home and want to
be alerted about any break-ins outside the house.
Customized mode: Recommended if you feel a customized security
mode is needed to match your specic life requirements.
OFF mode: No sensors are activated, while the camera is set to ON by
default.

08 English English 09
Arm, Disarm and Turn off an Alarm
To arm the system, enter the access code and press the button.
To disarm all the sensors, enter the access code and press the button.
To turn off an alarm, enter the access code and press √. The on-going alarm will be
turned off with the device’s security mode unchanged. When you turn off the alarm,
the alarms of all the devices connected to HomeBase will be turned off.
Set Customized Security Mode
To set a customized security mode using the eufy Security app:
1. Open the App homepage.
2. Tap the “Security” tab.
3. Tap the “Modes” tab and then tap “Customize” to add your personalized
settings.
4. Follow the on-screen instructions to define the actions of sensors. When the
customized mode is activated, the sensors will act as dened in the app.
5. Go to the Keypad homepage, tap “Button Allocation” and assign the customized
mode to the button.
For example, you could customize a “Sleep Mode” in which only certain sensors
are monitored and alarms are triggered. When you press the button, “Sleep
Mode” will be activated.
Switch between Away / Home / Customized / OFF modes
To switch between Away / Home / Customized / OFF modes:
1. Enter the access code, which is an optional setting on the eufy Security app.
2. Press / / / to switch to the corresponding mode.
Note: Access code is recommended to use when you switch from Away to Off
mode, while it is not necessary otherwise.
Device Bypass
Device bypass means that the system will ignore faulty sensors for a specic time
while the system is armed.
When you switch to Home, Away or any customized security mode, the system
will check if there are any issues with all your devices.You may need to bypass a
particular sensor in the following scenarios:
• You want to leave a sensor off while the system is armed.
o Example: You arm the system but want to leave a window open.
o You are sleeping at home and want the room to be unmonitored.
• A sensor malfunctions and you don’t have time to deal with it.
• A sensor is not connected to the HomeBase and cannot be detected.
If any issues are detected, the × and √ keypad buttons will ash simultaneously. You
may need to:
• Select √to bypass faulty devices.Then you can switch to the desired mode.
• Select × to cancel the operation. Then you cannot switch the current security
mode.
Note: • Each time you switch the security mode, the system will re-check
whether your devices are working properly.
• Make sure there is at least one active sensor in a mode that can arm
the system, or you cannot switch the security mode.
Panic Alarm
The Panic alarm can be used in the case of an emergency. To trigger an emergency
alarm, press and hold the Panic button for 3 seconds. Once the emergency alarm is
triggered, the LED indicator blinks red quickly for 3 seconds, the alarm coming from
HomeBase will be heard, and text notications will be sent to you/the administrator
via the eufy Security app and email.

10 English English 11
LED Indication
LED indicator Status Description
Numeric keypad
area
Keypad indicator blinks
white 3 times Access code error
Only × and √buttons
blink white for 5s
Device faults detected that must be
dealt with to switch to a certain mode
Mode button ( /
/ )
Solid blue The current mode is active
Blinking blue
The current mode is active and the
countdown has started for you to
leave the house.
Solid white Device faults detected that must be
dealt with to switch to a certain mode
Blinking white Failed to switch mode
Note: When the Away ( )/ Home ( )/CUS ( ) buttons blink blue
simultaneously, it indicates that the current security mode is not associated with
these buttons or specied on the app.
Buzzer Indication
Scenario Buzzer Description
Press any key on the keypad Buzzes once
Operation error (access code /
Mode switch error) Buzzes three times
Countdown reminder Buzzes continuously until the end
Waiting to bypass devices Buzzes for 5s
Press Panic button for 3s Buzzes quickly for 3s
OPERATING ON THE EUFY
SECURITY APP
All operations, such as mode switch, alarm on / off, device bypass, OTA update can
be performed on the eufy Security app.
Keypad Settings
On the eufy Security app, you can create the following settings:
• Set Away, Home, Customized, and Off security modes. Make sure the mode
associates to the Keypad button accordingly.
• Change access code
• Create access codes for other family members or guests. Up to 6 access
codes are supported.The access code should be 4 digits to 8 digits by default.
• Name the device
• Set emergency code.After entering the set code, the alarm will be disabled. A
specied message will be sent to emergency contacts via the app.
• Synchronize the Keypad status: Connected, disconnected, charging, factory
default.
Access Code Management
The eufy Security app allows you to assign an access code to your family members,
friends or visitors.
To assign the access code to them, open the eufy Security app, go to the Keypad’s
Device page, enter the user name and assign a new access code.
You can set an expiration date for each access code. Access codes beyond the
expiration date are invalid. This may be suitable for temporary visitors.
Note: Up to 6 access codes can be added on one HomeBase.

12 English English 13
CHARGING YOUR KEYPAD
Before charging your keypad, check whether the Keypad power is low.
When the Keypad power is low:
The Keypad’s LED indicator will ash red for 5 seconds when movement is detected
nearby. On the eufy Security app, the Keypad power level icon will turn red.
To charge your Keypad, use the micro USB cable and charger (not provided).
1
23
4
56
7
8
9
X
0
CUS
OFF
Charging indicator Solid red Charging
Solid blue Fully charged
OTA UPDATE
In some cases, the system may push OTA updates automatically. When the OTA
update begins, the LED indicator keeps ashing red until the process is completed.
To make sure the software is always the latest version, check your software updates
and follow the on-screen instructions to update the rmware manually.
RESETTING YOUR KEYPAD
When a keypad malfunction occurs, use a sharp-pointed object (such as SIM card
opener) to reset the keypad.
SPECIFICATION
Radio Frequency(SUB-1G): 866~866.8MHz (For EU); 920~920.8MHz (For US)
Cell Capacity: 2600 mAh
USB-A input: 5V 1A
Working temperaure: -10ºC - 50ºC / 14°F - 104°F
Storage temperature: -20ºC - 60ºC / -4°F - 140°F
TROUBLESHOOTING
The keypad keeps blinking red.
This indicates the keypad is disconnected from the HomeBase.
• Check whether the HomeBase is charged.
• Reset the keypad
• Check whether there is wireless interference nearby.
• Take the keypad closer to the HomeBase
For troubleshooting, check the FAQ section in the eufy Security app.

14 English English 15
NOTICE
FCC Statement
This device complies with Part 15 of the FCC Rules. Operation is subject to the
following two conditions: (1) this device may not cause harmful interference, and (2)
this device must accept any interference received, including interference that may
cause undesired operation.
Warning: Changes or modications not expressly approved by the party responsible
for compliance could void the user's authority to operate the equipment.
Note: This equipment has been tested and found to comply with the limits for a Class
B digital device, pursuant to Part 15 of the FCC Rules. These limits are designed to
provide reasonable protection against harmful interference in a residential installation.
This equipment generates uses and can radiate radio frequency energy and, if not
installed and used in accordance with the instructions, may cause harmful interference
to radio communications. However, there is no guarantee that interference will not
occur in a particular installation. If this equipment does cause harmful interference to
radio or television reception, which can be determined by turning the equipment off
and on, the user is encouraged to try to correct the interference by one or more of
the following measures: (1) Reorient or relocate the receiving antenna. (2) Increase
the separation between the equipment and receiver. (3) Connect the equipment
into an outlet on a circuit different from that to which the receiver is connected. (4)
Consult the dealer or an experienced radio / TV technician for help.
FCC Radio Frequency Exposure Statement
The device has been evaluated to meet general RF exposure requirements. The device
can be used in xed/mobile exposure condition. The min separation distance is 20cm.
Notice: Shielded cables
All connections to other computing devices must be made using shielded cables to
maintain compliance with FCC regulations.
The following importer is the responsible party:
Company Name: POWER MOBILE LIFE, LLC
Address: 400 108th Ave NE Ste 400, Bellevue,WA 98004-5541
Telephone:1-800-988-7973
This product complies with the radio interference requirements of the European
Community.
Declaration of Conformity
Hereby,Anker Innovations Limited declares that this device is in compliance with the
essential requirements and other relevant provisions of Directive 2014/53/EU. For
the declaration of conformity, visit www.eufylife.com.
Do not use the Device in the environment at too high or too low temperature, never
expose the Device under strong sunshine or too wet environment.
The suitable temperature for the product and accessories is -10°C-50°C.
RF exposure information: The Maximum Permissible Exposure (MPE) level has been
calculated based on a distance of d=20 cm between the device and the human body.
To maintain compliance with RF exposure requirement, use product that maintain a
20cm distance between the device and the human body.
CAUTION RISK OF EXPLOSION IF BATTERY IS REPLACED BY AN INCORRECT
TYPE. DISPOSE OF USED BATTERIES ACCORDINGTO THE INSTRUCTIONS
SUB-1G Frequency range: 866 ~ 866.8MHz
Max Output Power: 11.746dBm
Anker Innovations Deutschland GmbH | Georg-Muche-Strasse 3-5, 80807 Munich,
Germany
Anker Technology (UK) Ltd | Suite B, Fairgate House, 205 Kings Road, Tyseley,
Birmingham, B11 2AA, United Kingdom
This product is designed and manufactured with high quality materials and
components, which can be recycled and reused.
This symbol means the product must not be discarded as household waste,
and should be delivered to an appropriate collection facility for recycling.
Proper disposal and recycling helps protect natural resources, human health
and the environment. For more information on disposal and recycling of this
product, contact your local municipality, disposal service, or the shop where
you bought this product.
IC Statement
This device complies with Industry Canada licence-exempt RSS standard(s).
Operation is subject to the following two conditions:

16 English
(1) this device may not cause interference, and
(2) this device must accept any interference, including interference that may cause
undesired operation of the device."
Le présent appareil est conforme aux CNR d'Industrie Canada applicables aux
appareils radio exempts de licence. L'exploitation est autorisée aux deux conditions
suivantes:
(1) l'appareil nedoit pas produire de brouillage, et
(2) l'utilisateur de l'appareil doit accepter tout brouillage radioélectrique subi, même
si le brouillage est susceptible d'en compromettre le fonctionnement."
This Class B digital apparatus complies with Canadian ICES-003.
Cet appareil numérique de la classe B est conforme à la norme NMB-003 du Canada.
IC RF Statement:
When using the product, maintain a distance of 20cm from the body to ensure
compliance with RF exposure requirements.
Lors de l'utilisation du produit, maintenez une distance de 20 cm du corps an de
vous conformer aux exigences en matière d'exposition RF.
FCC ID: 2AOKB-T8960 IC: 23451-T8960
Anker Innovations Limited
Room 1318-19, Hollywood Plaza, 610 Nathan Road, Mongkok, Kowloon, Hong Kong
INHALTS-
VERZEICHNIS
Im Lieferumfang 18 28 Auaden Ihres Tastenfelds
Produktübersicht 19 29 OTA-Aktualisierung
Hinzufügen desTastenfelds zum
System 20 29 Zurücksetzen IhresTastenfelds
Montage IhresTastenfelds 21 30 Spezikationen
Verwendung desTastenfelds 23 30 Fehlerbehebung
Bedienung in der eufy Security-App 27

18 Deutsch Deutsch 19
PRODUKTÜBERSICHT
Tastenfeld
1
23
4
56
7
8
9
X
0
CUS
OFF
1
2
3
4
5
8
9
7
6
①Paniktaste
• Zum Auslösen des Alarms 3 Sekunden lang gedrückt halten
②SYNC-Taste
• Zum Koppeln mit der HomeBase 2 Sekunden lang gedrückt halten
③Zurücksetzen
④LED-Anzeige
⑤Signalton
⑥Betriebsanzeige
⑦Mikro-USB-Ladeanschluss
⑧Tastenfeld-Tasten
⑨Bewegungssensor
BENUTZERHANDBUCH
IM LIEFERUMFANG
Installation des Tastenfelds
Tastenfeld T8960
Ladekabel
Befestigungsschrauben
3 m Klebesticker * 2
Benutzerhandbuch
Willkommenskarte
1
23
4
56
7
8
9
X
0
CUS
OFF
QSG
1
23
4
56
7
8
9
X
0
CUS
OFF
QSG

20 Deutsch Deutsch 21
HINZUFÜGEN DES TASTENFELDS
ZUM SYSTEM
Hinweis: • Stellen Sie sicher, dass Sie zuerst die Einrichtung Ihrer eufy Security
HomeBase abgeschlossen haben.
• Stellen Sie sicher, dass das Tastenfeld vollständig aufgeladen ist. Eine
vollständige Ladung desTastenfeld-Akkus kann bis zu 6 Monate halten.
1. Navigieren Sie zu „Gerät hinzufügen“ und wählen Sie anschließend „Tastenfeld“, um
es zu Ihrem System hinzuzufügen.
1
23
4
56
7
8
9
X
0
CUS
OFF
2. Halten Sie die SYNC-Taste 2 Sekunden lang gedrückt, bis die LED-Anzeige blau
blinkt. Dies weist darauf hin, dass das Tastenfeld auf die Kopplung wartet.
Die LED-Anzeige wechselt 5 Sekunden lang zu einem dauerhaften Blau, um
anzuzeigen, dass der Koppelungsvorgang abgeschlossen ist.
3. Befolgen Sie die Bildschirmanweisungen, um den Einrichtungsvorgang abzuschließen.
Hinweis: Sie können Ihrer HomeBase bis zu 3 Tastenfelder hinzufügen.
LED-Anzeige Beschreibung
Blinkt blau Wird mit der HomeBase gekoppelt
Leuchtet blau Ist mit der HomeBase gekoppelt
Blinkt rot Nicht mit der HomeBase verbunden
Aus Standby oder Koppeln fehlgeschlagen
MONTAGE IHRES TASTENFELDS
Tastenfeld montieren
So wird dasTastenfeld montiert:
Option 1: Verwenden Sie die Klebestreifen
1. Kleben Sie die Klebestreifen auf dasTastenfeld und ziehen Sie anschließend die
ablösbare Folie ab.
2. Kleben Sie das Tastenfeld an die Wand.
Option 2: Verwenden Sie die Befestigungsschrauben
1. Ziehen Sie die Montagehalterung ab.

22 Deutsch Deutsch 23
2. Positionieren Sie die Montagehalterung an der Wand, wobei „oben“ und „unten“
wie auf der Rückseite der Montagehalterung angegeben ausgerichtet ist. Drücken
Sie einen Bleistift durch die Öffnungen der Montagehalterung, um die Position für
die Montage des Tastenfelds zu markieren.
3. Bohren Sie an jeder Markierung ein Loch mit einem Bohreinsatz (15/64-Zoll / 6
mm).
4. Setzen Sie Dübel in die Löcher und befestigen Sie die Montagehalterung mit
den mitgelieferten Schrauben an der Wand. Für Holzwände sind keine Dübel
erforderlich.
5. Schieben Sie das Tastenfeld nach unten, bis es optimal in die Montagehalterung
einrastet.
1
2
3
4
5
6
7
8
9
X
0
CUS
OFF
VERWENDUNG DES TASTENFELDS
Einführung in die Tastenfeld-Modi
Das Tastenfeld bietet vier Modi: Nicht zuhause, Zuhause, Benutzerdeniert und Aus.
Diese Modi sind entsprechend mit vierTastenfeld-Tasten verknüpft.
Modus „Nicht zuhause“:Alle Sensoren werden aktiviert und Ihr Haus wird
überwacht. Das System ist scharfgestellt. Jede Bewegung wird erkannt und
ein Alarm wird ausgelöst. Es wird empfohlen,diesen Modus zu verwenden,
wenn Sie nicht zuhause sind.
Modus „Zuhause“: Die Innensensoren werden deaktiviert, während die
Außensensoren aktiviert werden. Es wird empfohlen, diesen Modus zu
verwenden, wenn Sie zuhause sind und über jedes Eindringen außerhalb des
Hauses informiert werden möchten.
Benutzerdenierter Modus: Dieser Modus wird empfohlen, wenn Sie
das Gefühl haben, dass Sie einen benutzerdenierten Sicherheitsmodus
benötigen, um Ihre spezischen Lebensanforderungen zu erfüllen.
Modus „Aus“: Es sind keine Sensoren aktiviert, während die Kamera
standardmäßig EINGESCHALTET ist.

24 Deutsch Deutsch 25
Scharfstellen, entschärfen und einen Alarm ausschalten
Geben Sie zum Scharfstellen des Systems den Zugriffscode ein und drücken Sie dieTaste
oder .
Geben Sie zum Entschärfen aller Sensoren den Zugriffscode ein und drücken Sie auf die
Taste .
Geben Sie zum Ausschalten eines Alarms den Zugriffscode ein und drücken Sie auf √.
Der fortwährende Alarm wird ausgeschaltet, während der Sicherheitsmodus des Geräts
unverändert bleibt.Wenn Sie den Alarm ausschalten, werden dieAlarme aller mit der
HomeBase verbundenen Geräte ausgeschaltet.
Benutzerdenierten Sicherheitsmodus einstellen
So stellen Sie einen benutzerdenierten Sicherheitsmodus mit der eufy Security-App
ein:
1. Öffnen Sie die App-Startseite.
2. Tippen Sie auf die Registerkarte „Sicherheit“.
3. Tippen Sie auf die Registerkarte „Modi“ und anschließend auf „Anpassen“, um
Ihre personalisierten Einstellungen hinzuzufügen.
4. Befolgen Sie die Bildschirmanweisungen zum Denieren der Sensoraktionen.
Wenn der benutzerdenierte Modus aktiviert ist, agieren die Sensoren wie in der
App festgelegt.
5.Navigieren Sie zu derTastenfeld-Website, tippen Sie auf „Tastenzuordnung“ und
weisen Sie den benutzerdenierten Modus der Taste zu.
Sie könnten beispielsweise einen „Schlafmodus“ einrichten, in dem nur bestimmte
Sensoren überwacht und Alarme ausgelöst werden.Wenn Sie die Taste drücken,
wird der „Schlafmodus“ aktiviert.
Zwischen den Modi „Nicht zuhause“/„Zuhause“/„Benutzerdeniert“/„Aus“
wechseln
So wechseln Sie zwischen den Modi „Nicht zuhause“/„Zuhause“/„Benutzerdeniert“/
„Aus“:
1. Geben Sie den Zugriffscode ein. Hierbei handelt es sich um eine optionale
Einstellung in der eufy Security-App.
2. Drücken Sie / / / , um in den entsprechenden Modus zu
wechseln.
Hinweis: Die Verwendung des Zugriffscodes wird empfohlen, wenn Sie vom Modus
„Nicht zuhause“ zu „Aus“ wechseln.Anderenfalls ist er nicht erforderlich.
Geräte-Umgehung
Geräte-Umgehung bedeutet, dass das System defekte Sensoren für einen bestimmten
Zeitraum ignoriert, während das System scharfgestellt ist.
Wenn Sie in den Modus „Zuhause“, „Nicht zuhause“ oder in einen
benutzerdenierten Sicherheitsmodus wechseln, überprüft das System all Ihre Geräte
auf potenzielle Probleme. In folgenden Szenarien müssen möglicherweise einen
bestimmten Sensor umgehen:
• Sie möchten einen Sensor ausgeschaltet lassen, während das System scharfgestellt
ist.
o Beispiel: Sie stellen das System scharf, aber möchten ein Fenster geöffnet
lassen.
o Sie schlafen zu Hause und möchten, dass das Zimmer nicht überwacht wird.
• Ein Sensor ist defekt und Sie haben keine Zeit, um das Problem zu beheben.
• Ein Sensor ist nicht mit der HomeBase verbunden und kann nicht erkannt werden.
Wenn Probleme erkannt werden, blinken die Tastenfeld-Tasten × und √gleichzeitig.
Möglicherweise ist Folgendes erforderlich:
• Auswahl von √zu Umgehung defekter Geräte. Anschließend können Sie in den
gewünschten Modus wechseln.
• Auswahl von × zum Abbruch des Vorgangs. Anschließend können Sie aktuellen
Sicherheitsmodus nicht ändern.
Hinweis: • Bei jedem Wechsel des Sicherheitsmodus wird das System erneut
prüfen, ob Ihre Geräte ordnungsgemäß funktionieren.
• Stellen Sie sicher, dass ein Modus mit mindestens einem aktiven Sensor
ausgerüstet ist, anderenfalls können Sie den Sicherheitsmodus nicht
wechseln.

26 Deutsch Deutsch 27
Panikalarm
Der Panikalarm kann in einem Notfall verwendet werden. Halten Sie zum Auslösen
eines Notfallalarms die Paniktaste 3 Sekunden lang gedrückt. Sobald der Notfallalarm
ausgelöst wurde, blinkt die LED-Anzeige 3 Sekunden lang schnell rot, der Alarm der
HomeBase ist zu hören und es werden Textbenachrichtigungen über die eufy Security-
App und per E-Mail an Sie/den Administrator gesendet.
LED-Anzeige
LED-Anzeige Status Beschreibung
Numerischer
Tastenfeldbereich
Tastenfeld-Anzeige blinkt
3 Mal weiß Zugriffscodefehler
Nur die Tasten × und √
blinken 5 Sekunden lang
weiß
Es wurden Gerätefehler erkannt,
die behoben werden müssen, um in
einen bestimmten Modus wechseln zu
können.
Modustaste ( /
/ )
Leuchtet blau Der aktuelle Modus ist aktiviert
Blinkt blau
Der aktuelle Modus ist aktiviert und
der Countdown zumVerlassen des
Hauses wurde gestartet.
Leuchtet weiß
Es wurden Gerätefehler erkannt,
die behoben werden müssen, um in
einen bestimmten Modus wechseln zu
können.
Blinkt weiß Moduswechsel fehlgeschlagen
Hinweis: Wenn die Tasten „Nicht zuhause“ ( )/ „Zuhause“ ( )/BEN( )
gleichzeitig blau blinken, weist dies darauf hin, dass der aktuelle Sicherheitsmodus
nicht mit diesen Tasten verknüpft oder in der App speziziert ist.
Buzzer-Angaben
Szenario Beschreibung des Buzzers
Drücken Sie auf eine beliebigeTaste
auf dem Tastenfeld Summt einmal
Betriebsfehler (Fehler beim
Zugriffscode / Moduswechsel) Summt dreimal
Countdown-Erinnerung Summt durchgehend bis zum Ende
Wartet auf Umgehung von Geräten Summt 5 Sekunden
Drücken Sie die Paniktaste für 3
Sekunden Summt 3 Sekunden lang schnell
BEDIENUNG IN DER EUFY
SECURITY-APP
Alle Bedienungen, wie Moduswechsel, Ein-/Ausschalten von Alarmen, Geräte-
Umgehungen und OTA-Aktualisierungen können in der eufy Security-App
durchgeführt werden.
Tastenfeldeinstellungen
In der eufy Security-App können Sie folgende Einstellungen erstellen:
• Festlegen der Sicherheitsmodi „Nicht zuhause“, „Zuhause“, „Benutzerdeniert“
und „Entschärft“. Stellen Sie sicher, dass der Modus entsprechend mit der
Tastenfeld-Taste verknüpft ist.
• Ändern des Zugriffscodes
• Erstellen Sie Zugriffscodes für andere Familienmitglieder oder Gäste.
Es werden bis zu 6 Zugriffscodes unterstützt. Der Zugriffscode sollte
standardmäßig 4 bis 8 Ziffern lang sein.
• Geben Sie dem Gerät einen Namen.

28 Deutsch Deutsch 29
• Legen Sie einen Notfallcode fest. Nach Eingabe des festgelegten wird der
Alarm deaktiviert. Über die App wird eine spezifizierte Nachricht an die
Notfallkontakte gesendet.
• Synchronisieren Sie den Tastenfeldstatus: Verbunden, Getrennt, wird geladen,
Werkseinstellungen.
Zugriffscodeverwaltung
Mit der eufy Security-App können Sie Ihren Familienmitgliedern, Freunden oder
Besuchern einen Zugriffscode zuweisen.
Öffnen Sie zum Zuweisen des Zugriffscodes die eufy Security-App, navigieren Sie zu
der Geräteseite des Tastenfelds, geben Sie den Benutzernamen ein und weisen Sie
einen neuen Zugriffscode zu.
Sie können für jeden Zugriffscode ein Ablaufdatum festlegen. Zugriffscodes mit
überschrittenem Ablaufdatum sind ungültig. Dies eignet sich für vorübergehende
Besucher.
Hinweis: Einer HomeBase können bis zu 6 Zugriffscodes hinzugefügt werden.
AUFLADEN IHRES TASTENFELDS
Prüfen Sie vor dem Auaden Ihres Tastenfels, ob der Akku niedrig ist.
Bei niedrigem Akku des Tastenfelds:
Die LED-Anzeige des Tastenfelds blinkt 5 Sekunden lang rot, wenn eine Bewegung in
der Nähe erkannt wird. In der eufy Security-App wechselt das Akkustandsymbol zu
rot.
Verwenden Sie zum Aufladen Ihres Tastenfelds das Mikro-USB-Kabel und das
Ladegerät (nicht im Lieferumfang enthalten).
1
23
4
56
7
8
9
X
0
CUS
OFF
Ladeanzeige Leuchtet rot Ladevorgang
Leuchtet blau Vollständig aufgeladen
OTA-AKTUALISIERUNG
In einigen Fällen senden das System OTA-Aktualisierungen möglicherweise
automatisch.Wenn die OTA-Aktualisierung startet, blinkt die LED-Anzeige weiterhin
rot, bis der Vorgang abgeschlossen ist.
Überprüfen Sie Ihre Software-Aktualisierungen und befolgen Sie die
Bildschirmanweisungen zum manuellen Aktualisieren der Firmware, um sicherzustellen,
dass stets die neuesteVersion der Software installiert ist.
ZURÜCKSETZEN IHRES
TASTENFELDS
Wenn eine Fehlfunktion des Tastenfelds auftritt, verwenden Sie einen spitzen
Gegenstand (wie einen SIM-Kartenfachöffner), um das Tastenfeld zurückzusetzen.

30 Deutsch
SPEZIFIKATIONEN
WLAN-Frequenz: Sub-1G: 866 ~ 866,8 MHz
Zellkapazität: 2600 mAh
USB-A-Eingangsleistung: 5V 1A
Betriebstemperatur: -10 ºC - 50 ºC
Lagertemperatur: -20 ºC - 60 ºC
FEHLERBEHEBUNG
Das Tastenfeld blinkt dauerhaft rot.
Dies weist darauf hin, dass das Tastenfeld nicht mit der HomeBase verbunden ist.
• Überprüfen Sie, ob die HomeBase aufgeladen ist.
• Setzen Sie das Tastenfeld zurück.
• Überprüfen Sie, ob sich eine Funkstörung in der Nähe bendet.
• Positionieren Sie das Tastenfeld näher an der HomeBase.
Lesen Sie zur Fehlerbehebung den FAQ-Abschnitt in der eufy Security-App.
TABLA
DE CONTENIDOS
Contenido 32 42 Carga del teclado
Descripción del producto 33 43 Actualización OTA
Adición del teclado al sistema 34 43 Restablecimiento del teclado
Instalación del teclado 35 43 Especicaciones
Uso del teclado 37 43 Solución de problemas
Operación a través de la aplicación
eufy Security 41

32 Espanol Espanol 33
CONTENIDO
Para la instalación del teclado
Teclado T8960
Cable de carga
Tornillos de montaje
2 tiras adhesivas 3M
Manual Del Usuario
Tarjeta de bienvenida
1
23
4
56
7
8
9
X
0
CUS
OFF
QSG
1
23
4
56
7
8
9
X
0
CUS
OFF
QSG
MANUAL DEL
USUARIO
DESCRIPCIÓN DEL PRODUCTO
Teclado
1
23
4
56
7
8
9
X
0
CUS
OFF
1
2
3
4
5
8
9
7
6
①Botón de pánico
• Mantener pulsado durante 3 segundos para activar la alarma
②Botón Sincronizar
• Mantener pulsado durante 2 segundos para emparejar con el dispositivo
HomeBase
③Restablecer
④Indicador LED
⑤Timbre de alarma
⑥Indicador de encendido
⑦Puerto de carga micro-USB
⑧Botones del teclado
⑨Sensor de movimiento

34 Espanol Espanol 35
ADICIÓN DEL TECLADO AL
SISTEMA
Nota: • Asegúrese de haber completado la configuración del dispositivo
HomeBase de eufy Security.
• Asegúrese de que la batería del teclado esté totalmente cargada. La
batería del teclado totalmente cargada puede durar hasta 6 meses por
cada carga.
1. Vaya a Añadir dispositivo, seleccione Teclado y añádalo al sistema.
1
23
4
56
7
8
9
X
0
CUS
OFF
2. Mantenga pulsado el botón Sincronizar durante 2 segundos hasta que el indicador
LED parpadee en color azul. Esto indica que el teclado está esperando el
emparejamiento.
El indicador LED se ilumina en color azul jo durante 5 segundos para indicar
que el emparejamiento se ha completado.
3. Siga las instrucciones en pantalla para completar el proceso de conguración.
Nota: Puede añadir hasta 3 teclados a un dispositivo HomeBase.
Indicador LED Descripción
Azul intermitente Emparejamiento con HomeBase en curso
Azul jo Emparejamiento con HomeBase completado
Rojo intermitente No conectado a HomeBase
Apagado En espera o error de emparejamiento
INSTALACIÓN DEL TECLADO
Instale el teclado
Para instalar el teclado:
Opción 1: uso de las tiras adhesivas
1. Adhiera las tiras adhesivas al teclado y, a continuación, retire la película extraíble.
2. Pegue el teclado a la pared.
Opción 2: uso de los tornillos de montaje
1. Deslice el soporte de montaje para extraerlo.

36 Espanol Espanol 37
2. Coloque la placa de montaje contra la pared de modo que las marcas UP (arriba)
y DOWN (abajo) coincidan con las indicaciones en la parte posterior del soporte
de montaje. Inserte la punta de un lápiz a través de los oricios del soporte de
montaje para marcar la ubicación de instalación del teclado.
3. Taladre oricios en cada marca con una broca de 6 mm (15/64”).
4. Inserte tacos en los oricios y je el soporte de montaje a la pared con los
tornillos suministrados. El uso de tacos no es necesario en paredes de madera.
5. Deslice el teclado hacia abajo hasta que encaje perfectamente en el soporte de
montaje.
1
2
3
4
5
6
7
8
9
X
0
CUS
OFF
USO DEL TECLADO
Descripción de los modos del teclado
El teclado ofrece cuatro modos: Fuera de casa, En casa, Personalizado y Desactivado; cada
uno de ellos está asociado respectivamente a cada uno de los cuatro botones del teclado.
Modo Fuera de casa: se activan todos los sensores y se supervisa la casa.
El sistema está armado. Se detectará cualquier movimiento y se activará
una alarma. Se recomienda utilizar este modo cuando no esté en casa.
Modo En casa: se desactivan los sensores interiores, mientras que
los sensores exteriores permanecen activos. Se recomienda utilizar
este modo cuando esté en casa y desee que se emitan alertas sobre
cualquier intrusión en el exterior de la casa.
Modo personalizado: se recomienda utilizar este modo cuando
considere que requiere un modo de seguridad personalizado para
satisfacer sus necesidades.
Modo Desactivado: los sensores están desactivados y la cámara está
activada de forma predeterminada.
Other manuals for T8960
1
Table of contents
Languages:
Other eufy Security Keypad manuals
Popular Keypad manuals by other brands
Vicon
Vicon V1411X-DVC Installation & operation manual
AMX
AMX MIO-CLASSIC-D Specifications
Bosch
Bosch SOLUTION 3000 Quick user guide

Chamberlain
Chamberlain LiftMaster Professional WGB315 Security+ user guide
Satel
Satel INT-KSG Installer manual
IntelliControl ICS
IntelliControl ICS Contact-TT Quick install guide
