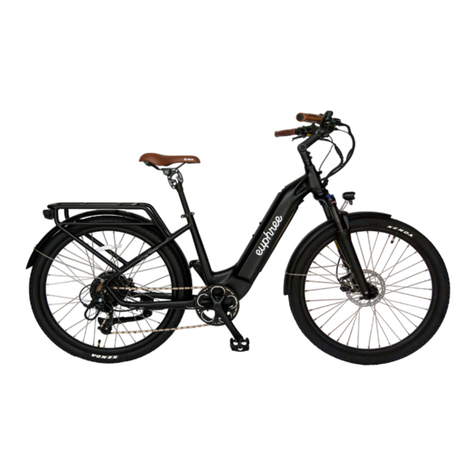
Euphree Model X User manual

Phone: (866) 729-8075
Website: www.euphree.com
MANUAL
Model X
Step-Thru Electric Bike
STEP-THRU EBIKE CITY ROBIN X

BATTERY 15
DISPLAY 20
WARRANTY 26
OUR MISSION: TO DESIGN EBIKES THAT ARE SO COMFORTABLE AND
INNOVATIVE THAT THEY BECOME YOUR PRIMARY COMMUTING
OPTION AND TO TREAT EVERY CUSTOMER LIKE THEY ARE THE FIRST
CUSTOMER WE’VE EVER HAD.
An American Company
BASED OUT OF HOUSTON, TEXAS.
3 | CITY ROBIN X
EUPHREE
2 | CITY ROBIN X
TABLE OF CONTENT 02
MANUAL
Model X
EBIKE ASSEMBLY 8

Disclaimer:
The specications, information and performance of Euphree electric bicycles (ebikes) featured in this
manual may change without notice. It is the sole responsibility of the buyer and/or the rider to deter-
mine safety of use and to check the ebike before each and every use. Any liability which may be in-
curred as a result of the use of the Euphree City Robin is limited to the cost of repairing or placing the
failed component at the discretion of Euphree, and does not extend to any loss or damage which may
be caused by misuse or failure of the product. Any and all damages to the ebike, components, prop-
erty or persons is the sole responsibility of the buyer and/or rider. By using this product, you are stat-
ing that you have read the disclaimer and this owner’s manual in entirety and agree to hold Euphree,
its owner/s and any Euphree employees or contractors free from all liabilities, that you agree you are
operating the product at your own risk, and that no warranties or guarantees are made by Euphree,
expressed or implied, on performance or operation. Because it is impossible to anticipate every situa-
tion or condition that can occur while assembling, operating, or riding an ebike, this manual makes no
representation about the safe use of bicycles under all conditions. There are risks associated with the
use of any bicycle which cannot be predicted or avoided and are the sole responsibility of the rider.
Keep this manual and any documents that were included with your ebike for future reference.
All content in this manual is subject to change without notice. Euphree makes every eort to ensure
accuracy and assumes no responsibility or liability if any errors or inaccuracies appear within.
General warnings:
Bicycling, including ebike operation and riding, involves risk of damage, injury and/or death. Risks are
increased when operating a bicycle in urban environments. By choosing to ride and operate an ebike,
the user assumes responsibility for any and all risks associated with bicycle riding. All users must
know, understand and practice safe and responsible ebike riding practices and procedures. To re-
duce risk of damage, injury and/or death, proper use and maintenance is essential. Incorrect assem-
bly, maintenance, or use of your ebike can cause component or performance failure, loss of control,
accidents, serious injury or death. All riders regardless of experience level must read and understand
the Owner’s Manual and any documentation provided for accessories and components before riding.
Your insurance may not provide coverage for accidents involving the use of this bicycle. Contact your
insurance company or agent to determine if coverage is provided.
Intended use:
Euphree City Robin is an electric bicycle designed for commuting or simple riding in fair weather and
only at safe and appropriate speeds in urban and suburban environments. The City Robin is intended
for use on paved roads or surfaces only. Inappropriate use will invalidate your warranty. Using your
City Robin in the wrong manner may impact the lifetime of the product and can be dangerous, can
result in damage to the ebike, to property, injury, and death. The City Robin is not a mountain ebike
or racing ebike. Riders must not perform jumping, stunts, wheelies and/or ebike tricks while riding
this electric ebike. Putting undue or unnecessary stress on ebike parts, components, frame, brakes,
handlebars, stem, or forks can cause components and/or ebike to fail, causing damage to the ebike,
damage to property, loss of control, accidents, serious injury and/or death.
The Euphree City Robin is intended for use by physically competent riders. Consult your doctor be-
fore riding or operating an electric bicycle. Do not ride or operate this ebike if you are an inexperi-
enced ebike rider. The City Robin is designed for use only by persons of age 18 and older. Riders must
have the mental capacity, reaction time and physical condition to manage sudden situations associat-
ed with bicycle riding and operating a bicycle or vehicle in urban environments. If you have an impair-
ment or disability such as a visual impairment, hearing impairment, cognitive impairment, language
impairment or physical impairment, or a seizure disorder, or any other physical or mental condition
that could impact your ability to safely operate a bicycle or a vehicle, consult your physician before
riding or operating any ebike.
Using this manual:
This manual contains important details of the product, components and equipment, and information
and tips on operation and maintenance. This manual contains many warnings and cautions concern-
ing safe operation and consequences if proper setup, operation and maintenance are not performed.
Carefully review all information in this manual and immediately contact Euphree if you have any
questions.
The note “WARNING” within this manual should be given special care. Users should also pay careful
attention to information in this manual that begins with NOTICE.
Keep this manual along with any other documents that were included with your ebike for future
reference. All content in this manual is subject to change or withdrawal without notice. Assembly and
rst adjustment of your ebike from Euphree requires special tools and skills. It is recommended that
assembly and rst adjustment be completed by a certied, reputable ebike mechanic unless you are
mechanically inclined.
General information:
Euphree recommends having a certied, reputable ebike mechanic to assemble your ebike. If you are
not sure you have the experience, skills, and tools to correctly perform all assembly steps, consult
a certied reputable bicycle mechanic. Even if you have the experience, skill, and tools to complete
assembly, Euphree recommends that a certied, reputable ebike mechanic completes and/or checks
your assembly before your rst ride. We recommend that a certied, reputable ebike mechanic com-
plete future adjustments, maintenance or tuning. The cables, spokes and chain will stretch and bolted
connections can loosen after an initial 50-100 miles (80-160 km) (depending on riding conditions such
as total weight, terrain, riding style). Regular inspections by a certied, reputable ebike mechanic are
important for ensuring the safety of your ebike.
Be sure to follow all laws for using an electric ebike in your region. These laws may limit where you
can ride your ebike and may specify mandatory equipment and use of hand signaling when riding.
Changing components or attaching accessories: The use of non-original components, spare parts, or
accessories can jeopardize your safety, the safety of your ebike and can void your warranty.
Replacing original components or installation for third-party accessories or accessories from Euphree
not explicitly recommended for your ebike model is at your own risk. Using aftermarket components
or accessories may void your warranty. Using aftermarket components or accessories may create un-
safe riding conditions, damage to property or to your ebike, or result in serious injury and/or death.
Safety check before each ride: Inspect your ebike prior to every use. Failure to thoroughly inspect
could result in serious injury or even death. If you are unsure of how to conduct a complete check of
the condition of your ebike before every ride, consult a certied, reputable ebike mechanic.
Electrical system:
In addition to a complete safety check, it is critical that you familiarize yourself with all aspects of your
ebike’s electrical system and check for proper operation before every ride. The front and rear brake
levers contain safety power cuto switches. When the brake levers are applied, the hub’s motor assis-
tance is disabled. Both levers should be checked for correct operation before every ride. The throttle
should provide smooth acceleration when gradually applied. If the throttle, brake lever cuto switch-
es, pedal assistance or lighting are functioning abnormally or not working, immediately discontinue
use of your ebike and contact Euphree for assistance. Before every ride, ensure the battery is ade-
quately charged and operating properly. Ensure that the battery charger is unplugged from the outlet
and battery, and make sure to store the charger in a safe location before riding. The battery MUST be
locked onto the frame battery mount correctly before use. Do not operate the electrical system if the
battery is removed.

Accessories and hardware:
Before every ride, ensure all hardware is secured and approved accessories are properly attached
per manufacturer’s instructions. If you do discover something you are unsure about, have it checked
by a certied, reputable ebike mechanic.
Tires and wheels:
Your wheels should always spin straight and must be repaired or replaced if they wobble when spin-
ning. If you notice a side-to-side wobble or up-and-down wobble, or if your wheels become untrue or
spokes loosen (which can happen with normal use), we recommend a certied, reputable ebike me-
chanic to perform all wheel tuning operations. Do not attempt to true wheels or tighten spokes unless
you have adequate knowledge, tools and experience. Even if you have adequate knowledge, tools
and experience, we recommend that a certied, reputable ebike mechanic check your work. Before
every ride, always ensure the tires and inner tubes have the correct amount of air pressure and are in
good working condition without any visual damage.
Always replace tires and inner tubes with punctures, cuts or damage before you ride. Tires without
the correct amount of air pressure can increase tire and component wear and make unsafe riding
conditions.
Suspension, handlebar, grips and seat adjustments:
The suspension fork on your ebike will aect your ebike’s handling and should be properly adjusted
for your weight and terrain. Ensure the handlebar and handlebar stem are properly aligned, secured
to recommended torque values and tted to the user. Loose, worn or damaged handlebar grips
should be replaced before you ride. The seat and seatpost should be properly aligned and tted to
the user with seatpost quick release properly tightened, fully closed and safety secured before riding.
Any major or minor impact to your City Robin can compromise the integrity of the frame, electronics
and components. If your City Robin has experienced an impact, do not ride your ebike until it has
been inspected by a certied, reputable ebike mechanic.
Hydraulic braking systems must be “bedded in” upon rst use. When fully squeezing the brake levers,
ensure that neither the front nor the back brake lever touches the handlebar.
The City Robin has been designed with a maximum weight limit of 286 lbs (130 kg) for total payload
(rider, clothing, luggage, ebike accessories, cargo). Exceeding the weight limit will void all warranties
and may result in unsafe operating conditions, damage to ebike or property, injury and/or death.
To reduce the risk of damage to your ebike and injury to yourself and/or others, keep children away
from the ebike and under close supervision when the product is in use near children.
Safeguard against corrosion and rust.
Your ebike has electric components. Damage to the electrical system caused in any manner, including
water damage, can lead to electrical system malfunction, failure of battery, or electrical re and con-
sequent injury, property damage or death.
Minimize the chance of water damage by following all recommendations.
• Tore ebike in an upright position and under shelter. Do not leave the ebike in the rain. Do not
leave the ebike exposed to corrosive substances. Corrosive substances can include water, salt, or
de-icing substances. If your ebike is exposed to rain or other weather elements, dry your ebike
immediately afterward and apply anti-rust treatment to the chain
• Before cleaning your ebike, turn o the ebike and turn o the battery. Wipe the frame with a
clean, damp cloth. If needed, a mild mixture of non-corrosive detergent can be used with a damp
cloth to wipe the frame of your ebike. Dry by wiping with a clean, dry cloth. Do not use high-pres-
sure water on your ebike. Do frequently wipe down your ebike.
• Do frequently spray unpainted mechanical parts with anti-rust treatment.
• Use touch up paint or nail polish on scratched or chipped painted metal surfaces to minimize
rusting.
• Never submerge ebike or components in water or liquid. Immersion in any liquid can damage the
electrical system.
Damage from corrosion is not covered under warranty. Avoid exposing your ebike to corrosive sub-
stances. Avoid riding on the beach, in environments with high-salinity, fog, or on surfaces treated with
de-icing compounds such as salt. Riding in these conditions exposes your ebike to corrosive sub-
stances. Corrosion of electrical components can lead to irreversible damage that can cause electrical
system malfunction, failure of battery, or electrical re.

• Ebike
• Pedals (2)
• Charger
• Front wheel
• Front wheel skewer
• Front wheel fender
• Seat post
• Saddle
9 | CITY ROBIN X EUPHREE
City Robin
Model X
ebike manual
The City Robin X
includes the following
Open the ebike box
Components included in shipment, if there are any missing parts, please contact Euphree
HOW TO
ASSEMBLE YOUR CITY ROBIN X
NOTICE:
THE FOLLOWING STEPS ARE ONLY A GENERAL GUIDE TO ASSIST IN THE ASSEM-
BLY OF YOUR EBIKE. THIS MANUAL IS NOT A COMPLETE NOR COMPREHENSIVE
MANUAL OF ALL ASPECTS OF ASSEMBLY, MAINTENANCE AND REPAIR. CON-
SULT A CERTIFIED, REPUTABLE EBIKE MECHANIC TO ASSIST WITH ASSEMBLY,

Step 2:
Install the handlebar onto the stem
• Loosen the stem cap and clamp bolts
• Rotate the forks 180 degrees to face forward
• Unbolt the stem clamp and place the handlebars on the stem
• Tighten the handlebars once they are at the proper angle
Step 3:
Install the front wheel
• Insert the front wheel skewer through the ebike front wheel. Lightly tighten the skewer cap on
the front wheel. There should be plenty of space on both sides for the forks to slide into the
front wheel.
• Make sure the quick connection is on the same side as the brake disk. ● Lift the front forks and
position the front wheel into place.
• Tighten the skewer into a locked position.
WARNING: The Skewer must be locked very tight to ensure safe riding.
WARNING: Never touch the brake rotor, especially when the wheel and/or ebike is in
motion, or serious injury could occur. Do not touch the brake rotor while inspecting, open-
ing, or closing the quick release lever. Hand oils can cause squeaking and decrease brake
performance.
WARNING: An improperly secured front wheel and/or handlebar stem can cause loss of
control, accidents, serious injuury or death.
Step 4:
Perform a handlebar twist to ensure the handlebar stem is secure.
1. Brace the front wheel. Stand at the front of the ebike, facing the handlebar, and brace the front
wheel between your feet and lower legs.
2. Attempt to twist the handlebar. Hold both handlebar grips and push forward with one hand
while pulling back with the other. Push and pull at the same time with about 20 lb of force with
each hand.
3. Check that the handlebar and wheel stay properly aligned. The handlebar and handlebar stem
should be tightly secured perpendicular to the front wheel.
4. Repeat the twist test with opposite hands.
5. If needed, align the handlebar and stem and torque the stem clamp bolts evenly to the speci-
cation for the handlebar stem clamp bolts listed in the Recommended Torque values tablebe-
low. After making any adjustments, perform the twist test again. If the handlebar still moves,
contact Euphree or consult a local, certied ebike mechanic.
WARNING: If you are not sure you have the experience, skills, ability and tools to secure
and verify security and safety of the handlebar, front and rear wheels, and handlebar
stem, you must consult a certied, reputable ebike mechanic. An improperly secured
wheel or handlebar stem can cause loss of control, serious injury or death. Check that
wheels and handlebar stem are secured and safe to operate before each ride.

Step 5:
Install the pedals
• The pedals have a small A (right pedal - drive side) or B (left pedal - non drive side) on the front.
• Place each pedal on the corresponding crank.
• Pedals are left handed threads.
Warning: Pedals should easily screw into cranks. If they don’t then you have the wrong
pedal. Do not strip the crank threads.
Step 6:
Install the front fender and headlight
• Unscrew the bolt on the front fork
• Screw in the front headlight and fender with the same bolt onto the front fork
• Screw in the side fender arms on the bolt connection on the front forks
Step 7:
Inate the tires
• Inate tires to the appropriate PSI marked on the side of the tire
Step 8:
Set the desired seat height
• Place a small amount of grease on the seat post and place into the seat tube
• Do not place the seat post above the required minimum height marked on the seat post.
Step 9:
Make sure that all hardware is tightened properly following recommended torque
values.
Hardware Location Hardware Torque required(Nm)
Handlebar area Handlebar stem clamp bolts 10
Handlebar area Stem faceplate bolts 6
Handlebar area Brake lever clamp bolt 6
Handlebar area Shifter clamp screw 6
Handlebar area Angle adjustment bolt 18
Brakes Caliper adapter to frame 6-8
Brakes Caliper to adapter 6-8
Brakes Brake cable to caliper clamp 6-8
Handlebar area Handlebar stem clamp bolts 10
Handlebar area Stem faceplate bolts 6
Handlebar area Brake lever clamp bolt 6
Brakes Disc brake rotor to hub 7
Seatpost area Seat angle adjustment bolt 20
Rear dropout area Rear acle nuts 40
Rear dropout area Rear torque arm bolts 5
Rear dropout area Derailleur hanger mounting bolt 6
Rear dropout area Derailleur mounting bolt 10
Rear dropout area Derailleur cable pinch bolt 6-8
Rear dropout area Kickstand mounting bolts 8
Bottom bracket & crank area Bottom bracket and lockring 60
Bottom bracket & crank area Crank arm bolt into bottom
bracket spindle
35
Bottom bracket & crank area Pedal into crank arm 35
Bottom bracket & crank area Chainring bolts 10
Bottom bracket & crank area Controller mounting bolts 6
Fenders All fender mounting bolts and
hardware
6

WARNING: Ensure that all hardware is properly tightened, all components are secured, and per-
form all safety checks before your rst ride. Failure to properly assemble your bike can cause
damage to property, serious injury and/or death. Check that all components including handlebar
stem, seatpost or seat saddle DO NOT extend beyond any minimum insertion marking etched in
components.
WARNING: Both wheels must be properly secured before operating your bike. It is critical to
check the tightness of the rear wheel axle nuts, as mechanisms and components may become
loose during shipment or over time. Upon arrival and on a regular basis, you should inspect the
torque and security of all wheel mounting hardware.
WARNING: After assembly, before your rst ride, before all rides and after any time your ebike is
left unsupervised, always check to ensure that all latches, levers and quick releases are secured
and undamaged. Handlebar stem and/or seat post may become loose and can result in loss of
control, damage to property, serious injury and/or death.
Adjusting the seat height:
For most users, the seat height should be set by placing the ball of their foot on the pedal when
the crank is at its lowest point. In this orientation, the leg should be almost fully extended, with
a slight bend at the knee. Correct seat height should not allow leg strain from overextension and
hips should not rock from side to side when pedaling.
To adjust seat height:
1. Open the quick release lever by swinging the lever open and outward fully (pictured below).
2. Move the seat up and down by sliding the seatpost in or out of the seat tube to set to desired
seat height.
3. After tightening the adjustment nut (located opposite of the quick release lever), close the quick
release lever fully so that the seat cannot move up, down or to the left or right.
WARNING: A loose seat clamp or seatpost adjustment bolt can cause damage to the ebike, loss of
control, serious injury and/or death. Regularly check to make sure that the seat clamp is tightened.
Prior to rst use, properly tighten the seat clamp via the seat adjustment bolt.
WARNING: DO NOT raise the seatpost beyond the minimum insertion marking etched into the seat-
post tube If the seatpost is raised beyond the minimum insertion point, the seatpost or frame may
break, which could cause a rider to lose control and fall, resulting in damage to the ebike, to property,
or serious injury and/or death. Ensure the minimum insertion markings on the seatpost are inside the
seat tube of the frame.
Adjusting the seat position and angle is critical for rider comfort and posture. please use side adjust-
ments on the seat post to achieve the optimum angle. the seat should be horizontal or slightly down-
ward.
Adjusting the suspension fork: the suspension fork can move up and down up to cushion bumps in
the riding surface. if desired, the suspension fork can be locked out as a rigid fork which will generally
yield higher pedaling eciency.
• The right suspension fork has a actuator dial on it for adjusting the suspension rigidity
• A rigid suspension fork is not as comfortable as a compressible fork
Rider comfort:
• Depending on the rider’s preference, ability and experience with ebike riding, lowering the seat so
the rider can put one or both feet on the ground without dismounting from the seat may oer a
safer and more comfortable riding experience.
• For maximum comfort, the rider should not overextend arms’ reach when riding. ensure the han-
dlebar and brake lever angles allow for a comfortable arm position and relatively straight line from
forearms, wrists and hands. ensure handlebar angle allows the handlebar to remain clear of the
rider’s body while turning.
• A ebike tting professional should be consulted to ensure a proper t. if you have questions re-
garding proper t, consult a certied, reputable ebike mechanic.
Battery:
WARNING: Do not use a damaged battery or charger. Use of a damaged battery or charger can cre-
ate additional damage to your ebike and is a re hazard.

Do not use your battery and charger and immediately contact Euphree if you experience any
of the following:
1. Your charger’s power cord or output cable or any electrical cables on your ebike have any signs of
damage, including by not limited to fraying, broken insulation, or any other signs of damage.
2. Your battery or charger is damaged, non-functional or performing abnormally
3. Your battery or charger experienced a signicant impact (i.e. from a fall, from a crash, from a drop,
etc.) with or without signs of damage
4. Your charger will get warm with normal use. If your charger becomes too hot to touch, is emitting a
smell, or shows signs of overheating.
Store any damaged battery or charger in a safe location and recycle/dispose of it according to
local rules. Contact Euphree with questions or to purchase compatible replacements.
Connect only to a circuit provided with 10 amperes maximum branch circuit overcurrent pro-
tection that is in accordance with the National Electrical Code, ANSI/NFPA 70.
Battery charging procedure:
WARNING: Only charge the battery with the originally supplied charger supplied by Euphree, or with
a charger purchased directly from Euphree that is designed for your ebike model. Never use an after-
market charger. Use of an aftermarket charger can result in damage, serious injury and/or death. An
inappropriate charger may cause damage, serious injury or death through re or electric shock.
WARNING: Do not use your battery or charger if the battery is damaged, non-functional, performing
abnormally. Do not use your battery or charger if involved in a fall or crash, with or without signs of
damage.
Before initiating charge, ensure the charger is on a hard, at, re-resistant surface in an open
space. Never cover or obstruct the charger. Use the charger only with the indicator lights fac-
ing upwards. Never use the charger inverted. Use of an inverted charger can inhibit charging
and decrease the lifespan of your charger.
Follow these steps for charging your ebike from Euphree:
1. Make sure that the ebike is turned o
2. Remove the rubber cover on the charging port on the side of the downtube.
3. Plug the charger into the battery’s charging port. Place the charger in a at, secure place with blink-
ing light side up. Connect to the DC output plug from the charger to the charging port on the side of
the battery
4. Plug the charger into a power outlet. Connect the charger input plug (110/220-volt plug) to a power
outlet. Charging should initiate. To indicate charging, the LED charge status lights on the charger will
turn red.
5. Unplug the charger from the outlet, then the charging port. When fully charged, unplug the charger
from the wall outlet rst and then remove the charger output plug from the battery charging port.
The charging indicator on the ebike charger will turn from red to green.
Battery Charging Best Practices:
• Check the charger, charger cables, all electrical cables, battery, and battery holder for damage
before initiating each charge.
• Only charge in a safe area that is cool, dry, and indoors. Only charge in a safe area that is away
from direct sun, dirt, debris and is away in a clear area to prevent tripping on cords and to prevent
damage occurring to ebike, battery or charging equipment while charging.
• Always charge your battery in temperatures between 50 °F – 77 °F (10 °C – 25 °C). ● The battery
should be recharged after each use so that you are fully prepared for your next ride. This battery
has no memory eect, therefore charging the battery after short rides will not cause damage to
your battery.
• Remove the charger from the battery within one hour of the green indicator light turning on (indi-
cated completed charge)
• Unnecessary wear of the charging components could occur if the charger is left attached to the
battery and connected to a power source.
• Never charge a battery for more than 12 hours at a time.
Do not leave a charging battery unattended.
WARNING: Avoid damage to battery connector terminals. Battery connector terminals are exposed
when the battery is removed from the ebike frame. In case of damage to the battery mounts or to the
terminals, do not use your battery and do not use your charger, and contact Euphree immediately.
Removing the battery:
1. Make sure that the ebike and battery are turned o
2. Insert the key into the keyhole and turn to unlock
3. Once unlocked, turn the bottom lever and push down to remove the battery
Installing the battery onto the ebike:
1. Turn the key in the keyhole to the unlocked position
2. Insert the battery into position and squeeze to lock into place
3. Turn key to lock in the keyhole
Long term battery storage:
Be sure to follow all instructions for storing ebike and battery. Failure to follow ebike and battery stor-
age procedures can result in a non-functional battery, and replacement is not covered under
warranty.
If storing your Euphree ebike for longer than two weeks at a time, follow instructions to help maintain
health and longevity of your battery.
• Charge (or discharge) battery to approximately 75% charged
• Power o the battery either locked to the frame or unlocked and removed from the frame. ● Store
batteries in a dry, climate controlled, indoor environment between 50 °F – 77 °F (10 °C – 25 °C).
• Check the battery every month. If necessary, use the charger from Euphree to charge the battery
to 75% charged.

WARNING: Opening the battery housing will void the warranty. Do not open the battery housing.
Opening of the battery housing can result in damage to the battery, to property and can cause seri-
ous injury and/or death.
Charing time:
When properly connecting the input and output plugs of the charger, two red charging indicator
lights should illuminate if the battery is not fully charged. When charging is complete, the red light will
turn green. The time for full charge will depend on factors including distance traveled, payload, riding
characteristics, terrain and battery age.
If your battery does not seem to be charging normally, is taking longer than expected to charge, or
you’ve noticed a substantial reduction in range between charges, discontinue use and contact Eu-
phree immediately. Note that the battery may take longer to charge when fully depleted, when very
new, and after 3-5 years of use.
Charger safety:
Failure to follow charging procedures can result in damage to your ebike, damage to the battery, the
charger or personal property, and can cause serious injury and/or death.
• Do not drop or otherwise cause an impact to your battery. Any impact can damage the battery
and cause it to overheat, rupture, leak or ignite.
• Do not expose the battery to re or high temperatures over 100F.
• Avoid charger contact with liquids, dirt, debris or metal objects.
• Do not cover the charger while in use.
• The charger should only be used only indoors in a cool, dry, ventilated area on a at, stable, hard
surface
• The charger works on 110/220 V 50/60 Hz AC power outlets. The charger automatically detects
and accounts for incoming voltage. Do not open the charger or modify the voltage input.
• Do not yank or pull on the cables of the charger. Only unplug by pulling on the plastic plugs direct-
ly and not by pulling on the cables.
• The charger will get hot when operating as designed. If the charger gets too hot to touch, emits a
strange smell or has any other indication of overheating, immediately discontinue use of the char-
ger and contact Euphree for support.
WARNING: Take special care in charging your ebike by reading, understanding and following the pro-
cedures and safety information detailed in this manual. Failure to follow proper charging procedures
can result in damage to your ebike, the charger, property, and/or cause serious injury or death.
Balancing the battery:
When you rst receive your ebike and for the rst 3 times you charge the battery, follow the proce-
dure below to ensure the battery cells are fully balanced and operating as eciently as possible.
The battery will arrive with approximately 50-75% charge. It can be ridden without initial charging or
can be charged before riding.
• After the rst, second and third ride, charge the battery and leave it on the charge for as close to
12 hours as possible (but no longer than 12 hours). This may require leaving the charger attached
to the battery and outlet even after the charger illuminates a green light indicating a full battery.
• Disconnect the charger from the battery and outlet once each balance charge is complete (long
charge as close to but not longer than 12 hours). Store the ebike for the next ride.
• Ride the ebike to discharge part or all of the battery and prepare for the next balance charge. Re-
peat steps 1-3 for at least three dierent times. After this you may charge the battery normally.
Normal Charging Procedure
1. Connect the charger to the battery and outlet
2. Charge your city robin until the charger indicator light turns green (2-3 hours).
3. Never leave the battery charging for more than 12 hour
4. Never leave the battery / charger unattended while charging
BRAKES:
WARNING: Do not touch the brake rotor. The brake rotor has sharp edges and can get hot while
riding. Touching the brake rotor can cause serious injury, slicing damage, or burns. Do not touch the
brake rotor with bare skin, as natural oils can transfer to the rotor, decreasing braking performance.
Touch the brake rotor only for necessary maintenance, only while wearing gloves or protective equip-
ment, and only when the brake rotor is cool and not moving.
WARNING: Never use the front brake by itself. First apply the rear brake, then second apply the front
brake. Use both brakes for all braking operations. Braking with only the front brake can cause loss of
control, injury and/or death. Braking with only the front brake excessively stresses components and
can cause damage to the ebike and parts.
WARNING: Ensure brakes are working correctly and that all braking system components are free
from damage. Ensure that when you fully squeeze the brake levers that neither the front nor the rear
brake levers make any contact with the handlebar. Perform this check before every ride. If you nd a
problem, take your ebike to a certied, reputable mechanic to have the brakes repaired.
WARNING: Hydraulic brake uid can be an irritant when it contacts human tissue. If contact with skin
occurs, immediately wash o brake uid. If contact with eye(s) occurs, immediately ush eyes with
fresh water continuously for 15 minutes. Consult with medical personnel.
Operation section:
Do not attempt to operate your ebike until you have read and understood all sections of this manual.
The safety warnings throughout the manual must be followed to prevent accidents, damage to ebike
and/or property, injury and/or death. Damage caused by failing to read, understand and follow all in-
structions is not covered under warranty. Contact Euphree if you have questions regarding assembly
or operation.
Users must fully understand the ebike’s power systems before operating. Users must take extra care
when rst applying the throttle mechanism. Throttle allows for full power to be applied from a stop.
Pedal assistance should also be fully researched and understood before rst use. Failure to take care
and familiarize yourself, and failure to practice the operation of the power systems on your ebike can
lead to damage, serious injury and/or death.

Handlebar features:
The gure below shows the features of the handlebar.
Mode Selector:
The image and table below show the features and information of the Mode Selector.
Display:
The image below shows the features and information of the full-color display.
Settings Menu:
To change display settings and functions, press the POWER button twice to open up the
Settings Menu. Once in the Settings Menu press the UP and DOWN buttons to scroll through.
Press the POWER
Operations Directions
Turn on ebike Press and hold the POWER button
Turn on lights Press and hold the UP button
Increase pedal assist level Press the UP button
Decrease Pedal assist level Press the DOWN button
View Odometer, Trip Distance, and Ride Time Press the POWER button once
Brightness:
• The brightness of the screen has 5 dierent levels, with 1 being the darkest and 5 being the bright-
est.
• Use the UP and DOWN buttons to cycle through each of the dierent levels and press the POWER
button once to select it.
System:
• The System menu is broken down into several sub-menus. Use the UP and DOWN buttons to cycle
through them, and use the POWER button to select each individual sub-menu.
• An explanation of each sub-menu is on the following page.
• Navigate to EXIT to leave the menu.
Auto-o
• The system can be congured to automatically power o anywhere from 1 to 30 minutes, or it can
be turned o entirely.
• Use the UP/DOWN buttons to determine Top Speed Adjustment To increase the top speed of the
ebike, increase P07 to 45. This will allow the rider to use the ebike as a Class 3 ebike. Ebike law
classications must be followed in each state.
Sub-menu Options Default Explanation
Unit System Imperial/Metric Imperial Determines whether speed and distance is
measured in miles or kilometers
Power System 24V/36V/48V/52V 48V Ensures the proper readout of voltage. The
City Robin’s battery operates at 48V. Do not
change this setting.
Power Indicate Percent/Voltage Percent Determines whether the power indicator-
shows what percentage is left or how much
voltage is left. The recommended setting is
percentage.
Auto-Assist ON/OFF OFF Determines whether assist level is chosen
automatically or manually. The recommended
setting is OFF.

Wheel:
• The accuracy of the speed and distance measurement is dependent on the wheel size listed in this
menu.
• Press the UP/DOWN buttons to change the size of the wheel diameter, and then press the POWER
button to save the selection.
• The options are 16/18/20/22/24/26/27/27.5/28/29/30/31/32/34 inches.
• The default is 28 inches
Advanced Settings:
• IMPORTANT: Some of the settings in this menu should not be changed. If changed, it may impac
the way your bike performs. Please note which ones are marked as DO NOT CHANGE.
• A password is required to enter the Advanced Settings menu. The password is 1801.
• The Advanced Settings menu is broken down into several sub-menus. Use the UP and DOWN but-
tons to cycle through them, and use the POWER button to select each individual sub-menu.
An explanation of each sub-menu is as follows:
Sub-menu Options Default Explanation
Speed Limit 0 - 60 km/h 45 km/h Implements a speed limit on the bike. After the bike hits
that limit, the motor will cease to provide
assistance. Please note: This option is always in km/h. To
determine the speed limit in mph, multiply the desired
mph by 1.6 to get an approximate km/h.
Current Limit 1 - 20A 18A DO NOT CHANGE
Determines the amperage output from the
controller to the motor.
Assist Levels 3/5/9 5Determines the number of assist levels available.
Poles in Motor 01 - 15 01 DO NOT CHANGE
Tells the system how many poles are in the motor.
Throttle 6km Yes/No NO If set to yes, the throttle is cease to function after a speed
of 6km/h (3.7 mph) has been achieved.
• Navigate to EXIT to leave the menu.
Factory Setting
• This menu is used to reset the bike back to factory default settings.
• After resetting to factory default settings, please go through each menu listed above to ensure that
everything is set correctly.
Password:
• This menu is used to put password protection on the bike. If enabled, the correct password must
be entered in order to use any of the electrical features on the bike. Please note: This simply pre-
vents the motor from engaging, it does not lock the wheels. It is meant as a safety feature, not a
protection from theft.Please use a sturdy lock if leaving your bike unattended for long periods of
time.
• The default password is 0000. Use the UP/DOWN buttons to adjust the password number to enter
the menu.
Sub-menu Options Default Explanation
Start Password ON/OFF OFF Determines whether the password will be
required on startup or not.
Reset the Password N/A N/A Used to change the password to another
combination.
• Select “Back” to return to the Settings Menu.
EXIT:
• Select Exit and press the POWER button to return to the Main Menu
Start-up procedure:
• After the e-bike has been properly assembled, all components are secured correctly and the user
has read this entire manual, user may turn on the e-bike and select a power level as outlined be-
low:
• Test the battery lock security. Ensure the key port is locked indicating the battery is securely in
place inside the frame.
• Remove the key. Carefully use both hands to test that the battery is securely locked into place.
• Make sure that handlebars and seats are properly adjusted. Note that lowering the seat so that
the rider can put one or both feet at on the ground without dismounting from the seat may oer
a safer introduction to operating the e-bike.
• Ensure handlebar faceplate bolts and seatpost quick release are fully secured.
• Turn the e-bike on by holding the M on the mode selector on the left hand side of the handlebar.

WARNING: The key must be removed from the battery before mounting or operating the ebike. Leav-
ing the key inserted in the key barrel while mounting or dismounting, while removing an unlocked
battery from the frame, and/or while operating the ebike can cause damage to the key or battery,
and can cause damage to property, serious injury and/or death.
4. Turn on the headlight and taillight if needed by holding down the up arrow. A light indication will
appear on the screen indicating that the lights are now on.
5. Select the desired level of pedal assistance between level 0 through 5 using the up and down ar-
rows on the LCD display remote. Level 0 indicates pedal assistance is inactive. Level 1 corresponds to
the lowest level of pedal assistance. Level 5 corresponds to the highest level of pedal assistance. Start
in PAS level 0 and adjust from there.
6. Begin riding carefully. With proper safety gear, prior experience in bicycle riding, and after reading
this manual in its entirety, the rider may now operate the Euphree ebike. On a at surface, most rid-
ers should be able to begin pedaling the ebike with pedal assist level 0 or 1. You may also gently use
the throttle to accelerate or maintain desired speed.
7. The throttle is used by slowly, gently and carefully pressing down the thumb into the throttle lever.
The throttle is active when the ebike is turned on. Do not use the throttle unless you are riding the
ebike.
WARNING: Never use the throttle while dismounted. While dismounted and moving the ebike, ensure
that the ebike is powered o to prevent application of the throttle.
Power system
How pedal assist works:
The user can engage the pedal assist system (PAS) while pedaling. Use of the PAS will recruit assis-
tance from the motor and will help propel the ebike forward. PAS uses a cadence sensor built into the
drivetrain. This cadence sensor detects when the user is pedaling and signals the electric motor to
provide assistance. The user selects ve levels of pedal assistance (PAS 0, 1, 2, 3, 4, 5). PAS 0 indicates
no pedal assistance will be provided.
How the throttle works:
The throttle is located on the right side of the handlebar. The user can engage the throttle by pushing
down with the thumb. To engage the throttle while riding, slowly push the throttle lever down with
the thumb. The more you push, the more powerfully the throttle will propel the ebike forward. Once
you release the throttle or apply the brakes, the throttle will no longer be engaged. Always keep on
hand on the brake lever and be prepared to squeeze the brake lever when using the throttle. You
should not use your throttle if local regulations prohibit the use of throttle on ebikes. It is the user’s
responsibility to research, understand and follow ebike regulations and all trac law.
WARNING: Even if you are an experienced ebike user, all users must read and implement the proce-
dures and information described in the owner’s manual and any manuals included with each sub-
component.
Headlight and brake light features turn on by holding the up arrow for 5 seconds.
Battery charge level indicator:
The LCD Display on the handlebar features a battery charge level indicator. This indicator calculates
battery life based on the battery power output (instantaneous voltage reading) and can uctuate
while riding if power demand and/or output changes. If one bar is left on the display, users should
charge the battery as soon as possible. To prevent damage to the battery, at lower states of charge
the ebike may limit power output. When the battery is fully depleted, the last bar will begin to ash.
Best practices for extending range and battery life:
1. Avoid applying full throttle when the ebike has slowed to very low speeds, has stalled or stopped.
2. Pedal to assist the motor when accelerating from a stop and climbing hills 3. Reduce power con-
sumption when possible
4. Do not climb hills steeper than 15% grade
5. Avoid sudden starts and stops
6. Accelerate slowly
Carrying loads:
Total maximum payload for ebike: 130 kg or 285 lbs
Total maximum payload for cargo loaded on rear rack: 45 kg or 100 lbs
WARNING: You MUST hold onto and secure the ebike whenever loading cargo and/or a passage. The
kickstand must not be used when loading cargo and/or a passenger. Never assume the ebike to be
stable when using the kickstand.
WARNING: Serious injury or death can occur if passengers are inexperienced or unt to ride safely
as a passenger. It is the user’s responsibility to ensure any and all passengers on the City Robin are
experienced and t to ride safely as a passenger.
WARNING:: ebike can tip over and cause serious injury and/or death to the user or passenger.
WARNING: Never leave a child unattended on the ebike. Always remove the child before looking
away or walking away from the ebike. When carrying cargo or a passenger, do not use the kickstand
to balance your ebike.
WARNING: The extra weight of cargo and/or a passenger aects steering, braking and balance. Once
cargo and/or passengers are loaded on the ebike, hills can become challenging
WARNING: Increased weight from cargo and/or passengers will increase the time it takes to slow the
ebike when braking, so plan stopping accordingly.
WARNING: It is the user’s responsibility to ensure that cargo on a passenger does not interfere with
safe operation of the ebike. Serious injury or death can occur if cargo or a passenger impacts user
ability to safely operate the ebike.

Tires:
Proper air pressure is critical in pneumatic tires. Never underinate or overinate tires. Failure to
always maintain the air pressure rating as indicated on your tires may result in tire and/or wheel fail-
ure. Low pressure may result in loss of control. Overinated tires may burst. Always maintain proper
air pressure.
Always use a regulated air source with a readable, accurate pressure gauge to inate your tires. In-
ating with an unregulated source may overinate tires and cause a burst tire.
Before changing a tire or tube, always ensure that all air pressure is removed from the inner tube
prior to removing the tire from the wheel rim. Failure to remove all air pressure from the inner tube
can result in serious injury and/or death.
Use of aftermarket tires or inner tubes not provided by Euphree may void your warranty, may dam-
age your ebike, or may create an unsafe riding condition resulting in loss of control, accidents, seri-
ous injury and/or death.
Always replace tires and inner tubes with punctures, cuts or damage prior to riding or operating your
ebike.
Serious injury or death can result when the useful life of a component is surpassed. Pay close atten-
tion to signs of wear such as cracks, scratches, or color changes of components which could indicate
useful life has been exceeded. Worn components must be replaced immediately. Consult a certied,
reputable ebike mechanic for regular maintenance and care of your ebike.
Parking, storage, transport:
• When pushing or carrying the ebike, turn o the power to avoid accidental acceleration from the
motor.
• Turn o the power and lights to conserve battery.
• Ensure the battery
• Park indoors when possible.
• If you must park outdoors in rain or wet conditions, do not leave ebike in wet conditions for more
than a few hours. Bring to a dry location as soon as possible and allow all of systems to dry out.
As with a regular ebike, an ebike used in wet conditions requires a more frequent maintenance
schedule to prevent rust, corrosion, etc. and to ensure all systems are working safely.
• Park your ebike in accordance with local rules and regulations.
• Locks to not prevent all ebike theft. Locking up your ebike with at least one lock is recommended
to reduce the chance of ebike theft. Euphree makes no claims or recommendations on the prop-
er lock hardware or procedures to secure your ebike. We do recommend you take precautions to
keep your ebike safe from theft.
• Do not park, store or transport your ebike on a rack not designed for you ebike’s size and weight.
• When placing your ebike on a rack for transport, unlock the battery, remove the key and then
remove the battery to reduce the weight of the ebike for safer lifting and to protect the battery by
transporting the battery in the cab of the vehicle.
• Do not transport ebike on a vehicle rack during rain, as this may cause water damage to the elec-
trical components.
Safety check before riding:
• Fully charge the battery using only the charger provided by Euphree for use with your ebike
• Ensure the battery is locked into position using the key provided.
• Visually check that there is no damage to the ebike or battery
Safe riding:
When riding or operating an ebike, always wear a helmet that covers the forehead and is properly
tted. It is the user’s responsibility to understand and follow local laws, rules and regulations.
Never operate an ebike while under the inuence of alcohol, drugs, controlled substance, or any sub-
stance or condition that could impair motor functions, judgement, or the ability to safely operate an
ebike, vehicle or equipment.
Do not use the motor power when going over potholes, speed bumps or similar obstructions in
the road.
Extra care must be taken if operating this ebike in wet or icy weather conditions. It is not recommend-
ed to ride in wet weather. If unavoidable, decrease riding speed and brake earlier as it will take longer
to slow in wet or icy conditions. The traction of tires is reduced in icy or wet road conditions. Proceed
with caution as road hazards are more dicult to see when wet. Wear reective clothing and use
approved safety lights.
Extra care must be taken if operating this ebike at night. It is not recommended to ride at night. If un-
avoidable, wear reective and light colored clothing. Use familiar, well-lit streets. Ensure all reectors
are installed and unobstructed. Ensure headlight and taillight are on and fully functioning.
Maintenance:
To ensure safe riding conditions, you must properly maintain your ebike. Follow these basic guide-
lines and see a certied, reputable ebike mechanic at regular intervals.
• Properly maintain batteries by keeping them fully charged when between uses of as much as two
weeks apart. If going longer than two weeks between uses, see the long-term battery storage
procedure.
• Never immerse or submerge the ebike or any components in water or liquid.
• Check wiring and connectors to ensure no damage and maintain secure connectors.
• To clean, wipe the frame with a damp cloth. Dry by wiping with a clean, dry cloth
• Store under shelter. Avoid leaving the ebike in the rain or exposed to corrosive materials.
• If exposed to rain, dry the ebike and apply anti-rust treatment to the chain and any other un-
painted steel surfaces.
• If the hub and bottom bracket bearings have been submerged in water or liquid, they must be
taken out and de-greased to prevent accelerated bearing deterioration.
• Use touch up paint to prevent rust if the paint has become scratched or chipped. Clear nail polish
may also be used as a preventative measure.
• Regularly clean and lubricate all moving parts.
• Regularly tighten components and adjust as required.
• Regularly inspect all pre-attached and optional component hardware to ensure proper torque
spec, secure attachment and working condition.

Limited Warranty:
Your bike’s warranty and all other binding legal terms (e.g., terms of purchase, etc.) are subject to
change at any time. To view terms of purchase, visit www.euphree.com/policies/terms-of service. To
view the current warranty, visit www.euphree.com/pages/warranty.
All Euphree ebikes (the “ebike”), and their individual Covered Components (as dened herein), are
protected against all manufacturing defects in material or workmanship for one (2) years after receipt
of the ebike by the customer (the “Warranty Period”).
This Warranty is only applicable to United States ebike purchases and in accordance
with the following terms:
• Only the original owner of an ebike purchased from Euphree’s online store or physical storefront
is covered by this Limited Warranty. The Warranty Period begins upon your receipt of the ebike
and shall end immediately upon the earlier of the end of the Warranty Period or any sale or trans-
fer of the ebike to another person, and under no circumstances shall the Limited Warranty apply
to any subsequent owner or other transferee of the ebike.
• The Limited Lifetime Warranty expressly applies to the replacement of a defective or failed frame
due to a manufacturing defect. All components have such as lithium ion battery (the “Battery”),
forks, stem, handlebar, headset, seat post, saddle, brakes, bottom bracket, crank set, pedals, rims,
wheel hub, freewheel, cassette, derailleur, shifter, motor, throttle, controller, wiring harness, kick-
stand and hardware (each a “Covered Component”).
• The Covered Components are covered under a two year warranty to be free of defects in materi-
als and/or workmanship.
This Warranty Does Not Cover:
• Normal wear and tear of any Covered Component.
• Consumables or normal wear and tear parts (including without limitation tires, tubes, brake pads,
cables and housing, grips, chain, spokes and lights).
• Any damage or defects to Covered Components resulting from failure to follow instructions in the
ebike owner’s manual, acts of God, accident, misuse, neglect, abuse, commercial use, alterations,
modication, improper assembly, installation of parts or accessories not originally intended or
compatible with the ebike as sold, operator error, water damage, extreme riding, stunt riding, or
improper follow-up maintenance.
• For the avoidance of doubt, Euphree will not be liable and/or responsible for any damage, failure
or loss caused by any unauthorized service or use of unauthorized parts.
• The Battery is not warranted from damage resulting from power surges, use of an improper char-
ger, improper maintenance or other such misuse, normal wear or water damage.
• Any products sold by Euphree that is not an ebike.
DETERMINING WHETHER DAMAGE OR DEFECT TO AN EBIKE OR COVERED COMPONENT IS PRO-
TECTED BY THIS LIMITED WARRANTY SHALL BE IN THE SOLE DISCRETION OF EUPHREE.
Shipping damage:
Damage to a Covered Component during shipping is not covered by this Limited Warranty, but Eu-
phree will replace such damaged.
Covered Components if you:
• Notify Euphree of a Covered Component damaged in the shipping process within thirty (30) days
of your receipt of the ebike
• Provide Euphree with a dated picture of the the damaged Covered Component
• Return all original packaging and paperworkin included with the ebike
• Note any immediately recognizable damage on the shipper’s Bill of Lading prior to signing o on
the shipment.
Shipping damage claims are very time sensitive and it is your responsibility to immediately inspect
the ebike for damage upon receipt.
If you choose to set up your own independent shipping method, such as use of a freight forwarder or
other similar service, Euphree will not replace any Covered Components damaged during such ship-
ping method.
Credit card chargebacks:
If any ebike purchase becomes subject to a credit card chargeback in any amount, and you are still in
possession of the ebike, then this Limited Warranty shall be invalidated until the credit card charge-
back has been resolved.
THE REMEDIES DESCRIBED ABOVE ARE YOUR SOLE AND EXCLUSIVE REMEDIES AND EUPHREE’S
ENTIRE LIABILITY FOR ANY BREACH OF THIS LIMITED WARRANTY. EUPHREE’S LIABILITY SHALL
UNDER NO CIRCUMSTANCES EXCEED THE ACTUAL AMOUNT PAID BY YOU FOR THE EBIKE, NOR
SHALL EUPHREE UNDER ANY CIRCUMSTANCES BY LIABLE FOR ANY CONSEQUENTIAL, INCIDEN-
TAL, SPECIAL OR PUNITIVE DAMAGES OR LOSSES, WHETHER DIRECT OR INDIRECT.
SOME STATES DO NOT ALLOW THE EXCLUSION OR LIMITATION OF INCIDENTAL OR CONSEQUEN-
TIAL DAMAGES, SO THE ABOVE LIMITATION OR EXCLUSION MAY NOT APPLY TO
THIS LIMITED WARRANTY GIVES YOU SPECIFIC LEGAL RIGHTS AND YOU MAY ALSO HAVE OTHER
RIGHTS, WHICH VARY FROM STATE TO STATE.
TO THE EXTENT PERMISSIBLE UNDER APPLICABLE LAW, EUPHREE DISCLAIMS ALL IMPLIED WAR-
RANTIES, INCLUDING WITHOUT LIMITATION THE WARRANTIES OF MERCHANTABILITY AND FIT-
NESS FOR A PARTICULAR PURPOSE FOR THE DURATION OF THIS EXPRESS LIMITED WARRANTY.
SOME STATES DO NOT ALLOW LIMITATIONS ON HOW LONG AN IMPLIED WARRANTY LASTS, SO
THE ABOVE LIMITATION MAY NOT APPLY TO YOU.
Table of contents
Other Euphree Scooter manuals
Popular Scooter manuals by other brands

ElectricUSA
ElectricUSA ESA1001ZB owner's manual

Helvei
Helvei Smartmove ALLROAD user manual
HOMCOM
HOMCOM 371-031 Assembly instruction

Huffy
Huffy Tilt N Turn Assembly instructions

Olsson and Brothers
Olsson and Brothers STROOT B8 User guide and guarantee

Sunrise Medical
Sunrise Medical Sterling Little Gem owner's manual
