Kayoba 956-095 User manual

956-095
Bruksanvisning för sparkcykel
Bruksanvisning for sparkesykkel
Instrukcja obsługi hulajnogi
User Instructions for Scooter

© Jula AB
Date of production: 2014-08-28
SE - Bruksanvisning i original
NO - Bruksanvisning i original
PL - Instrukcja obsługi w oryginale
EN - Operating instructions in original

SVENSKA. . . . . . . . . . . . . . . . . . . . . . . . . . . . . . . . . . . . . . . . . . . . . . . . . . . . . . . . . .5
SÄKERHETSANVISNINGAR. . . . . . . . . . . . . . . . . . . . . . . . . . . . . . . . . . . . . . . . . . . . . . . . . . . . . . . . . . . .5
TEKNISKA DATA . . . . . . . . . . . . . . . . . . . . . . . . . . . . . . . . . . . . . . . . . . . . . . . . . . . . . . . . . . . . . . . . . . . .5
Förinställd kod � � � � � � � � � � � � � � � � � � � � � � � � � � � � � � � � � � � � � � � � � � � � � � � � � � � � � � � � � � � � � � � � � � � � �5
BESKRIVNING . . . . . . . . . . . . . . . . . . . . . . . . . . . . . . . . . . . . . . . . . . . . . . . . . . . . . . . . . . . . . . . . . . . . .5
Delar� � � � � � � � � � � � � � � � � � � � � � � � � � � � � � � � � � � � � � � � � � � � � � � � � � � � � � � � � � � � � � � � � � � � � � � � � � � � �5
HANDHAVANDE . . . . . . . . . . . . . . . . . . . . . . . . . . . . . . . . . . . . . . . . . . . . . . . . . . . . . . . . . . . . . . . . . . 6
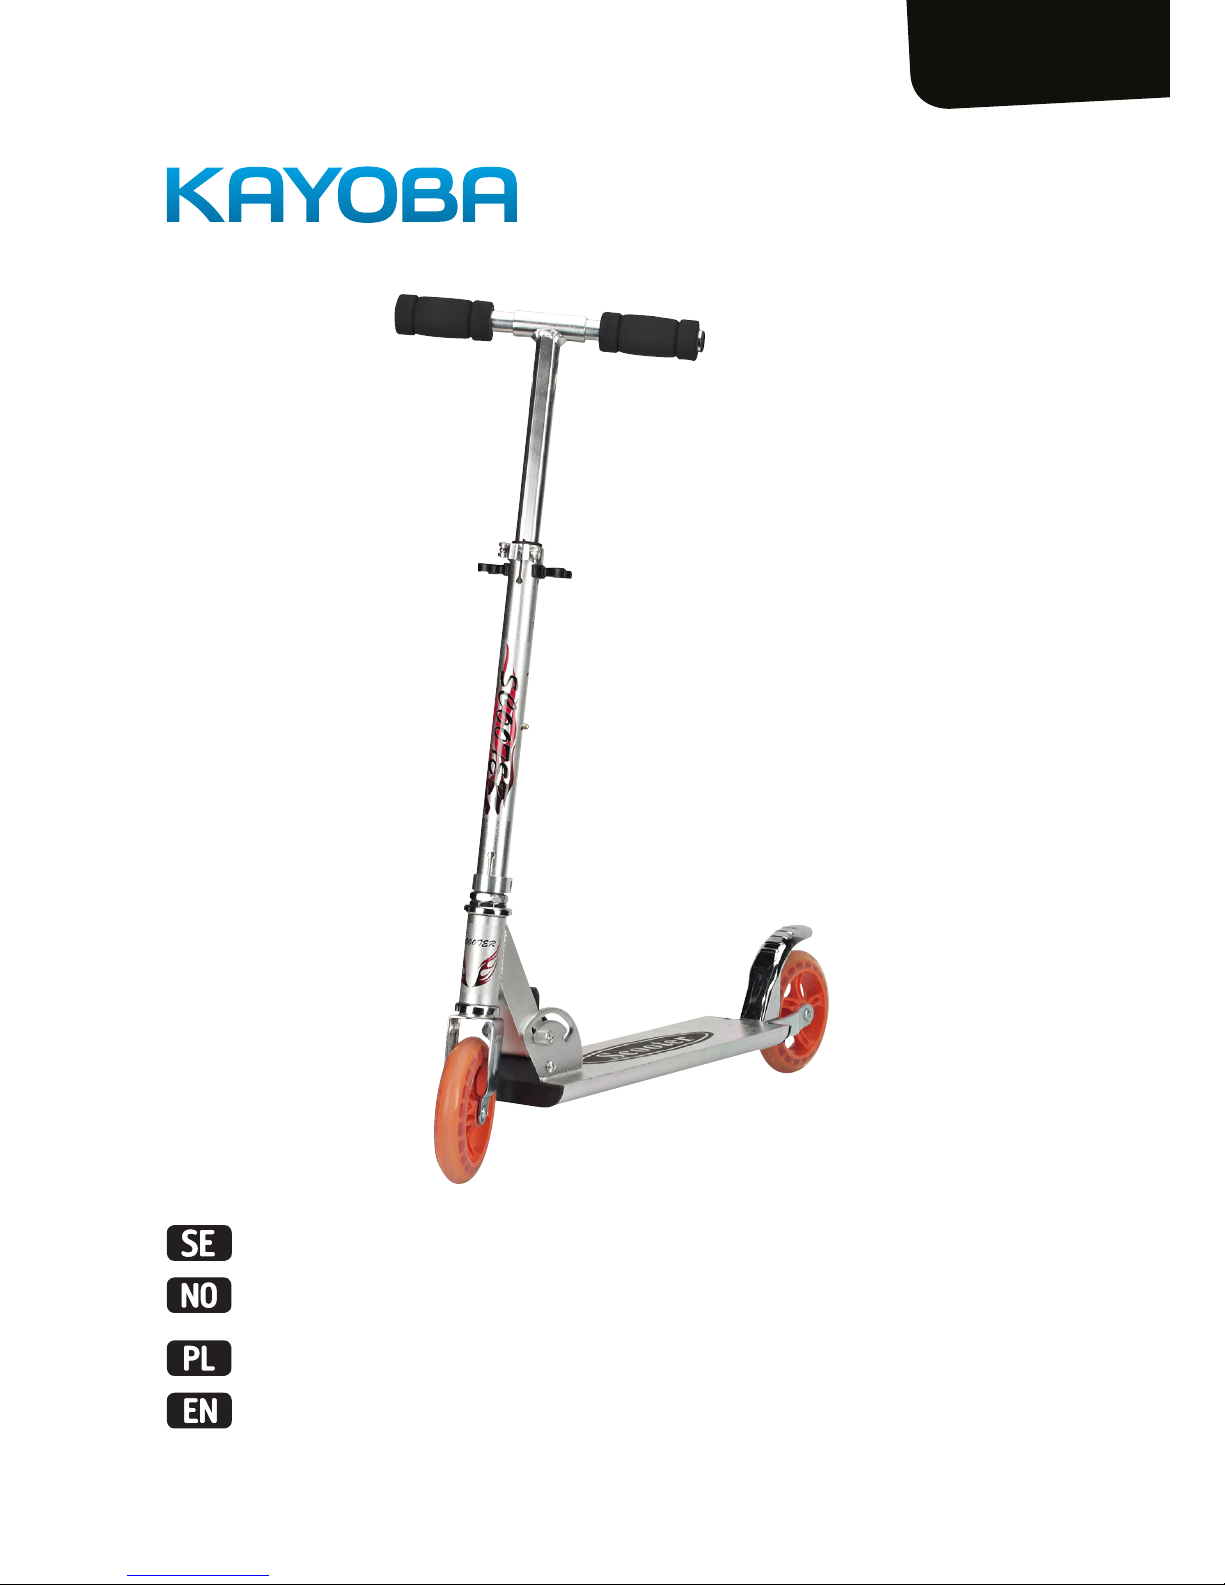
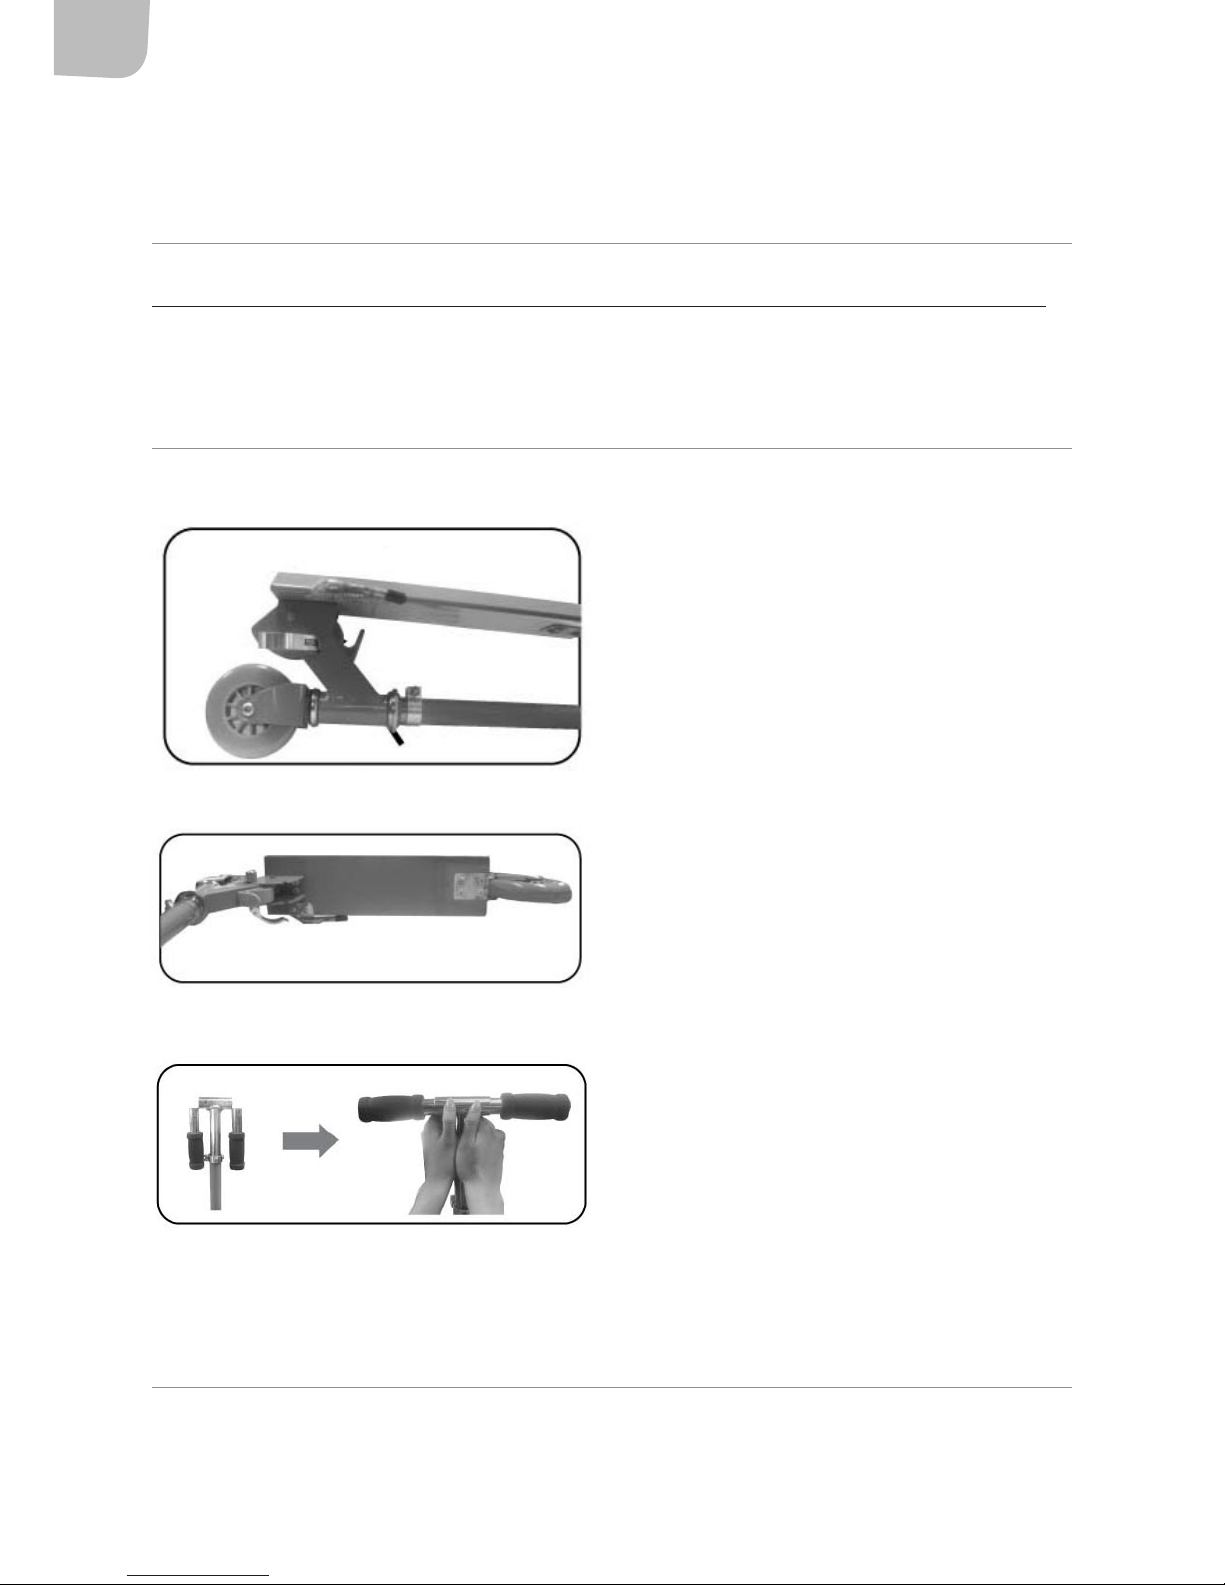
Förberedelser � � � � � � � � � � � � � � � � � � � � � � � � � � � � � � � � � � � � � � � � � � � � � � � � � � � � � � � � � � � � � � � � � � � � � �6
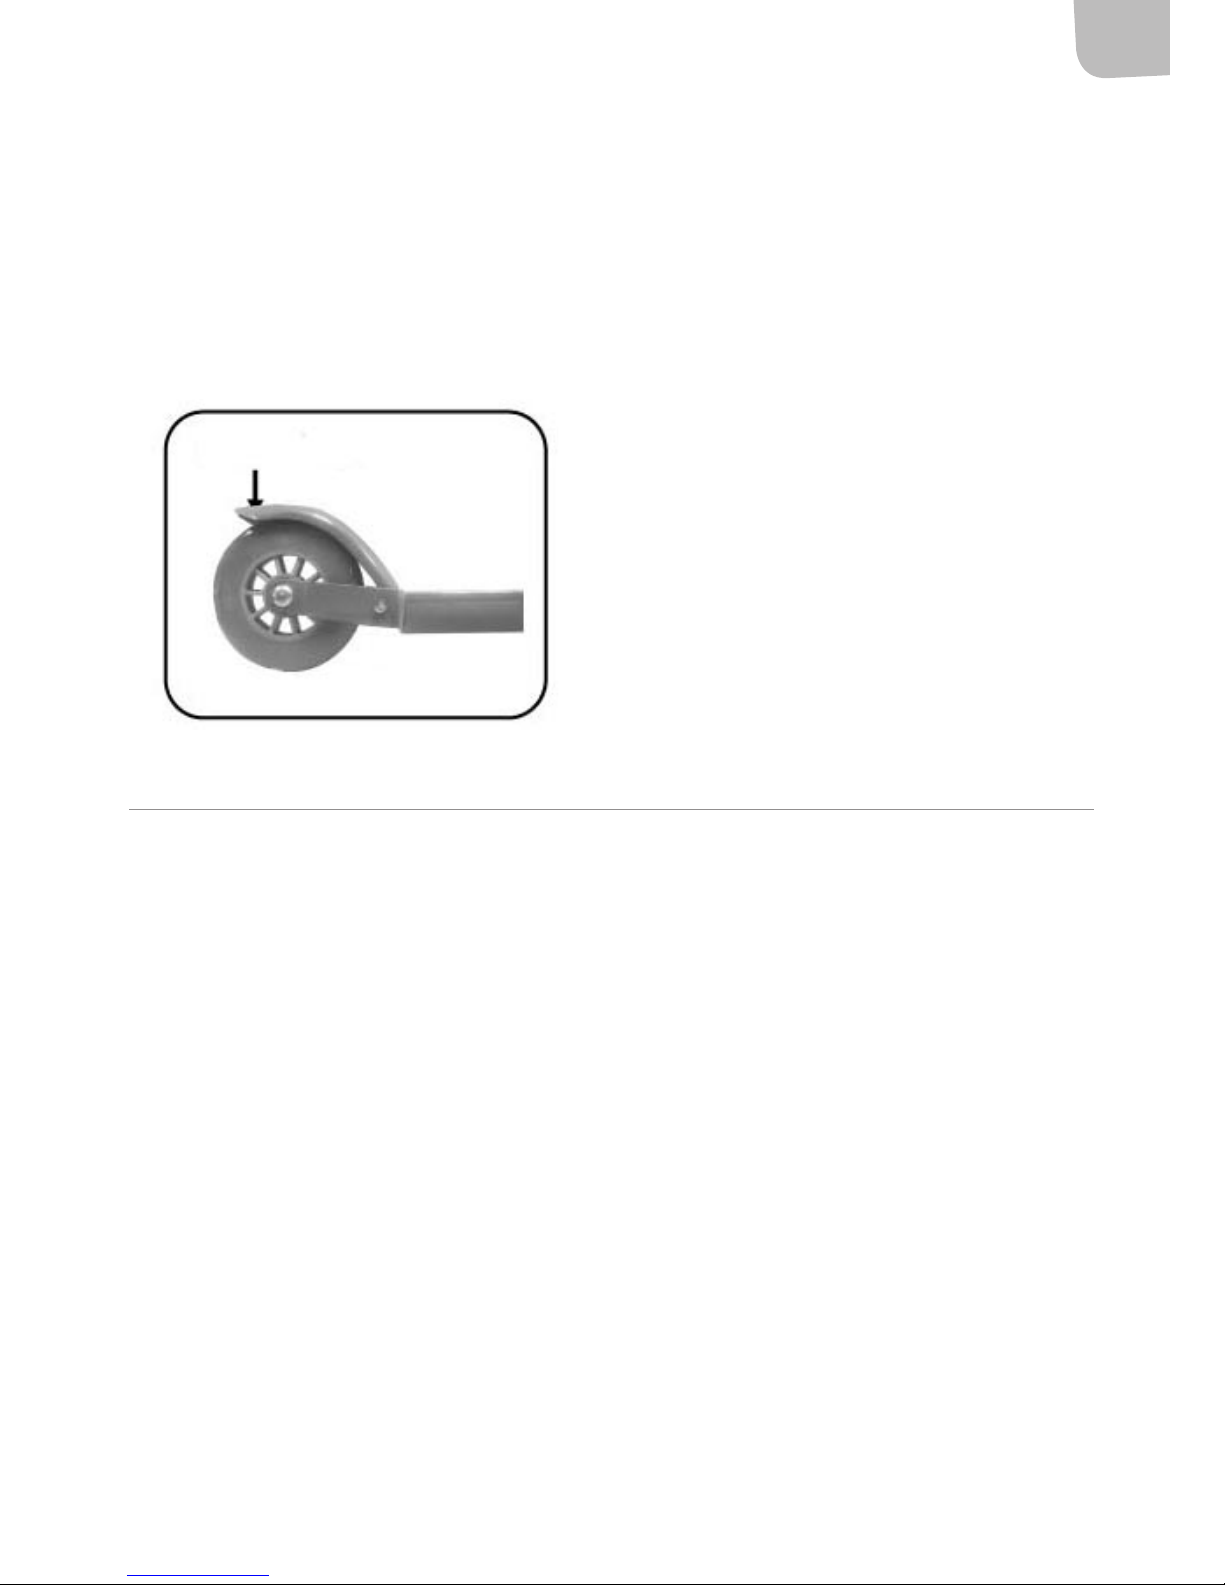
Användning � � � � � � � � � � � � � � � � � � � � � � � � � � � � � � � � � � � � � � � � � � � � � � � � � � � � � � � � � � � � � � � � � � � � � � �6
Isättning av batterier � � � � � � � � � � � � � � � � � � � � � � � � � � � � � � � � � � � � � � � � � � � � � � � � � � � � � � � � � � � � � � � �7
Funktion � � � � � � � � � � � � � � � � � � � � � � � � � � � � � � � � � � � � � � � � � � � � � � � � � � � � � � � � � � � � � � � � � � � � � � � � � �8
FELSÖKNING . . . . . . . . . . . . . . . . . . . . . . . . . . . . . . . . . . . . . . . . . . . . . . . . . . . . . . . . . . . . . . . . . . . . . 9
NORSK . . . . . . . . . . . . . . . . . . . . . . . . . . . . . . . . . . . . . . . . . . . . . . . . . . . . . . . . . . 10
SIKKERHETSANVISNINGER . . . . . . . . . . . . . . . . . . . . . . . . . . . . . . . . . . . . . . . . . . . . . . . . . . . . . . . . . .10
TEKNISKE DATA . . . . . . . . . . . . . . . . . . . . . . . . . . . . . . . . . . . . . . . . . . . . . . . . . . . . . . . . . . . . . . . . . . .10
Forhåndsinnstilt kode� � � � � � � � � � � � � � � � � � � � � � � � � � � � � � � � � � � � � � � � � � � � � � � � � � � � � � � � � � � � � � � 10
BESKRIVELSE. . . . . . . . . . . . . . . . . . . . . . . . . . . . . . . . . . . . . . . . . . . . . . . . . . . . . . . . . . . . . . . . . . . . .10
Deler� � � � � � � � � � � � � � � � � � � � � � � � � � � � � � � � � � � � � � � � � � � � � � � � � � � � � � � � � � � � � � � � � � � � � � � � � � � � 10
BRUK. . . . . . . . . . . . . . . . . . . . . . . . . . . . . . . . . . . . . . . . . . . . . . . . . . . . . . . . . . . . . . . . . . . . . . . . . . . 11
Forberedelser � � � � � � � � � � � � � � � � � � � � � � � � � � � � � � � � � � � � � � � � � � � � � � � � � � � � � � � � � � � � � � � � � � � � � 11
Bruk � � � � � � � � � � � � � � � � � � � � � � � � � � � � � � � � � � � � � � � � � � � � � � � � � � � � � � � � � � � � � � � � � � � � � � � � � � � � 11
Sette inn batterier � � � � � � � � � � � � � � � � � � � � � � � � � � � � � � � � � � � � � � � � � � � � � � � � � � � � � � � � � � � � � � � � � 12
Funksjon� � � � � � � � � � � � � � � � � � � � � � � � � � � � � � � � � � � � � � � � � � � � � � � � � � � � � � � � � � � � � � � � � � � � � � � � � 13
FEILSØKING. . . . . . . . . . . . . . . . . . . . . . . . . . . . . . . . . . . . . . . . . . . . . . . . . . . . . . . . . . . . . . . . . . . . . .14

POLSKI . . . . . . . . . . . . . . . . . . . . . . . . . . . . . . . . . . . . . . . . . . . . . . . . . . . . . . . . . . 15
ZASADY BEZPIECZEŃSTWA . . . . . . . . . . . . . . . . . . . . . . . . . . . . . . . . . . . . . . . . . . . . . . . . . . . . . . . . . .15
DANE TECHNICZNE . . . . . . . . . . . . . . . . . . . . . . . . . . . . . . . . . . . . . . . . . . . . . . . . . . . . . . . . . . . . . . . .15
Ustawiony fabrycznie kod� � � � � � � � � � � � � � � � � � � � � � � � � � � � � � � � � � � � � � � � � � � � � � � � � � � � � � � � � � � � 15
OPIS . . . . . . . . . . . . . . . . . . . . . . . . . . . . . . . . . . . . . . . . . . . . . . . . . . . . . . . . . . . . . . . . . . . . . . . . . . . 15
Części � � � � � � � � � � � � � � � � � � � � � � � � � � � � � � � � � � � � � � � � � � � � � � � � � � � � � � � � � � � � � � � � � � � � � � � � � � � 15
OBSŁUGA . . . . . . . . . . . . . . . . . . . . . . . . . . . . . . . . . . . . . . . . . . . . . . . . . . . . . . . . . . . . . . . . . . . . . . .16
Przygotowania � � � � � � � � � � � � � � � � � � � � � � � � � � � � � � � � � � � � � � � � � � � � � � � � � � � � � � � � � � � � � � � � � � � � 16
Sposób użycia� � � � � � � � � � � � � � � � � � � � � � � � � � � � � � � � � � � � � � � � � � � � � � � � � � � � � � � � � � � � � � � � � � � � � 16
Wkładanie baterii� � � � � � � � � � � � � � � � � � � � � � � � � � � � � � � � � � � � � � � � � � � � � � � � � � � � � � � � � � � � � � � � � � 17
Działanie� � � � � � � � � � � � � � � � � � � � � � � � � � � � � � � � � � � � � � � � � � � � � � � � � � � � � � � � � � � � � � � � � � � � � � � � � 18
WYKRYWANIE USTEREK . . . . . . . . . . . . . . . . . . . . . . . . . . . . . . . . . . . . . . . . . . . . . . . . . . . . . . . . . . . .19
ENGLISH . . . . . . . . . . . . . . . . . . . . . . . . . . . . . . . . . . . . . . . . . . . . . . . . . . . . . . . . .20
SAFETY INSTRUCTIONS . . . . . . . . . . . . . . . . . . . . . . . . . . . . . . . . . . . . . . . . . . . . . . . . . . . . . . . . . . . . 20
TECHNICAL DATA . . . . . . . . . . . . . . . . . . . . . . . . . . . . . . . . . . . . . . . . . . . . . . . . . . . . . . . . . . . . . . . . . 20
Preset code� � � � � � � � � � � � � � � � � � � � � � � � � � � � � � � � � � � � � � � � � � � � � � � � � � � � � � � � � � � � � � � � � � � � � � �20
DESCRIPTION . . . . . . . . . . . . . . . . . . . . . . . . . . . . . . . . . . . . . . . . . . . . . . . . . . . . . . . . . . . . . . . . . . . 20
Parts � � � � � � � � � � � � � � � � � � � � � � � � � � � � � � � � � � � � � � � � � � � � � � � � � � � � � � � � � � � � � � � � � � � � � � � � � � � �20
OPERATION. . . . . . . . . . . . . . . . . . . . . . . . . . . . . . . . . . . . . . . . . . . . . . . . . . . . . . . . . . . . . . . . . . . . . . 21
Preparations� � � � � � � � � � � � � � � � � � � � � � � � � � � � � � � � � � � � � � � � � � � � � � � � � � � � � � � � � � � � � � � � � � � � � � 21
Use � � � � � � � � � � � � � � � � � � � � � � � � � � � � � � � � � � � � � � � � � � � � � � � � � � � � � � � � � � � � � � � � � � � � � � � � � � � � � 21
Inserting the batteries � � � � � � � � � � � � � � � � � � � � � � � � � � � � � � � � � � � � � � � � � � � � � � � � � � � � � � � � � � � � � �22
Function � � � � � � � � � � � � � � � � � � � � � � � � � � � � � � � � � � � � � � � � � � � � � � � � � � � � � � � � � � � � � � � � � � � � � � � � �23
TROUBLESHOOTING . . . . . . . . . . . . . . . . . . . . . . . . . . . . . . . . . . . . . . . . . . . . . . . . . . . . . . . . . . . . . . .24

SE
4
SVENSKA
Läs bruksanvisningen noggrant innan användning!
Spara den för framtida behov�
TEKNISKA DATA
Maxvikt 90 Kg
MONTERING
Steg 1
Skruva loss skruvlocket vid styrrörets anslutning
till fotplattan och tryck ned styrröret tills det
klickar på plats�
Låsmekanism
Steg 2
Fäll upp styrröret, bort från fotplattan�
Steg 3
Tryck in de båda delarna av styret i T-stycket
tills de klickar på plats� För att lossa styret från
T-stycket, tryck på den runda låsknappen�
VARNING! Om inte alla delar låses på plats korrekt nns risk för personskada� Akta ngrarna – kläm-
risk�
HANDHAVANDE
Före varje användning
1� Kontrollera att produkten är korrekt utfälld och låst och anpassad till användarens storlek�

SE
5
2� Kontrollera att produkten fungerar korrekt�
3� Läs alla anvisningar och säkerhetsanvisningar noga före användning�
4� Använd hjälm, handskar, knäskydd och armbågsskydd vid åkning�
5� Kontrollera alla förband före varje användning� Justera vid behov�
6� Byt omedelbart ut skadade och/eller slitna delar�
Användning
1� Sätt ena foten på fotplattan och sparka
dig fram med den andra foten�
2� Bromsa genom att trampa ned den
bakre hjulkåpan med klacken�
Trampa ned
Bakre fotbroms
UNDERHÅLL
Följ anvisningarna nedan för bästa funktion och livslängd�
• Kontrollera före varje användning att produkten är korrekt utfälld och låst och anpassad till
användarens storlek�
• Rengör produkten med en torr trasa efter varje användning�
Veckoservice
• Ska utföras av vuxen eller under övervakning av vuxen�
• Applicera några droppar olja på hjulaxlarnas ändar�
• Kontrollera att axlarnas skruvförband är korrekt åtdragna� Om inte, dra åt med 6 mm insexnyck-
el�
Rätten till ändringar förbehålles� Vid eventuella problem, kontakta vår serviceavdelning på telefon
0200-88 55 88�
Jula AB, Box 363, 532 24 SKARA
www�jula�se�

NO
6
NORSK
Les bruksanvisningen nøye før bruk!
Ta vare på den for fremtidig bruk�
TEKNISKE DATA
Maksimal vekt 90 Kg
MONTERING
Trinn 1
Skru løs skrudekselet ved styrerørets tilkobling til
fotplaten, og trykk ned styrerøret til det klikker
på plass�
Låsemekanisme
Trinn 2
Fell opp styrerøret, bort fra fotplaten�
Trinn 3
Trykk inn begge delene av styret i T-stykket til de
klikker på plass� For å løsne styret fra T-stykket
trykker du på den runde låseknappen�
ADVARSEL! Det er fare for personskade hvis ikke alle delene låses riktig på plass� Pass på ngrene –
klemfare�
BRUK
Før hver gangs bruk
1� Kontroller at produktet er riktig utfelt og låst, og at det er tilpasset til brukerens størrelse�

NO
7
2� Kontroller at produktet virker som det skal�
3� Les alle anvisninger og sikkerhetsanvisninger nøye før bruk�
4� Bruk hjelm, hansker og kne- og albuebeskyttere under bruk�
5� Kontroller alle sammenføyninger før hver bruk� Juster disse ved behov�
6� Skadde og/eller slitte deler må byttes ut umiddelbart�
Bruk
1� Sett den ene foten på fotplaten og spark
deg frem med den andre�
2� Du bremser ved å tråkke bakskjermen
ned med hælen�
Tråkk ned
Bakre fotbrems
VEDLIKEHOLD
Følg anvisningene nedenfor for optimal funksjon og levetid�
• Kontroller før hver bruk at produktet er riktig utfelt og låst, og at det er tilpasset til brukerens størrelse�
• Rengjør produktet med en tørr klut etter hver bruk�
Ukeservice
• Skal utføres av en voksen eller under oppsyn av en voksen�
• Påfør noen dråper olje på endene av hjulakslene�
• Kontroller at akslenes skrueforbindelser er godt skrudd til� Hvis ikke, skrur du dem til med en 6 mm
sekskantnøkkel�
Med forbehold om endringer� Ved eventuelle problemer kan du kontakte vår serviceavdeling på telefon
67 90 01 34�
Jula Norge AS, Solheimsveien 6–8, 1471 LØRENSKOG
www�jula�no�

PL
8
POLSKI
Przed użyciem uważnie przeczytaj instrukcję obsługi!
Zachowaj ją w celu przyszłego użycia�
DANE TECHNICZNE
Maksymalna waga 90 Kg
MONTAŻ
Krok 1
Odkręć zakrętkę w punkcie przyłączenia rury
kierownicy do deski hulajnogi i wciśnij rurę, aż
usłyszysz kliknięcie�
Mechanizm blokujący
Krok 2
Rozłóż rurę kierownicy, odwróć od deski�
Krok 3
Wciśnij obie części kierownicy w teownik, aż
usłyszysz kliknięcie� Aby wyjąć kierownicę z
teownika, wciśnij okrągły przycisk blokujący�
OSTRZEŻENIE! Niezablokowanie wszystkich części we właściwej pozycji grozi obrażeniami ciała� Uwaga na
palce – niebezpieczeństwo zmiażdżenia�
OBSŁUGA
Przed każdym użyciem
1� Sprawdź, czy produkt jest prawidłowo rozłożony i zablokowany oraz czy został dopasowany do
rozmiarów użytkownika�

PL
9
2� Sprawdź, czy produkt działa prawidłowo�
3� Przed użyciem przeczytaj dokładnie wszystkie instrukcje i wskazówki bezpieczeństwa�
4� Podczas jazdy noś kask, rękawiczki oraz ochraniacze na kolana i łokcie�
5� Każdorazowo przed użyciem sprawdź wszystkie połączenia� W razie potrzeby – wyreguluj�
6� Natychmiast wymień uszkodzone i/lub zużyte części�
Sposób użycia
1� Przyłóż jedną stopę na desce hulajnogi i
odepchnij się drugą nogą�
2� Zahamuj, wciskając tylne nadkole
obcasem�
Wciśnij
Tylny hamulec nożny
KONSERWACJA
Przestrzegaj poniższych wskazówek, aby uzyskać jak najlepszą funkcjonalność i najdłuższą żywotność
produktu�
• Przed każdym użyciem sprawdź, czy produkt jest prawidłowo rozłożony i zablokowany oraz czy został
dopasowany do rozmiarów użytkownika�
• Po każdym użyciu wyczyść produkt suchą szmatką�
Cotygodniowy przegląd
• Przegląd wykonuje osoba dorosła lub odbywa się on pod nadzorem osoby dorosłej�
• Zaaplikuj kilka kropli oleju na końce osi kół�
• Sprawdź, czy połączenia śrubowe są prawidłowo dokręcone� Jeśli nie, dokręć je kluczem imbusowym 6
mm�
Z zastrzeżeniem prawa do zmian� W razie ewentualnych problemów skontaktuj się telefonicznie
znaszym działem obsługi klienta pod numerem:
801 600 500�
Jula Poland Sp� z o�o�, ul� Malborska 49, 03-286 Warszawa, Polska
www�jula�pl

GB
10
ENGLISH
Read the User Instructions carefully before use.
Save these instructions for future reference�
TECHNICAL DATA
Maximum load 90 Kg
ASSEMBLY
Step 1
Undo the screw cap where the handlebar tube
connects to the footplate and press down the
tube until it clicks in place�
Locking mechanism
Step 2
Unfold the handlebar tube, away from the
footplate�
Step 3
Press in both parts of the handlebar in the
T-piece until they click in place� To release the
handlebar from the T-piece, press the round lock
button�
WARNING: Failure to lock all the parts properly in place can result in the risk of personal injury� Mind your
ngers – risk of pinching�
OPERATION
Before using
1� Check that the product is correctly unfolded and locked, and adjusted to the size of the user�

GB
11
2� Check that the product is working properly�
3� Read all the instructions and safety instructions carefully before use�
4� Wear a helmet, gloves, knee pads and elbow pads when riding�
5� Check all the connections before use� Adjust if necessary�
6� Replace damaged and/or worn parts immediately�
Use
1� Place one foot on the footplate and
push forward with the other foot�
2� Brake by pushing down the rear wheel
cover with your heel�
Push down
Rear foot brake
MAINTENANCE
Follow the instructions below for best functionality and useful life�
• Always check before using that the product is correctly unfolded and locked, and adjusted to the size
of the user�
• Clean the product with a dry cloth after use�
Weekly service
• To be carried out by an adult, or under the supervision of an adult�
• Apply a few drops of oil on the ends of the wheel axles�
• Check that the axle screw unions are correctly tightened� If not, tighten med a 6 mm hex key�
Jula reserves the right to make changes� In the event of problems, please contact our service department�
www�jula�com
Table of contents
Languages:
Other Kayoba Scooter manuals
Popular Scooter manuals by other brands

Invacare
Invacare LYNX LX-3 Unpacking and setup instructions

EMMO
EMMO E-mini B Assembly instructions & owner's manual

flyscooters
flyscooters Trek owner's manual

FREERIDER
FREERIDER Westminster FR510GDX User instruction manual

Aosom
Aosom AA1-093 user manual

Red Bull Racing
Red Bull Racing RB-RTEEN85 user manual