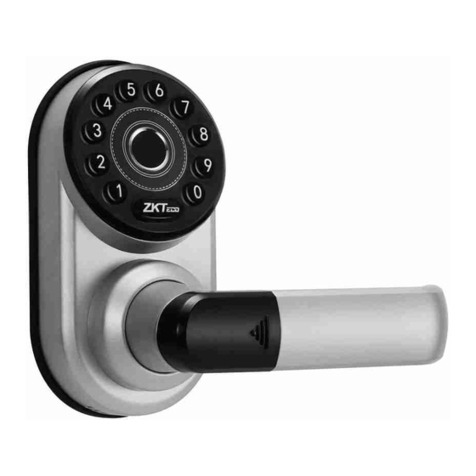
EURA AC-01C9 User manual

ACCESS CONTROL LOCKS
Instruction
manual
AC-01C9 AC-02C9

INDEX
1. DEVICE CONSTRUCTION ............................................................................................. 4
2. INSTALLATION .............................................................................................................. 4
3. MASTER SCHEMA .........................................................................................................5
4. PROGRAMMING...........................................................................................................6
4.1. ACCOUNT REGISTRATION IN TTLOCK MOBILE APP......................................... 6
4.2. LOGGING IN TO THE TTLOCK APP .......................................................................7
4.3. ADDING DEVICE TO APP.......................................................................................7
4.4. OPERATINGTHE DEVICE .....................................................................................7
5. TECHNICAL SPECIFICATION ...................................................................................... 10
WARRANTY..........................................................................................................11

INITIAL REMARKS
Before assembling, wiring and setting up of device the user should carefully read given ma-
nual. In case of any troubles with understanding the content the user should contact the
producer.
Unassisted assembling and start ofthe device can be done onlywith the use of propertools.
However, it is highly advised to set up a device by qualifed personnel.
The producer is not responsible for damages made during incorrect set-up or maintenance
or in case of any unassisted repairs or modifcations.

4
1. DEVICE CONSTRUCTION
Rain cover
Keypad with Mifare
proximity reader
Doorbell button
Connection
socket
Tamper switch
AC-01C9
Keypad with Mifare
proximity reader
Doorbell button
AC-02C9
2. INSTALLATION
outside rubber gasket inside rubber
gasket
Wall plugs
raincover
bracket keypad
screw

5
CONNECTING DESCRIPTION
+12V
GND
NC
COM
NO
SW
IN
OUT
BELL
BELL
12V DC
relay output
Exit button
Caution: inactive outputs
Doorbell
3. MASTER SCHEMA
12V DC
electromagnetic
strike
exit button
+12V
GND
NC
COM
NO
SW
IN
OUT
BELL
BELL
Schema of connecting the keypad with standard electromagnetic strike
+12V
GND
NC
COM
NO
SW
IN
OUT
BELL
BELL
12V DC
electromagnetic
strike
exit button
Schema of connecting the keypad with reverse electromagnetic strike

6
+12V
GND
NC
COM
NO
SW
IN
OUT
BELL
BELL
12V DC
gate
exit button
Schema of connecting the keypad with gate opener
4. PROGRAMMING
In order to program the access control, download the TTLock app from GooglePlay for An-
droid devices or from AppStore for iOS devices, and then follow the below instruction.
4.1. ACCOUNT REGISTRATION IN TTLOCK MOBILE APP
4.1.1. in the upper right corner click ‘Register’;
4.1.2.select registration mode by phone/e-mail;
4.1.3.enter the phone number/e-mail address;
4.1.4.set the password;
4.1.5.selectthevericationcodebyclicking‘Getcode’:
4.1.6.enter the code provided via text message/e-mail;
4.1.7. provide answers to security questions in the case of the password being lost -
answer 3 questions selected from the list of suggestions.

7
4.2. LOGGING IN TO THE TTLOCK APP
Aertheaccountiscreated,logintotheappbyenteringyourphonenumber/e-mailaddress
and the set password.
4.3. ADDING DEVICE TO APP
First adding
Inthecaseofaddingtherstdevice,clickintheroundeldofthestartscreenwithinscription
‘+Add lock’, and then move to the activities described from item 4.3.3
Adding further devices
4.3.1. Clicktheiconwith‘user”intheleuppercorneroftheapp,whichisfollowed
by the app’s main menu appearing;
4.3.2. fromthemainmenuselectrstposition‘+Addlocks’;
4.3.3. if Bluetooth is not switched on, the app will askfor initiating, agree to add a lock;
4.3.4. fromtheselectionmenuofdevicetypes,selecttherstposition‘DoorLock’;
4.3.5. in order to introduce electronics into pairing state, hold the door handle set
keypad until the illumination appears;
4.3.6. Aersearchingisnished,theappwillshowthelistoffounddevices.
4.3.7. selecttheaddeddevicefromthelist.Note:inordertopassthroughthepair-
ing process easily, add devices one by one and check if the device’s keypad is
illuminated;
4.3.8. having selected the device, the app will move automatically to the main menu
of door handle set management.
4.3.9. then, select option Setting(see item 4.4.8) and then Clock, which opens the
LOCKCLOCK page, where thetime shall be synchronized by clickingAdjust Clock
4.4. OPERATING THE DEVICE
4.4.1. The lock icon in the upper portion of the app screen enables releasing the lock
that remains in the range of the Bluetooth transmitter in the device with the
app installed.
4.4.2. „Send eKey” - eKeys are access keys, which can be send to other app users,
typically dedicatedto the personnel operatingthe protected room. These keys
enable opening lock that remains withinthe range of Bluetooth transmitter, in
ordertosendtheeKey:
4.4.2.1. select the eKey icon;
4.4.2.2.selectthekeytypebyclicking‘Type’-youcanchoosebetween:
- timed
- permanent
- one-time;
4.4.2.3.inthe‘Account’eldentertheaccountnameoftheuser,whois
provided with the key;
4.4.2.4.inthe‘Name’eldenterthekeyname;
4.4.2.5. in the case of a timed key, specify its period of validity
4.4.2.6. send the key by clicking ‘Send’.
In order to open door using an eKey, click the lock icon in the app.

8
4.4.3. „Send Passcode” - these are access codes sent to door handle set users
(guests, employees, visitors), in orderto send an access code, click ‘Send Pass-
code’icon,and:
4.4.3.1. selectthecodetype:
- permanent - the code must be used at least once within 24 h from
being established, otherwise it loses validity;
- timed - the code must be used at least once within 24 h from being
established, otherwise it loses validity;
- one-time - single-use code - the code must be used at least once
within 6 h from being established, otherwise it loses validity;
- erase - erasing code, should be used within 24h, otherwise it ex-
pires.Aeritsapplicationallcodesassignedtothegivendeviceare
erased. In order for the code list in the app to be cleared, perform
app and door handle set synchronization, this is best done using
door opening via the lock icon;
- customized - manual code - enables full personalization of code
thanks to the possibility to select the operation time and the code
number (4-9 signs);
Note: option available only in the case when the mobile device re-
mains within the operating range of the door handle set’s Bluetooth
module;
- cyclic - cyclic code enables setting access according to the scheme,
it is possible to select the day of the week and hours for the code to
work - the code must be used at least once within 24 h since being
established, otherwise it loses expires.
4.4.3.2. generate code by clicking ‘Generate’
4.4.3.3. click the icon of square with arrow in the upper right corner of the
app.
4.4.3.4. Fromthelist,selectthecodetransmissionmethod:
- WeChat - the code will be sent via WeChat app, under the condi-
tiontheWeChatappiscongured;
- Text Meg - the code will be sent via a text message- the text
message will contain a template with information on the access
code, its expiry date etc. - it is possible to edit any text mes-
sages;
- E-mail - the message will be sentvia e-mail, under the condition
ofpossessingcongurede-mailaccountonthemobiledevice.
4.4.4. eKeys - list of generated and sent access codes - with information on keys -
key type, activity status - it is possible to remove the given key from the list,
inordertoremovepressandholdthegivenkeyuntil‘Delete’buttonappears,
upon its clicking the key becomes permanently deleted.
NOTE: Removing an active key from the list in the app prior to its expiration
is possible, in order to remove, the device with the app must be connected to
the Internet, and the key will be removed only when the person receiving the
key is also connected to the Internet. Information on premature key removal
will be downloaded from server.

9
Allkeyscanbedeletedfromthelistatonce:
- click the icon with three dots in the upper right corner of the app;
- select reset eKeys;
-conrmthatyouwanttoresetkeys-enterthepasswordoftheappadmin-
istrator.
4.4.5. Passcodes - list of generated and sent access codes - with information on
codes - type, activity status - it is possible to remove the given code from the
list,inordertoremovepressandholdthegivencodeuntil‘Delete’buttonap-
pears, upon its clicking the key becomes permanently deleted.
NOTE: In order to remove a permanent code, one must remain within the
range of the Bluetooth transmitter built in the door handle set.
Allcodescanbedeletedfromthelistatonce:
- click the icon with three dots in the upper right corner of the app;
- select reset passcodes;
-conrmthatyouwanttoresetcodes-enterthepasswordoftheappadministrator.
4.4.6. 1C Cards - door handle sets with access control possess Mifare 13.56 MHz card
reader built in. By clicking the IC Cards icon, the card management panel is
opened.
InordertoaddtheMifarecard:
- click the icon with three dots in the upper right corner;
- select ‘add IC Cards’ option;
-enterthecardnameinthe‘Name’eld;
- select the access type - permanent or timed;
- in the case of a timed access being selected, specify its period of validity;
- click OK and wait for signal from the door handle set;
-aerthesoundmessage,placecardnearthe‘2’digitinthenumericalkeypad
of the device;
Allcardscanbedeletedfromthelistatonce:
- click the icon with three dots in the upper right corner of the app;
- select ‘Clear IC cards’;
-conrmthatyouwanttoresetcards-enterthepasswordoftheappadmin-
istrator.
4.4.7. Records - device logbook.
4.4.8. Settings – clicking the Settings icon provides us with information on the de-
vice:
- lock id - lock no.;
- MAC - MAC adress;
- Battery - battery status;
- Validity - access validity;
- Lock name - here you can enter the lock name, e.g. Room 308;
- Group - lock group- here you can create a group, to which door handle sets
can be assigned, e.g. Floor 1;
- Admin passcode - administrator code;
Lock clock - option for synchronization of app and door handle set clocks;
FaultDiagnosis-diagnosisofissueswiththelock;
Lockupgrade-sowareupdate;
Attendance - attendance;
Unlocking alert - information on the door handle set being unlocked.

10
Warning!
Following each battery exchange it is necessary to perform synchronization of the door
handle set’s clock with the app’s clock, if synchronization is not performed the codes may
not work correctly.
5. TECHNICAL SPECIFICATION
AC-01B9 AC-02B9
Power supply voltage 12V DC
Energy consumption - standby / operation 42 mA / 200 mA
Capacity no limit
Installation Surface mounted
Housing material Plastic
Bluetooth transmitter power output 4dB
Electromagnetic strike release time 5-900 sek.
Keypad Sensor
Proximity card reader frequency 13,56 MHz
Types of outputs
Output 1: relayN.C. & N.O. 1A/ 24VDC Max
Output 2: N.O.
(transistor) 50mA/12VDC Max
Temperature operating range -10ºC ~ +45ºC
Protection coecient IP44 IP20
Dimensions (W x SZ x G) 150 x 105 x 80 mm 115 x 75 x 22 mm
Net weight 215 g 115g

11
WARRANTY
Astheonly distributoroftheEura products,Eura-Tech isobligedtoensure ecient
warranty and post-warranty service. In the countries where Eura-Tech has neither its
own service network, nor DOOR-TO-DOOR service, the quality claims are dealt with
by authorised distributors of the Eura products on the basis of the signed distribution
agreements.Withintheframeworkofsuchagreements,Eura-Techwillensurenancing
of the possible repairs and delivery of spare parts.

EURA-TECH Sp. z o.o.
ul.Przemysłowa35A,84-200Wejherowo,Poland
www.eura-tech.eu
All rights reserved.
The pictures, drawings and texts used in this manual are the property of ‘EURA-TECH’ Sp. z o.o. Reproduction,
distribution and publication of the whole or parts of the manual without the author’s consent are prohibited!
The Eura-Tech Sp. z o.o. company reserves the right to change technical parameters and modifythe operating
instructionswithoutnotication.
At the same time, we would like to inform that the most up-to-date version of the manual can be found on the
website www.eura-tech.eu on the subpage of the given product.
TheEUdeclarationofconformityofthegivendeviceisprovidedonthehttp://www.eura-tech.euwebsite
09/2019
Eura-Tech Sp. z o.o. hereby declares that the radio equipment type - AC-01C9 i AC-02C9 access
controllocks-isinaccordancewithDirective2014/53/EU.
FulltextoftheEUdeclarationofconformityisavailableunderthefollowingwebaddress:
www.eura-tech.eu
This manual suits for next models
1
Table of contents
Other EURA Door Lock manuals
