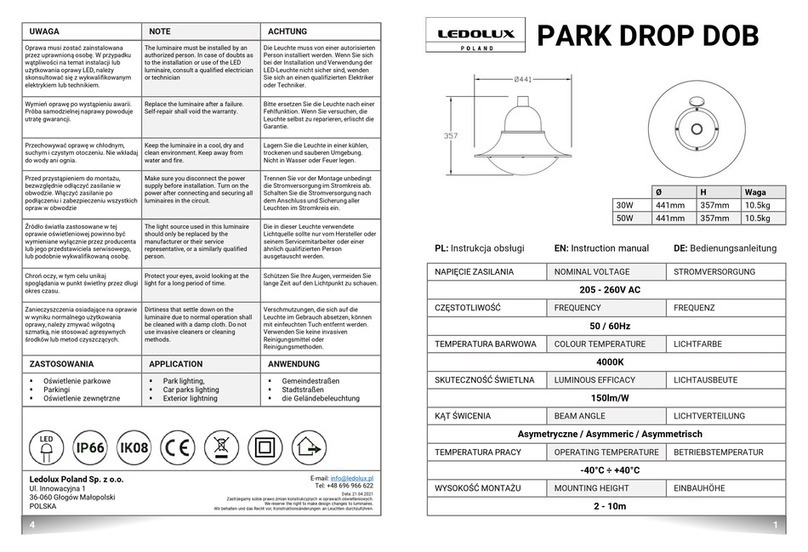
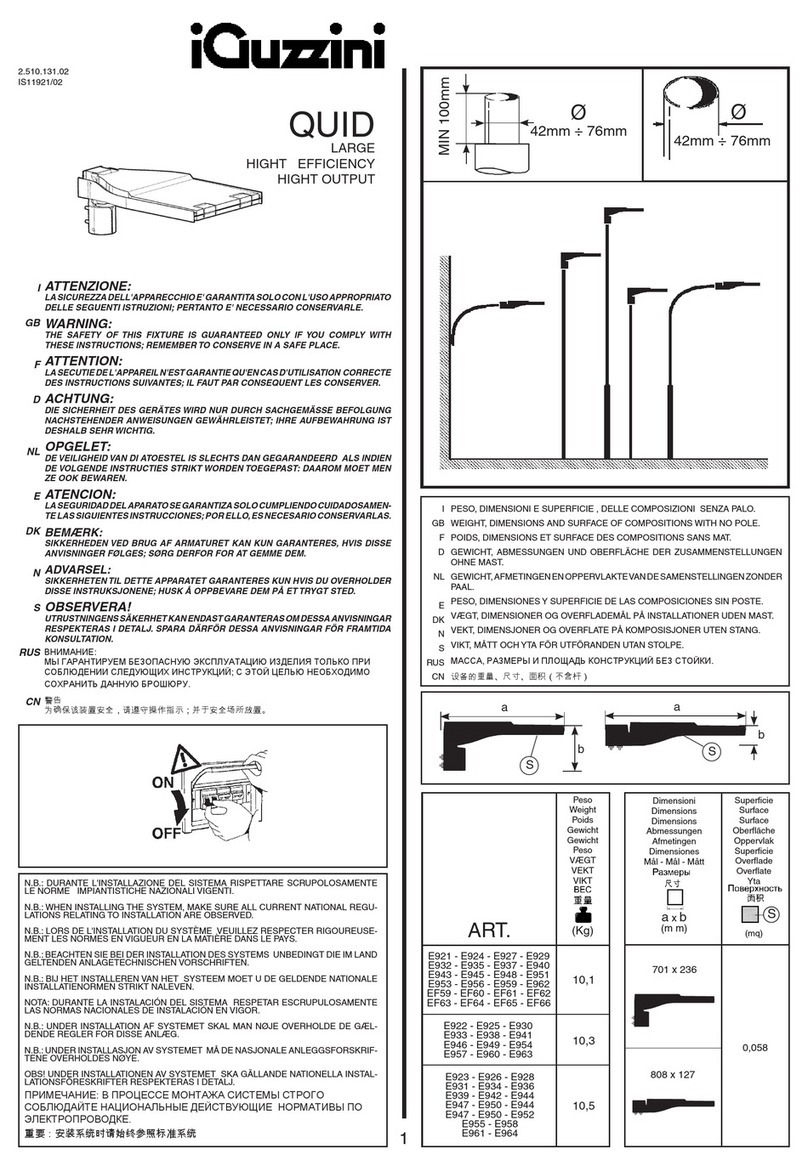
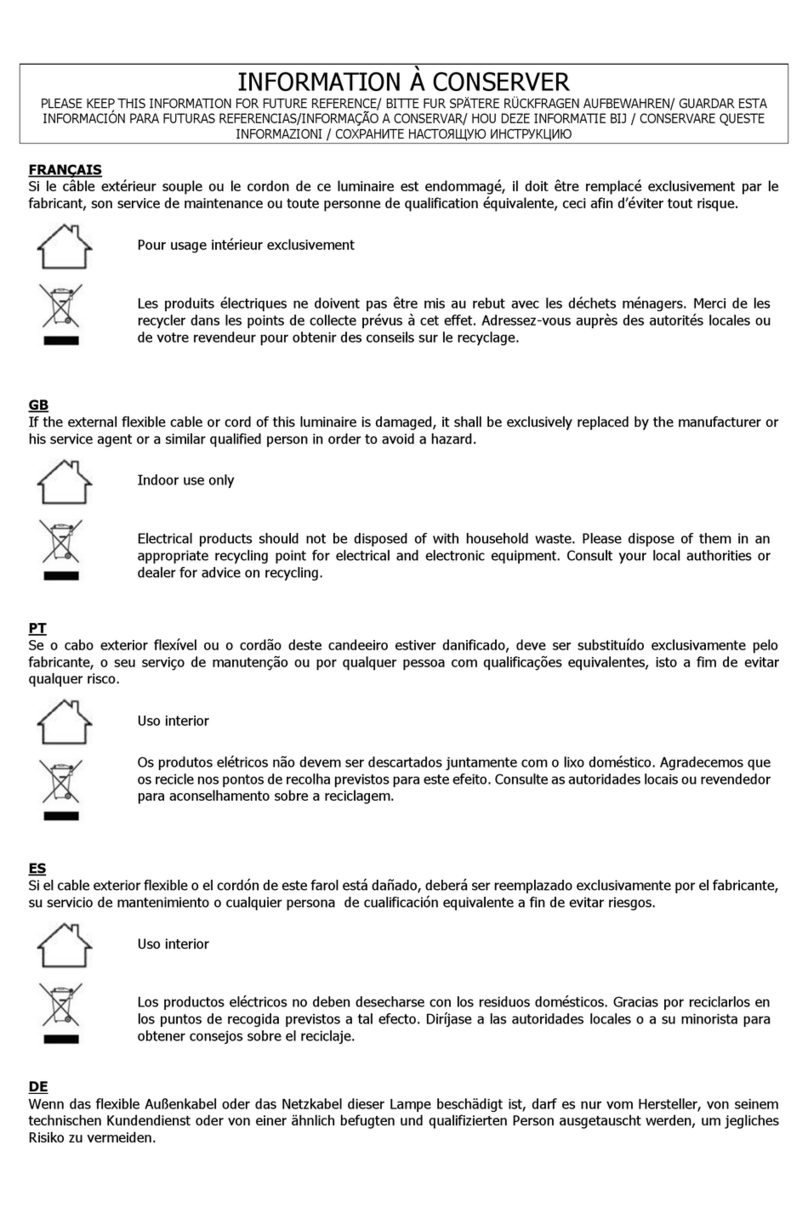
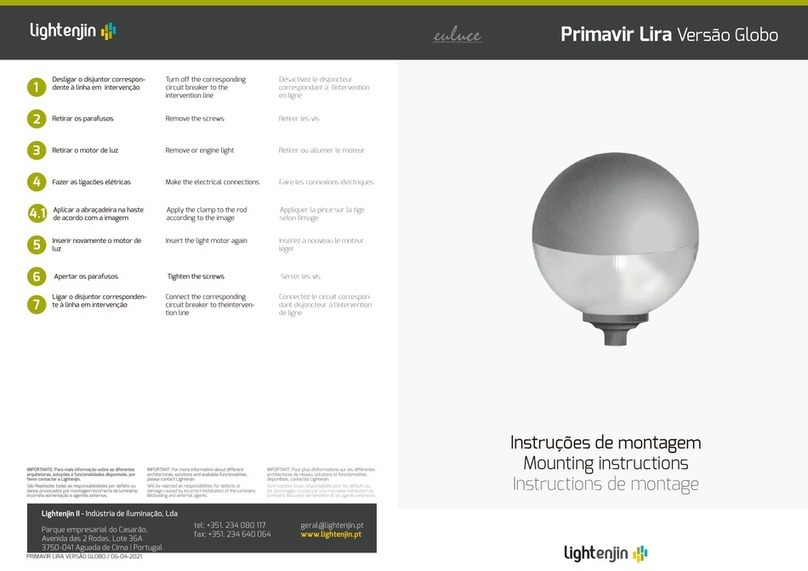
Euri EOL-WL56BLK-1220cec User manual

WARNINGS CAUTIONS
• Risk of fire / electrical shock
• LED Fixture installation requires knowledge of luminaire electrical
systems.
• Risk of electric shock – disconnect power at source before installation
• Do not make or alter any open holes in an enclosure of wiring or
electrical components during installation.
• If lamp or luminaire exhibits abnormal operation (buzzing, flickering,
minimal light, etc.), turn off power, remove fixture and contact us. For
more information please visit www.eurilighting.com or call our toll-free
number 1-888-743-5766.
• Do not use with dimmers.
• Do not look directly at the operating LED Fixture.
• Do not touch this product with wet hands.
• Do not disassemble, repair or alter lamp.
• Designed for outdoor applications only.
• Suitable for wet locations.
• The luminaires shall be grounded.
• Be careful not to touch the lamp pins to the metal housing
when installing.
• This Device is not intended for use with emergency exits or
emergency lights.
INSTALLATION GUIDE
MODEL #: EOL-WL56BLK-1220cec
©2020. Euri Lighting | A Division of IRTRONIX Inc. All Rights Reserved
For customer service please call us at 1-888-743-5766
Office Hours: 8:00 a.m. – 5:00 p.m. PST Monday-Friday
Questions?
LED Fixtures | Outdoor Wall Light Series
Lantern Class
1. Fix the crossbar to the
junction box with screws.
(See Figure 01)
2. Use the wire nuts to connect the white power line to the white power
line from the wall. And do the same to the black power line.
Connect the grounding wire from the fixture to the grounding wire from
the wall, and fix the grounding wire to the green screw. (See Figure 02
or wiring diagram above.)
3. Secure the fixture onto the crossbar with screws.
4. Screw included LED bulb into the socket.
(See Figure 03)
PLEASE REVIEW THE INSTRUCTIONS AND WARNINGS
LISTED BELOW PRIOR TO PROPER INSTALLATION
wall
Junction box Crossbar
LED Bulb
IR sensor
fix the grounding wire here
grounding
wire
grounding wire
power lines
wire nut
power lines
SAFETY INSTRUCTIONS
Fig.1 Fig.3
Fig.2

INSTALLATION GUIDE
MODEL #: EOL-WL56BLK-1220cec
©2020. Euri Lighting | A Division of IRTRONIX Inc. All Rights Reserved
For customer service please call us at 1-888-743-5766
Office Hours: 8:00 a.m. – 5:00 p.m. PST Monday-Friday
Questions?
PLEASE REVIEW THE INSTRUCTIONS AND WARNINGS
LISTED BELOW PRIOR TO PROPER INSTALLATION
LED Fixtures | Outdoor Wall Light Series
Lantern Class
SPECIFICATIONS OF PIR DUAL SENSOR
CUSTOMIZATION OPTIONS:
Function and Operation
Choose a mode by sliding the switch on the bottom of the backplate
of the fixture. When power is first applied, the light will turn on
immediately. Wait for 20 seconds to allow the sensor to warm up.
1. TEST MODE (daytime and nighttime operation.)
The light will turn to low-level brightness (50% brightness). The light
will turn to high-level brightness (100% brightness) when motion is
detected, and stay on as long as the motion is continuing. The light
will revert to low-level brightness about 5 seconds after motion is no
longer detected.
2. AUTO MODE (nighttime operation only; on at dusk, off at dawn)
At dusk, the light will turn to low-level brightness (50% brightness).
The light will turn to high-level brightness (100% brightness) when
motion is detected, and stay on as long as the motion is continuing.
When the motion stops, the light will remain on for the predetermined
time set (5 ~ 300 seconds), and then revert to low-level brightness.
The light will turn off automatically at dawn.
3. D2D MODE (nighttime operation only; on at dusk, off at dawn)
The light will turn to high-level brightness (100% brightness) at dusk.
It will turn off at dawn.
Shut-off Delay
The Shut-off delay is the length of time the light will stay at high-level
brightness after motion has ceased to be detected. This Shut-off delay
can be set when the operation is in “AUTO” mode by using the “TIME”
knob located on the left side of the panel at the bottom of the backplate
(See Fig.5).
To increase the shut-off delay, turn the knob clockwise. To decrease
shut off delay, turn the knob counterclockwise. The delay may be
adjusted from a minimum of 5 seconds to a maximum of 5 minutes.
The light will stay on as long as motion is detected continuously and
will automatically turn to low-level brightness when no more motion is
detected after the delay time has passed.
The sensitivity of the Motion Sensor
The sensitivity of the motion sensor can be adjusted by using the
“SENSITIVITY” knob located on the right side of the panel at the bottom of
the backplate (See Fig.5). To increase sensitivity, turn the knob clockwise.
To decrease sensitivity, turn the knob counterclockwise. The sensitivity
may be adjusted from a minimum of 5 feet to a maximum of 30 feet.
4.Manual Override Mode (6-hours auto Rest)
To shift to the manual override mode, set the switch to” AUTO” Mode.
Turn the wall switch“OFF” and then turn it“ON” within 2 seconds. The
light will remain on for 6 hours. To shift back to the“AUTO” mode, turn
the wall switch “OFF” and then turn it “ON” within 2 seconds again.
(See Fig.4)
Auto Mode
Manual
Override
Mode
Turn wall switch
or
Turn wall switch
Note: To make sure the above functions operate properly, always
keep the wall switch in the “ON” position (including the daytime).
The light will turn off automatically at dawn
TIME SENSITIVITY
TEST AUTO D2D
Manual Override Operation Diagram
OFF-ON within 2 sec.
OFF-ON within 2 sec.
Reset automatically aer 6 hours
Fig.5
Fig.4

SPECIFICATIONS OF PIR DUAL SENSOR
SELECTING A LOCATION:
SELECTING A LOCATION (CONTINUED):
TEST THE LIGHT FIXTURE
INSTALLATION GUIDE
MODEL #: EOL-WL56BLK-1220cec
©2020. Euri Lighting | A Division of IRTRONIX Inc. All Rights Reserved
For customer service please call us at 1-888-743-5766
Office Hours: 8:00 a.m. – 5:00 p.m. PST Monday-Friday
Questions?
PLEASE REVIEW THE INSTRUCTIONS AND WARNINGS
LISTED BELOW PRIOR TO PROPER INSTALLATION
LED Fixtures | Outdoor Wall Light Series
Lantern Class
FEATURES:
1. MOTION SENSOR FUNCTION-At dusk the Light fixture will be turn on for
a low-level illumination. When the motion sensor detects any moving heat
sources(such as people and vehicles), the Light fixture will be switched
from the low-level illumination to a high-level illumination for a short
duration time. After the short duration time, the light returns to the low-level
illumination until to dawn for saving energy.
2. MANUAL OVERRIDE-The user many manually tum on the light from
inside his home using a wall switch.
3. Uses a 17W dimmable LED light bulb.
1. When selecting a location, be aware of the motion sensor’s maximum
range of 30 ft and 150° detection angle (Fig.6). In addition, be aware of its
25° detection down-angle(from
horizontal) (Fig.2). Mounting the fixture too high or in front of a sloped
surface, such as an uphill walkway or driveway, may affect the motion
sensor’s effectiveness.
2. Select locations away from heat sources, such as heating vents, air
conditioners, and heated swimming pools.
1. When selecting a location, be aware that the motion sensor is more
sensitive to movement across its coverage area and less sensitive to the
movement toward or away from the motion sensor (Fig.7)
2. Select locations away from nighttime light sources, such as street lamps
or other light fixtures. They may shine light onto the fixture’s photocell
sensor(located beneath the sensor), this light might cause the circuit
to“think” that it is daytime and not allow the fixture’s functions to operate.
3. Be aware that shade from a porch or an eave may not allow enough
daylight to shine onto the photocell sensor and may cause the circuit
to“think” that it is nighttime, and subsequently cause the light to come on
during the daytime.
4. Be aware that motorized equipment, such as power tools, on the same
electrical circuit, may cause oscillation on the electrical line which might
cause the fixture to malfunction
The sensitivity knob adjusts the amount of distance that is required to activate the unit. To set to a desired level of sensitivity:
1- Turn on the circuit breaker and the light switch. The sensor has about 20 seconds warm-up period before it will detect motion. When first
turned on, wait about 20 seconds.
2- Set the Time switch to the“TEST position and the Sensitivity knob set in the middle position of minimum and maximum position.
The lights turn off in about 5 seconds. Keep in mind a better sensitivity is achieved by walking across the coverage area, not walking towards or
away from the motion sensor.
SPECIFICATIONS:
Motion Sensor Range: Up to 30 ft(Varies with surrounding
temperature)
Sensor Detection Angle: 150°
Electrical Requirements: 120 VAC, 60HZ
Max Load: 26W LED dimmable Bulb
Insallation Height: 6.5+0.7 Ft (1.8-2.2M)
150°
Sensor Sensor
Fig.6
Fig.7
