EUROFLY Firefox Minifox User manual

Assembly wing's instructions
Minifox
Firefox minimale

Eurofly srl
Via Brega, 36056
Tezze sul Brenta, (VI) Italy
www.euroflyulm.com
info@euroflyulm.com
Freedom to fly 1
SUMMARY
PREFACE ......................................................................................................................................................................................................... 2
FUSELAGE ARRANGEMENT AND PILLARS PREPARATION................................Errore. Il segnalibro non è definito.
RIGHT WING ASSEMBLY.................................................................................................Errore. Il segnalibro non è definito.
LEFT WING ASSEMBLY.....................................................................................................Errore. Il segnalibro non è definito.
WINGS' PLUG FIXING.......................................................................................................Errore. Il segnalibro non è definito.
WINGS' STRUCTURE CLOSING.....................................................................................Errore. Il segnalibro non è definito.
CONTROL FIXING ..............................................................................................................Errore. Il segnalibro non è definito.
CONCLUSIONS ..........................................................................................................................................................................................14

Eurofly srl
Via Brega, 36056
Tezze sul Brenta, (VI) Italy
www.euroflyulm.com
info@euroflyulm.com
Freedom to fly 2
PREFACE
The Minifox was born from the Firefox. The Minifox's main idea is could fly with complete freedom, security
and amusement.The project allows the pilot to reduce HANGARRAGGIO space thanks to the possibility to
disassemble and assemble wings rapidly and simply.
It's really incredible as the Minifox combines practically, speed and security with an enladen weight of 115kg!
Now, we analyse all the operations necessaires to assemble wings in the next docement.
Edition July 2016
THIS MANUAL CONTAINS IMPORTANTS INFORMATIONS OF MAINTENANCE AND SECURITY ABOUT THE
LIGHTWEIGHT FIREFOX MINIMALE AND IT MUST BE EQUIP WITH THE VEHICLE AT THE MOMENT OF SALE.
THE CONSUMER IS INVITED TO PAY PARTICULAR ATTENTION TO THE SUGGESTIONS AND PRATICAL
ADVICE FOLLOWING- THIS FOLLOWING TIPS WILL GIVE YOU TO OVERCOME EASILY ALL THE PROBLEMS
AND DIFFICULTIES THAT YOU HAVE TO FACE.

Eurofly srl
Via Brega, 36056
Tezze sul Brenta, (VI) Italy
www.euroflyulm.com
info@euroflyulm.com
Freedom to fly 3
FUSELAGE ARRANGEMENT AND PILLARS PREPARATION
In the first stage, the Minifox is still without wings which are placed into specific polystyrene support
(optional). The wings' pillars are rearward-facing along the fuselage and they are inserted in specific pouches
fixed on the end. (figure n1).
Figure 1
First thing, it is necessary to lay out the pillars making them rotate on the fixing pivot to the fuselage and to
lay out them to earth as in the figure 2. To watch out during the rotation for not to force the fixing pivot
along the longitudinal axle and therefore to accompany the rotation.
Figure 2

Eurofly srl
Via Brega, 36056
Tezze sul Brenta, (VI) Italy
www.euroflyulm.com
info@euroflyulm.com
Freedom to fly 4
RIGHT HALF-WING ASSEMBLY
We take easily from the support the right half-wing of the weight of only 9,8 Kg. We bring it toward the
fuselage as in figure 3.
Figure 3
We arrange the wing on the joints of the two longerons as in figure 4 and 5.
Figure 4

Eurofly srl
Via Brega, 36056
Tezze sul Brenta, (VI) Italy
www.euroflyulm.com
info@euroflyulm.com
Freedom to fly 5
Figure 5
Now, we fix the pivots from front to back through the holes (figure 5) and the relative rear so that to allow
the half-wing to rotate successively, when we have to lift it to fix the pillars.
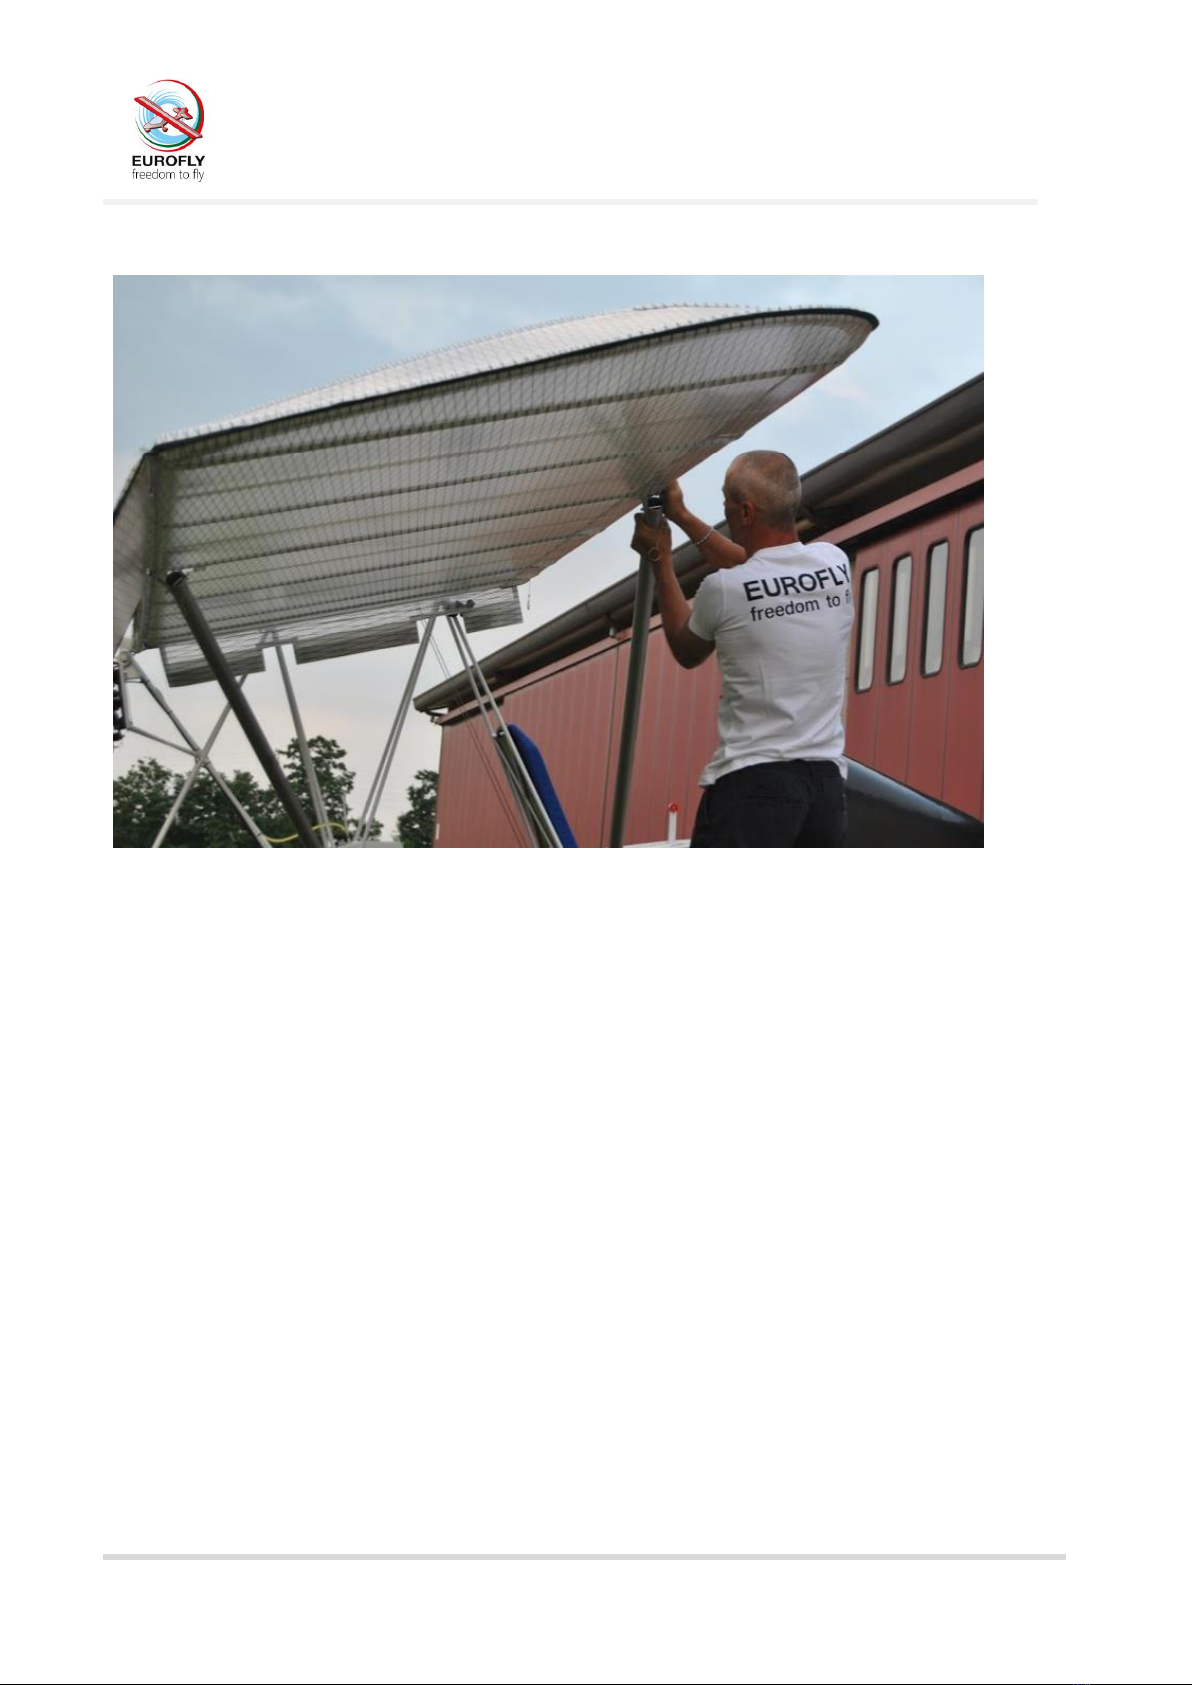
We take the half-wing in correspondence of the pillar’s fixing. Then, we lift it and we fix the first pillar with the
pivot as in the figure 6. In the pivots’ fixing we leave the plugs not inserted. We will insert them later.
Figure 6
Eurofly srl
Via Brega, 36056
Tezze sul Brenta, (VI) Italy
www.euroflyulm.com
info@euroflyulm.com
Freedom to fly 6
Now, we lift the frontal pillar and we secure it on the pivot similarly as represented by the figure 7.
Figure 7
Eurofly srl
Via Brega, 36056
Tezze sul Brenta, (VI) Italy
www.euroflyulm.com
info@euroflyulm.com
Freedom to fly 7
LEFT WING ASSEMBLY
Similarly as we did for the right half-wing, we take from the relative support the left half-wing and we bring it
in proximity of the joints of the fuselage’s longeron. Then, we fix the frontal and back pivots as in figure 8
and 9.
Figure 8
Figure 9
Eurofly srl
Via Brega, 36056
Tezze sul Brenta, (VI) Italy
www.euroflyulm.com
info@euroflyulm.com
Freedom to fly 8
At this stage, we could lift the half-wing and accompany the pillar securing the pivot as in the figure 10.
Figure 10
We have to do the same thing for the left wing’s frontal pillar which i twill fix similarly. (figure 11)
Figure 11

Eurofly srl
Via Brega, 36056
Tezze sul Brenta, (VI) Italy
www.euroflyulm.com
info@euroflyulm.com
Freedom to fly 9
WINGS’ PLUG FIXING
Now, we have to fix all the pivots’ plugs that fix the half-wings. Then, we insert all the plugs in the relative
pivots with patience. The pivots fixed till now are eight!
Figure 12
Figure 13

Eurofly srl
Via Brega, 36056
Tezze sul Brenta, (VI) Italy
www.euroflyulm.com
info@euroflyulm.com
Freedom to fly 10
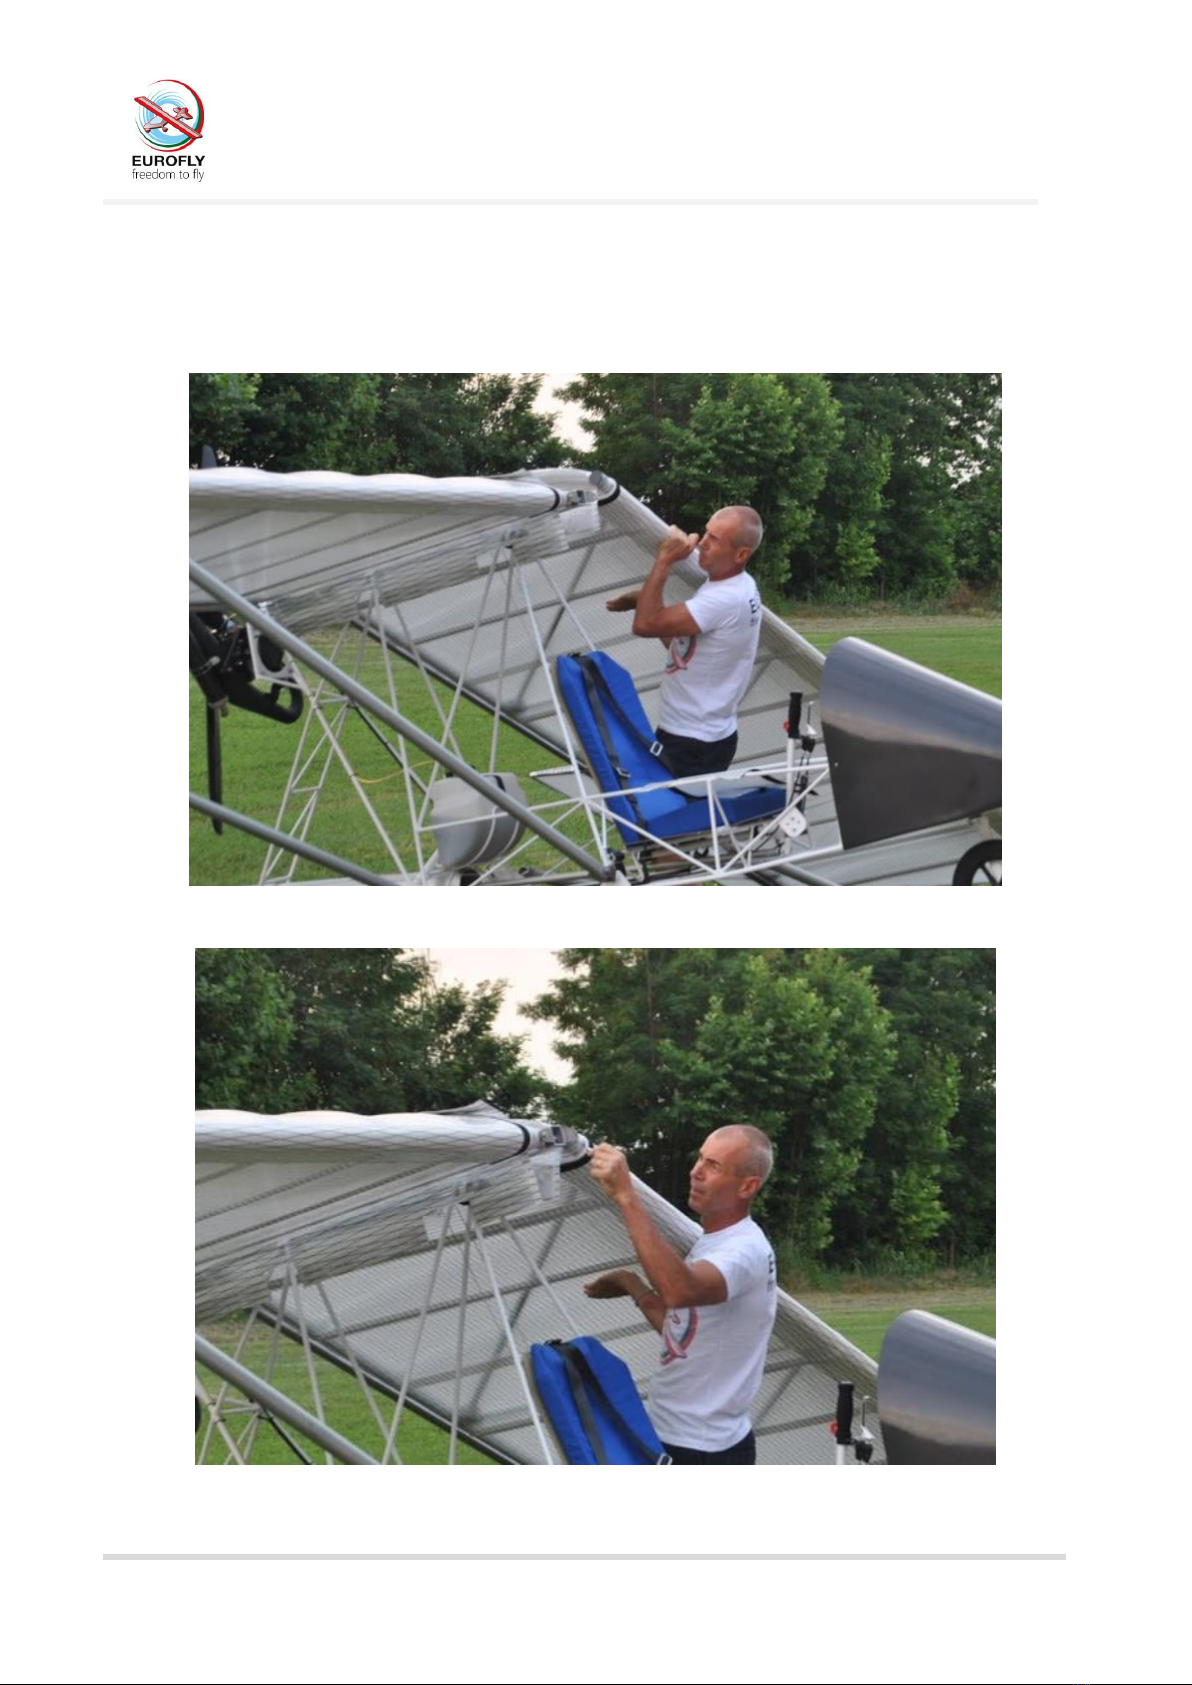
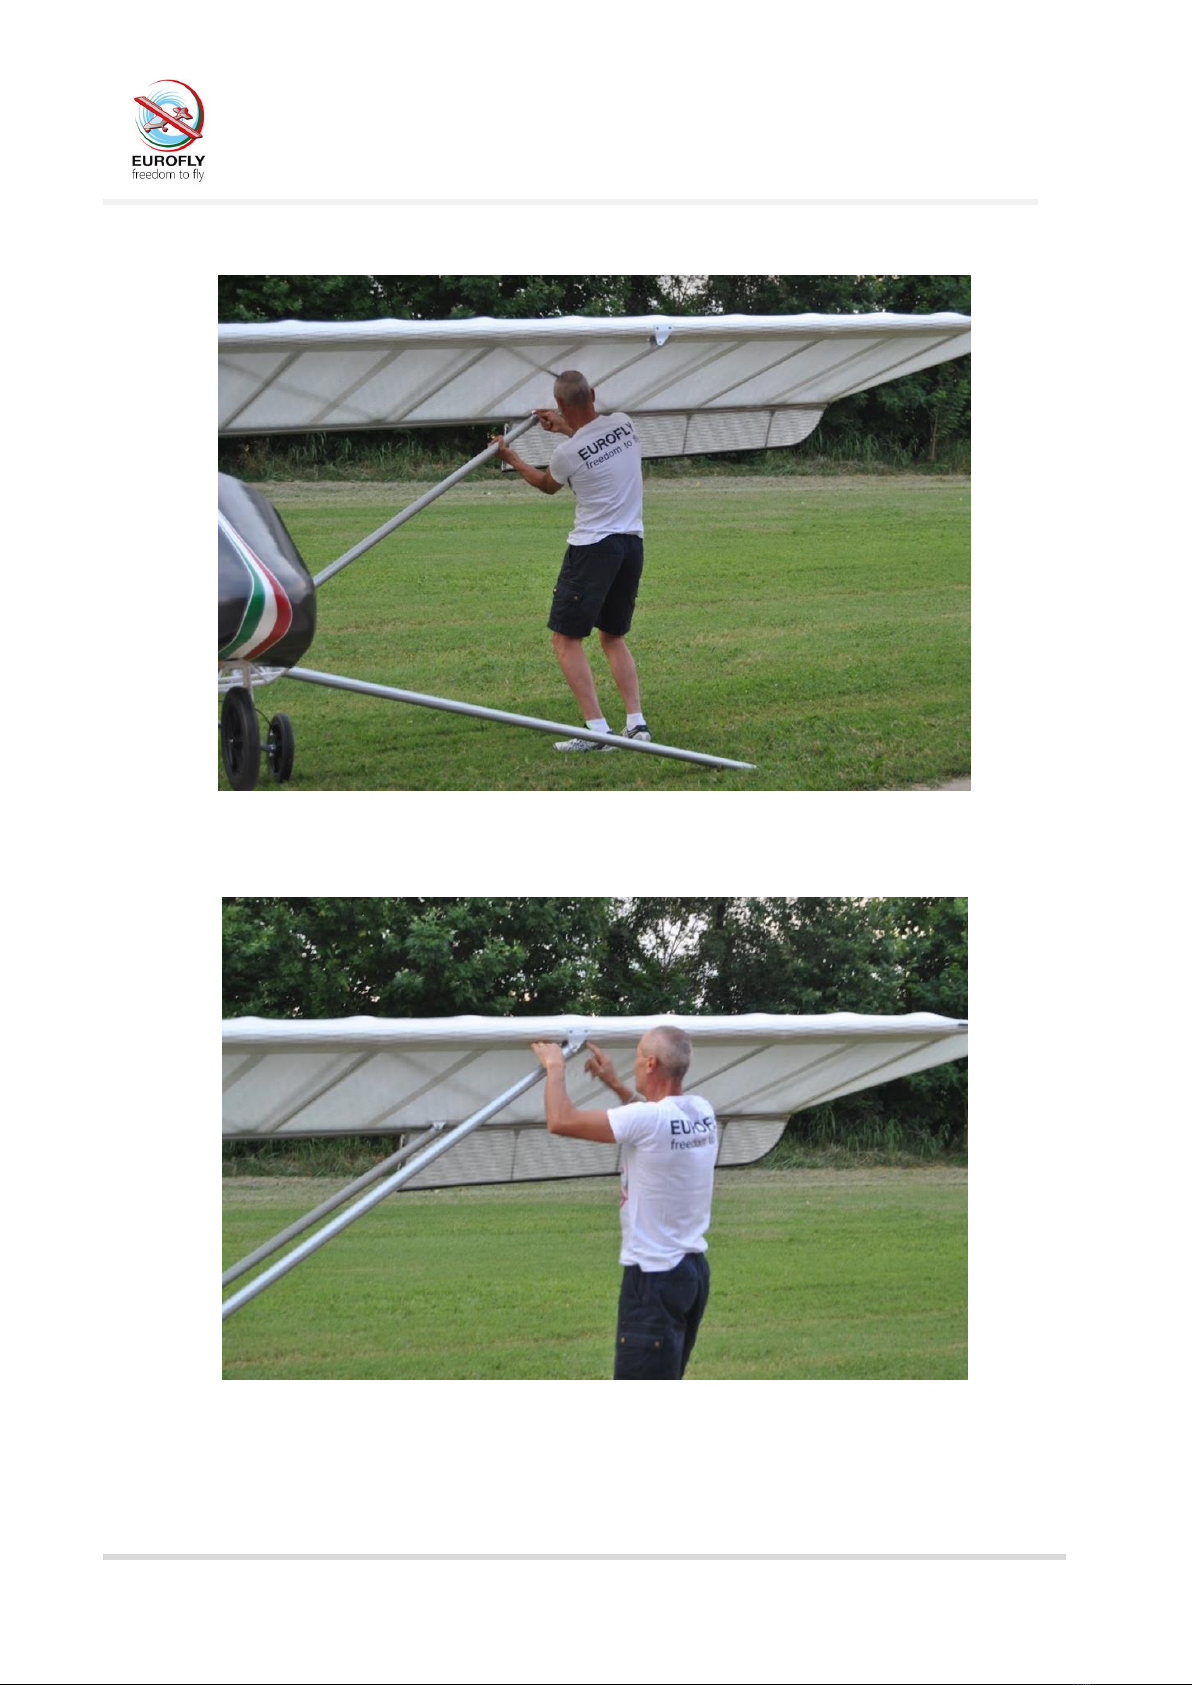
WINGS' STRUCTURE CLOSING
To cover the space among the two half-wings, above the fuselage, we have to use the velcro along the
closing line and subsequently we have to close the wing’s frontal profile with a mylar’s outline in endowment
that it can be fixed easily through the velcro. We can see the procedure in the following figures.
Figure 14
Figure 15

Eurofly srl
Via Brega, 36056
Tezze sul Brenta, (VI) Italy
www.euroflyulm.com
info@euroflyulm.com
Freedom to fly 11
Figure 16
Figure 17

Eurofly srl
Via Brega, 36056
Tezze sul Brenta, (VI) Italy
www.euroflyulm.com
info@euroflyulm.com
Freedom to fly 12
Figure 18
Figure 19

Eurofly srl
Via Brega, 36056
Tezze sul Brenta, (VI) Italy
www.euroflyulm.com
info@euroflyulm.com
Freedom to fly 13
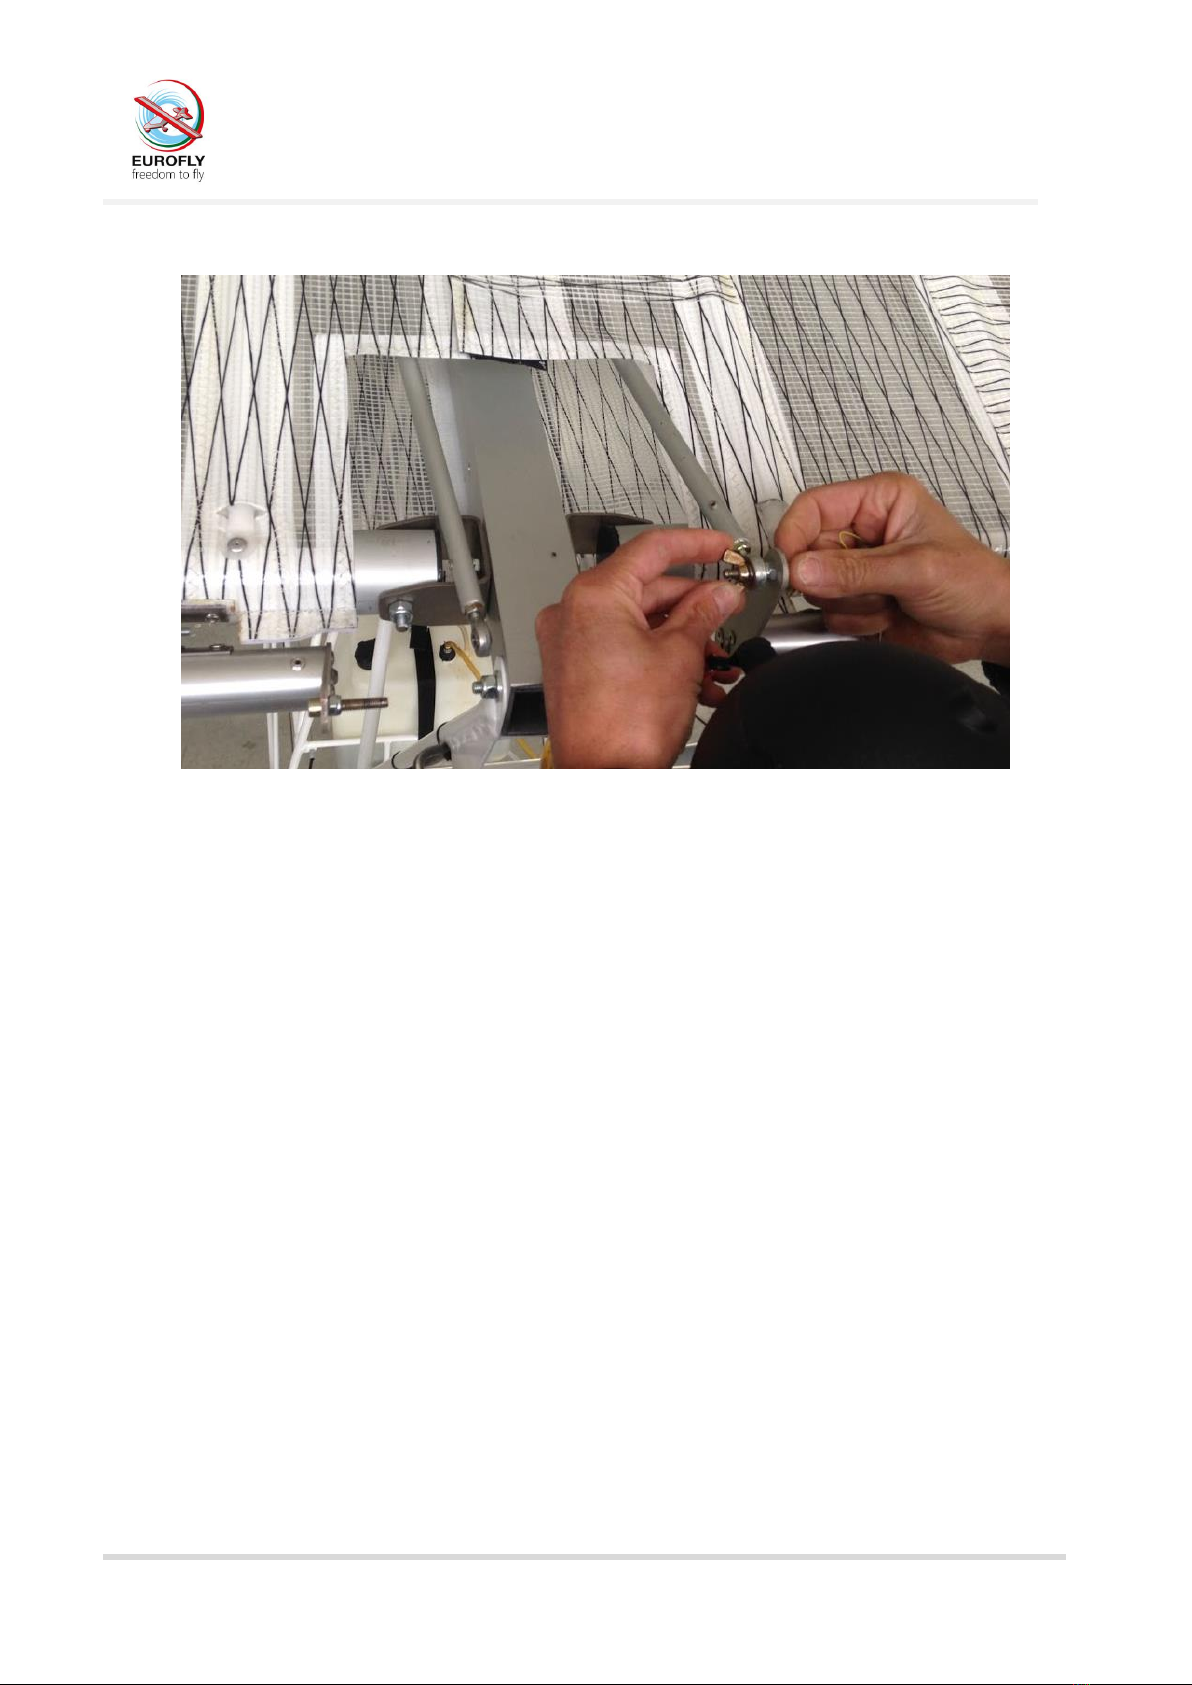
CONTROL FIXING
The commands’ fixing of the ailerons is the final part. However it is necessary to accompany the commands’
BRACCETTI in the relative locations and to insert the pivots and the relative plugs. You can observe the pivot
and plug’s insertion in the figure 17.
Figure 20
Figure 21
Eurofly srl
Via Brega, 36056
Tezze sul Brenta, (VI) Italy
www.euroflyulm.com
info@euroflyulm.com
Freedom to fly 14
Figure 22
CONCLUSIONS
We can affirm without any doubt that what we illustrated underline the extreme facility of assemblage and
preparation to the Minifox’s flight, departing from a situation of reduction to the least one of the volumes of
encumbrance in hangar. However it is important, as for every mean of flight, to effect all the operations with
the maximum patience and concentration as these operations precede the check of pre-flight which it must
be done always with the maximum scruple.

Eurofly srl
Via Brega, 36056
Tezze sul Brenta, (VI) Italy
www.euroflyulm.com
info@euroflyulm.com
Freedom to fly 15
NOTE:
______________________________________________________________________________________________________
______________________________________________________________________________________________________
______________________________________________________________________________________________________
______________________________________________________________________________________________________
______________________________________________________________________________________________________
______________________________________________________________________________________________________
______________________________________________________________________________________________________
______________________________________________________________________________________________________
______________________________________________________________________________________________________
______________________________________________________________________________________________________
______________________________________________________________________________________________________
______________________________________________________________________________________________________
______________________________________________________________________________________________________
______________________________________________________________________________________________________
______________________________________________________________________________________________________
______________________________________________________________________________________________________
______________________________________________________________________________________________________
______________________________________________________________________________________________________
______________________________________________________________________________________________________
______________________________________________________________________________________________________
______________________________________________________________________________________________________
______________________________________________________________________________________________________
______________________________________________________________________________________________________
Table of contents


