Eurofred Daitsu ACVD User manual
ACVD
AUVD
ASVD
ABVD
AGVD
INSTRUCTION
MANUAL WIRELESS
REMOTE CONTROL
MULTISPLIT-HYBRID
Serie
INDOOR UNIT MULTISPLIT-HYBRID
Edition
06/21
Models
USER MANUAL

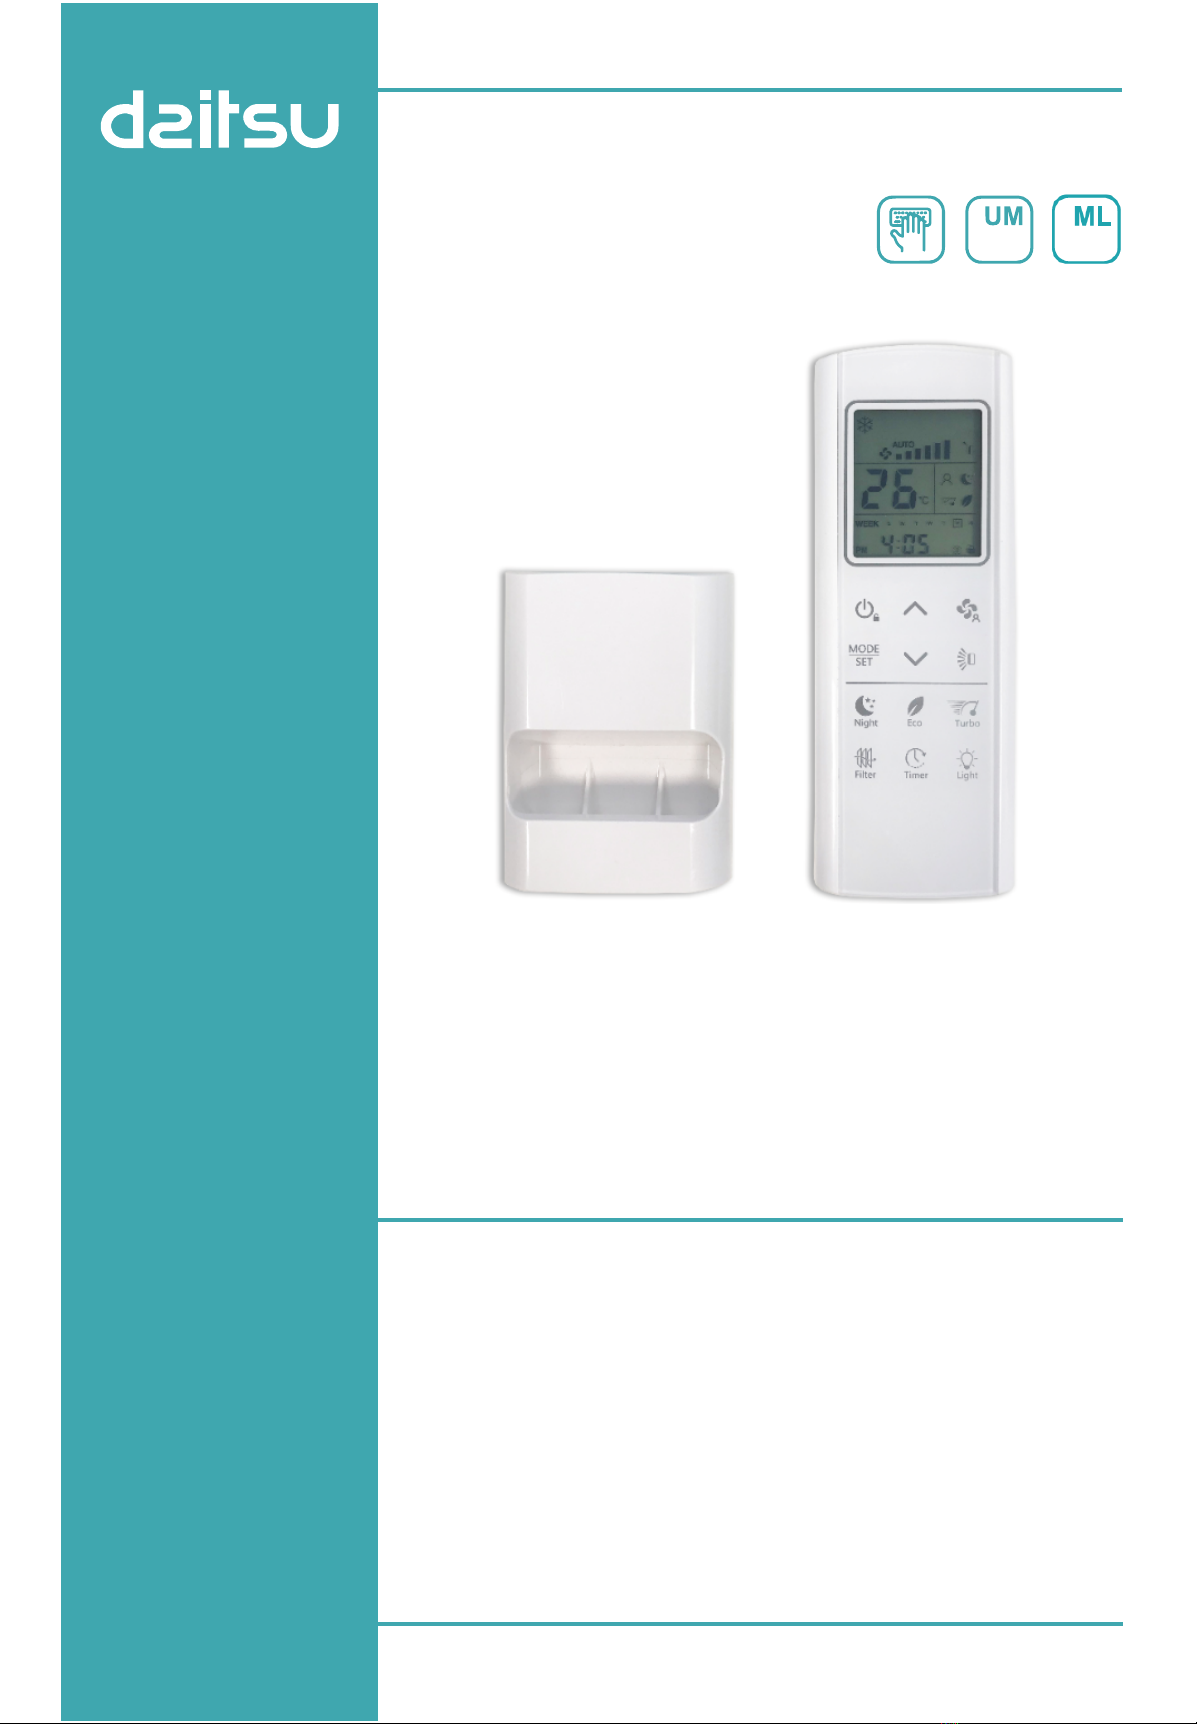
Congratulations, you have just received the latest generation remote control!
This remote control is pre-congured to be paired with the latest generation units.
If your unit does not have the latest software version (you will understand this as the unit will not receive the remote control signal)
you will need to congure the remote control as follows:
1. Insert the batteries into the remote control
2. If the keyboard is locked (symbol lit on the display), unlock the keyboard by pressing and holding the on/off button for 2
seconds until the symbol turns off
3. Hold the button down for 5 seconds until the word ‘02’ appears on the display
The remote control is now congured to work with your unit. This setting is retained even if the batteries are removed.
On the back of these instructions you will nd a summary of the buttons of the new remote control and their use.
Complete instructions for using the new remote control can be found in the unit’s user manual that you can download from the
ofcial website.
Complimenti, hai appena ricevuto il telecomando di ultima generazione!
Questo telecomando è pre-congurato per essere accoppiato alle unità di ultima generazione.
Se la vostra unità non dovesse disporre dell’ultima versione software (lo capirete in quanto l’unità non riceverà il segnale del tele-
comando) dovrete congurare il telecomando come segue:
1. Inserire le pile nel telecomando
2. Se la tastiera è bloccata (simbolo acceso sul visore), sbloccare la tastiera tenendo premuto per 2 secondi sul pulsante on/
off nché il simbolo si spegne
3. Tenere premuto per 5 secondi il tasto nché la scritta ‘02’ appare sul visore
Il telecomando è ora congurato per lavorare con la vostra unità. Questa impostazione viene tenuta in memoria anche nel caso in
cui le pile vengano rimosse.
Sul retro di queste istruzioni troverete uno schema sintetico dei tasti del nuovo telecomando e del loro utilizzo.
Le istruzioni complete per l’utilizzo del nuovo telecomando sono reperibili nel manuale utente dell’unità scaricabile dal sito web
ufciale.
Félicitations, vous venez de recevoir la télécommande de dernière génération!
Cette télécommande est précongurée pour être couplée avec les unités de dernière génération.
Si votre unité ne dispose pas de la dernière version du logiciel (vous comprendrez-le parce que l’unité ne recevra pas le signal de
la télécommande), vous devrez congurer la télécommande comme suit:
1. Insérez les piles dans la télécommande
2. Si le clavier est verrouillé (symbole allumé sur l’afchage), déverrouillez le clavier en appuyant sur le bouton on/off et en la
maintenant enfoncée pendant 2 secondes jusqu’à ce que le symbole s’éteigne
3. Maintenez le bouton enfoncé pendant 5 secondes jusqu’à ce que le mot ‘02’ apparaisse à l’afchage
La télécommande est maintenant congurée pour fonctionner avec votre unité. Ce réglage est conservé même si les piles sont
retirées.
Au dos de ces instructions, vous trouverez un résumé des boutons de la nouvelle télécommande et de leur utilisation.
Vous trouverez des instructions complètes pour l’utilisation de la nouvelle télécommande dans le manuel d’utilisation de l’unité que
vous pouvez télécharger sur le site ofciel.
Herzlichen Glückwunsch, Sie haben gerade die Fernbedienung der neuesten Generation erhalten!
Diese Fernbedienung ist für die Kopplung mit Einheiten der neuesten Generation vorkonguriert.
Wenn Ihre Einheit nicht über die neueste Softwareversion verfügt (Sie werden dies verstehen, da die Einheit das Fernbedienungssi-
gnal nicht empfängt), müssen Sie die Fernbedienung wie folgt kongurieren:
1. Legen Sie die Batterien in die Fernbedienung ein
2. Wenn die Tastatur gesperrt ist (Symbol leuchtet auf dem Anzeige), entsperren Sie die Tastatur, indem Sie die Ein- / Aus-
Taste 2 Sekunden lang gedrückt halten, bis sich das Symbol ausschaltet
3. Halten Sie die Taste 5 Sekunden lang gedrückt, bis das Wort ‘02’ im Display angezeigt wird
Die Fernbedienung ist jetzt für die Verwendung mit Ihrer Einheit konguriert. Diese Einstellung bleibt auch dann erhalten, wenn die
Batterien entfernt werden.
Auf der Rückseite dieser Anleitung nden Sie eine Zusammenfassung der Tasten der neuen Fernbedienung und ihrer Verwendung.
Eine vollständige Anleitung zur Verwendung der neuen Fernbedienung nden Sie in der Bedienungsanleitung der Einheit, die Sie
von der ofziellen Website herunterladen können.
¡Enhorabuena, acaba de recibir el mando a distancia de última generación!
Este mando a distancia está precongurado para ser emparejado con unidades de última generación.
Si su unidad no tiene la última versión de software (lo entenderá porque la unidad no recibirá la señal del mando a distancia), de-
berá congurar el mando a distancia de la siguiente manera:
1. Inserte las pilas en el mando a distancia
2. Si el teclado está bloqueado (el símbolo se ilumina en el visor), desbloquee el teclado presionando y manteniendo presio-
nado el botón de encendido / apagado durante 2 segundos hasta que el símbolo se apague
3. Mantenga presionado el botón durante 5 segundos hasta que aparezca ‘02’ en la pantalla
El control remoto ahora está congurado para funcionar con su unidad. Este ajuste se conserva incluso si se retiran las pilas. En
la parte posterior de estas instrucciones encontrará un resumen de los botones del nuevo mando a distancia y su uso.Las instruc-
ciones completas para usar el nuevo mando a distancia se pueden encontrar en el manual del usuario de la unidad que se puede
descargar del sitio web ocial.
Parabéns, você acaba de receber o controle remoto de última geração!
Este controle remoto é pré-congurado para ser emparelhado com as unidades de última geração.
Se a sua unidade não tiver a versão de software mais recente (você entenderá isso porque a unidade não receberá o sinal do con-
trole remoto), você precisará congurar o controle remoto da seguinte forma:
1. Insira as pilhas no controle remoto
2. Se o teclado estiver bloqueado (símbolo aceso no visor), desbloqueie o teclado pressionando e segurando o botão liga /
desliga por 2 segundos até que o símbolo apague
3. Mantenha o botão pressionado por 5 segundos até que ‘02’ apareça no visor
O controle remoto agora está congurado para funcionar com sua unidade. Esta conguração é mantida mesmo se as pilhas
forem removidas.
No verso destas instruções, você encontrará um resumo dos botões do novo controle remoto e seu uso.
As instruções completas para usar o novo controle remoto podem ser encontradas no manual do usuário da unidade, que pode
ser baixado do site ocial.
+IU
+IU
+IU
+IU
+IU
EN
IT
FR
DE
ES
PT
+IU
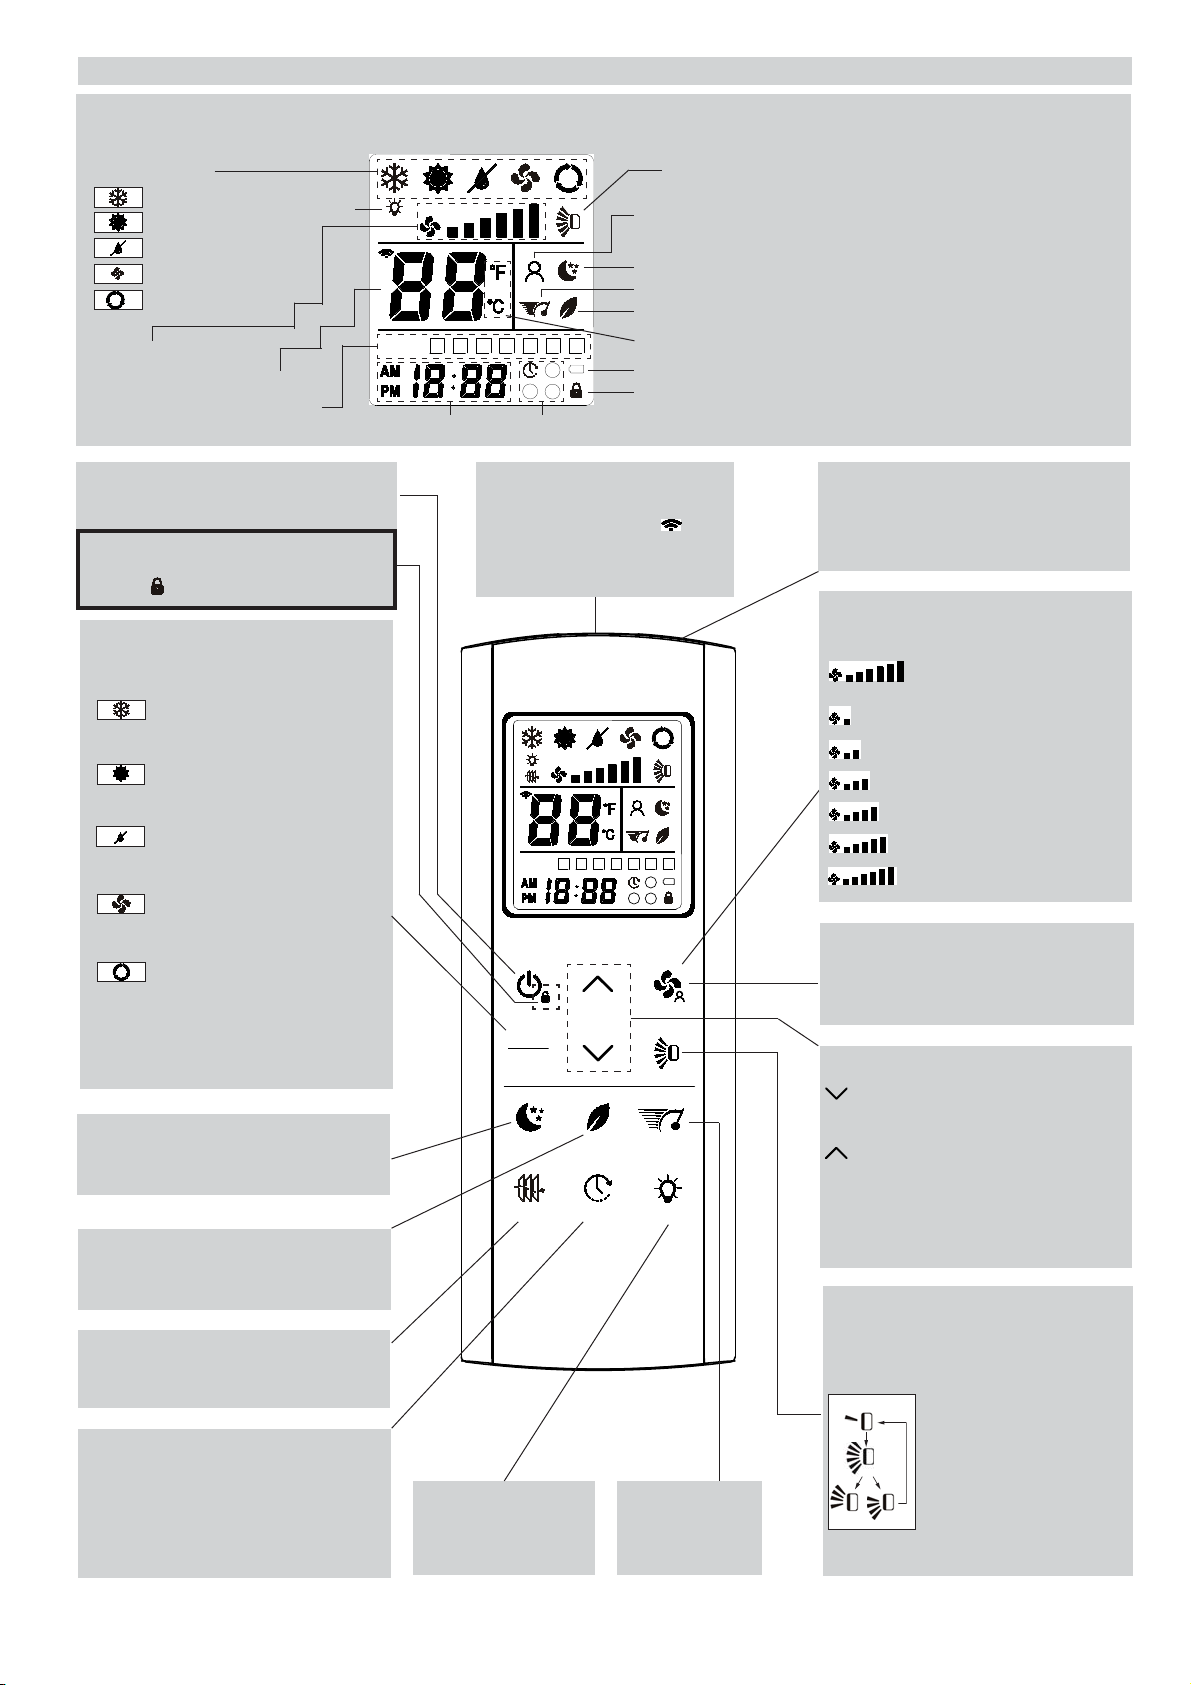
LOCK-UNLOCK
Press for 2 seconds to lock / unlock the
buttons
ON/OFF BUTTON
Press this b utton to turn the air
conditioner ON / OFF.
MODE SELECTOR BUTTON
Press this button to modify the air
conditioner mode.
COOLING
The air conditioner makes the room
cooler.
HEATING (if available)
The air conditioner makes the room
warmer.
DEHUMIDIFYING (DRY)
The air conditioner reduces the humidity
in the room.
FAN
The air conditioner works only as a
circulation fan.
AUTOMATIC
When this setting is selected, the unit
calculates the difference between
the thermostat setting and the room
temperature and automatically switches
to the “cooling” or “heating” mode.
A
REMOTE CONTROL UNIT INSTRUCTIONS
DISPLAY
Information described below is displayed:
Operation mode
Fan speed
I FEEL mode
Night mode
Timer: 3 types + delayed timer
Cooling
Dehumidification
Fan
Automatic
Clock
A
TRANSMITTER
When you press the buttons of the
remote control unit, the mark
appears on the display to transmit
the setting changes to the receiver
in the air conditioner.
CLOK AND TIMER SETTING BUTTON
Press this button in order to select the
desired timer.
Press for 2 seconds to set the timer
For details refer to paragraphs “HOW
TO SET THE PRESENT TIME”, “TIMER
SELECTION”, and “SETTING THE TIMER”.
35*+
9+:
:[XHU
+IU
4OMNZ
,ORZKX :OSKX 2OMNZ
S
1
MWT TFS
AUTO
WEEK
SET
23
A
TEMPERATURE SETTING BUTTONS
(cooler)
Press this button to decrease the set
temperature.
(warmer)
Press this button to increase the set
temperature.
USE THESE BUTTONS ALSO TO SURF
THROUGH TIMER AND PARAMETERS’
SETTING
SENSOR
A temperature sensor inside the remote
control unit detects the room temperature.
(see on the back of the remote control unit)
IFEEL MODE
Press this button for a few seconds to
modify the temperature sensor selection
(from remote controller to air conditioner
and viceversa).
FILTER BUTTON (if present)
Press this button in order to activate the air
ionizer built into the unit
NIGHT BUTTON
Press this button in order to select the
NIGHT mode.
FLAP BUTTON (if present)
Press this button in order to select the
desired flap operation.
Fixed: six position
Continous oscillations
Automatically oscillations
(cooling-heating)
TURBO BUTTON
Press this button
in order to select
the TURBO mode.
ECO BUTTON
Press this button in order to select the ECO
mode.
S
1
MW
TTFS
AUTO
WEEK
SET
23
A
TURBO mode
LIGHT BUTTON
Press this button to turn
the unit display on or off
Days of the week
(from sunday to saturday)
ECO mode
Temperature
FAN BUTTON
Press this button to change the fan speed.
Fan speed is automatically
selected by the unit.
Low speed
Medium/low speed
Medium speed
Medium/high speed
High speed
Very high speed
AUTO
Flap position
Heating
Celsius o Fahrenheit degrees
Low battery
Buttons’ lock active
Light
37.4140.538.00 04/2021

Eurofred S.A.
Marqués de Sentmenat 97
08029 Barcelona
www.eurofred.es
This manual suits for next models
4
Other Eurofred Remote Control manuals

Popular Remote Control manuals by other brands


Panasonic
Panasonic AJRC10G - REMOTE CONTROL UNIT Operation guide

Canon
Canon PR100-R user guide

Magnavox
Magnavox MRU3300 - Universal Remote Control Specifications

Daikin
Daikin BRC1E73 Operation manual

Rugged Computing
Rugged Computing SABRE Series quick start guide

Microchip Technology
Microchip Technology ATAK51005-V1 user guide


