EV-PEAK U4 User manual

www.ev-peak.com
Product Manual
MODEL:U4
Compatible with smart
and non-smart battery

WARNING
INSTRUCTION
Thank you for choosing EV-PEAK balance charger model U4.
This instruction manual could help you install and use properly, so
be sure to read it carefully before operating and keep it in handy
for further reference.
1. Do not put the charger in inappropriate conditions such as direct sunlight, rain, moisture and so on
2. Keep it away from thermal source, high voltage, water, flammable gas, corrosives and so on, be sure to keep it
at the range of recommended temperature 0℃-40℃/32℉~104℉.
3. Keep it horizontally stable to avoid any tilt or shake. And be sure to provide it(around>50cm) with enough
ventilation during operating.
4. Do not put anything or any cover on the radiator or battery during operating.
5. Do not charge any non-rechargeable Lithium batteries with out of specifications.
6. Keep the charger and battery on an anti-flammable and anti-conductive surface, and do not put it on car seat,
carpet and so on to avoid any losses or damages.
7. Do not use any voltage out of the specifications, and provide it with the specified type of battery and number of
battery.
8. Do not charge or discharge any battery that has been damaged physically.
9. Do not plug off the input cable during operating, and plug off timely once charging completed.
10. Please wipe off any object attached to the metal ports with dry cloth.
11. Do not disassemble or modify the charger by yourself.
12. Do not operate it during thunderstorm.
13. Keep children under age of 14 away from the charger.
14. Do not tumble, short-circuit, reverse polarity to avoid damage before connecting.
15. Keep an eye on it during operating.
16. Please use dry powder extinguisher in case in fire, and do not take liquid extinguisher to avoid electric shock.
This charger can charge 2 sets of Lithium batteries simultaneously. The Max output power is 750Wx2.Charging
mode or maintenance mode is selectable. Charging current is adjustable between 10A, 15A and 20A.It also has
over-current, over-charging, over-temperature, safety cut-off, fast-equilibrium and status indicator functions.With
the charger U4 and the charging manager UB4 combined, single charging manager can connect up to 6 sets of
batteries simultaneously. It charges alternately for the 6 sets of battery on basis of charging saturation from high
to low. If the charger U4 connects with 2 charging managers UB4, it can charge 12 sets of battery simultaneous-
ly.With double LCD display equipped, the charger automatically indicates real time charging status, charging
voltage, charging current, charging time, battery capacity and cell voltage.
1
2
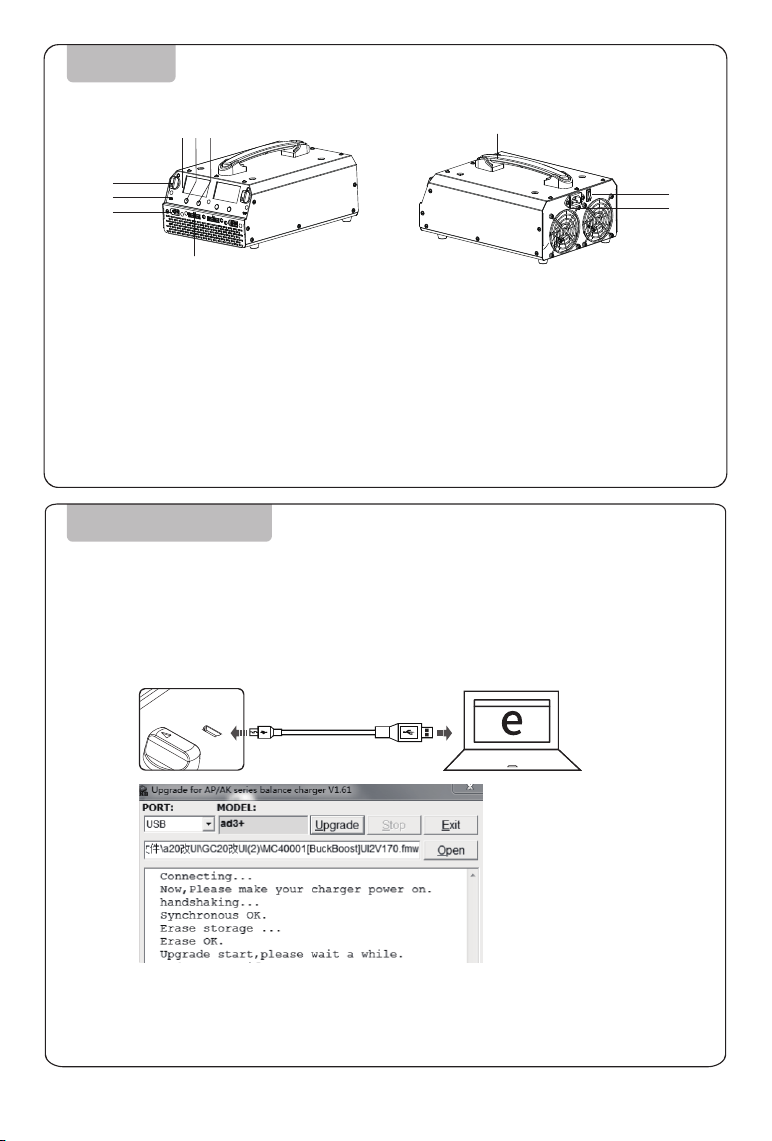
FIREWARE UPGRADE
DIAGRAM
Current Switch
Micro USB
Power Supply
Balance Port
LCD Display
①
②
③
④
⑤
Charge
Storage
Handle
Main Switch
AC Input
⑥
⑦
⑧
⑨
⑩
Please visit EV-PEAK official website to upgrade firmware if needed and follow
the steps as below:
1. Visit EV-PEAK official website www.ev-peak.com
2. Connect the charging manager UB4 to power supply, and the Mini USB cable connect the charging
manager to computer to upgrade.
3. Run the firmware and click “Upgrade” button to upgrade.
4. After upgrade completed, the equipment will restart.
5. If failure to upgrade, please restart steps as above.
①
②
③
⑤⑥⑦
④
⑨
⑩
⑧

3
1. Connect power cable to the charger U4, and to the power
socket(AC100~240V,50/60Hz), and switch on and LED display on.
2. Connect LiPo-12S battery or the charger manager UB4.
AC Input
1. Before connecting, please check carefully whether terminals
and cables are damaged or broken.
2. When using the banana head, be sure to connect it with
right and correct positive or negative indicator.
CONNECTING
Direct Connecting Diagram Charging Manager Connecting Diagram
Charging
Manager
LiPo LiPo
LiPo
LiPo
LiPo
LiPo
LiPo
Adapter cable
1. Startup and Self-Test
2. Operation Modes
3.Setting of Working Current
4.Charging
4
U4 is a dual channel charger with independent output, and with
independent operation interface on each channel, the following takes
one of the channels as example:
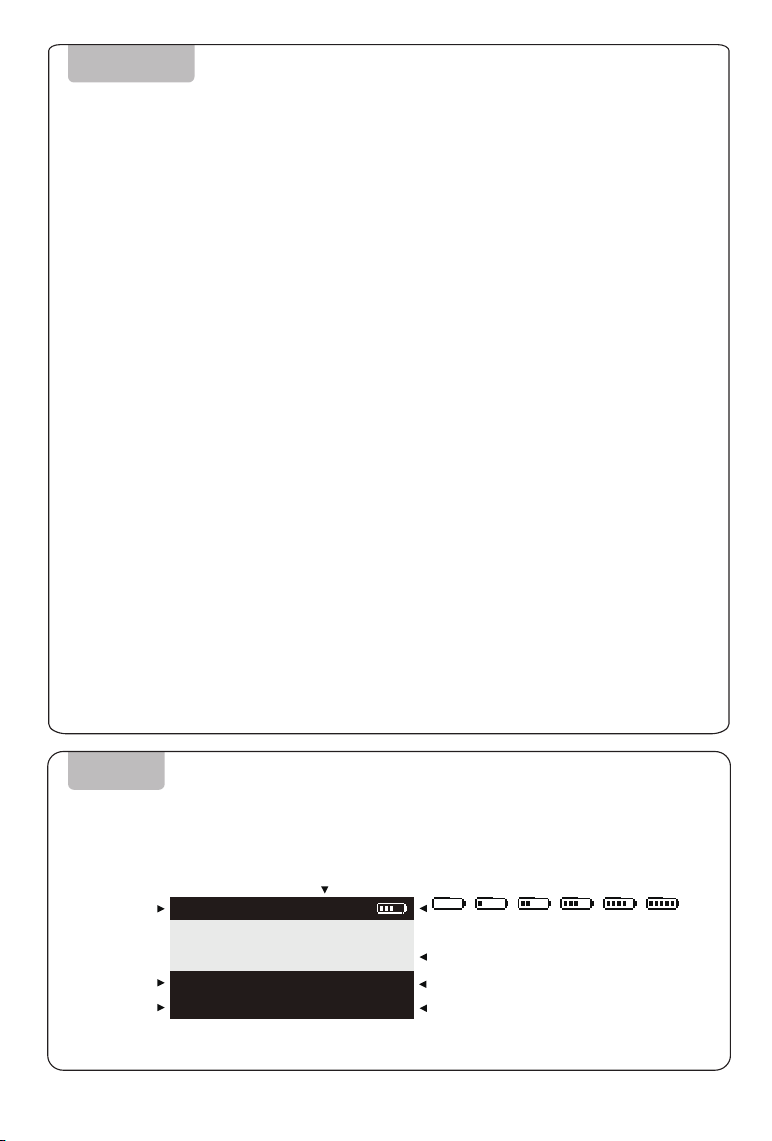
If the charging manager is working, the display will
show the charging channel; if the charging manager is
not working, no information displayed.
Charging/Storage
Standby/Error
Real-time charging
maintenance current
Real-time charging
maintenance voltage
Charging/maintenance time
Battery pack single-cell voltage display
The icon blinks half a second during charging or
maintenance and indicates the ratio of capacity.
When the capacity exceeds 999mAh, the unit of
capacity will be converted to "Ah"
OPERATING
SCREEN
0% 20% 40% 60% 80% 100%
The interface displayed as below:
MODE:CHARGE
CURRENT:
VOLTAGE:
19.9A
50.4V
TIME:
CAPACITY:
25:58
999mAh
1:
5:
9:
0.00
0.00
0.00
0.00
0.00
0.00
0.00
0.00
0.00
0.00
0.00
0.00
NO.12 S
Be sure to connect all the cables correctly, and switch on and LCD display lights up, and the buzzer is
on, the charger completes startup and self-test process after the buzzer sounds.
The charger has both charging and discharging mode. Users choose appropriate and different modes based
on different needs. After the charging manager connected, the main charger automatically detect and
switch to working mode. The charger works coordinately with the charger manager to any command.
Working Mode: Under working mode, battery can be balance charging quickly.
Maintenance Mode: While the battery is in idle for a long time, it is recommended to run maintenance
(based on specification of the battery) every 15 days; During daily use, to run maintenance if battery life
significantly declines or cell balance is more than 50mV; Under maintenance mode, the charger balance
charges or discharges battery with a small current to adjust cell voltage to 3.84~3.86V.
Continuous Working Mode: After the charging manager connected, the charger automatically detect and
switch to continuous working mode.
Tips: Under continuous working mode, the charger automatically run a series of
operations, which come from intelligent instructions of the charger without
manual intervention, including stopping, testing, switching and so on.
Turn the current switch to do the current setting based
on battery capacity and practical needs.
Long press charge button more than 2 seconds to charging mode.
1. Red light on, the charger is charging battery, and LCD display indicates real time charging status.
2. Green light on, charging finished.
3. Press any key to stop charging.

5
When the wrong use of charger or failure, the charger will
prompt an error message! As shown below:
ERROR!
Error Error
REVERSE POLARITY BATTERY HIGH
VOLTAGE
REVERSE POLARITY
PROCESS INTERRUPTED
OUTPUT SHORT CIRCUIT
INPUT VOLTAGE ERROR
CHARGER FAILURE
BATTERY LOW VOLTAGE
BATTERY HIGH
VOLTAGE
CELL LOW VOLTAGE
CELL HIGH VOLTAGE
CELL CONNECT ERROR
CHARGER OVERHEATING
OVER POWER
MAX CURRENT
SAFETY TIMER
MAX CAPACITY
MAX EXT.TEMP
......

6
SPECIFICATIONS
100-240V~11A 50/60Hz
750W/CH×2
LiPo、Smart battery
12S
Dual channel
(12 channels with 2 charging managers combined)
±20mV
Overcurrent
Overvoltage, Undervoltage, Short circuit,
Over temperature, Reverse polarity
0℃-40℃/32℉~104℉
Forced air cooling
USB
288×203×145mm
3.05kg
Max 50.4V Max 20.0A
AC Input
DC Output
Output Power
Type of battery
Number of batteries
Channel
Balance accuracy
Input protection
Output protection
Working temperature
Cooling system
Upgrade
Size
Weight
Note: The product specifications mentioned in this manual are for
reference only and are subject to change without prior notice.
Thank you for purchasing EV-PEAK charger. We do out best to provide you with timely support. Do not
hesitate to contact us whenever you have issue with EV-PEAK charger.
1. The deadline of warranty is subject to the date on which EV-PEAK receive the item.
2. We provide you with one year warranty from purchase date for manufacturing defects; if in some case, the
purchase date can’t be provided, it is subject to the recording date from EV-PEAK.
3. Beyond one year from purchase date, it depends it charge a portion of fees, besides the shippings back and
forth.
4. Please provide your contact information in detail to contact you timely after warranty.
Disclaimer:
1. Damage caused by wrong connecting out of specifications.
2. Damage caused by wrong operations against instructions.
3. Damage caused by intended or accidental bump and force majeure.
4. Damage caused by disassemble and modify by yourself.
5. Internal damage caused by moisture,soaking, dust and so on.
6. External body aging, scratches and so on.
1. This charger is not designed to use for people who has physical,
sensory or mental disabilities or lack of related experience and
knowledge.
2. Please take care of children and be sure to keep children away from
it while charging.
3. Please turn off the power to avoid any possibility of electric shock if
the surface is broken.
4. The charger is for indoor use only.
Attention: Any expense exceeding product cost shall not be borne by EV-PEAK, and
EV-PEAK reserves any right to modify and explain these clauses.
7
SUPPORT AND WARRANTY
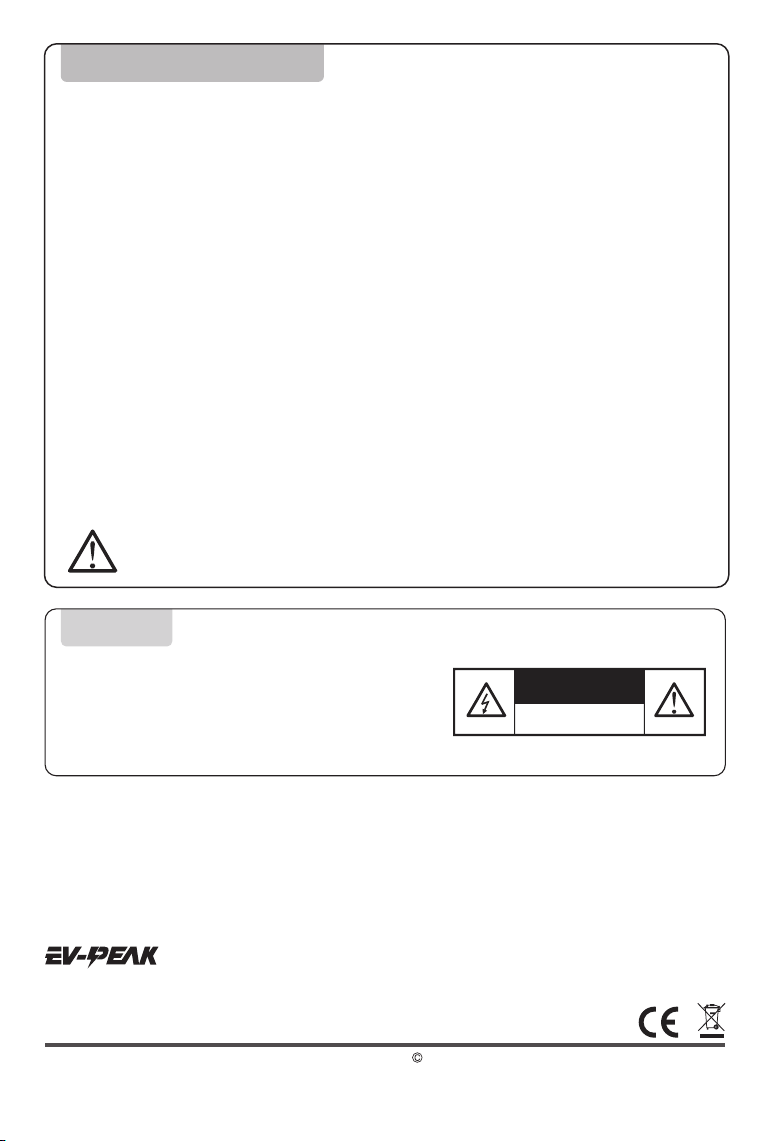
WARNING!
RISK OF ELECTRIC SHOCK
DO NOT OPEN!
Shenzhen EV-PEAK Electronic Technology(HK)Co.ltd.
www.ev-peak.com
The product specifications and information mentioned in this instruction manual are for
reference only and are subject to change without prior notice.
Copyright Shenzhen EV-PEAK Electronic Technology(HK)Co.ltd.
WARNING!
Table of contents
Other EV-PEAK Batteries Charger manuals


Popular Batteries Charger manuals by other brands

SMARTOOOLS
SMARTOOOLS MC2 STICK quick guide

Texas Instruments
Texas Instruments bq24735 user guide

Priorit
Priorit PRIOCAB-Li EI90 Assembly and operating manual

Limitless Innovations
Limitless Innovations ChargeHub X3 user manual

ATESS
ATESS EVD-60D user manual

VOLTCRAFT
VOLTCRAFT DAPS-4000/4+ operating instructions


