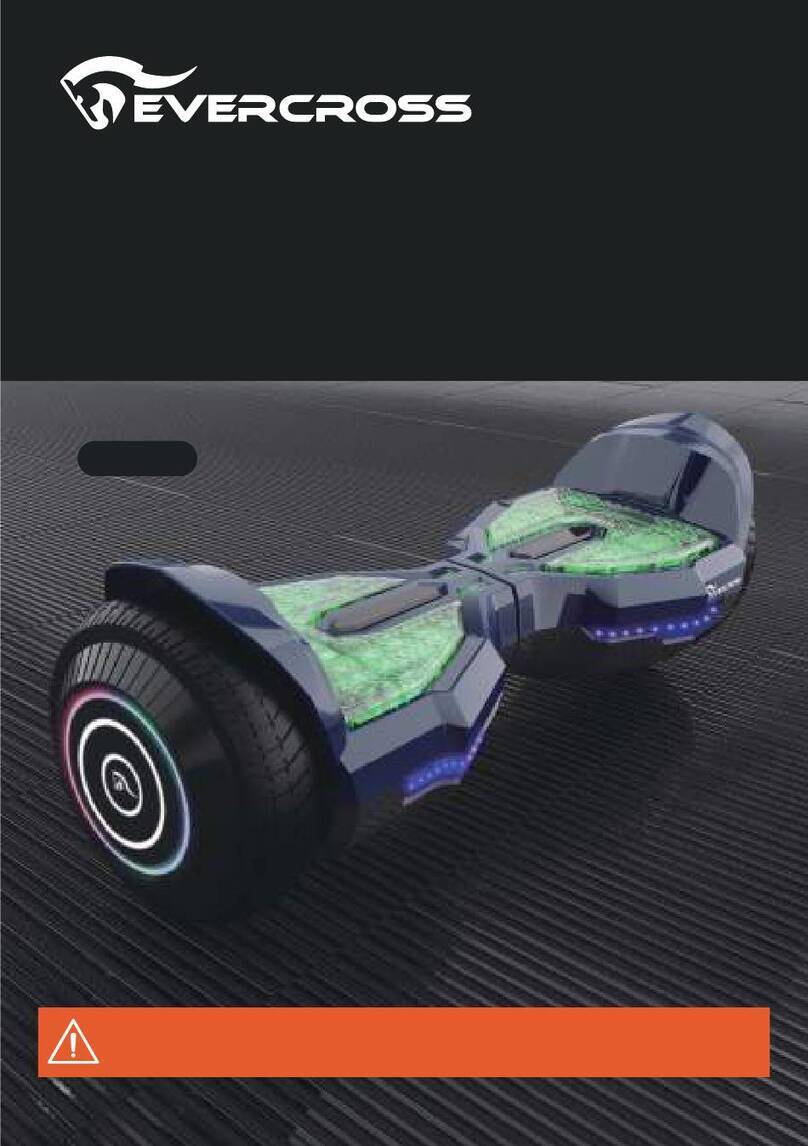
EVERCROSS XP9 User manual

CORRECT FITTING:
Make sure your helmet
covers your forehead.
INCORRECT FITTING:
Forehead is exposed and
vulnerable to serious injury.
2
HELMETS
SAVE LIVES!
Always wear a properly fitted helmet that complies with safety
standards when you ride your hoverboard.

3
In order to avoid dangers that are caused by collisions, falls, and loss
of control, please learn how to ride the hoverboard safely.
• You can learn operating skills by reading the product manual and
watching videos.
• This manual includes all operating instructions and precautions, and
users must read it carefully and follow the instructions.
• All users are responsible for any consequences caused by violating
warning contents or prompt operations.
1. Use only the supplied charger with this hoverboard.
2. Do not ride on icy or slippery surfaces.
3. Read the user manual and warnings before riding.
4. Store the hoverboard in a dry, ventilated environment.
5. When transporting the hovrboard, avoid violent crashes or impact.
PLEASE READ THE USER MANUAL THOROUGHLY.
This manual applies to the EVERCROSS Hoverboard.
ATTENTION
Failure to follow the basic instructions and safety precautions listed
in the user manual can lead to damage to your device, other property
damage, serious bodily injury, and even death.
WARNING!
Thank you for choosing and buying our EVERCROSS Hoverboard.It
is important to us that our customers are safe in driving with our
Hoverboard. Only then you can enjoy the driving pleasure free of
worries. You need to know exactly how your hoverboard works.
Hence practicing is important. This is the only way will to acquire safe
driving skills, and to continually develop your sense of driving.

OPERATING PRINCIPALS
4
The device uses digital electronic gyroscopes and acceleration sensors
to control balance and motion, depending on the user's center of gravity.
The device also uses a control system to drive the motors that are
located within the wheels. The device has a built-in inertia dynamic
stabilization system that can help assist with balance when moving
forward and backwards, but not while turning.
WARNING
Any hoverboard that does not work properly can cause
you to lose control and fall. Inspect the entire device
thoroughly before every ride, and do not ride it until any
problems have been corrected.
SPECIFICATIONS
Model XP9
Dimensions (packing) 605 x 220 x 560 mm
Dimensions (product) 584 x 186 x 178 mm
Net weight (Product) 6.5kg (14.3lbs) (hoverboard)
Gross weight 14kg (30.9lbs) (hoverboard + hoverkart)
Load capacity Min.20 kg (44lbs) - Max.100 kg (220lbs)
Max.speed 15 km/h (9.3 mph)
Max Incline Angle 15°
Wheel Size 6.5 Inches
Tire Type Non-Pneumatic Solid Tires
Working temperature -10 °c -+45 °c
Battery charger Input 100 - 240 V, 50/60 Hz, 1.0 A
Battery charger Output 29.4 V 1000mA
Battery Type 25.2V 4.0AH, Lithium-ion Battery
Bluetooth Speaker V2.0 with stereo sound quality
Warm Tips: The above datas may vary depending on riding conditions,
rider weight, climate, and/or proper maintenance.

1 - Charge Port 2 - Power Button
3 - Non-Pneumatic Solid Tires
4 - Foot Mat
5 - LED Light
6 - Power/Battery Indicator
7 - Warning Indicator
8 - Charging Adapter
9 - Power Cord & Plug 10 - User Manual
10
9
8
2
476
3
5
1
5
PACKAGE CONTENTS
• 1 x EVERCROSS Hoverboard
• 1 x Hoverboard Seat Attachment
• 1 x Charge Adapter
• 1 x Instruction Manual
FEATURES/PARTS

HOVERBOARD SEAT ATTACHMENT
1. Seat
2. Handle Bar (R)
3. Pedal Mounts
4. Adjustable Strap
5. Handle Bar (L)
6. Frame Base
7. Twist Knob
8. Frame Extension
9. Foot Rests
10. Swivel Wheel
SPECIFICATIONS
Compatibility: Most of Self-Balancing Scooters and Hoverboards
Max Load: See max load of your self-balancing scooter
Max Speed: See max speed of your self-balancing scooter
Seat Material: PP
BOX CONTENT
CONTENTS
1x Frame (2 parts)
1x Adjustment knob
1x
2x
2x Handles 1x Kart seat
A.4x B.4x C.4x
2x Velcro
①
②
⑨⑩
③
⑤
⑥⑦
⑧
④
6

7
SAFETY GUIDE
OPERATION INSTRUCTIONS:
HOVERBOARD SEAT ATTACHMENT
MANUAL
It will take you a couple of minutes to control this kart kit. Please be
careful if you are a starter.
We are responsible for the product's quality. If any physical injury or
property loss is caused by wrong operation, we won't be held
responsible.
1. Pushing forward both left and right handle makes the Kart Kit go
forward.
2. Pulling back both left and right handle makes the Kart Kit go
backward.
3. Pull back left handle, the kart kit will turn left.
4. Pull back right handle, the kart kit will turn right.
(Note: Before switching it on, adjust the handles to make sure scooter
at horizontal level, to avoid fast moving forward once it turns on. Before
switching it off, lift the kart to make scooter in state of no burden, then
turn it off).
1. This product is based on the self-balancing scooter. And the speed
limit is 12KM/H. Please slow down before hearing the alarm sound.
2. For yours and others’ safety, please don’t either accelerate the kart
kit to high speed suddenly or stop suddenly.
3. The safety speed is 10KM/H. When the speed is over 12km/h, the
kart kit will be out of control for 0.3-0.5s and user can’t apply the
brakes immediately.
4. The MAX load of this kart kit is 100kg .
5. People less than 12 year-old and over 60 year-old are not allowed to
use the kart kit.
6. Please do not ride this kart kit at rainy days or on wet ground.
7. Please do not ride on a slope (over 15°).
8. This device is only for entertainment. Please follow local laws and
regulations.
9. Please do not ride it in crowded place.
10. Teenagers are not allowed to ride the kart kit without adult
companion.

ASSEMBLING SEAT ATTACHMENT
8
If you have questions or concerns about any of these steps, please feel
A representative will be in touch to walk you through these steps.
Carefully follow the steps shown on the following pages for assembling
the Hoverboard Seat Attachment.
Take out and open accessories box. Ensure all contents from the ‘Parts
List’ section are accounted for.
1. Mount the handles on the frame on both sides with the nuts A and
bolts B
2. Now fasten the adjustment knob into the frame and feet frame
B
BA
A
B
B
A
A
Links

3. Mount the seat on the frame.
4. Your XP9 HOVERBOARD SEATATTACHMENT is now completely
assembled and should look like the below image.
INSTALLING YOUR XP9 HOVERBOARD
Carefully follow the steps shown on the following pages for assembling
the Hoverboard with Seat.
Your Hoverboard Seat Attachment must be completely assembled
before installing it onto your XP9 Hoverboard. Please refer to the ‘
ASSEMBLING YOUR XP9 HOVERBOARD SEAT ATTACHMENT’
section for assembling procedures.
9

10
1. As shown in the figure below, install 4 sensor foam pads under the
pedal bracket. Place the pedal mounts onto the foot pedals of your
self-balancing scooter with the front wheel facing forward. Ensure the
pedal mounts are centered on the foot pedals of your scooter as much
as possible. Ensure the foam pads are attached to the bottom of the
pedal mounts so that the seat does not touch the footpad sensors on
the hoverboard.
2. Secure your Seat Attachment to your hoverboard using adjustable
velcro straps. With the velcro side facing away from your scooter, attach
one hook of each adjustable strap to the back of each pedal mount.

11
3. Wrap both adjustable straps under your hoverboard and attach the
ends to the hooks on back of each pedal mount.
4. WARNING: Do not over tighten straps when you are assembling your
seat attachment to your hoverboard. Ensure that the seat attachment is
securely attached to the hoverboard. See below diagram for correct
fitting.
5. Your Hoverboard Seat Attachment should be properly installed onto
your EVERCROSS XP9 as shown below.
Small foam pad

BEFORE RIDING & RIDING YOUR
HOVERBOARD
12
OPERATING THE DEVICE
FIRST USE OF THE HOVERBOARD
CHARGING THE BATTERY
What you need to know for the optimal operation of our device, you
can read here. You will get important information about how to best
and easiest handle our device. Please note: For your safety and a
long service life of your device, it is important that you observe these
instructions at all times.
• Please slowly take our device and the accessories from the packaging.
• Check whether the content in the package is really complete and
without defects. If the contents are incomplete or have defects, do not
use the device. Rather please contact your dealer immediately.
• For the disposal of the packaging material, please observe the
applicable legal regulations.
• Please keep the packing material in case you wish to store, ship or in
other ways transport the device. Please keep it out of the reach of
children when stored.
Danger of suffocation. Children like to play with packing material
and consider it a toy. Bags, plastic films and polystyrene are
dangerous though: A child can suffocate from these. Therefore:
Always safely store away your packaging material from children.
Danger of injury. Do not use our device if the battery power is
less than 15 %. This will prevent damage to the battery and to
your device. Please immediately charge your battery fully.
We recommend that you charge your battery completely as a
matter of procedure.

Do not connect the charger (8, 9) if you detect signs of
moisture on the charger port (1).
• The charger port (1) is next to the on / off button (2).
• Please connect the charger cable (8) to the mains cable (9).
• Now connect the charger cable (8) to the charger port (1).
• Please connect the mains cable (9) to a power socket. Please pay
attention to the notes on the type plate of the charger (8, 9).
Indicator light is green: charging is complete or charger (8, 9)
cannot be connected. Indicator light is red: Device is charging.
9
8
2
1
13

DRIVING WITH THE EVERCROSS HOVERBOARD
Direction of travel Execution
Drive faster / Move
forward. Move your body’s centre of gravity / weight forward.
Slow down / reverse. Move your body’s centre of gravity / weight backwards.
Steer to the right.
Steer to the left.
Please move your body / weight to the right.
Please move your body’s centre of gravity / weight to
the left.
Stop Move the body‘s centre of gravity to the middle, evenly
distributed on both feet.
If you use our device, this may also be hazardous. Therefore:
Learn more about our device little by little. Allow yourself enough
time to exercise.
Practice getting on and getting off our device together with an
acquaintance or the parents, until you are able to master this with
ease.
You must place your feet on the designated foot pads (4) at the
same time. Please do this almost simultaneously. Otherwise, our
device will turn very quickly in one direction. You could fall and get
injured.
• Please press the power button (2) to activate or deactivate the product.
• Place your left foot on the left foot pad (4) if you get on the board with
your left foot first. If you get on the board with the right foot first, please
place it on the right foot pad (4). Then you must be swift to place the
respective other foot on the foot pad (4). To get on the Hoverboard with
both feet at once can also be done of course, however this requires
great skill.
• When you have assumed a safe body position, you can control the
device by moving your body or your weight. (Fig. 2). Please refer to the
table below for control. Attention: Please do not lean too much in one
direction.
14

Our Hoverboard does not have a brake mechanism. If you wish to
reduce speed, you must slowly move your body‘s centre of gravity /
your weight backwards.
Please only get off the device in backwards direction. Should you
get off in forward direction, your body‘s centre of gravity / weight
will be moved forward. Then the device will perform an extra thrust
forward. The board will stop you from getting off.
Please remember: Never get off the Hoverboard at the highest
speed. Gradually reduce the speed. Please always get off in
backwards direction.
Please refrain from any hasty turning. At high speeds this is a great
danger.
15

BATTERY INDICATOR WHILE CHARGING:
(Hoverboard) Yellow LED light flashing indicates battery is charging.
(Charger) Red LED light charging is not finished.
(Charger) Green LED light charging is finished.
BATTERY INDICATOR WHILE RIDING:
Green LED light indicates from 100 % to 25 % electricity.
Green LED light flashing indicates from 25 % to 15 % electricity.
Red LED light flashing with a sound indicates electricity from
under 15%.
Please do not use the Hoverboard. Please charge the battery.
16
CONTROLS AND DISPLAY
PLEASE READ THE FOLLOWING INSTRUCTIONS CAREFULLY
TURNING YOUR DEVICE ON/OFF
Power On: Take your device out of the box and place it flat on
a level surface. Press the power button once. Check the battery
LED indicator. The battery indicator light should be lit, indicating
the device is powered on.
Power Off: Press the power button once.
MAT SENSOR
There are four sensors under the foot mats on your XP9 Hoverboard.
When riding the hoverboard, you must ensure you are
stepping on the foot mats. Do not step or stand on any other area of your
hoverboard.
Do not put items on the foot mats. Doing so will make the
XP9 turn on, and increase the probability of collision and cause injury to
people, riders, or damage the device.

17
CHARGING YOUR HOVERBOARD
Your XP9 Hoverboard comes with a built-in lithium ion battery pack.
Be sure to charge the battery in a clean, dry location away from
direct sunlight, flames or sparks.
• Initial charge time: 6 hours.
• Recharge time: up to 2-4 hours.
• Please use only the original charger provided.
• Always charge the battery immediately after riding. Failure to recharge
battery periodically may result in a battery that will not accept a charge.
• The charger supplied with the XP9 should be regularly examined for
damage to the cord, plug, enclosure and other parts. In the event of such
damage, the Hoverboard must not be charged until it has been repaired
or replaced.
• It has built-in overcharge protection to prevent battery from being
overcharged.
Note: If the charger gets warm during regular use, this is a normal
response and is no cause for concern.
CHARGER
NOTE:
Wall outlet - Green (stand by)
Wall outlet and Hoverboard - Red
(charging)
Wall outlet and Hoverboard - Green
(charged)
1. Plug the charger plug into
wall outlet. The light on the
charger should be green.
Note: If green light (LED)
does not turn on, try a
different outlet.
2. Plug the charger into the charger
port on the XP9 Hoverboard. The
light on the charger should turn yellow
during charging. The light will turn
green again when charging is
complete.
(Note: Charger design may vary from one shown)

CLEANING & MAINTAIN THE
HOVERBOARD
Please deactivate the device. If you wish to clean the device, remove
the plug of the charger from the power socket. Now let all parts cool
down completely.
• When cleaning the appliance, do not use solvents or abrasive
cleaners. Please do without coarse and hard brushes. Objects, such as
from metal, which have hard edges, leave scuffs on the device.
• Should you wish to clean the charger and the Hoverboard, use a
slightly damp cloth. Please ensure that subsequently all parts are
rubbed dry with a cloth.
18
Please ensure that our device is not immersed in water or any
other liquid. The appliance must not come into contact with
running water. Otherwise there is a risk of electric shock.
Our device contains a Li-Ion battery, which can not be
removed. These batteries are subject to certain conditions
during transportation. They may only be transported if the local
laws permit this.
Please keep our device in a place that is clean and dry. Children
must not have access. The best thing to do is to store our device
in its original packaging.
• If you wish to transport our Hoverboard and its accessories, please
make sure it is deactivated and cooled down fully. We would advise that
you always use the original packaging for transport or a carrying bag.
• Our device must be protected against impacts and vibrations.
Especially when you transport it in a vehicle.
STORAGE AND TRANSPORT

19
BLUETOOTH SPEAKER
The XP9 Hoverboard has a powerful built-in wireless speakers so
you can play your music while riding.
1. Ensure your XP9 Hoverboard is turned off. If it is not, please turn it off
first before pairing.
2. Turn on your XP9 and the speakers will announce that it’s waiting for
a Bluetooth connection. This will indicate your XP9 speaker is now in
pairing mode.
3. Place the XP9 and the Bluetooth device to which you would like to
pair it within the operating distance. We recommend keeping the two
devices no further than 3 feet apart during pairing.
4. Ensure Bluetooth is enabled on your phone or music device. Refer to
manufacturer’s instructions for how to enable Bluetooth on your device.
5. Once you have activated Bluetooth on your device, select the option
from the list of available Bluetooth devices.
6. Please note, pairing mode on the XP9 will last for two minutes. If no
devices are paired after two minutes, the XP9 speaker will automatically
return to standby mode.
7. If pairing is unsuccessful, turn off the XP9 first and repair following the
aforementioned steps.
NOTE: Once you have paired the XP9 speaker with a device, the
speaker will remember this device and will pair automatically when the
device’s Bluetooth is activated and in range. You can reconnect a
previously paired device without going through the pairing or PIN
process on up to two devices.
Once the XP9 Bluetooth speaker is paired to your device, you can
stream music wirelessly through it. Select the track you wish to listen to
on your device to listen via the speakers. All volume and track controls
will be made using your music device.
PAIRING THE SPEAKER
LISTENING TO MUSIC

20
CALIBRATE YOUR HOVERBOARD
Many problems that surfaces are due to misconfigurations on the gyro
board. Most often they are off balance and in that state your hoverboard
does not know if you’re on a flat surface, going up/downhill or even if you
are standing on it or not.
There are numerous more problems that can be helped with a
re-calibration of your board and we highly recommend everyone that
has a problem with their hoverboard to test calibrating it first, before
you start looking at repair options like changing your motherboard or
the altitude/gyro boards.
STEP-BY-STEP GUIDE TO CALIBRATING YOUR
HOVERBOARD IN 10 SECONDS.
-Make sure your hoverboard is standing on a flat surface and with
both upper LED-indicators in level with each other.
-Press the power button and keep it depressed.
-Your hoverboards front LED-lights will flash fast 5 times before it
starts blinking with a longer interval.
-Release the button and restart your hoverboard.
• The hoverboard is shaking when you mount it or go uphill. This
happens more often if it’s kids who are using the hoverboard, due to
their low weight the gyros have a hard time keeping you in balance if
they are not correctly configured.
• It might beep when you start it but won’t let you take off.
• You have the hoverboard in perfect balance but it still wants to spin
around.
• When you ride the hoverboard straight it draws to the left/right.
Here are some very common problems that can be fixed by recalibrating
your hoverboard.
You’re done calibrating the gyro boards and your hoverboard is now
perfectly leveled. It now knows in what direction you’re riding and what
incline it’s currently going in. The best thing about a calibration problem
is that it’s easy to complete and you can do it wherever you are.

SAFETY PRECAUTIONS
The first rule in safe riding is to use common sense. A scooter is
vulnerable; it cannot protect you in a crash, against impact, or loss of
control the way driving a car can. It does not have bumpers or airbags
as a car does. This section is a guide of safe riding practices for on
and off-road operation. Make sure you are using your XP9 Hoverbaord
properly.
Different localities and countries have different laws governing riding
on public roads, and you should check with local officials to ensure you
are complying with these laws.
XP9 Hoverboard is not liable for tickets or violations given to riders
who do not follow these regulations.
When you ride in low-visibility conditions such as fog, dusk, or
night, you might be difficult to see, which could lead to a
collision. In addition to keeping your headlight on, wear bright,
reflective clothing when riding in poor lighting conditions.
• For your safety, always wear a helmet that meets safety standards.
In the event of an accident, a helmet can protect you from serious
injury and in some cases, even death.
• Obey all local traffic laws. Obey red and green lights, one-way
streets, stop signs, pedestrian crosswalks, etc.
• Ride defensively; expect the unexpected.
• Give pedestrians the right-of-way.
• Do not ride too close to pedestrians and alert them if you intend to
pass them from behind.
• Slow down at all street intersections and look to the left and right
before crossing.
Think about safety when you ride. You can prevent many accidents if
you think about safety. Below is a helpful checklist for Compact riders.
WARNING
21
Table of contents
Other EVERCROSS Hoverboard manuals
