Everest EBB23 User manual

Owner’s Manual for models:
Back Bar Coolers
24" Deep Back Bar Coolers
24" Deep Galss Door Back Bar Coolers
Glass Door Back Bar Coolers
24" Deep Galss Sliding Door Back Bar Coolers
EBB23, EBB48, EBB59, EBB69, EBB90
EBB48-24, EBB59-24, EBB69-24, EBB90-24
EBB23G, EBB48G, EBB59G, EBB69G, EBB90G
EBB48G-24, EBB59G-24, EBB69G-24, EBB90G-24
EBB48G-SD, EBB59G-SD, EBB69G-SD, EBB90G-SD
www.EVEREST .ref
com
Thank you for choosing EVEREST
A Step Above the Standard
ISO-9001
US
R
C

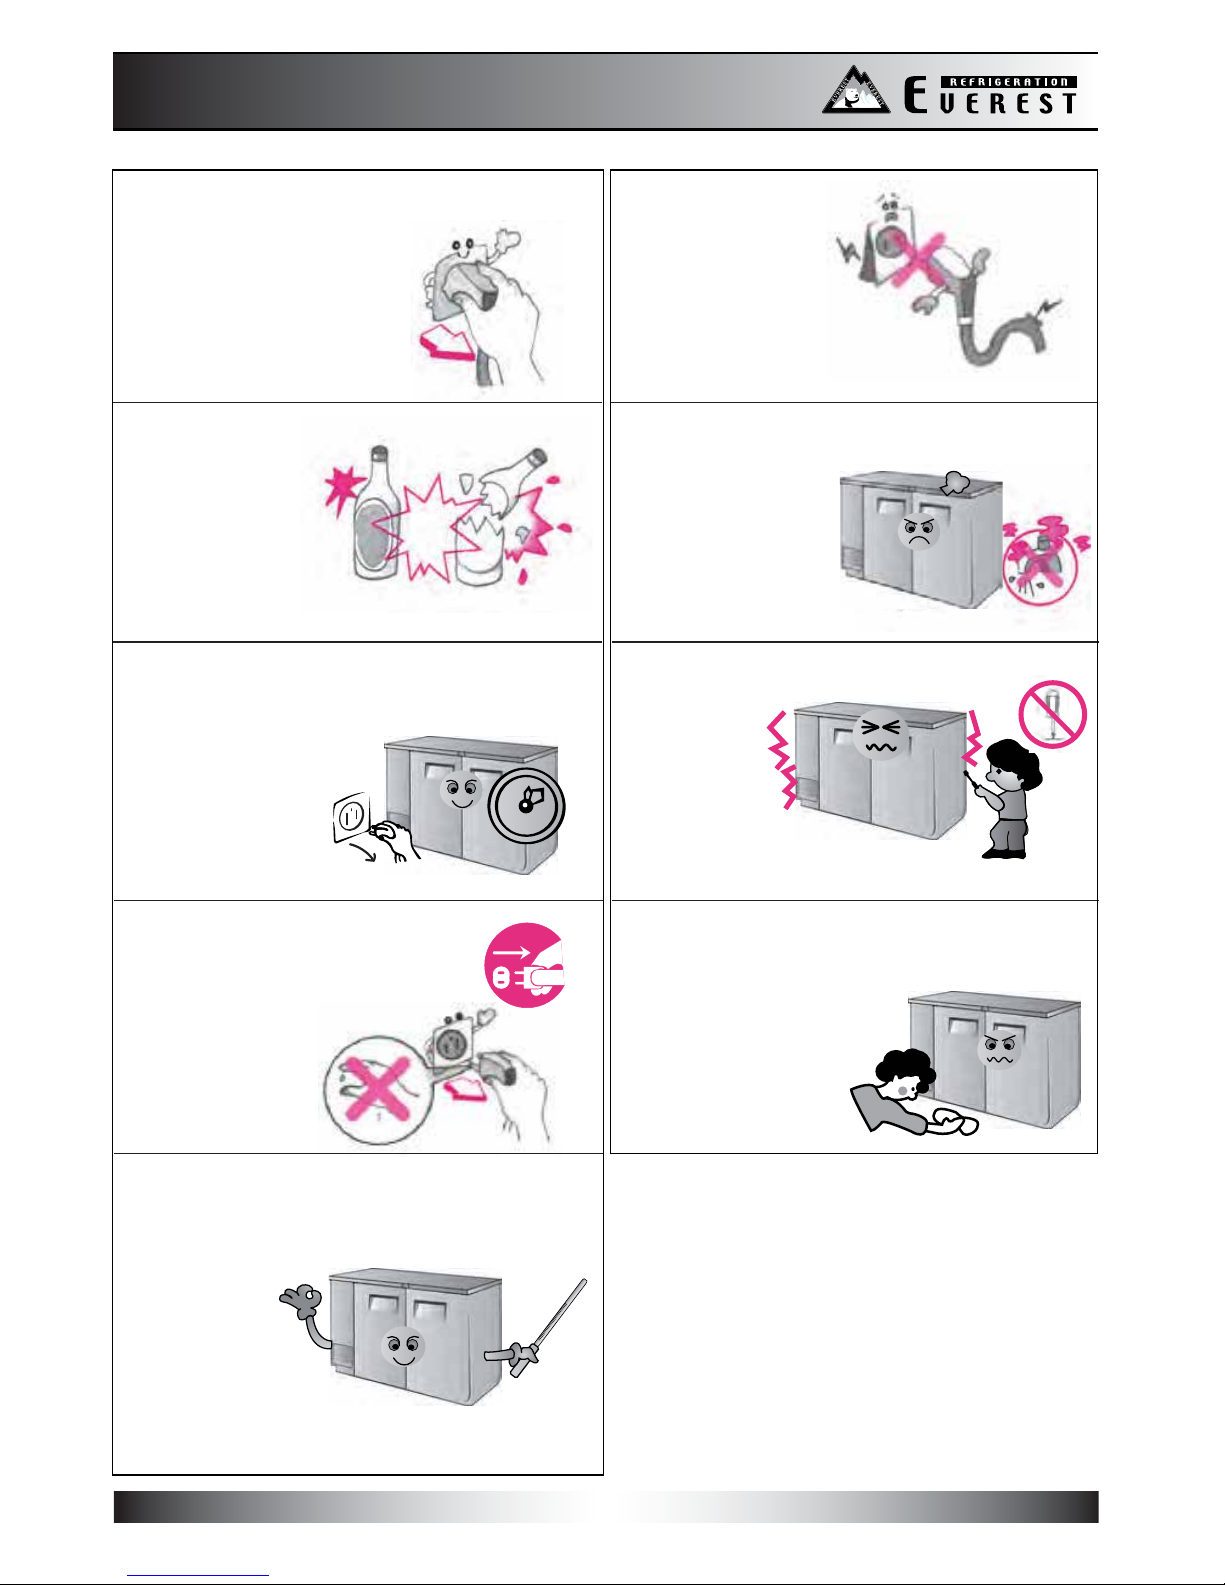
When installing the unit, be careful that the
electrical cord is not under the unit or
pressed against the wall.
This could cause a
damage to the cord.
time, make sure the unit
is free from all packaging.
Packaging left
on the unit
during
operation may
To prevent electrical shock, please do
not plug or unplug the cord
with wet hands.
WARNING - When using your appliance, always follow basic precautions, including
the following :
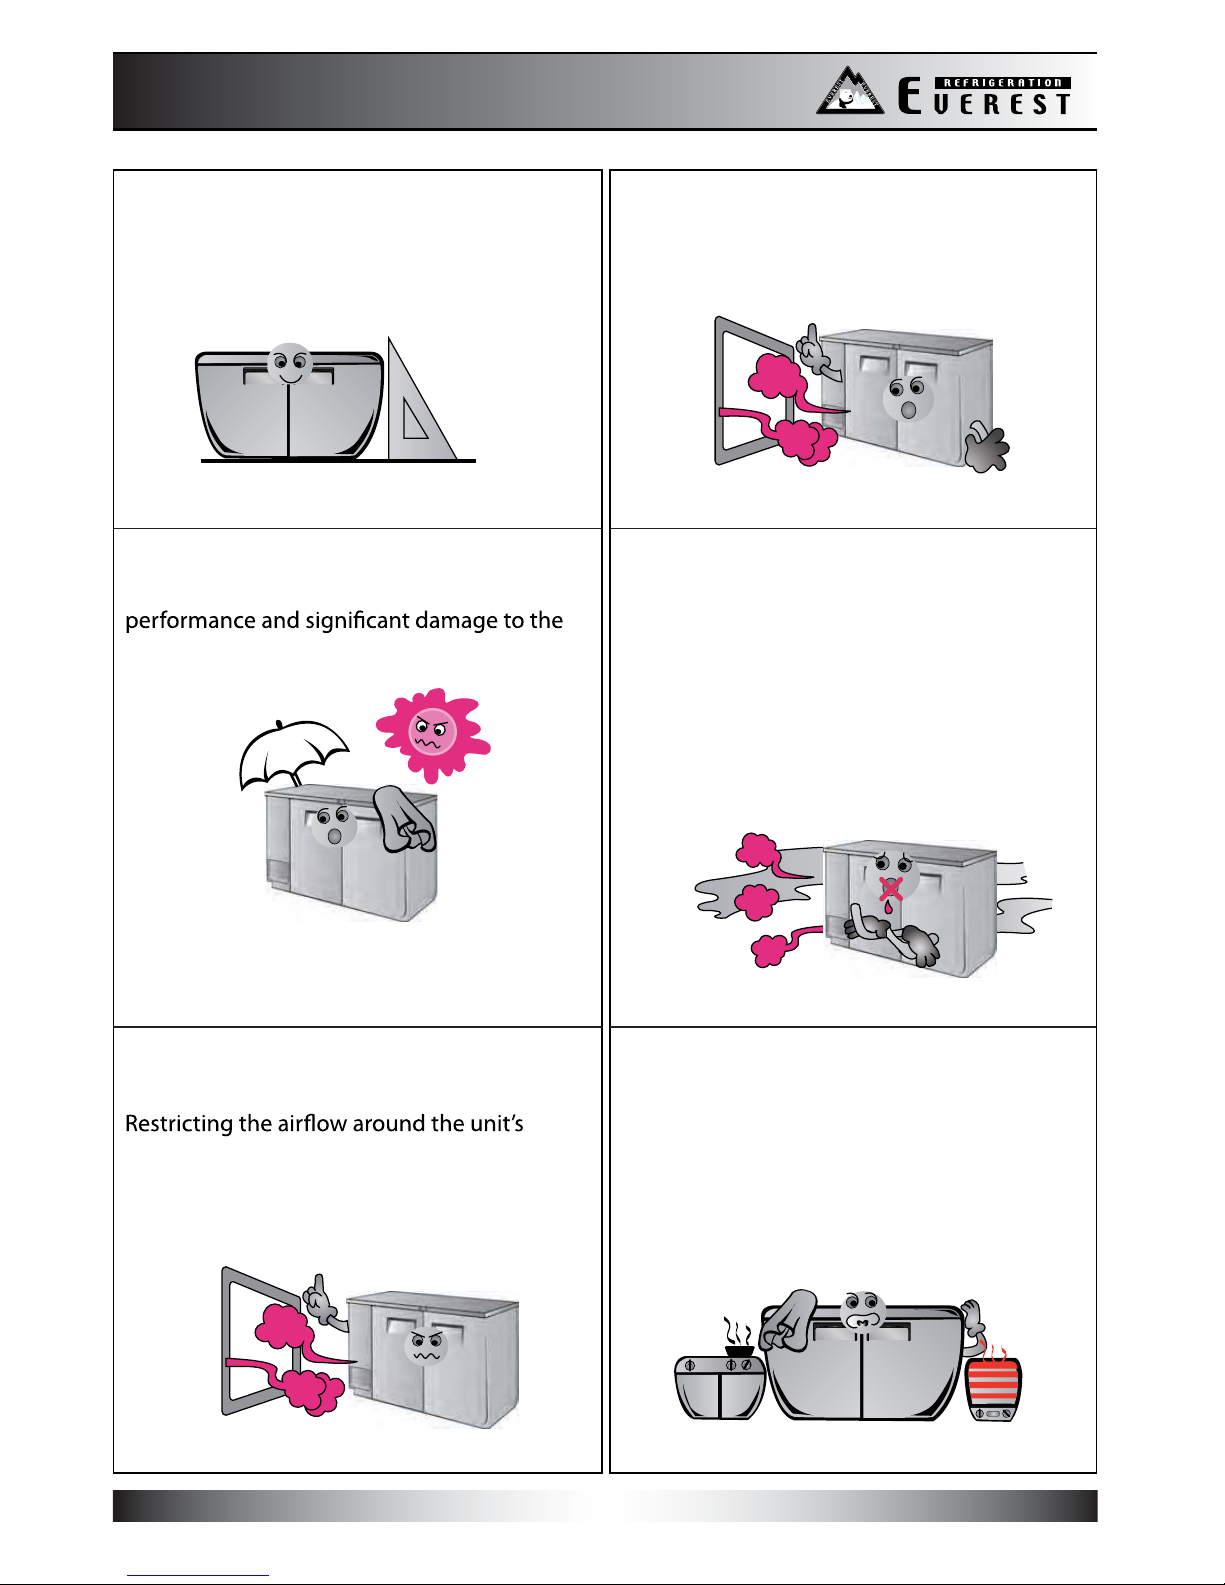
Install the unit on a hard
and level surface.
Before cleaning or maintaining the unit,
please unplug it. Do not use any
around the unit.
Please do not store temperature
sensitive items in the unit,
such as medical or
science research
related materials.
If you suspect a refrigerant leak,
unplug the unit and
immediately contact an
authorized service
technician.
Please do not hang or climb
on the unit as this may
cause the unit to fall.
Safety Notices
Safety Notices
REFRIGERATION
1

Safety Notices
Safety Notices
not to overload the outlet into which the
unit is plugged into. A dedicated circuit of
To prevent electrical shock and
malfunction, do not spray the
unit with water.
Clean the pronges of the electrical plug
with a soft cloth or brush before plugging
it into an electrical receptacle to prevent a
WARNING - Read and follow all safety notices in this installation guide.
information. Failure to do so may lead to serious injury and /
or damage to the unit.
When it is time to salvage the unit, make
sure to remove the rubber gaskets from
the doors to prevent the risk of children
or animals getting trapped inside the
unit.
REFRIGERATION
2
To prevent damage to the electrical
components, have the unit plugged indirectly
to its own circuit. EVEREST isnot responsible
forany damage causedby improperelectrical
connections resulting from electrical power
failure, use of extension cords &
surge protectors, and any
voltage drops to the unit.
Caution!
Caution!
To prevent electrical shock and damage to
the electrical cord, please hold
the plug head
when plugging
and unplugging
the unit.
Do not use the
electrical cord
or plug if they
are damaged
in any way.
To avoid personal injuries
from broken glass,
please do not
place glass items
in the freezer.
After unplugging the unit, please wait at
least 6 minutes
before re-plugging
it in. Failure to do
so could cause
extensive damage
to the compressor.
Avoid installing the
unit where it could
be exposed to
water or
moisture.
If the unit will
not be used for an
extended period of
time, please unplug
it from the outlet.
Please do not attempt to
remove or
repair any
components
unless you are
an authorized
service technician.
The refrigerator compartment temperature
should be set at 33°F~54°F (See page 9).
Setting the
temperature
out of the
recommended
ranges will void
the unit’s warranty.
Do not put your hands under the unit when
moving it. You could be injured by sharp
edges, protruding parts,
crushing, etc.
REFRIGERATION
3
Installation Guide
Installation Guide
Install the unit on a hard and level surface
or the unit could produce undesired noises.
The unit should be atleast 2” away from the
wall.
Indoor Use Only
Outdoor use may cause a decrease in
unit.
Dusty and High Humidity Areas
Dusty environments will cause the
condenser coil to prematurely clog which
will require it to be cleaned more often.
High humidy environments could cause the
unit to rust.
Do not build an enclosure or cabinet
around the unit.
condenser area will cause the compressor to
work harder, which can result in compressor
failure and the unit not being able to
maintain the desired temperature.
Select a location away from other heat
and moisture generating equipment
such as stoves, ovens, dish washers, etc.
High ambient temperatures cause the
compressor to work harder, which can result
in compressor failure and the unit not being
able to maintain the desired temperature.
REFRIGERATION
4
Maintenance Guide
Maintenance Guide
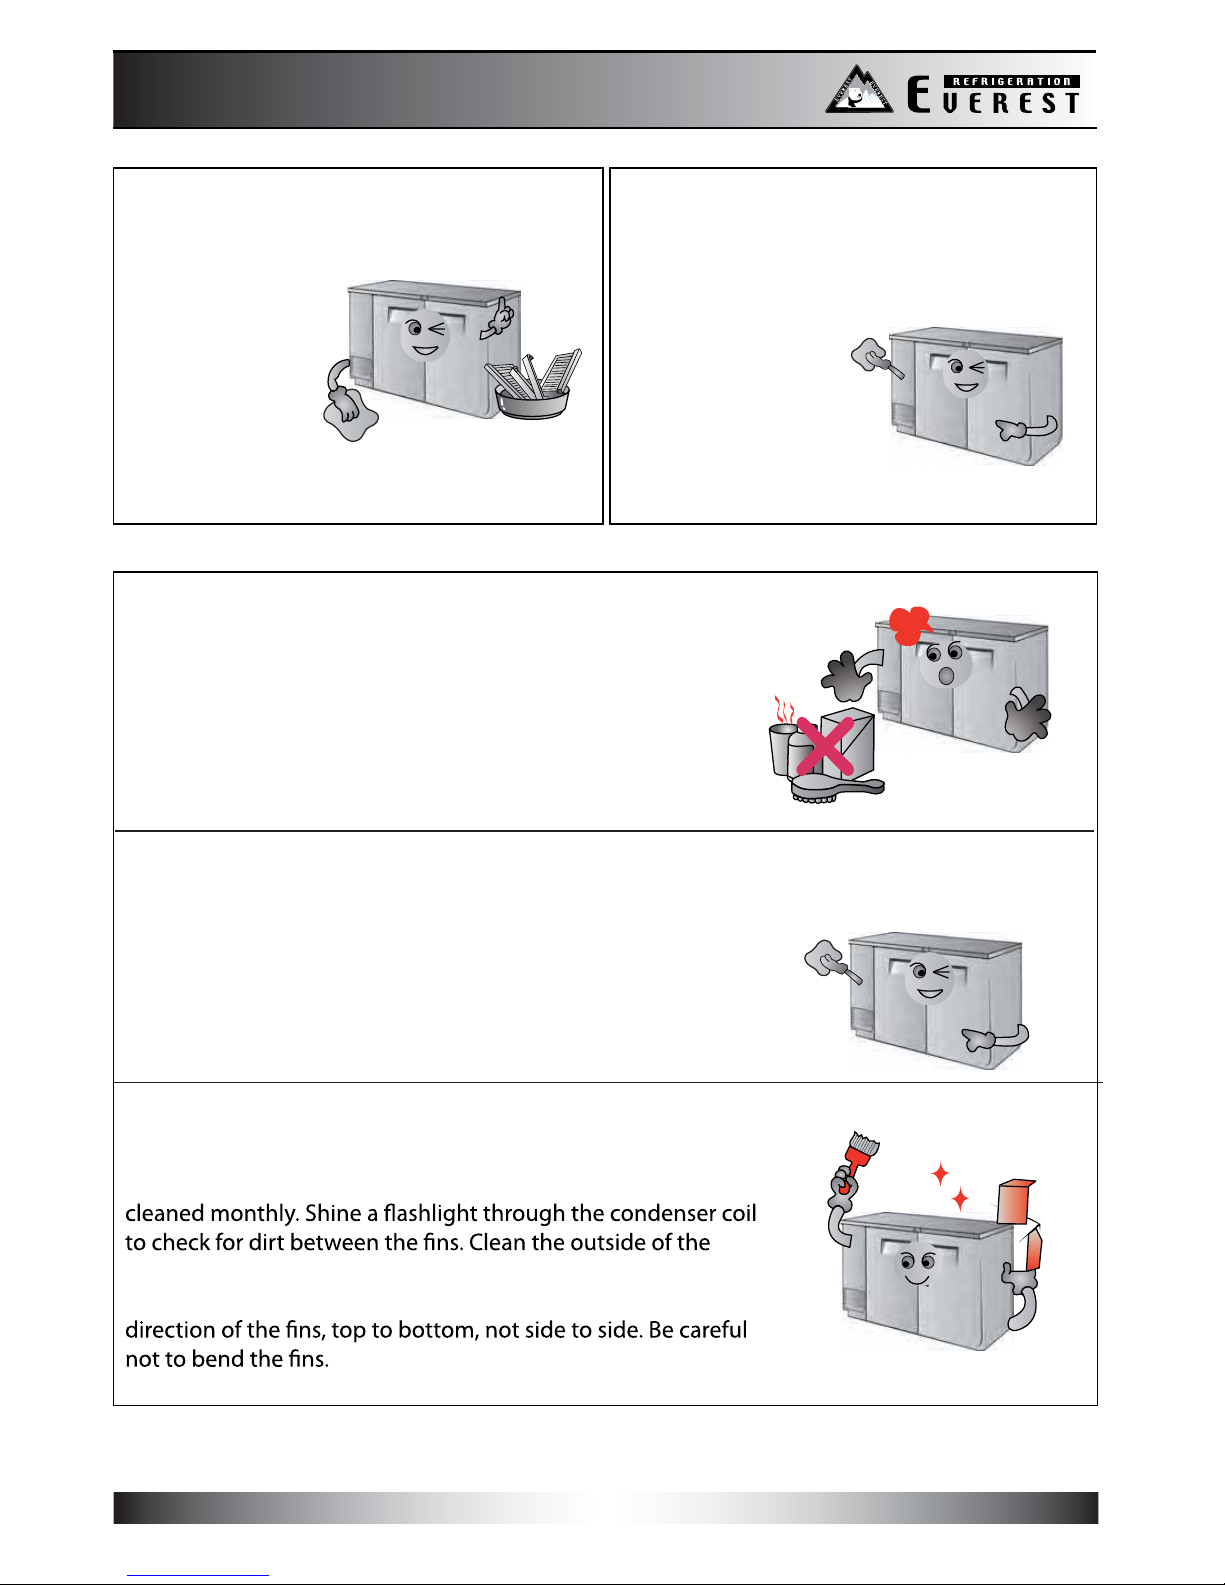
Shelf Cleaning
Periodically remove the shelves from the unit
and clean them
with mild soap
and warm water.
Door Gasket Cleaning
To preserve the life span of the door gasket,
clean the gasket
with mild soap
and water on
a regular basis.
Do not use the following products when cleaning
Clean the exterior of the product with mild soap and warm water.
Never use steel wool, strong acids, abrasive cleaners or degreasers.
Acidic products and products containing vinegar must
be stored in sealed containers to prevent acid damage
to the interior of the unit and the evaporator coil. (Rust
resulting from the lack of or improper maintenance will
not be covered under warranty.)
Interior Cleaning
Clean the interior surface of the unit with mild soap and warm
water. Do not let water accumulate inside the unit. To prevent
water damage, wipe the interior of the unit with a dry cloth as
needed. Do not use abrasive cleaners, concentrated detergents,
bleaches, cleaning waxes, solvents or polishes to clean the interior
of the unit.
Condenser Coil Cleaning
Poor condensing unit performance is caused by heavy dust
build-up on the condenser coil. The condenser coil should be
condenser with a soft brush or a vacuum with a brush
attachment. The condenser coil should be cleaned in the
REFRIGERATION
5

Condenser Coil Maintenance
Condenser Coil Maintenance
REFRIGERATION
6
Diagram
EBB-L-001-D1
Diagram
EBB-L-001-D2 Diagram EBB-L-001-D3
Diagram
EBB-L-001-D4
Diagram EBB-L-001-D6
Diagram
EBB-L-001-D5
EBB/EBD Series
Applicable Model Prefix: EBB23/EBD1
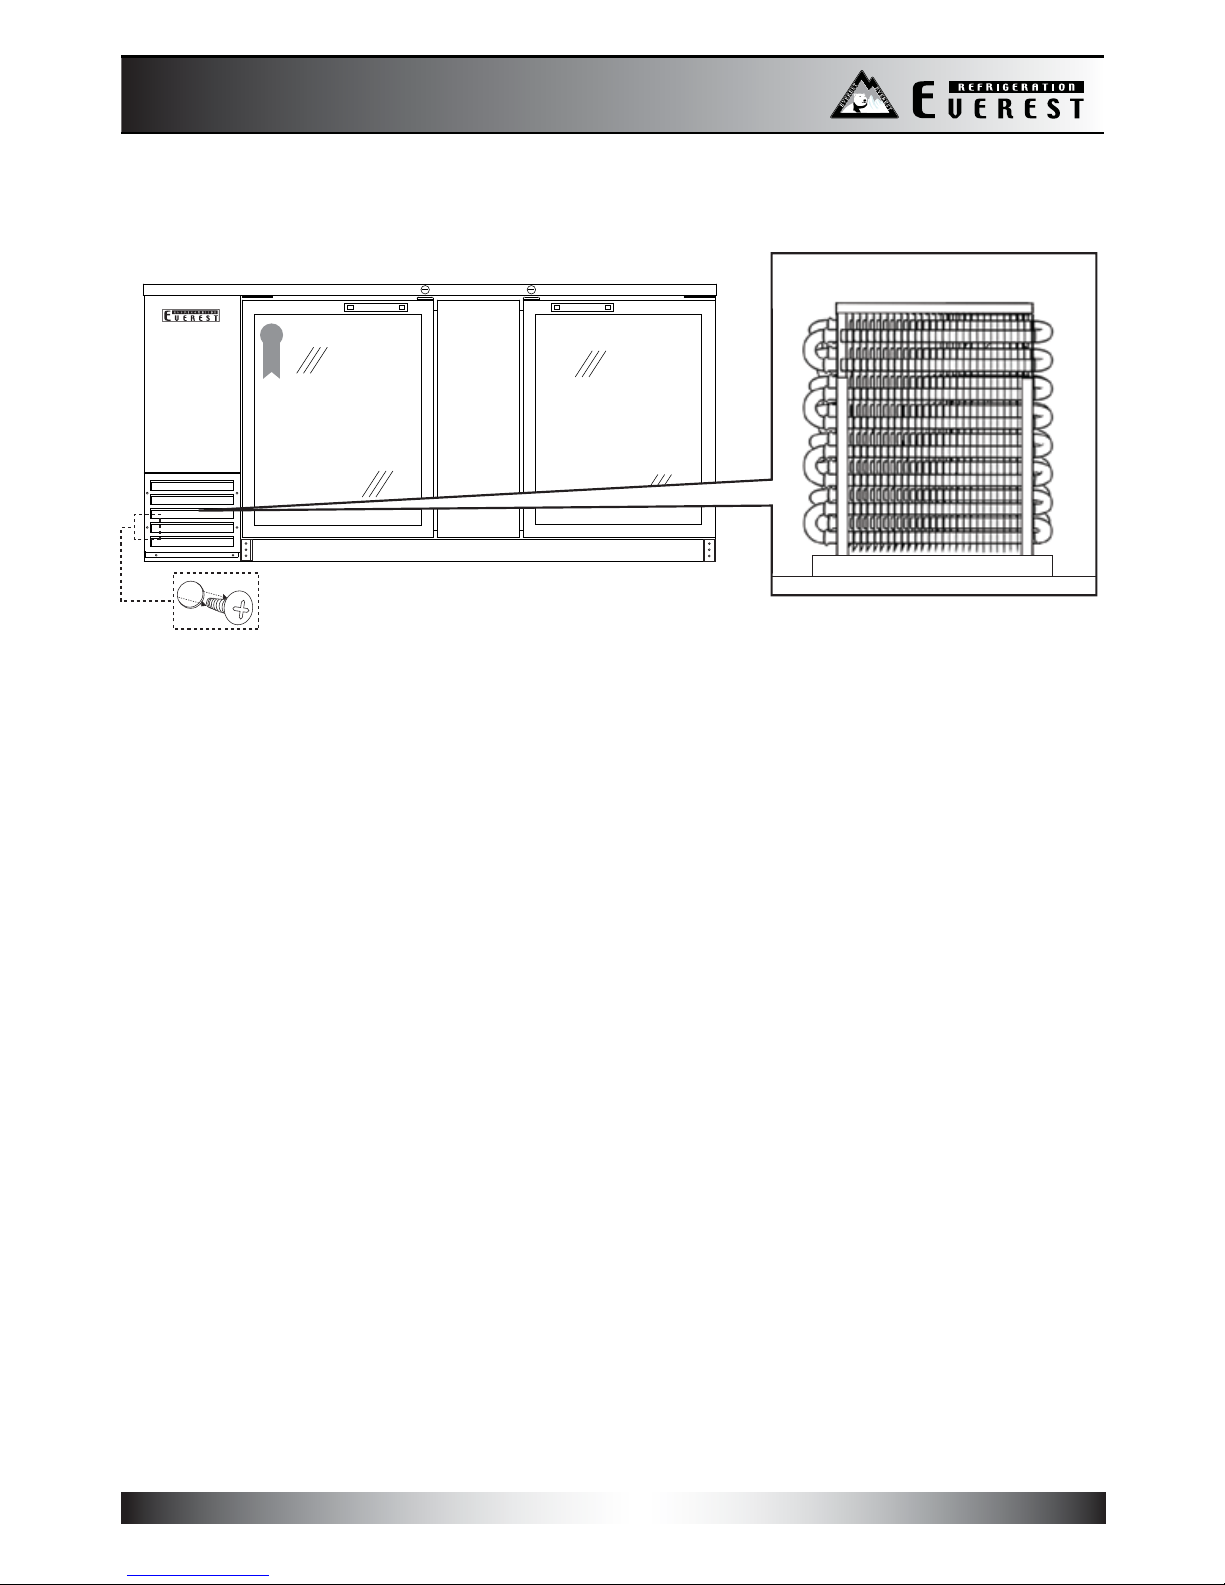
IMPORTANT: Failure to clean the condenser coil will result in a void of warranty.
Follow these simple steps at least once a month to ensure the proper operation of your Everest product.
1. Always unplug the unit before performing maintenance.
2. Locate the condenser coil at the back of the unit. See diagrams EBB-L-001-D1, EBB-L-001-D2 and EBB-L-
001-D3.
3. Unscrew the back grill completely. See diagrams EBB-L-001-D4 and EBB-L-001-D5.
4. Use any hard bristled brush in a vertical sweeping motion to remove lint, dust and debris from in between
the aluminum fins of the condenser coil. Do not apply heavy pressure so as not to bend the fins*.
5. For grease-coated fins, use any commercial condenser coil cleaner*. Please follow the specific instructions
on the bottle.
6. Repeat steps 4 to 5 until fins are clear of any blockage from lint, dust or grease.
* Do not use vacuum brush attachments and abrasive, acid-based cleaners or degreasers to avoid damage to the
aluminum fins.
Model Shown: EBB23
Front Right Side
Condenser Coil Maintenance
Condenser Coil Maintenance
REFRIGERATION
7
Diagram EBB-L-001A-D1
Diagram EBB-L-001A-D2
Diagram
EBB-L-001A-D3
EBB/EBD Series
Applicable Model Prefix: EBB/EBD
IMPORTANT: Failure to clean the condenser coil will result in a void of warranty.
Follow these simple steps at least once a month to ensure the proper operation of your Everest product.
1. Always unplug the unit before performing maintenance.
2. Locate the condenser coil at the front, left side of the unit. See diagrams EBB-L-001A-D1 and EBB-L-001A-D2.
3. Unscrew the front grill completely. See diagrams EBB-L-001A-D1 and EBB-L-001A-D3.
4. Use any hard bristled brush in a vertical sweeping motion to remove lint, dust and debris from in between
the aluminum fins of the condenser coil. Do not apply heavy pressure so as not to bend the fins*.
5. For grease-coated fins, use any commercial condenser coil cleaner*. Please follow the specific instructions
on the bottle.
6. Repeat steps 4 to 5 until fins are clear of any blockage from lint, dust or grease.
* Do not use vacuum brush attachments and abrasive, acid-based cleaners or degreasers to avoid damage to the
aluminum fins.
Model Shown: EBB69G
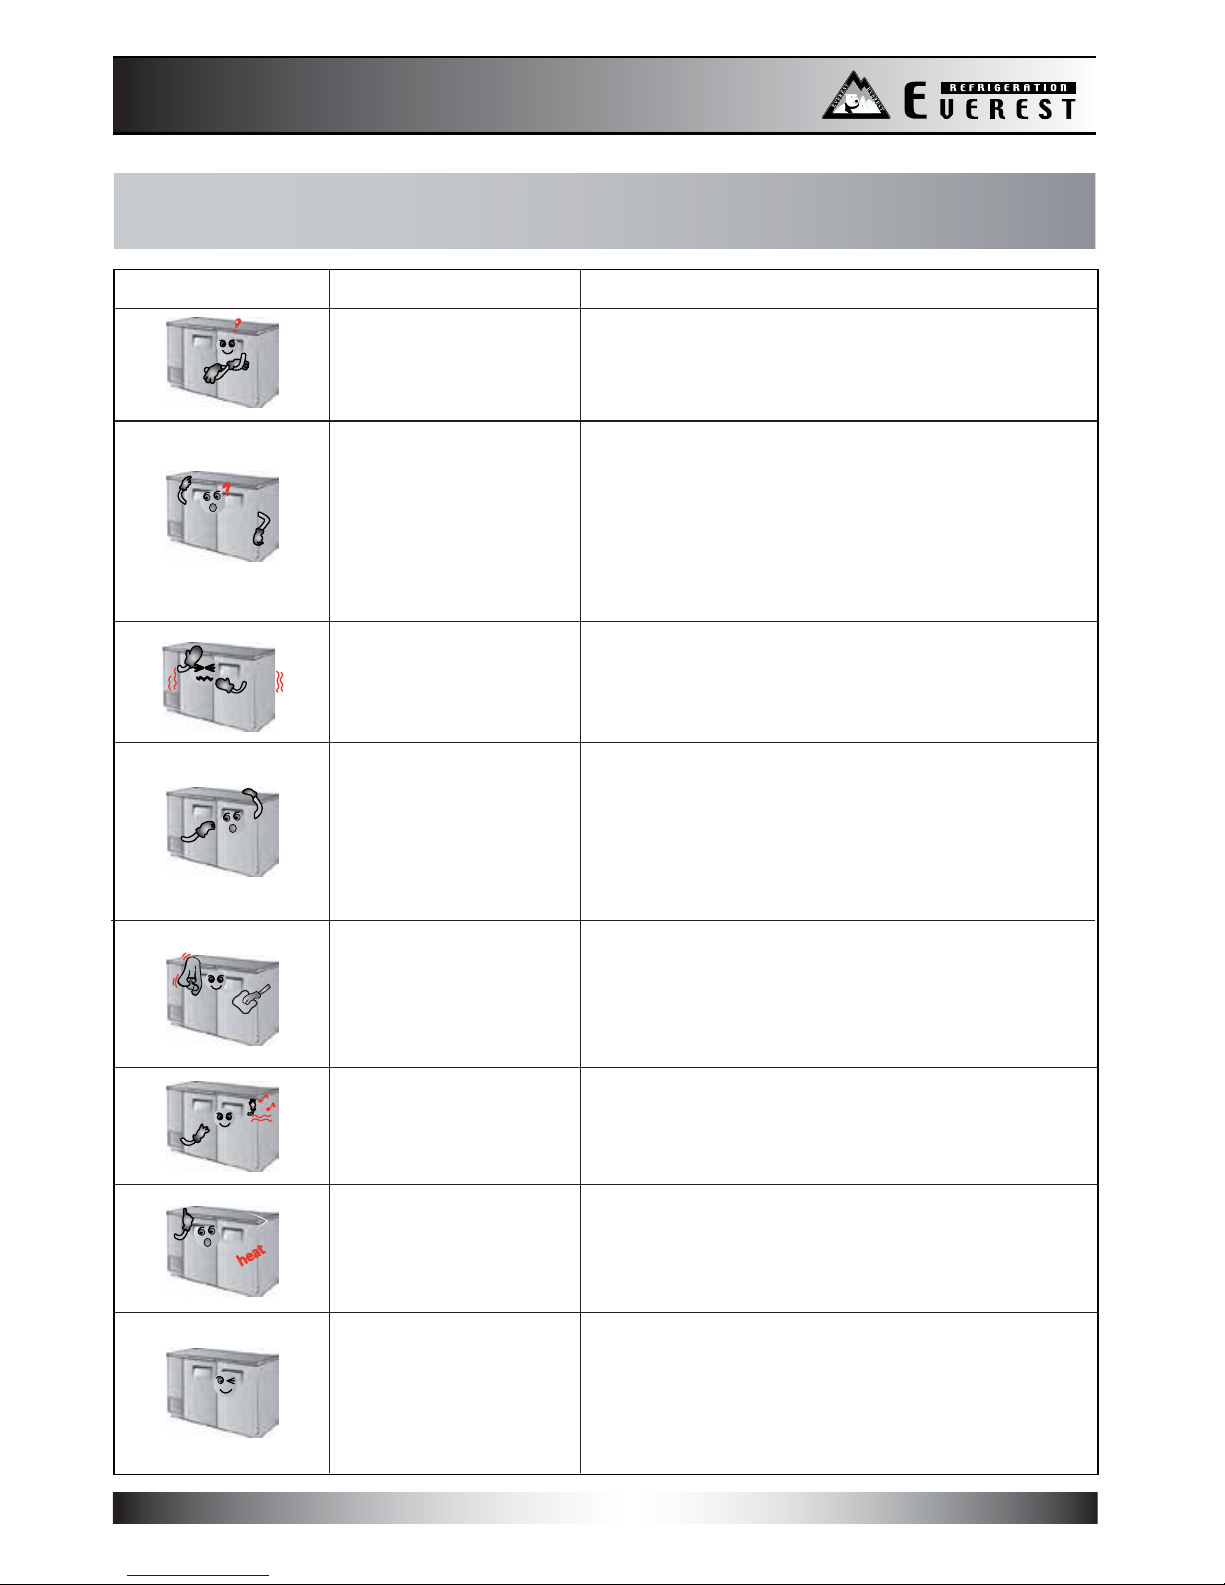
Symptom Possible Solutions
Condensing unit
fails to start
Refrigerated
compartment is too
cold
Sound of water
dripping
Exterior walls are
warm
Condensation on the
interior
Condensation on the
exterior surface
Noisy operation
Cabinet does not
maintain proper
temperature
heat
Trouble Shooting
Trouble Shooting
REFRIGERATION
8
Please check the following before requesting service.
a. Ensure the electrical cord has been connected.
b. Ensure the unit is turned on.
a. Adjust the temperature control to a warmer
setting.
a. This is the sound of the refrigerant circulating
during the compressor rest period and it is
normal.
a. Heaters have been placed around the door
openingsto prevent condensation buildup.
This is normal.
a. Condensation can occur during hot and
humid
weather with frequent or prolonged door
opening.
This is normal.
b. The doors might not be closed properly. Check door
alignment and gaskets for proper seal.
a. Checkfor loose parts.
b. Checkfor tubing rattle.
c. Checkfora bent fan blade.
d. Checkfor damaged fan motorbearings.
e. Ensure the unit is stable.
f. Ensure the cabinet islevel.
a. Checkthe doorgasketsfor properseal.
b. Checkto see if the temp. control setting is too
high, then adjust asnecessary.
c. Avoid installing the unit next to heat generating
equipment and direct sunlight.
d. Avoid storing hot contents.
e. Ensure the doors are fully closed.
a. Condensation on the exterior surface of the
unit isperfectly normal during periodsof high
humidity.
b. Checkdooralignment and gasketsforproper
seal.
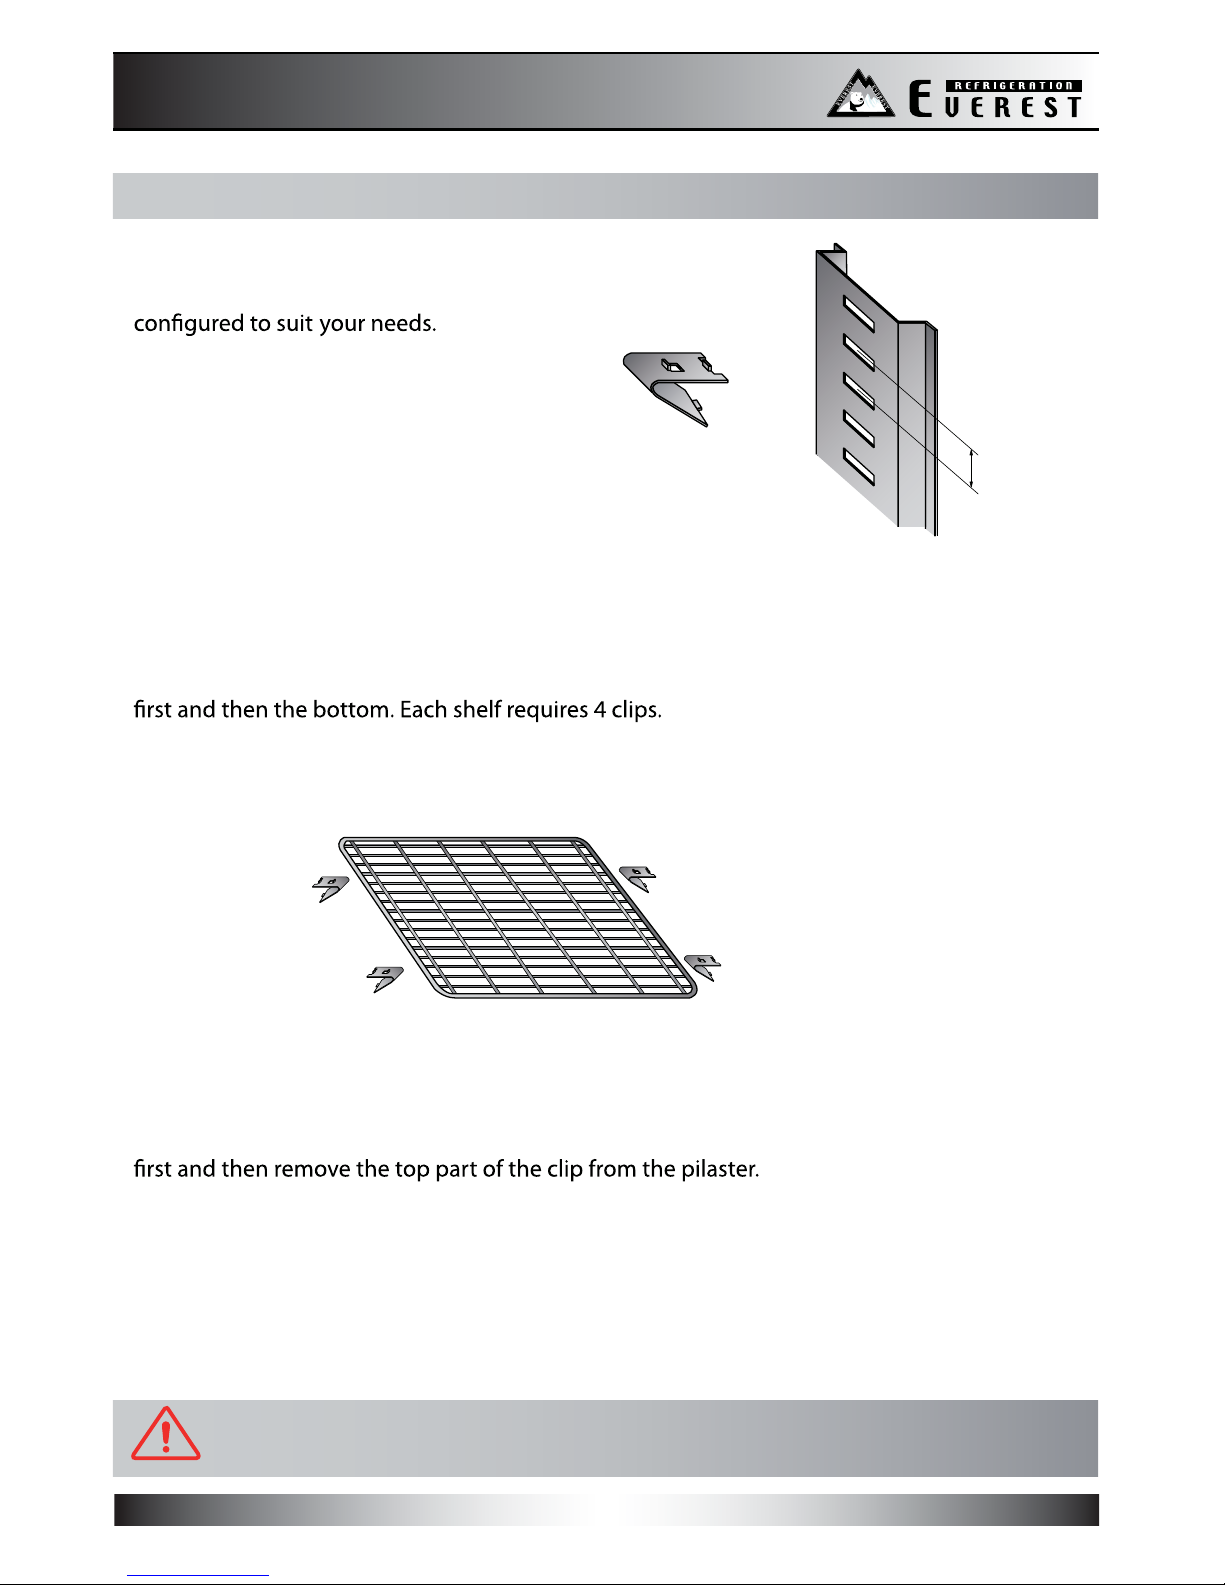
Warning - Never attempt to adjust a shelf when loaded!
Shelves
The unit’s shelves are adjustable so that
the refrigerated compartment can be
The shelf clip pilasters are spaced and
labeled in 1” increments for your
convenience.
To install a shelf, hook the shelf clips into the pilasters by inserting the top part of the clips
To remove a shelf, start by unloading the shelf. Second, remove the shelf itself. Finally,
remove the shelf clips by tilting them up and allowing the bottom of the clip to come out
Shelf Clip
Pilaster
1”
Shelves
Shelves
REFRIGERATION
9
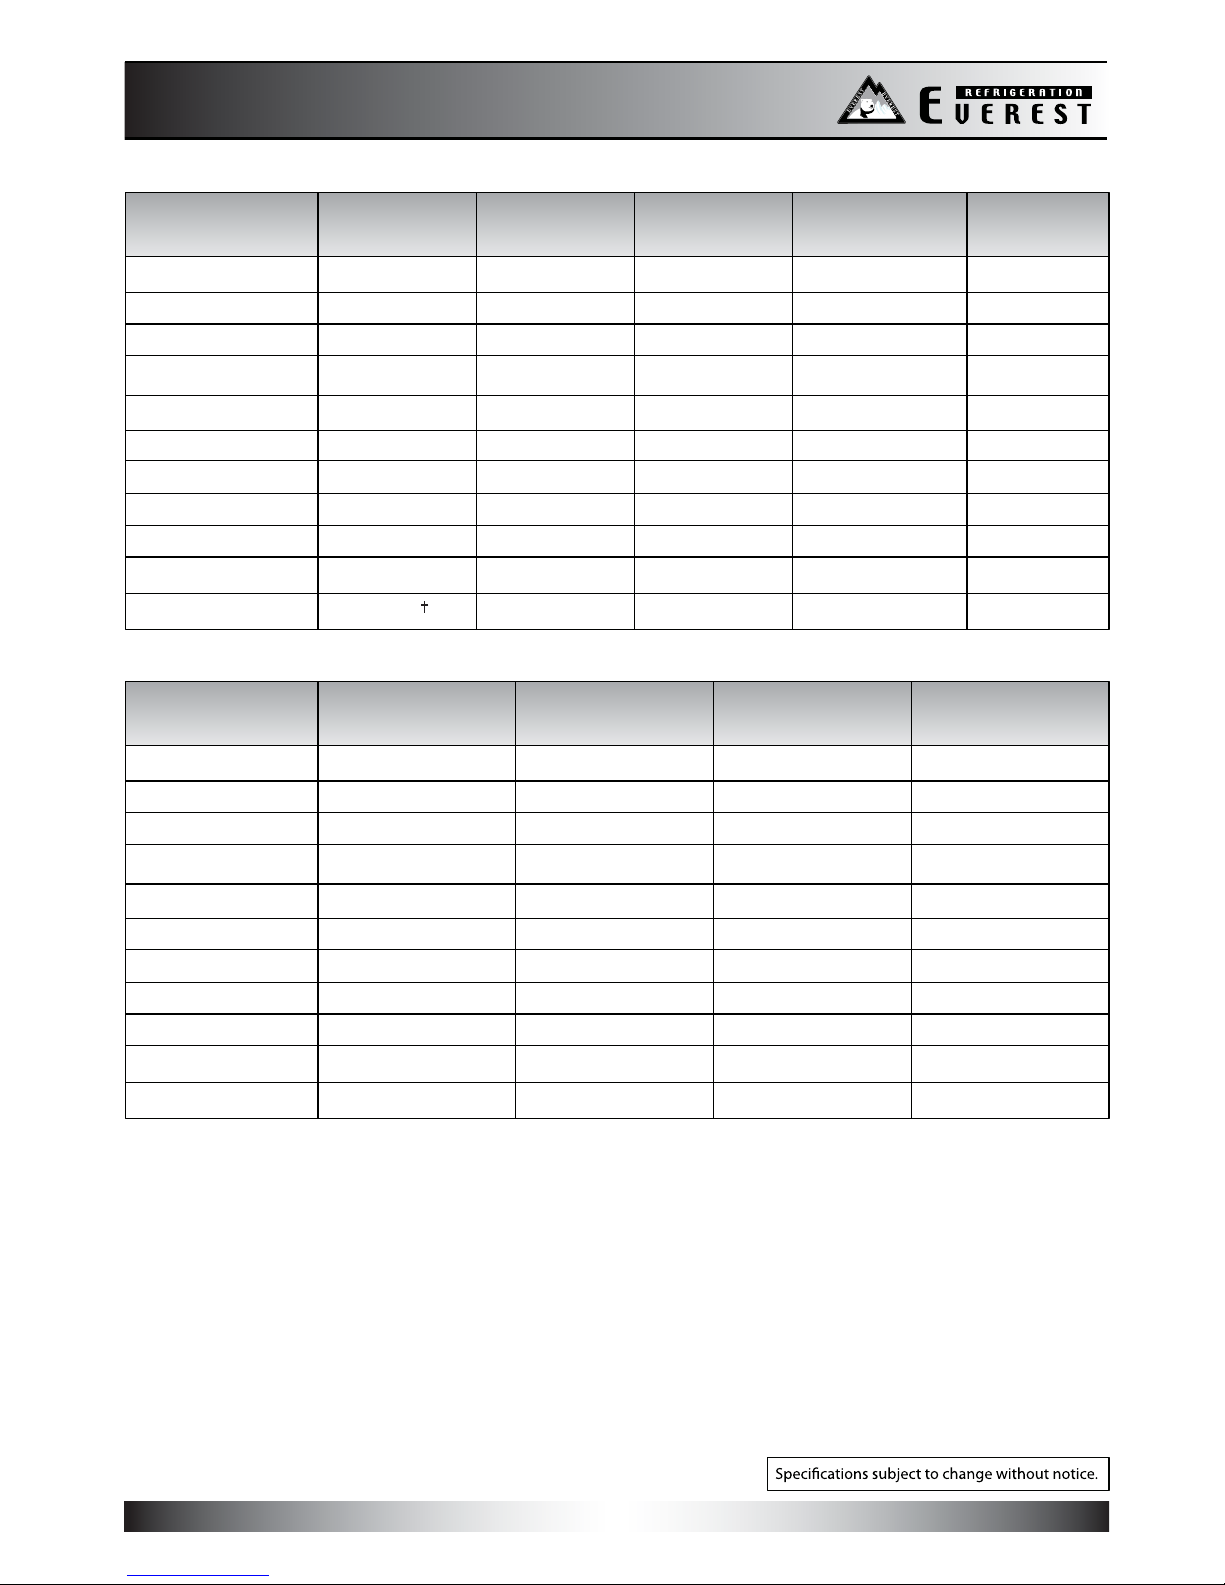
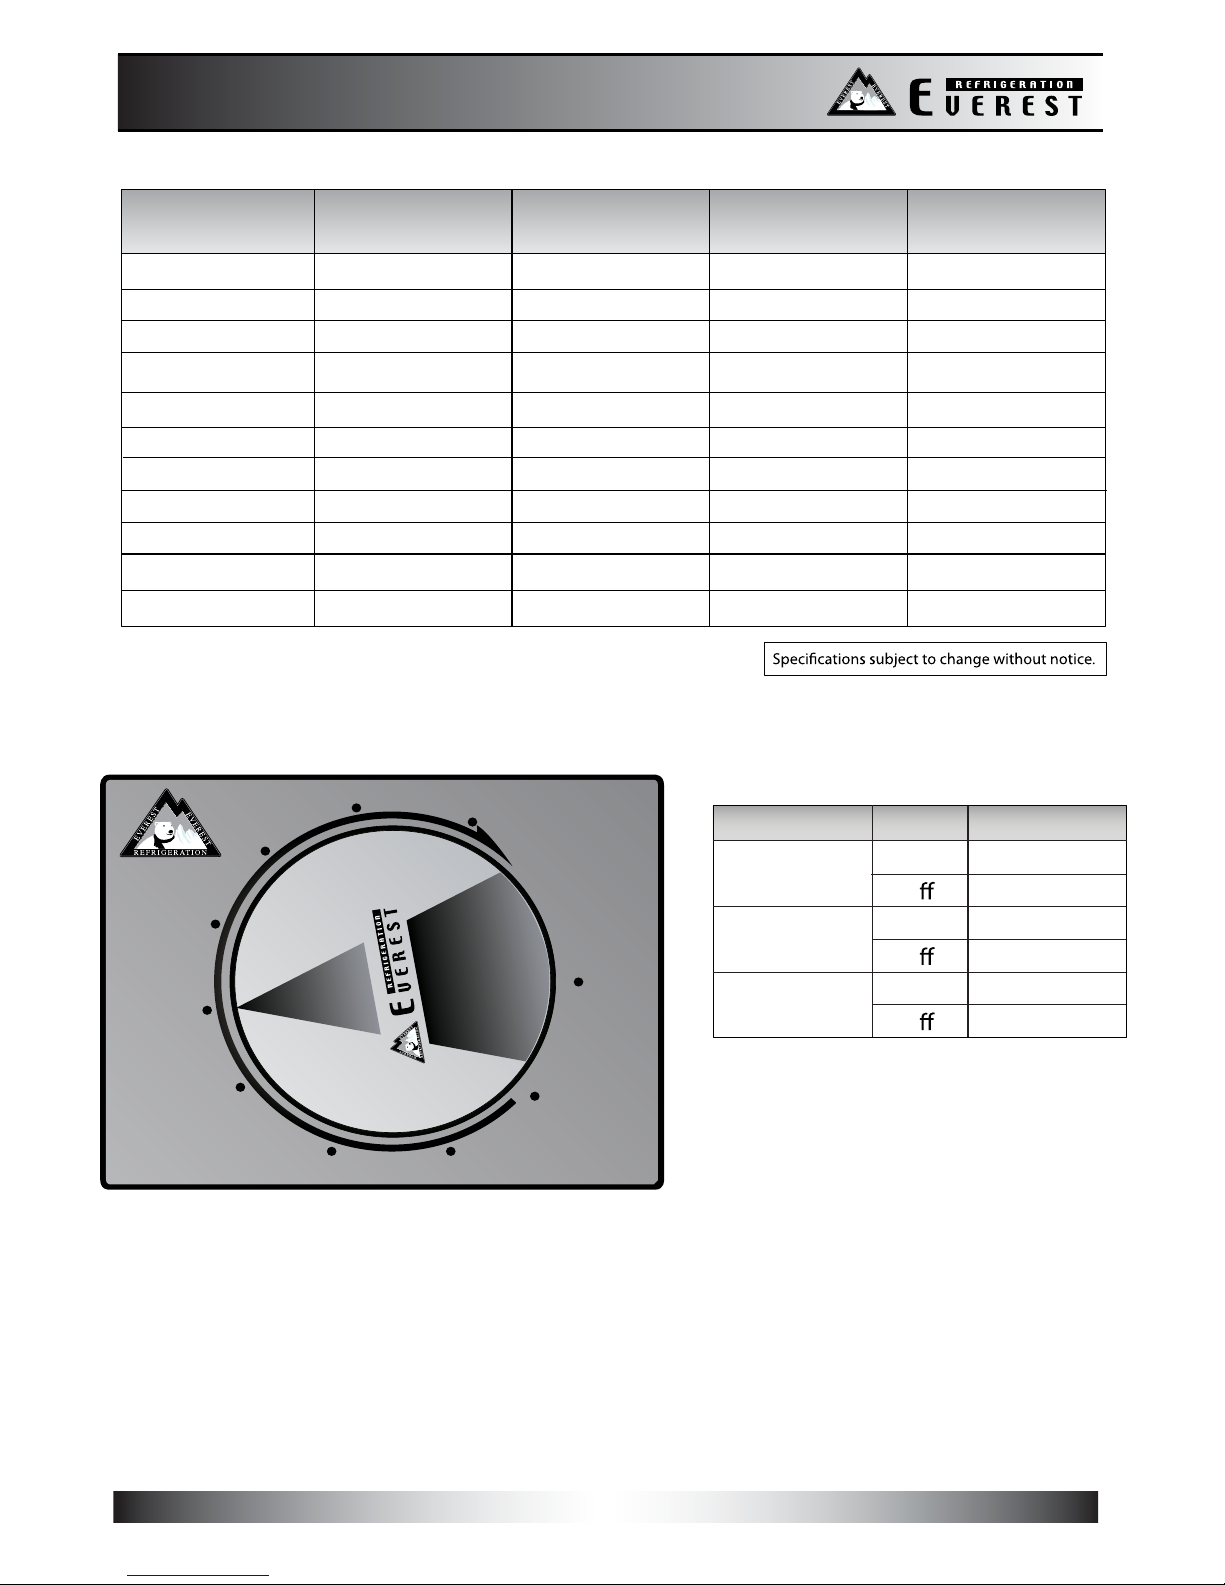
Specification
Specifications
REFRIGERATION
* Ext. height includes 5” for casters.
(EBB23 model is equipped with pre-installed casters as standard feature).
† Depth includes 1 1/2” for back grill.
[NOTE]
Model
Capacity( Cu. Ft.)
Door(s)
Shelves
Compressor (HP)
Power (V-Hz-Ph)
Temp. Range (°F)
Refrigerant
Crated Weight (LBS)
Amps (A)
Back Bar Coolers
20.09
2
4
1/4+
115 -60-1
297
4.50
57 3/4 x 27 1/8 x 37 1/8
8.19
1
2
1/5
115-60-1
32 ~ 42 32 ~ 42 32 ~ 42 32 ~ 42
R-134A R-134A R-134A R-134A
158
3.90
24.01
2
4
1/4+
115-60-1
329
4.50
68 x 27 1/8 x 37 1/8
32.37
3
6
Capacity
12 oz. Cans / Bottles 640 / 408220 / 125 800 / 504 1120 / 696
1/3
115-60-1
420
4.50
89 1/4
x 27 1/8 x 37 1/8
EBB23 EBB59 EBB69 EBB90
Exterior Dimensions
(W x D x H inches)
10
23 1/2 x 31 1/8 x 39*
(Refrigerator) (Refrigerator)
14.30
2
4
1/4+
115 -60-1
TBA
4.20
49 x 27 1/8 x 37 1/8
32 ~ 42
R-134A
490 / 258
EBB48
(Refrigerator) (Refrigerator) (Refrigerator)
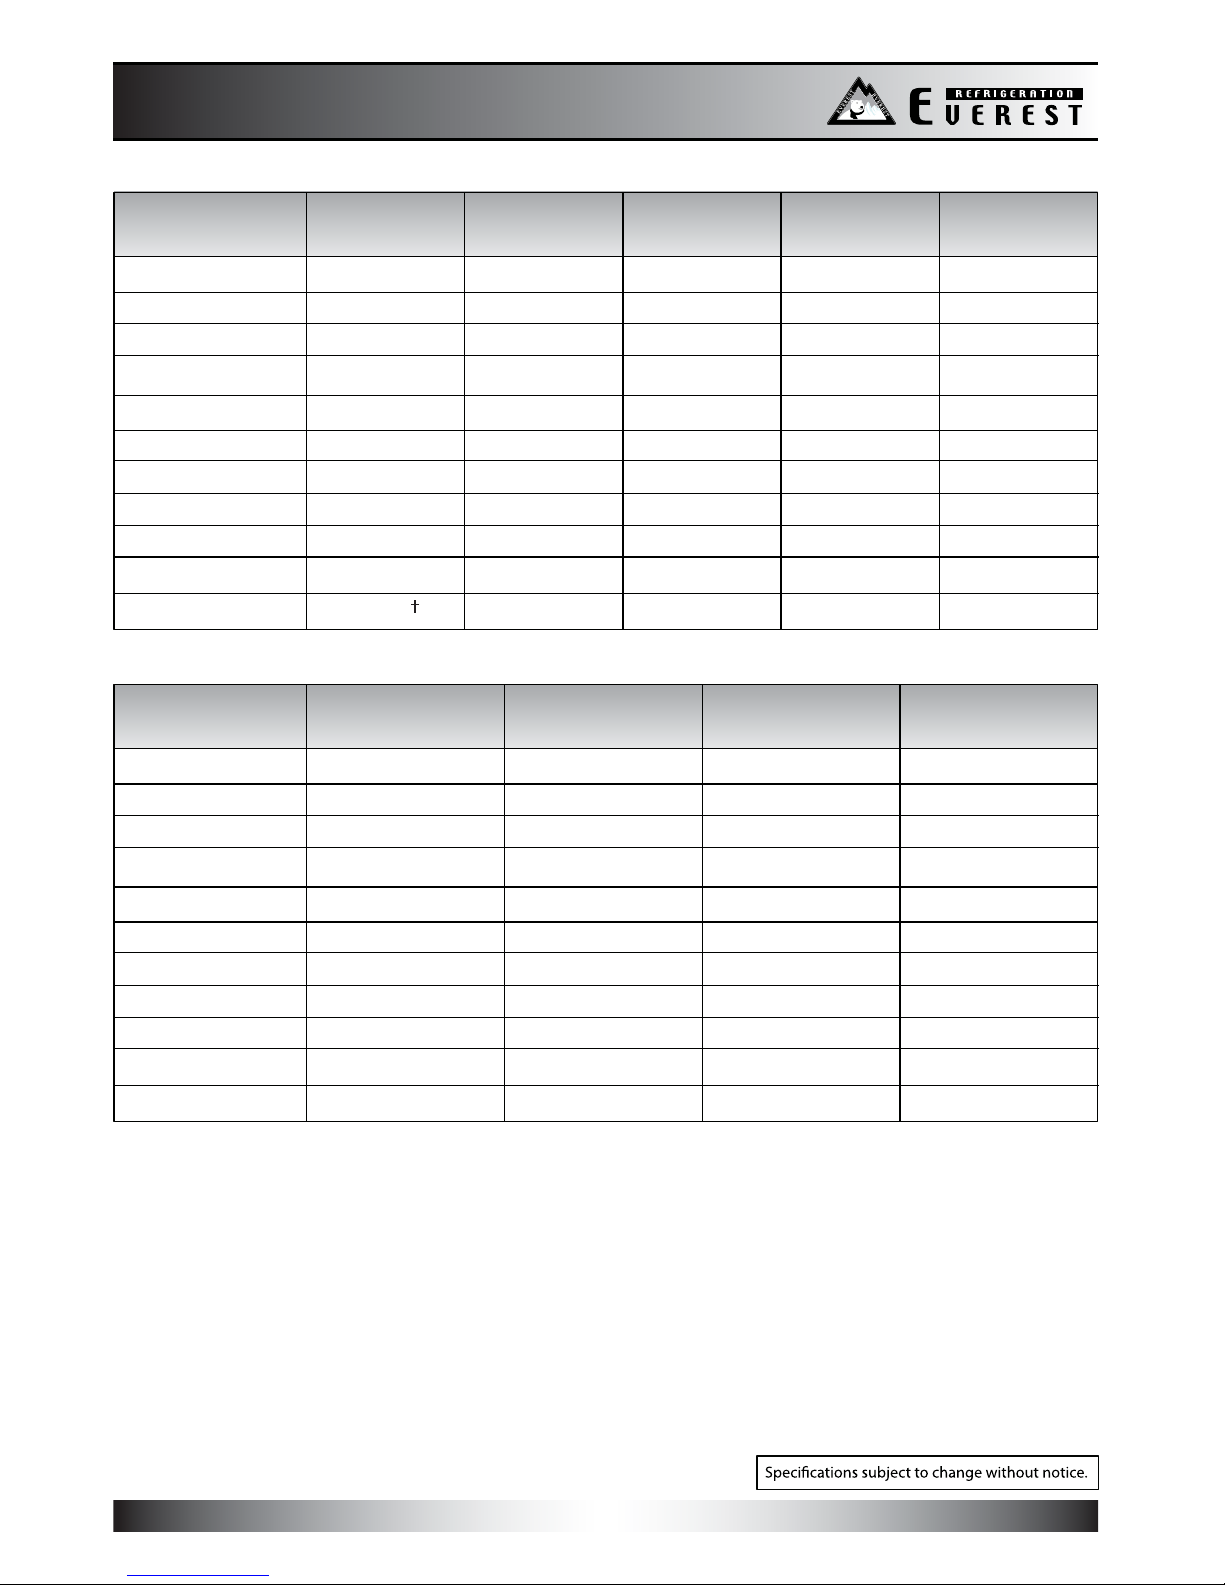
Model
Capacity( Cu. Ft.)
Door(s)
Shelves
Compressor (HP)
Power (V-Hz-Ph)
Temp. Range (°F)
Refrigerant
Crated Weight (LBS)
Amps (A)
24" Deep Back Bar Coolers
16.86
2
4
1/4+
115 -60-1
280
4.50
13.95
2
4
1/4+
115-60-1
32 ~ 42 32 ~ 42 32 ~ 42 32 ~ 42
R-134A R-134A R-134A R-134A
253
4.50
20.41
2
4
1/4+
115-60-1
307
4.50
27.76
3
6
Capacity
12 oz. Cans / Bottles 560 / 357420 / 294 700 / 441 980 / 609
1/3
115-60-1
381
4.50
EBB48-24 EBB59-24 EBB69-24 EBB90-24
Exterior Dimensions
(W x D x H inches)
(Refrigerator) (Refrigerator) (Refrigerator) (Refrigerator)
57 3/4 x 24 1/2 x 37 1/8 68 x 24 1/2 x 37 1/8 89 1/4 x 24 1/2 x 37 1/849 x 24 1/2 x 37 1/8
REFRIGERATION
Specifications
Specifications
11
Glass Door Back Bar Coolers
R-134A R-134A R-134A R-134A
Model
Capacity( Cu. Ft.)
Glass Door(s)
Shelves
Compressor (HP)
Power (V-Hz-Ph)
Temp. Range (°F)
Refrigerant
Crated Weight (LBS)
Amps (A)
20.09
2
4
1/4+
115 -60-1
32~ 42
322
4.50
8.19
1
2
1/5
115-60-1
32 ~ 42
170
3.90
24.01
2
4
1/4+
115-60-1
32 ~ 42
355
4.20
32.37
3
6
1/3
115-60-1
32 ~ 42
484
4.50
EBB23G EBB59G EBB69G EBB90G
Exterior Dimensions
(W x D* x H inches) 57 3/4 x 27 1/8 x 37 1/8 68 x 27 1/8 x 37 1/8 89 1/4 x 27 1/8 x 37 1/823 1/2 x 31 1/8 x 39a
(Refrigerator) (Refrigerator) (Refrigerator) (Refrigerator)
24" Deep Glass Door Back Bar Coolers
R-134A R-134A R-134A R-134A
Model
Capacity( Cu. Ft.)
Glass Door(s)
Shelves
Compressor (HP)
Power (V-Hz-Ph)
Temp. Range (°F)
Refrigerant
Crated Weight (LBS)
Amps (A)
16.86
2
4
1/4+
115-60-1
32~ 42
306
4.50
13.95
2
4
1/4+
115-60-1
32 ~ 42
278
4.50
20.41
2
4
1/4+
115-60-1
32 ~ 42
336
4.20
27.76
3
6
1/3
115-60-1
32 ~ 42
458
4.50
EBB48G-24 EBB59G-24 EBB69G-24 EBB90G-24
Exterior Dimensions
(W x D* x H inches) 57 3/4 x 24 1/2 x 37 1/8 68 x 24 1/2 x 37 1/8 89 1/4 x 24 1/2 x 37 1/849 x 24 1/2 x 37 1/8
(Refrigerator) (Refrigerator) (Refrigerator) (Refrigerator)
[NOTE]
* Ext. depth does not include door handles.
† Ext. depth includes 1 1/2” for back grill.
a Ext. height includes 5“ for casters.
(EBB23G model is equipped with pre-installed casters as standard feature).
Capacity
12 oz. Cans / Bottles 640 / 408
R-134A
14.30
2
4
1/4+
115 -60-1
32~ 42
TBA
4.20
EBB48G
49 x 27 1/8 x 37 1/8
(Refrigerator)
490 / 258220 / 125 800 / 504 1120 / 696
Capacity
12 oz. Cans / Bottles 560 / 357420 / 294 700 / 441 980 / 609
REFRIGERATION
Specifications &
Temperature Setting
Specifications &
Temperature Setting
12
OFF
( )
5
6
7
89
4
32
1
℉
[Temperature Setting Range]
1 ~ 3
3 ~ 5
6 ~ 9
On
O
On
O
On
O
REF (℉)
48
41
39
31
30
21
Setting Range
Comp.
•Factory Recommended Setting:
“5”
24" Deep Glass Sliding Door Back Bar Coolers
R-134A R-134A R-134A R-134A
Model
Capacity( Cu. Ft.)
Glass Door(s)
Shelves
Compressor (HP)
Power (V-Hz-Ph)
Temp. Range (°F)
Refrigerant
Crated Weight (LBS)
Amps (A)
20.09
2
4
1/4+
115-60-1
32~ 42
TBA
4.20
14.30
2
4
1/4+
115-60-1
32 ~ 42
TBA
4.20
24.01
3
6
1/4+
115-60-1
32 ~ 42
TBA
4.20
32.37
4
8
1/3
115-60-1
32 ~ 42
TBA
4.50
EBB48G-SD EBB59G-SD EBB69G-SD EBB90G-SD
Exterior Dimensions
(W x D* x H inches) 57 3/4 x 24 1/2 x 37 1/8 68 x 24 1/2 x 37 1/8 89 1/4 x 24 1/2 x 37 1/849 x 24 1/2 x 37 1/8
(Refrigerator) (Refrigerator) (Refrigerator) (Refrigerator)
Capacity
12 oz. Cans / Bottles 560 / 357420 / 294 700 / 441 980 / 609
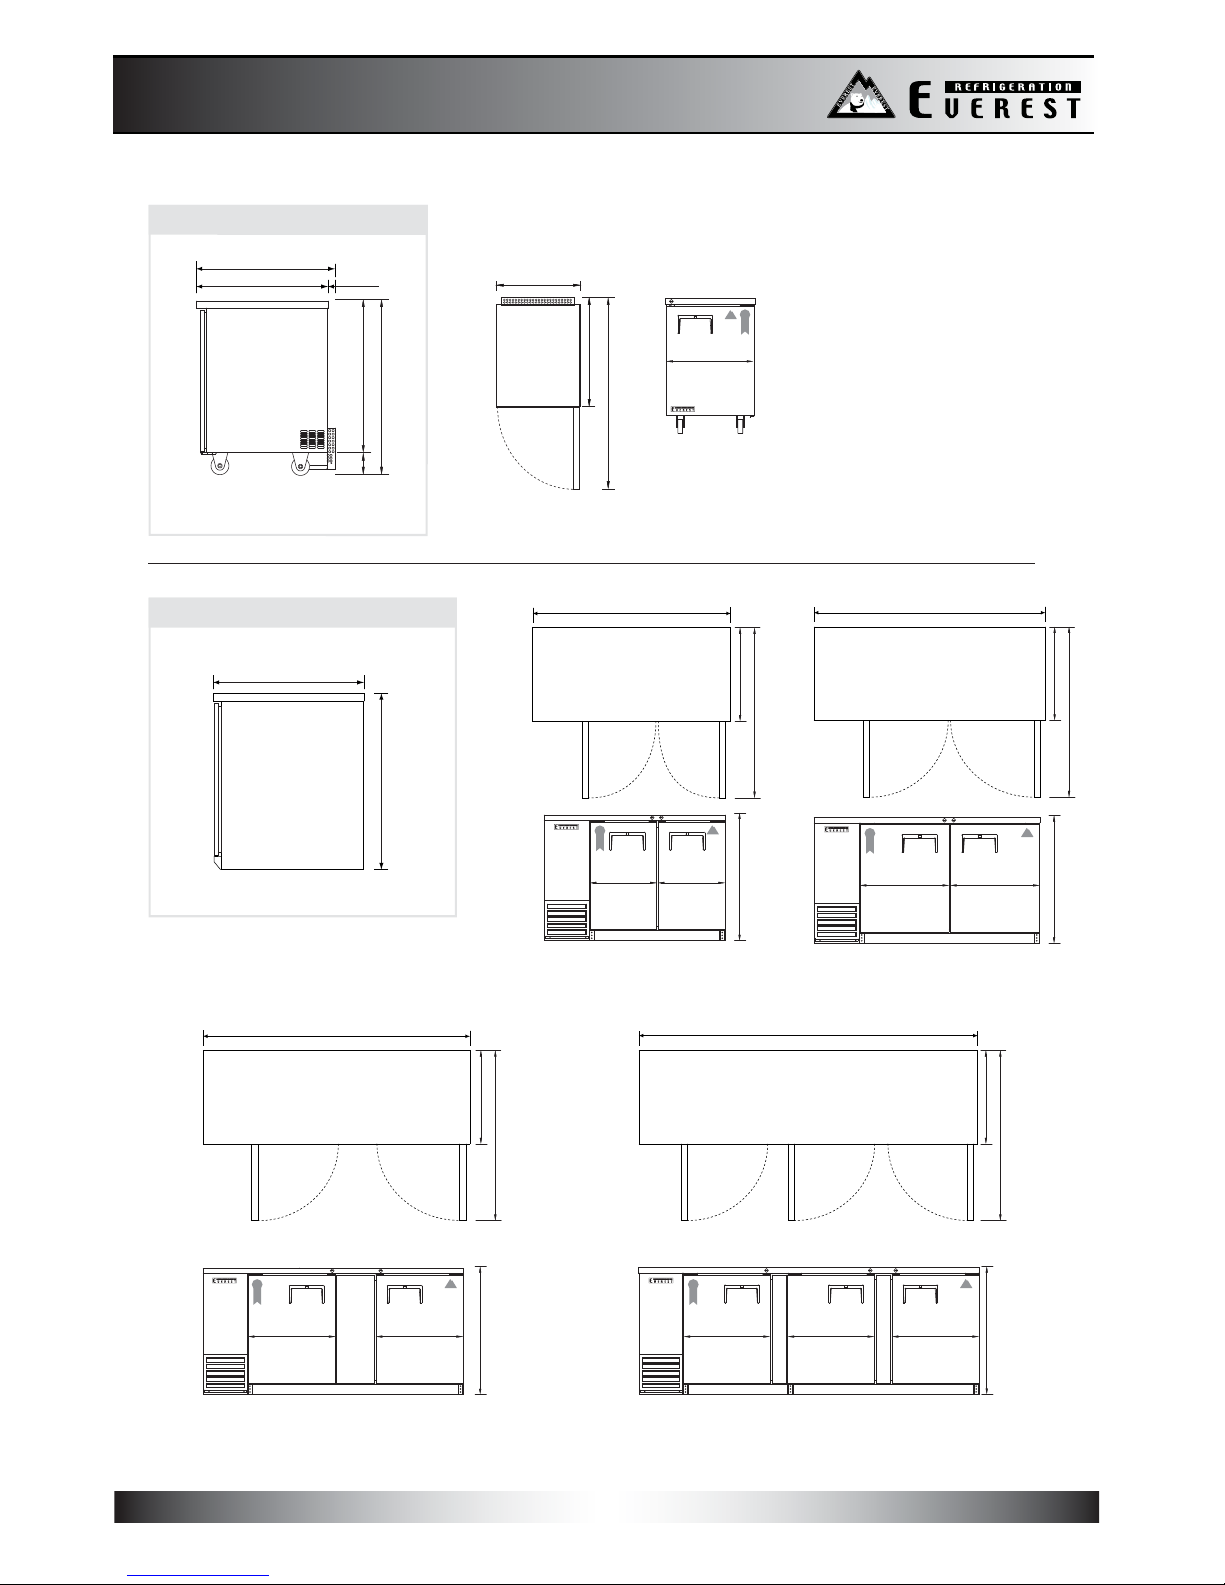
Product Drawings
Product Drawings
REFRIGERATION
13
Back Bar Coolers & Glass Door Back Bar Coolers
49"
18 1/2" 18 1/2"
37 1/8"
43 5/8"
27 1/8"
22 3/4"
EBB23
39"
34" 5"
23 1/2"
31 1/8"
Pre-installed casters
SIDE VIEW (EBB23)
31 1/8"
52"
30" 1 1/8"
SIDE VIEW (EBB48/EBB59/EBB69/EBB90)
37 1/8"
27 1/8"
EBB59EBB48
57 3/4"
22 3/4" 22 3/4"
EBB69
68"
22 3/4" 22 3/4"
EBB90
89 1/4"
49"
27 1/8"
22 3/4" 22 3/4" 22 3/4"
37 1/8"
37 1/8"
37 1/8"
49"
27 1/8"
49"
27 1/8"

Product Drawings
Product Drawings
REFRIGERATION
14
Back Bar Coolers & Glass Door Back Bar Coolers
Pre-installed Casters
39"
34" 5"
30"
31 1/8"
1 1/8"
SIDE VIEW (EBB23G)
EBB23G
23 1/2"
31 1/8"
52 3/4"
22 3/4"
37 1/8"
27 1/8"
SIDE VIEW
(EBB48G/EBB59G/EBB69G/EBB90G)
EBB48G
49"
18 3/8" 18 3/8"
43 5/8"
27 1/8" 37 1/8"
EBB59G
57 3/4"
22 3/4" 22 3/4"
49 1/2"
27 1/8" 37 1/8"
EBB69G EBB90G
68"
22 3/4"22 3/4"
89 1/4"
49 1/2"
49 1/2"
27 1/8"
22 3/4" 22 3/4"22 3/4"
37 1/8"
27 1/8" 37 1/8"

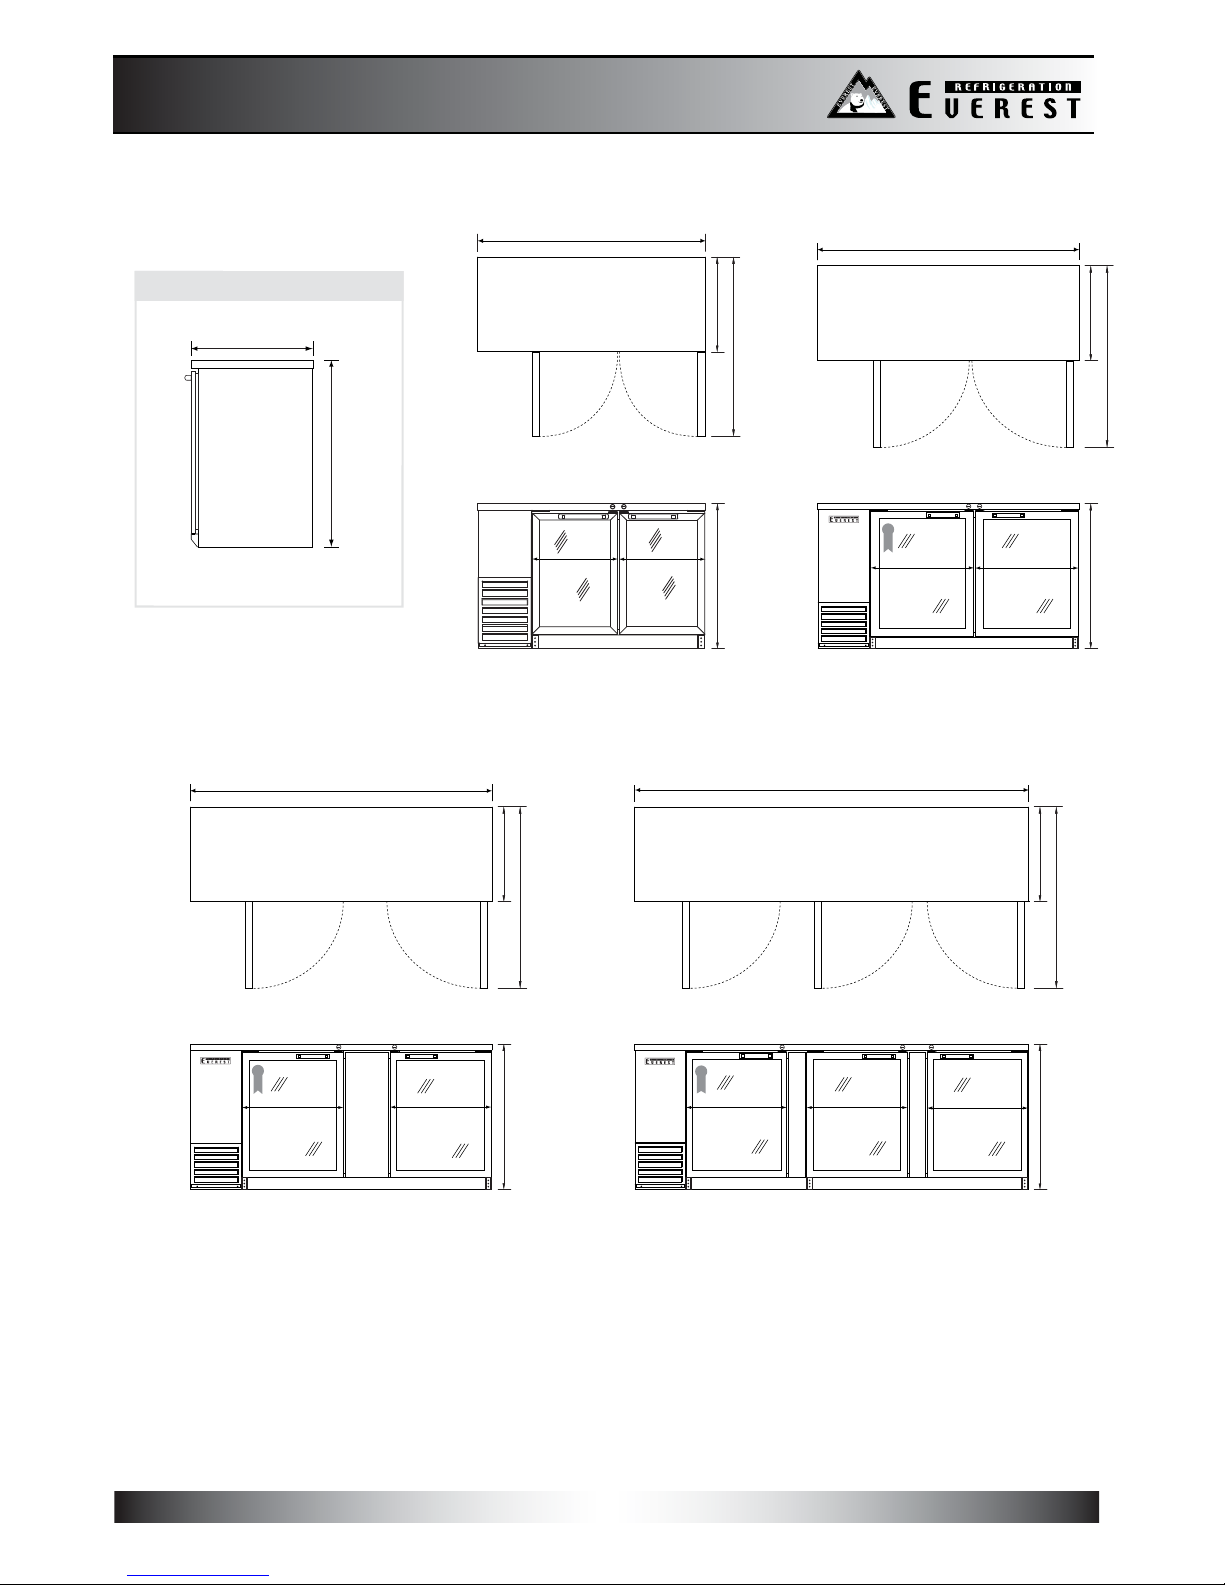
Product Drawings
Product Drawings
REFRIGERATION
15
24" Deep Back Bar Coolers
SIDE VIEW
37 1/8"
24 1/2"
EBB48-24
24 1/2"
42 1/4"
18 1/2" 18 1/2"
37 1/8"
49"
EBB59-24
57 3/4"
22 3/4" 22 3/4"
37 1/8"
46 1/2"
24 1/2"
EBB69-24
68"
22 3/4" 22 3/4"
EBB90-24
89 1/4"
22 3/4" 22 3/4" 22 3/4"
37 1/8"
37 1/8"
46 1/2"
46 1/2"
24 1/2"
24 1/2"
Product Drawings
Product Drawings
REFRIGERATION
16
24" Deep Glass Door Back Bar Coolers
SIDE VIEW
37 1/8"
24 1/2"
EBB48G-24
49"
24 1/2"
42 3/4"
37 1/8"
18 1/2" 18 1/2"
47"
24 1/2"
EBB59G-24
57 3/4"
22 3/4" 22 3/4"
37 1/8"
EBB69G-24 EBB90G-24
68"
22 3/4"22 3/4"
89 1/4"
22 3/4" 22 3/4"22 3/4"
47"
47"
37 1/8"
37 1/8"
24 1/2"
24 1/2"
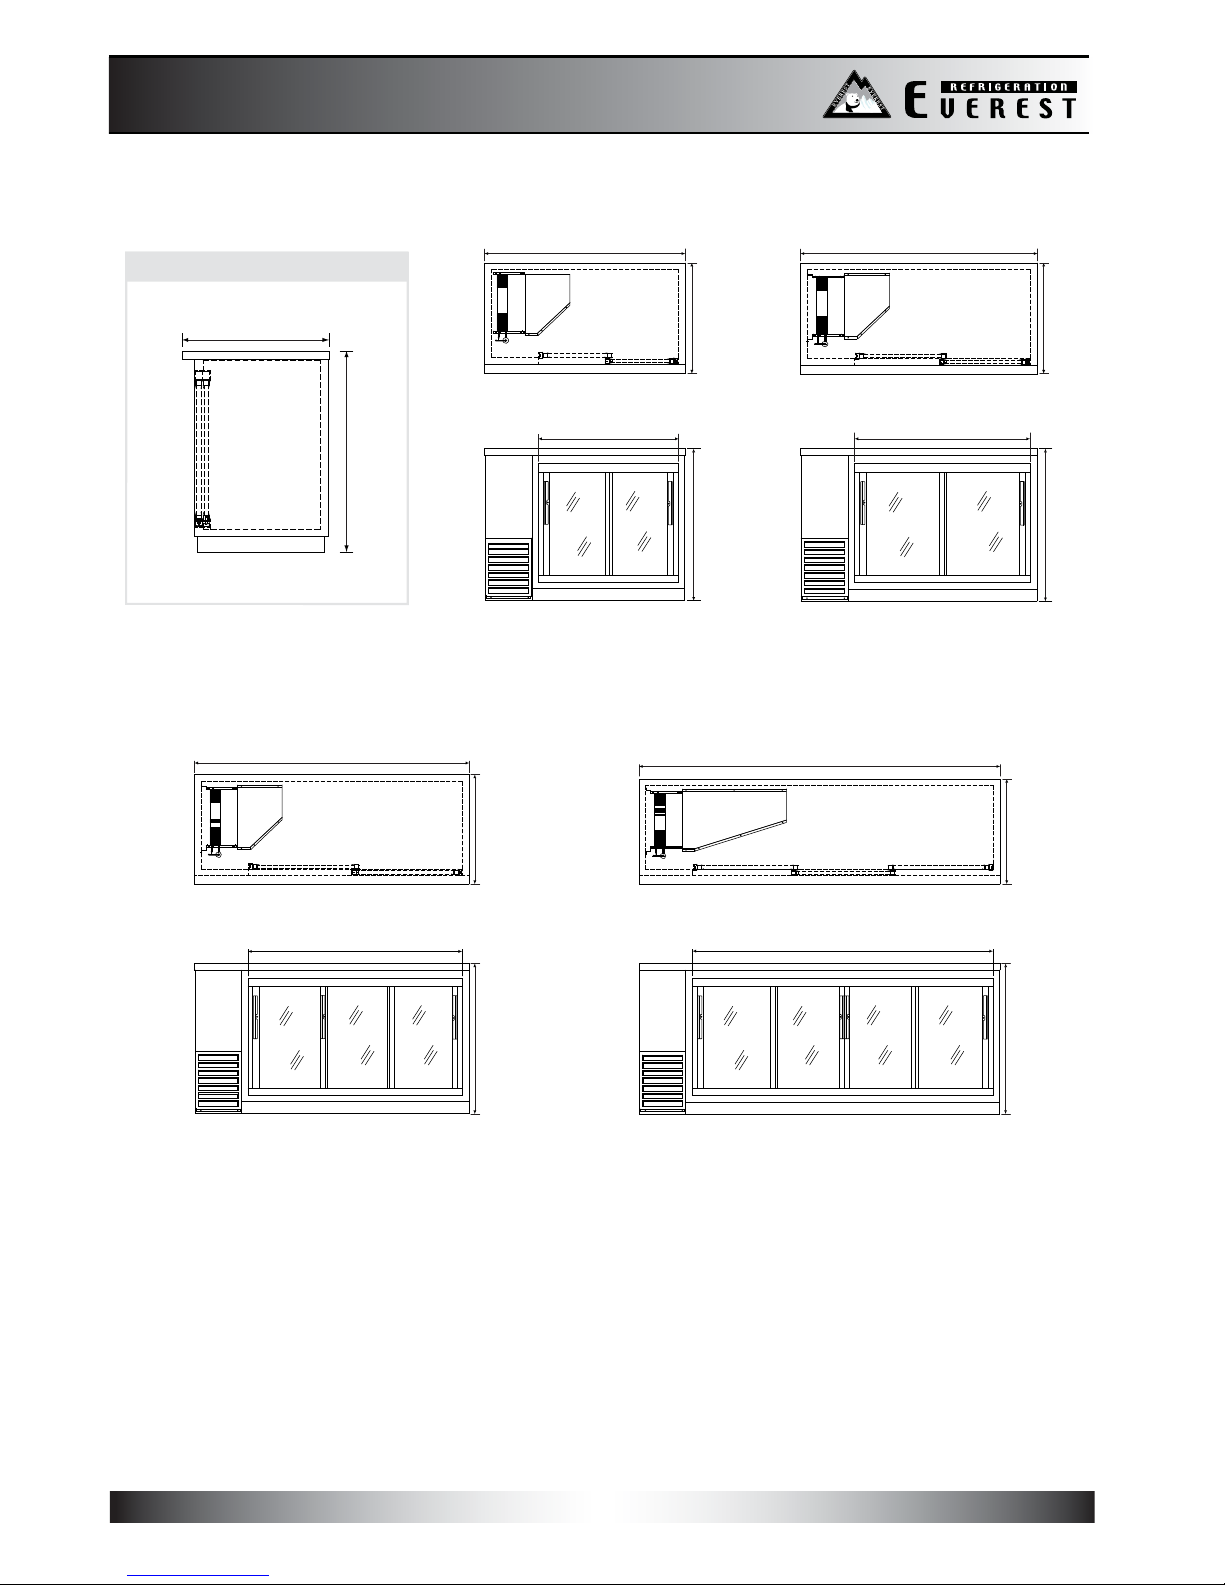
Product Drawings
Product Drawings
REFRIGERATION
17
24" Deep Glass Sliding Door Back Bar Coolers
SIDE VIEW
37 1/8"
24 1/2"
EBB48G-SD EBB59G-SD
49"
24 1/2"
34 1/4"
57 3/4"
42 3/4"
24 1/2"
37 1/8"
37 1/8"
EBB69G-SD EBB90G-SD
68"
53"
24 1/2" 37 1/8"
89 1/4"
74 1/4"
24 1/2" 37 1/8"
18
Critical Information
Critical Information
REFRIGERATION
The warranty card below must be submitted to Everest within thirty (30) days of purchase.
WARRANTY REGISTRATION CARD
Business Name : Telephone : ( )
Address :
City : State : Zip :
Place of Purchase : Date Purchased : Date Installed :
Model No : Cabinet Serial No :
3 YEAR PARTS and LABOR WARRANTY
(Applicable to units purchased after July 1, 2014.)
5 YEAR COMPRESSOR WARRANTY
Name of Business Owner : Date :
Signature of Business Owner :

19
Warranty Certificate
Warranty Certificate
REFRIGERATION
EVEREST warrants tothe original purchaserof every new EVEREST unit, the cabinet and all parts thereof, tobe free from defects in
installation and start-up in accordance with the instruction packetsuppliedwith eachunit. Ourobligation under this warranty is
limited toaperiod of three (3) years from the date of original installation or thirty six (36) months after shipment date from EVEREST,
determined
by EVEREST to have been defective within three (3) years of original installation or thirty six (36) months after shipment datefrom the
ssemblies.
The labor warranty shall include standard straight time labor charges only and reasonable travel time, as determined by EVEREST.
All warranty claims for labor or parts must be made directly through EVEREST. All claims shall include: unit model number, cabinet
serial number, proof of new product purchase, installation date, and all pertinent information related to the allegeddefect. For
compressor warranty claims, the compressor tag shall be returned to EVEREST with the above listed information.
EVEREST's sole obligation under this warranty islimited to either the repair or replacementof parts, subject to the additional limitations
below. This warranty neither assumes nor authorizesanyperson to assume obligations other than those expressly covered by this
warranty.
B. INDIRECT OR CONSEQUENTIAL DAMAGE
limitation, losses or damages arising from food or product spoilage claims caused by refrigeration failure.
C. IMPROPER USAGE
EVEREST is not responsible for parts or labor coverage for componentfailure and or otherdamages resulting from
improper usage, installation or failure to clean and/or maintain product assetforth in the user's manual provided with this
unit. All EVEREST products are designed for commercial usage, not for residential use. Therefore, the warranty will not be
honored if product is installed in a residential house.
D. WARRANTY IS NOT TRANSFERABLE
Warranty is limited to only the original purchaser/user to whom delivered. It is not transferable.
E. ALTERATION, NEGLECT, MISUSE, ABUSE, ACCIDENT, DAMAGE DURING TRANSIT OR INSTALLATION, FIRE, FLOOD, ACTS
OF GOD.
EVEREST is not responsible for malfunctions due to alteration, neglect, misuse, abuse, accident, damage during transit or
connections resulting from electrical power failure, the use of extension cords, and low voltage or voltage dropsto the unit.
F. UNAUTHORIZED MODIFICATION
EVEREST is not responsible for the repair or replacement of failed or damaged components resulting from unauthorized
modi ations to units or the use of non-standard parts without prior written approval from EVEREST.
G. RESIDENTIAL, NON-COMMERCIAL USE
This warranty does not apply to a unit installed in a residential setting. This unit is for commercial use only.
H. OUTSIDE THE U.S.
This warranty does not apply to any parts and/or labor warranty claims made on units sold or used outside of the United
States.
ADDITIONAL TWO(2) YEAR COMPRESSOR WARRANTY
In addition to the warranty set forth above, EVEREST warrants the hermetically sealed compressor for an additional two (2) years, not
to exceed sixty (60) months from the date of shipment from EVEREST, provided upon receipt of the compressor, manufacturer
examinationshows the sealed compressor to be defective. This compressorwarranty does notapply to shipping or labor costs or
any otherparts of the unit whether electrical or mechanical.
These warranties are exclusive and in lieu of all other warranties, expressed or implied, and all other obligations or liabilities on our
part, and we neither assume nor authorize any other person to assume for usany otherobligation or liability in connection with
the sale of said refrigeration units or any part thereof.
A. NON WARRANTY PARTS
This manual suits for next models
21
Table of contents
Other Everest Refrigerator manuals


Popular Refrigerator manuals by other brands


AEG
AEG SANTO Z 91200-4 i operating instructions

Electrolux
Electrolux ENB3660 Instruction book

Hotpoint
Hotpoint CSX20 How to get the best

Monogram
Monogram Monogram ZIC36N RH Custom options guide and installation instructions

Summit Professional
Summit Professional SPR315OS instruction manual

Viking
Viking 091207J Use & care manual