Everidge PREPRITE PBF4.0 User manual

Page 1
OWNER’S MANUAL
BLAST CHILLER
R290 (PROPANE) REFRIGERANT
PBF4.0
EVERIDGE, INC.
15600 37th Ave N, Suite 100
Plymouth, Minnesota 55446
Phone: 888-227-1629

Page 2

Page 3
Thank you for purchasing a Everidge Blast Chiller/Shock Freezer. This unit has been crafted to
provide you with exceptional and reliable service for many years.
Your Everidge Blast Chiller/Shock Freezer has been uniquely designed with the refrigeration system
and its controller strategically located for easy operation and maintenance. The cabinet is designed
with a back step for better condensing unit ventilation. The door has a seamlessly integrated handle built in
and a sanitary magneticgasket which assures a tight seal and is easily removable for cleaning. All of these
unique features were designed with you, the operator, in mind.
All of us on the Everidge team sincerely appreciate your choosing us, and we are confident that your
Blast Chiller/Shock Freezer will exceed your expectations in food preparation and preservation.
This manual will guide you through the operation and programming of the following model: PBF4.0
Model PBF4.0 is designed for:
5- GN 1/1 food pans
4 - Full Size Food Pans
6- 4L Gelato Containers
6 - 5L GelatoContainers
4 - 12L Gelato Containers
PBF4.0 meets or exceeds HACCP, FDA, NSF and all state regulations.
INTRODUCTION

Page 4
IMPORTANT PRODUCT DATA INFORMATIONFOR MODEL PURCHASED
For future reference, please record on this page the applicable data found on the unit’s data labels.
It is recommended that this page is preserved duringthe life of the product.
Reach-ins: Data label is located on the right side of the cabinet in the upper left corner.
Everidge Commercial Blast Chiller and/or Shock Freezer
Model No. _PBF4.0 Serial No. Date Purchased:
Refrigerant: _290R_
Charge inoz: 150 grams
Compressor: HP: 1/3 FLA: 6.0 AMPS__
Fan: HP: 1/4 FLA: 1.0 AMP__
Volts:120VACPH: 1_ Hz: _60 Amps: 7.0 AMPS_
Min. Circuit Amps: 15 AMPS_ Max. Fuse Size (Amps): 15 AMPS_

Page 5
TABLE OF CONTENTS:
INTRODUCTION............................................................................................................................ 2
IMPORTANT PRODUCT DATA INFORMATION.............................................................................. 3
INSTALLATION REQUIREMENTS.................................................................................................. 5
BLAST CHILLER AND SHOCK FREEZER TECHNOLOGY.................................................................. 5
OPERATION.................................................................................................................................. 6
1. AUTOMATIC MODE – SOFT CHILL CYCLE........................................................................ 6
2. AUTOMATIC MODE – HARD CHILL CYCLE...................................................................... 7
3. AUTOMATIC MODE – SHOCK FREEZE CYCLE..................................................................8
4. MANUAL MODE - SOFT CHILL CYCLE........................................................................... 10
5. MANUAL MODE - HARD CHILL CYCLE.......................................................................... 11
6. MANUAL MODE - SHOCK FREEZE CYCLE..................................................................... 12
PROGRAMMING. ...................................................................................................................... 13
1. INITIAL PROGRAMMING............................................................................................... 14
2. CYCLE PROGRAMMING................................................................................................. 17
ELECTRICAL DIAGRAM.............................................................................................................. 22
TROUBLESHOOTING GUIDE FOR PBF4.0.................................................................................. 23
CLEANING INSTRUCTIONS. ....................................................................................................... 27

Page 6
This model has an electrical cord and plug as standard.
Model PBF4.0 has 2 f ront swivel casters with brakes and 2 back casters, f ixed.
A minimum of four inches is recommended for proper clearance around the unit.
This appliance rapidly reduces the core temperature of raw or cooked foods to safe cold storage
temperature levels.
Blast chilling must attain within two hours a product core temperature of 37 0F / 40 0F and shock
freezing must reach a product core temperature of 0 0F within five hours.
The interval between 140 0F and 40 0F, commonly referred to as the “Danger Zone,” is considered the
ideal temperature range for bacteria proliferation in most food products.
The methods of blast chilling and shock freezing help avoid food deterioration by retarding or even
stopping bacteria proliferation.
After blast chilling, the food can be preserved at temperatures of 37 0F / 40 0F for as long as five days
before it is served. Shock freezing will allow food to be safely preserved in a frozen state for several
months.
INSTALLATION REQUIREMENTS
BLAST CHILLER AND
SHOCK FREEZER TECHNOLOGY

Page 7
AUTOMATIC CYCLES
***Important! The AUTOMATIC MODES use both the air and food temperatures to
control the cycles.***
1.
AUTOMATIC MODE – SOFT CHILL CYCLE
Note: The food probe must be used with this cycle!
With the display reading OFF, press (ON/OFF).
The display will show:
Press for Automatic mode and the display will show:
Press and the display will show:
Press , The Auto Soft Cycle will start and the display will show:
OPERATION
Choose cycle:
Automatic
Manual
Choose Auto Cycle:
Soft Hard
Shock
A
AUTO SOFT
Ready to Go / Press START
Air: 0FFood: 0F
75 73
SOFT
AUTO SOFT Time:
Running 00:00:48
Air: 0FFood: 0F
75 73
START
STOP

Page 8
2.
AUTOMATIC MODE – HARD CHILL CYCLE
Note: The food probe must be used with this cycle!
With the display reading OFF, press (ON/OFF).
When the food temperature has reached the TARGET FOOD TEMPERATURE set in PROGRAMMING
CYCLES (default 40oF), a beep will sound and the unit will automatically switch to holding mode.
The display will show:
Once the cycle has been stopped, the display will go back to OFF and another cycle may be selected if
desired.
The display will show:
Press for Automatic mode and the display will show:
Press and the display will show:
Press , The Auto Hard Cycle will start and the display will show:
When the food temperature has reached the TARGET FOOD TEMPERATURE set in PROGRAMMING
Choose cycle:
Automatic
Manual
AUTO HARD Time:
Running 00:00:48
Air: 0FFood: 0F
75 73
START
STOP
AUTO SOFT Time:
Ready / Holding 00:35:20
Air: 0FFood: 0F
40 40
Choose Auto Cycle:
Soft Hard
Shock
A
AUTO HARD
Ready to Go / Press START
Air: 0FFood: 0F
75 73
HARD

Page 9
CYCLES (default 40oF), a beep will sound and the unit will automatically switch to holding mode.
The display will show:
Once the cycle has been stopped, the display will go back to OFF and another cycle may be selected if
desired.
3.
AUTOMATIC MODE – SHOCK FREEZE CYCLE
Note: The food probe must be used with this cycle!
With the display reading
OFF, press (ON/OFF).
The display will show:
Press for Automatic mode and the display will show:
Press and the display will show:
Press . The Auto Shock Freeze Cycle will start and the display will show:
AUTO HARD Time:
Ready / Holding 00:35:18
Air: 0FFood: 0F
40 40
Choose cycle:
Automatic
Manual
Choose Auto Cycle:
Soft Hard
Shock
A
SHOCK
AUTO SHOCK
Ready to Go / Press START
Air: 0FFood: 0F
75 73
AUTO SHOCK Time:
Running 00:00:48
Air: 0FFood: 0F
75 73
START
STOP

Page 10
When the food temperature has reached the TARGET FOOD TEMPERATURE set in PROGRAMMING
CYCLES (default 0oF), a beep will sound and the unit will automatically switch to holding mode.
The display will show:
Once the cycle has been stopped, the display will go back to OFF and another cycle may be selected if
desired.
AUTO SHOCK Time:
Ready / Holding 00:25:25
Air: 0FFood: 0F
-20 0

Page 11
MANUAL CYCLES
***Important! The MANUAL MODES use ONLY time and air probe
temperatures to control the cycles.***
4.
MANUAL MODE – SOFT CHILL CYCLE
With the display reading OFF, press (ON/OFF).
The display will show:
Press for Manual mode and the display will show:
Press and the display will show:
Press . The Manual Soft Cycle will start and the display will show:
When the set cycle time is reached, a beep will sound and the unit will automatically switch to holding
mode.
The display will show:
SOFT
MANUAL SOFT Time:
Running 01:59:59
Air: 0FFood: 0F
75 73
START
STOP
Choose cycle:
Automatic
Manual
M
Choose Manual Cycle:
Soft Hard
Shock Defrost
MANUAL SOFT
Ready to Go / Press START
Air: 0FFood: 0F
75 73
MANUAL SOFT Time:
Ready / Holding 00:21:00
Air: 0FFood: 0F
40 40

Page 12
5.
MANUAL MODE – HARD CHILL CYCLE
With the display reading OFF, press (ON/OFF).
The display will show:
Press for Manual mode and the display will show:
Press and the display will show:
Press . The Manual Hard Cycle will start and the display will show:
When the set cycle time is reached, a beep will sound and the unit will automatically switch to holding
mode.
The display will show:
Once the cycle has been stopped, the display will go back to OFF and another cycle may be selected if
desired.
Choose cycle:
Automatic
Manual
Choose Manual Cycle:
Soft Hard
Shock Defrost
M
MANUAL HARD
Ready to Go / Press START
Air: 0FFood: 0F
75 73
START
STOP
HARD
MANUAL HARD Time:
Running 01:59:59
Air: 0FFood: 0F
75 73
MANUAL HARD Time:
Ready / Holding 00:20:29
Air: 0FFood: 0F
40 40

Page 13
6.
MANUAL MODE – SHOCK FREEZE CYCLE
With the display reading OFF, press (ON/OFF).
***To stop any cycle before it is complete press two times***
The display will show:
Press for Manual mode and the display will show:
Press and the display will show:
Press . The Manual Shock Freeze Cycle will start and the display will show:
When the set cycle time is reached, a beep will sound and the unit will automatically switch to holding
mode.
The display will show:
Once the cycle has been stopped, the display will go back to OFF and another cycle may be selected if
desired.
Choose cycle:
Automatic
Manual
Choose Manual Cycle:
Soft Hard
Shock Defrost
M
MANUAL SHOCK
Ready to Go / Press START
Air: 0FFood: 0F
75 73
START
STOP
HARD
MANUAL SHOCK Time:
Running 01:59:59
Air: 0FFood: 0F
75 73
MANUAL SHOCK Time:
Ready / Holding 00:38:15
Air: 0FFood: 0F
45

Page 14
PROGRAMMING
From OFF display
Press and keep it pressed for 5 sec. The display will show:
Press once
The Password is a combination of 3 keys out of 5 keys
followed by
The display will show:
From or we can go to any Programming Menu and then press
ENTER PASSWORD
_ _ _
START
STOP
A
M
SOFT
ENTER
A
M
SOFT
HARD
SHOCK
ENTER
MAIN MENU
Initial Programming
Cycle Programming
Technician Menu
Clear Events
ENTER

Page 15
Press while you are on ‘Initial Programming’. The display will show:
1. INITIAL PROGRAMMING
Press while you are on ‘Date & TimeSetup. The display will show:
INITIAL PROGRAMMING
Date & Time Setup
Temperature Unit 0F
Food Probes 1
High Air Alarm 1400F
Low Air Alarm -350F
High Food Alarm 1800F
Low Food Alarm 350F
Gelato YES or NO
Ozone YES or NO
Ozone Time 30 min
USB ID 1
Printer Setup
Language English or Spanish
Firmware Version
V 1.01
ENTER
DATE & TIME
Date Setup 03/03/20
Time Setup 07:50 PM
Time Zone UTC-5
Day Light Savings USA
ENTER
Press while you are on ‘Date Setup’. The display will show:
From or you select the month and press
From or you select the day and press
From or you select the year and press
Press to go back to ‘Date & Time’
Press to go to ‘Time Setup’ and press
DATE SETUP
03/05/2020
The ‘03’ (month) will be blinking
ENTER
ENTER
ENTER
SELECT
ENTER
ENTER

Page 16
Press to go to ‘Food Probes’ and press
You can select the number or food probes from 1 to 3. For this unit, being a small unit, one food probe is
recommended.
Press to go to ‘High Food alarm’ and press . Keep the setting at the 140 oF (recommended) and
press
Press to go to ‘Low Food alarm’ and press . Keep the setting at the 35 oF (recommended) and
press
Press to go to ‘Gelato’ and press Make your selection of ‘Yes’ or ‘NO’ and press
Press to go to ‘Ozone’ and press Make your selection of ‘Yes’ or no and press
Press to go to ‘Ozone Time’ and press Ifyour selection was‘Yes’for the ‘Ozone’ you can
selectthe ‘Ozone Time’ (30 min recommended) and press
Press to go to ‘USB ID’ and press
You can make your selection from 1 to 256.
Press to go to ‘Printer Setup’ and press . Make your selection of ‘Yes’ or ‘NO’ and press
Press to go to the ‘MAIN MENU’.
The display will show:
From or youselect the correct time and press
The display will go back to ‘Day & Time.
Press to go back to ‘Initial Programming’
Press to go to ‘Temperature Unit’ and press
You can select 0F or 0C.
Press or to go back to ‘Initial Programming’.
TIME SETUP
08:58 AM
ENTER
SELECT
ENTER
SELECT
ENTER
ENTER
ENTER
ENTER
ENTER
ENTER
ENTER
ENTER
ENTER
ENTER
ENTER
ENTER
ENTER
ENTER
ENTER
SELECT

Page 17
Press to go to ‘Cycle Programming’ and press . The display will show:
Press while you are on ‘Auto Parameters’.The display will show:
Press while you are on ‘Auto Soft Parameters’. The display will show:
From you can select any parameter, press and you can make changes by pressing or
2. CYCLE PROGRAMMING
CYCLE PROGRAMMING
Auto Parameters
Manual Parameters
Defrost Parameters
ENTER
ENTER
AUTO CYCLE PROGRAMMING
Auto Soft Parameters
Auto Hard Parameters
Auto Shock Parameters
ENTER
AUTO SOFT PARAMETERS
Low Air 280F
HighAir 350F
Target Food 400F
Hold Low 350F
HoldHigh 420F
ENTER

Page 18
Press or to go back to ‘Auto Soft Parameters’
Press to go back to ‘Auto Cycle Programming’.
Press to go to the ‘Auto Hard Parameters’ and then press . The display will show:
From you can select any parameter, press and you can make changes by pressing or
Press or to go back to ‘Auto Hard Parameters’.
Press to go back to ‘Auto Cycle Programming’.
Press to go to the ‘Auto Shock Parameters’ and then press . The display will show:
From you can select any parameter, press
and you can make changes by pressing or
Press or to go back to ‘Auto Shock Parameters’.
Press to go back to ‘Auto Cycle Programming’.
Press to go back to ‘Cycle Programming’.
ENTER
ENTER
ENTER
SELECT
SELECT
AUTO HARD PARAMETERS
Zone 1 Low Air 00F
Zone 1 High Air 100F
Break Temp 600F
Zone 2 Low Air 280F
Zone 2 High Air 350F
Target Food 400F
Hold Low 350F
Hold High 42
0
F
ENTER
ENTER
SELECT
SELECT
AUTO SHOCK PARAMETERS
Low Air -250F
HighAir -150F
Target Food 00F
Hold Low -40F
HoldHigh 30F
ENTER
ENTER
SELECT
SELECT
SELECT

Page 19
Press
to go to ‘Manual Parameters’ and press
. The display will show:
Press while you are on ‘Manual Soft Parameters’. The display will show:
From you can select any parameter, press and you can make changes by pressing or
Press or to go back to ‘Manual Soft Parameters’.
Press to go back to ‘Manual Cycle Programming’.
Press to go to the ‘Manual Hard Parameters’ and then press .
The display will show:
From you can select any parameter, press and you can make changes by pressing or
Press or to go back to ‘Manual Hard Parameters’.
Press to go back to ‘Manual Cycle Programming’.
MANUAL CYCLE PROGRAMMING
Manual Soft Parameters
Manual Hard Parameters
Manual Shock Parameters
ENTER
MANUAL SOFT PARAMETERS
Low Air 280F
HighAir 350F
Time 02:00
Hold Low 350F
HoldHigh 420F
ENTER
ENTER
ENTER
SELECT
SELECT
MANUAL HARD PARAMETERS
Zone 1 Low Air 00F
Zone 1 High Air 100F
Zone 2 Low Air 280F
Zone 2 High Air 350F
Time 02:00
Zone 1 Time Percent 75%
Hold Low 350F
Hold High 420F
ENTER
ENTER
SELECT
SELECT
ENTER

Page 20
Press to go to the ‘Manual Shock Parameters’ and then press . The display will show:
From you can select any parameter, press and you can make changes by pressing or
Press or to go back to ‘Manual Shock Parameters’.
Press to go back to ‘Manual Cycle Programming’.
Press to go back to ‘Cycle Programming’.
Press to go to the ‘Defrost Parameters’ and then press . The display will show:
From you can select any parameter, press and you can make changes by pressing or
Press to go back to ‘Defrost Cycle Programming’.
Press to go back to ‘Main Menu’.
ENTER
MANUAL SHOCK PARAMETERS
Low Air -250F
HighAir -150F
Time 04:00
Hold Low -40F
HoldHigh 30F
ENTER
ENTER
SELECT
SELECT
SELECT
ENTER
DEFROST PARAMETERS
Defrost Type Air Flow
Auto/Manual Manual
Manual Time 30 Min
Auto Time 40 Min
Min. Work Time 06:00
ENTER
SELECT
SELECT
Table of contents
Other Everidge Commercial Food Equipment manuals
Popular Commercial Food Equipment manuals by other brands
Stoelting
Stoelting U421 series Operator's manual
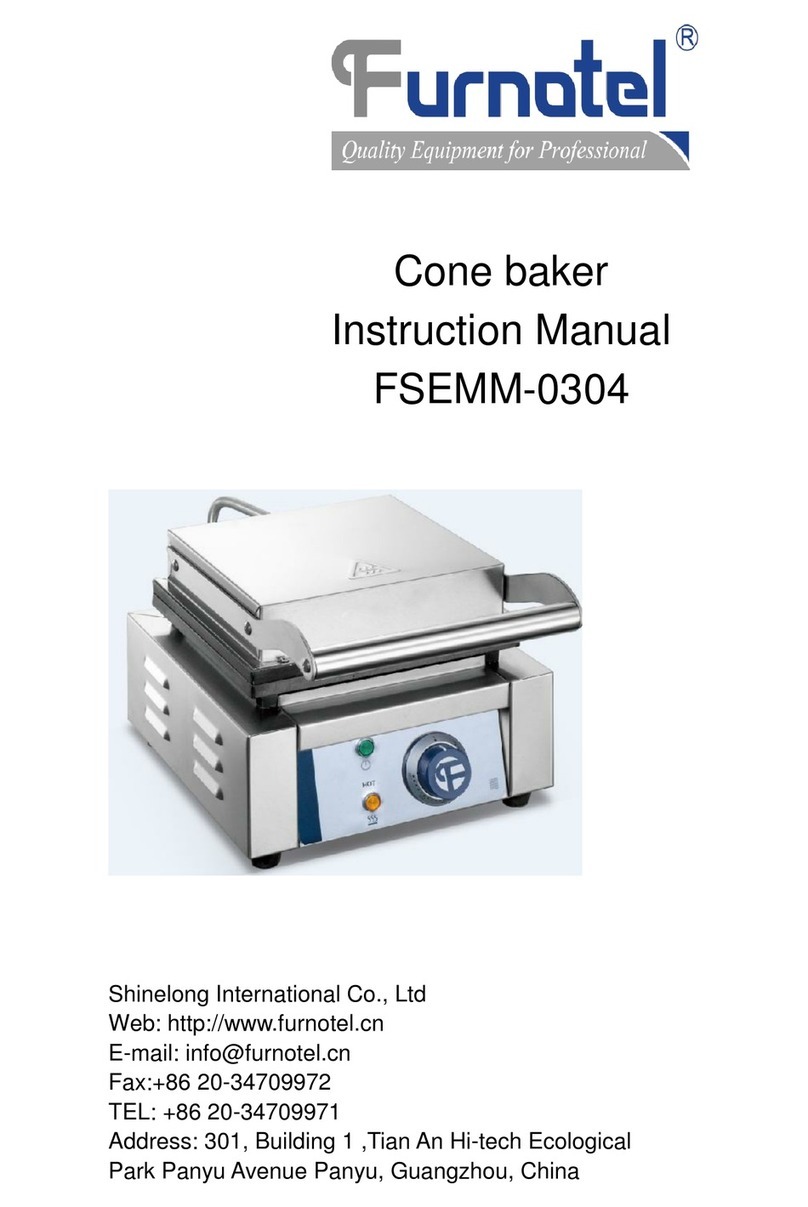
Furnotel
Furnotel FSEMM-0304 instruction manual
Atlas Metal
Atlas Metal BLH Series Service and installation manual
Bartscher
Bartscher 700FX-E1850 instruction manual
Alto-Shaam
Alto-Shaam 500-PVL Operation and care manual
Alto-Shaam
Alto-Shaam 1000-UP/HD Operation and care manual
