EverMore E-trace User manual

Page 1/ 36
E-trace Bedienungsanleitung
Handheld GPS
User manual and Reference guide
Date :April,2005
Version :1.1
All Rights Reserved
SPARTECHNIK HANDELSGESELLSCHAFT MBH BAHNHOFSTRASSE 6
D-71717 BEILSTEIN
TEL 07062 669376
FAX 07062 977897

Page 2/ 36
Introduction
Warnin
g
s
WARNINGS
Some certain knowledge is required to be well known by the user for
proper and safe use of E-trace GPS handheld receiver. Please read this
User’s Manual first before operation.
This product can help the user to find out his way and orient him in
travelling, BUT it can not totally replace the user’s own personal
judgement. Never lose your own reasonable judgement and solely rely
on one device.
Because E-trace is an assistant device, it will NOT undertake any legal
responsibility for any accident or damage caused by the user’s wrong
operation and/or wrong judgement in navigating with E-trace.
CAUTION
The Global Positioning System(GPS) is a system of 24 satellites which
circle the earth twice a day in a very precise orbit and transmit
information to earth. The E-trace must continuously find at least three
of these satellites to calculate your position and your movement.
This GPS system is operated by the government of the United States,
which is solely responsible for its accuracy and maintenance. Any
changes of the system could affect the accuracy and performance of all
GPS equipment.

Page 3/ 36
T
Th
ha
an
nk
k
y
yo
ou
u
f
fo
or
r
c
ch
ho
oo
os
si
in
ng
g
E-trace
G
GP
PS
S
h
ha
an
nd
dh
he
el
ld
d
r
re
ec
ce
ei
iv
ve
er
r!
!
I
It
t
w
wi
il
ll
l
n
ne
ev
ve
er
r
l
le
et
t
y
yo
ou
u
l
lo
os
se
e
y
yo
ou
ur
rs
se
el
lf
f
n
no
o
m
ma
at
tt
te
er
r
w
wh
he
er
re
e
y
yo
ou
u
a
ar
re
e.
.
T
Ta
ak
ke
e
i
it
t
n
no
ow
w
-
--
--
--
--
--
-i
it
t
c
ca
an
n
b
be
e
y
yo
ou
ur
r
b
be
es
st
t
f
fr
ri
ie
en
nd
d!
!
Application Conditions:
E-trace is designed for outdoors navigation in the temperature range of
-20°C~ 70°C. So please use E-trace at an open place with a clear
sky in the suitable environment since the surrounding environment
will surely affect the satellite signals reception and device work
efficiency.
Introduction section gives you a general overview of E-trace
features.
Reference section tells how to operate the unit to locate and record
your position, how to set up a route or record a track, and how to be
guided with this unit specifically in more details.
Standard Package:
•A E-trace GPS handheld receiver
•A User’s Manual
If you find something missing or damaged with the reference
to the standard package, please contact the local dealer or retailer.
Introduction
Welcome to E-trace

Page 4/ 36
Waterproo
f
Batter
y
housin
g
Screw
Reference
E-trace Features
•Unit Features
•Battery installation & Keypad
•Start up the unit
•Operation Structure
•Main pages
Internal GPS
Antenna
UP / DOWN /
RIGHT / LEFT/ ENTER
keypads
LCD Display
(with back
-
light)
ESCAPE
ke
yp
a
d
POWER
ke
yp
ad

Page 5/ 36
Battery Installation
1. Turn battery cover screw counterclockwise until the battery cover can
be removed.
2. Insert two new AA(or rechargeable) 1.5 V batteries as shown in the left
picture, be sure to check the polarity, and replace the battery cover.
3. Replace the screw and turn the screw clockwise until the battery cover
is held securely. While the battery cover does provide the waterproofing
seal to the batteries, you should avoid over-tightening the battery door
screw.
N
NO
OT
TE
E:Battery life varies due to variety of factors, including
temperature and back-lighting usage. Rechargeable batteries can
also be used except that batteries state is not always correctly
informed in the E-trace. An internal lithium battery will retain your
data while you’re changing AA(or rechargeable) batteries.
ESCAPE key
•switches among four main pages
•cancels current operation
•backs to last step or last page
POWER key
•turns the unit off and on
•turns the back-light off and on
UP / DOWN / RIGHT / LEFT/ ENTER key
•highlights menu options and enters data
•controls cursor movement on the map page
•adjusts screen lightness and map display scale
•initiates entry and accepts the selected value
•enters MENU page
Reference
Batter
y
Installation & Ke
yp
ad

Page 6/ 36
To start up the E-trace, you should take the unit outside and find an open area
where the built-in antenna has a clear view of the sky.
Turning the E-trace on
1. Press POWER key until you hear a sound of “B” and the Welcome page appears.
2. Press ESCAPE key continuously, the four main pages come out in order. Press ENTER
key from some of these main pages, you can enter MENU page and start operation as
stated below.
Turning the E-trace off
Press and hold POWER key for about 3 seconds until the screen goes blank.
Turning the back-lighting
In any step of the operation, just press POWER key to turn it on and off.
N
NO
OT
TE
E:When you use the unit for the first time, it
will take 5 minutes to track the satellites and fix
position for the unit. After the first use, it will only take
you less than one minute at the beginning for each
time .
If batteries do not have enough power to support the
unit operation at the very beginning, the unit will alarm
Reference
Start u
p
the unit

Page 7/ 36
E
S
C
A
P
E
The E-trace operation is organized into four main
pages: the Satellite Page, the Tracking Page, the
Navigation page, and User Format page. Normally,
every time you turn on the E-trace, you’d better
switch into Satellite page and check satellites status
first then start operation.
When you press POWER key to start up the unit, you
can press ESCAPE key to switch among these four
main pages. And from No.1 and No.3 main pages,
press ENTER key, the unit pops up the Menu page.
Here you could select specific section you want to
enter and make further operation.
In the Menu page, there are six options: MARK,
W_LIST, R_LIST, T_LIST , SETUP , COMMU.
Press UP / DOWN key to highlight the option you
want, and then press ENTER key, you are able to go
on further operation. Or press ESCAPE key in the
Menu page, you can withdraw from Menu page and
back to those four main pages.
1
2
3
4
Satellite
ESCAPE o
r
Wait for 30
secon
d
s
SETUP
T_LIST
R_LIST
W_LIST
MARK
Operation Structure
Navigation
Tracking
User Format
ENTER
ESC
COMMU
ESCAPE
ENTER
ESCAPE
ESCAPE
ESCAPE
ESCAPE
Tracking Options
ESCAPE
ENTER
Other User Format Datum
ESCAPE
ENTER
Reference
O
p
eration Structure

Page 8/ 36
The Satellite page
•This page informs you mainly on the satellites
distribution and satellite signal strength. Normally, the
unit needs at least three satellites in connection for data
processing. You should check the icon at the left top of
this page first. It plays the same role as defined in the
Position page.
•Here two circles are used to describe satellites
distribution scope. All satellites will scatter within or
along the bigger circle. If the satellite icon is blank, this
satellite is just found; if it is filled with blackness, its
signal is engaged in data processing.
•The columns in the half lower part of the page tell you
the strength of satellites signals. The higher the column,
Reference
Main Pa
g
es
02 21 12 24 15 10 18
02
21
18
12
24
15
10
•means all the information
displayed is valid
•Satellite position in the space
•The user’s position
•Satellite Signal state
•Satellite ID numbe
r

Page 9/ 36
The Tracking page
This page is mainly used for track recording. The little figure in the middle of
the screen is YOU. When you are moving, it will trail a line to simulate your
movement, in this the E-trace can record your track. And at the bottom of the
display, two messages are available: one is map scale at the left; the other is
mileage at the right. You can press LEFT/ RIGHT keys to adjust the map scale.
•Press ENTER key, four options pop up: MENU page and operation will be
introduced later in coming sections; highlight PAN item and press ENTER key
again to enter the state of cruise, in which you can travel along your track and
check more details; highlight AREA item and press ENTER key again to enter
to setup area .
•The battery state is displayed in the middle right part of the screen. The
higher the black column, the more the power.
•In cruise page, you can move the cross by pressing UP/ DOWN/ LEFT/ RIGHT
keys. The longitude and latitude of the moving cross can always be read at
right bottom of the display.
ENTER
ENTER
ENTER
ENTER
ENTER
ESCAPE
Reference
Main Pa
g
es

Page 10/ 36
The Navigation page
This page makes very essential direction when you are under navigation. It orients
you to your destination, tells you how far away you are from your destination, and
your actual movement speed, and the route or track name you are using for
navigation. The arrow in the middle always points to the direction you are
advancing (in another word, it is Head-up direction).So you can judge your
moving direction by the compass. Once you stop advancing, the arrow will return
to North after 2-3 seconds. The dot in the ring shows the reference orientation of
next waypoint or destination.
It displays the information about your current location, including longitude,
latitude, COG, SOG ,etc, you can use the UP/ DOWN keypads to choose the
content.
Altitude
Reference
Main Pa
g
es
Moving direction
North latitude
East longitude
The location of next wa
yp
oint
Bearing angle to North
Speed over ground

Page 11/ 36
N
NO
OT
TE
E:
•The date and time here is collected from the satellite, there is no clock in
E-trace.
•At the left top of the page, the icon of means all the information displayed is
invalid; but the icon of means valid. So it is very important for you to
check this icon during operation.
Reference
Main Pa
g
es

Page 12/ 36
Gauss X-coordinate
Gauss Y-coordinate
Latitude
Longitud
Altitude
World Geodetic System,1984
East-West warp
Center-Meridian
The scale of projection
South-North warp
ENTER
Reference
Main Pages
The User Format page
The page indicate information of local coordinates system(generally, it is
WGS84 ) and Gauss projection- coordinates .The information Contain X
coordinate , Y coordinate , latitude, longitude and altitude. Press ENTER key,
four options (Yf , Lf , Df , Xf ) will appear. Its can be togged by pressing
ENTER key, you can press Left/Right key to move the cursor in the selected
row and press Up/Down keys to vary the selected data.
After main pages introduction, let’s look at how to operate the E-trace step by step.
We will guide you the operation process in the order of Mark, Waypoint, Track, Route,

Page 13/ 36
A Waypoint is any identified point on the map or track that has
been named and recorded. The E-trace can store up to 1000
waypoints in the memory. Waypoints are used to build a route.
Marking Position
If you want to mark your current position as a waypoint, you should
check Position page to make sure your position is already fixed and
valid. Then follow these steps to mark it:
1. Press ENTER key from Position page and enter MENU page
2. Press UP / DOWN keys to select MARK item
3. Press ENTER key to go into MARKING page
4. Press LEFT / RIGHT/ ENTER keys to select change items
5. Press UP / DOWN keys to change letter and symbol in each
item to define this waypoint
6. Use LEFT/ RIGHT keys to highlight YES and press ENTER key
to confirm your marking, then this position is saved in waypoint
list; or highlight No and press ENTER key to cancel your
marking
Creating a waypoint:
1.Press UP/ DOWN keys in MENU page and highlight
Waypoint item, press ENTER key to go into Waypoint
List page
2.Press ENTER key and pop up a sub-menu
3.Press UP/ DOWN keys to highlight Create item, then
press ENTER key again and enter Waypoint Create
page
4.Press LEFT/ RIGHT/ ENTER keys and highlight the
item to change
5.Press UP/ Down keys to change letter, symbol and
number. You can not only define the waypoint by
name and symbol but also input the longitude and
latitude for this waypoint.
6.Highlight Yes and press ENTER key to confirm; or No
and press ENTER key to cancel.
Mark a waypoint
Create a waypoint
ENTER
ENTER
ENTER
ENTER
ESCAPE
Waypoint’s name
Waypoint’s icon
Latitude Longitude
Altitude
ESCAPE
ENTER
ESCAPE
Reference
Mark & Creatin
g
a Wa
yp
oint

Page 14/ 36
Reference
Editing a Waypoint
Editing a Waypoint:
1.Press ENTER key in Waypoint List page and see a sub-menu
2.Press UP/ DOWN keys to highlight Edit item
3.Press ENTER key again and enter Waypoint Edit page
4.Now follow the step4, 5 & 6 as described to build a Waypoint
Deleting a Waypoint:
1. Press ENTER key in Waypoint List page and see a sub-menu
2. Highlight Delete item by pressing UP/ DOWN keys
3. Press ENTER key and see a massage “delete?”
4. Choose Yes and press ENTER key to confirm your deletion; or choose No for
cancellation
Searching a Waypoint:
1.Press ENTER key in Waypoint List page and see a sub-menu
2.Press UP/ DOWN keys in sub-menu and highlight Search item
3.Press ENTER key and a small window pops up
4.Press UP/ DOWN/ LEFT/ RIGHT keys to input the waypoint name you are
looking for, and then highlight OK and press ENTER key
5.If your input exists in the waypoint list, the page will go back to Waypoint List
page and your wanted waypoint is highlighted in the list. Otherwise, there
comes out a message saying “ Fail to find out waypoint by name!”
Sorting Waypoints:
Sorting waypoint is to list all the waypoints in alphabetic order. Press ENTER
key in Waypoint List page and see a sub-menu. Press UP/ DOWN keys to
highlight Sort item in Waypoint List page, and press ENTER key, then all the
waypoints are relisted.

Page 15/ 36
Activate a Waypoints:
If you want to use a waypoint for navigation, you must make it active first.
1. Press ENTER key in Waypoint List page and see a sub-menu(as destination)
2. Highlight Active item by pressing UP/ DOWN keys
3. Press ENTER key to confirm and E-trace begins to guide you to reach destination
4. Then, “Active” change into “Stop”,if press ENTER key, guiding will stop .
DeleteAll:
Remove all waypoints.
1. Press ENTER key in Waypoint List page and see a sub-menu
2. Highlight DeleteAll item by pressing UP/ DOWN keys
3. Press ENTER key and see a massage “Sure to Delete?”
4. Choose Yes and press ENTER key to confirm your deletion; or choose No for
cancellation
ENTER ENTER
ENTER
ENTER ENTER
Reference
Editing Waypoints

Page 16/ 36
Creating a route
1.Press UP / DOWN keys to highlight R_LIST item in MENU page and press ENTER key
2.Coming to Routes List page, Press ENTER key
3Press UP/ DOWN keys to highlight Create item and press ENTER key
4. Press ENTER key again
5.Highlight Add item by UP/ DOWN keys and press ENTER key
6.Coming to the page of Waypoint List, you choose any waypoint you want to set in this route by UP/
DOWN keys, then press ENTER key
7. Redo from step 4 to step 6 to add multi- waypoint into the route, Press ENTER key and highlight Save
by pressing UP/DOWN keys.
8. Press ENTER key to finish creating a route.
The Route function allows you to link up a series of waypoints and guide to point by point, to a
final destination. If there is a route made up of three waypoints A, B and C. Then the segments
in travelling order from Waypoint A to Waypoint B, and from Waypoint B to Waypoint C are
called “two legs” on the route.
The route can contain up to 50 waypoints(including start and destination) in E-trace using any o
f
the waypoint stored in the memory.
In the page of Create a Route, highlight a waypoint by UP/ DOWN keys, and press ENTER ke
y
, pop up
four operational options:
1. Add Waypoint is to put a waypoint behind the highlighted waypoint:
•Press UP/ DOWN keys to highlight Add WPT item
•Press ENTER key and enter Waypoints List page
•Press UP/ DOWN keys to highlight the waypoint you want to add
•Press ENTER key to confirm
2. Insert Waypoint is to put a waypoint in front of the highlighted waypoint
• Press UP/ DOWN keys to highlight Insert WPT item
• Press ENTER key and enter Waypoints List page
• Press UP/ DOWN keys to highlight the waypoint you want to insert
• Press ENTER key to confirm
3. Delete Waypoint is to remove a waypoint in a route
• Press UP/ DOWN keys to highlight the waypoint you want delete
• Press ENTER key, then the waypoint erased from the route
4. Save is to finish route edition and keep it in the unit memory
• Press UP/ DOWN keys to highlight Save item
• Press ENTER key and a mini-window pops up
• Use LEFT/ RIGHT UP/ DOWN keys to name this route
• Press LEFT/ RIGHT keys to choose YES or NO, then press ENTER key to confirm your choice
Reference
Creatin
g
a Route

Page 17/ 36
NOTE: When you are saving a route in route creation, if there is already a same named route
existed in the memory, the unit will remind you to rename it.
ENTER
ENTER
ENTER
ENTER
ENTER
ENTER
ENTER
ENTER
ENTER
ENTER
ESCAPE
ENTER
ESCAPE
ENTER
ESCAPE
Reference
Creatin
g
a Route

Page 18/ 36
Reference
Editin
g
a Route
Editing Route
In the page of Route List, you can browse all the routes you saved in E-trace. If you want to
change a route, you can edit it by changing waypoints design:
1. Press UP/ DOWN keys to highlight the route you will change in the page of Route List
2. Press ENTER key and switch into the page of Edit This Route
3. You see all the waypoints along the route now, press ENTER key and pop up a sub-menu
with four commands: Add (WPT), Insert (WPT), Delete (WPT) and Save(route). You can
operate as stated above to change this route specifically.
4. In the end, don’t forget to save your edition. Press UP/ DOWN keys and highlight Save item in
the page of Edit This Route, press ENTER key and check the route name again. If you just want
to keep it, only choose OK; If you want to change the name, just follow the steps in Save Route.
Deleting Route
In the page of Route List, if you want to delete a route:
1. Press UP/ DOWN keys to highlight the route you will delete in the page of Route List
2. Press ENTER key and highlight Delete item in the pop-up sub-menu by UP/ DOWN keys
3. Press ENTER key , and a prompt appears asking for your confirmation
4. Use LEFT/ RIGHT keys to highlight Yes and press ENTER key again, the route is deleted
from the unit; otherwise press No, your deletion becomes invalid
Sorting Routes
1. Press UP/ DOWN keys to highlight any route in the page of Route List
2. Press ENTER key and highlight Sort item in the pop-up sub-menu by UP/ DOWN keys
3. Press ENTER key , and all the routes in the memory are listed in alphabetic order
Active Route
If you want to use a route for navigation, you must make it active first.
1. Press UP/ DOWN keys to highlight the route you will use for navigation in the page of Route
List
2. Press ENTER key and highlight Active item in the pop-up sub-menu by UP/ DOWN keys
3. Press ENTER key , then the route is activated ( a wait cursor appears beside the route),
navigation from start to end work ,“Active” become to “Stop”. Then, if press ENTER key
on it , guiding will stop .
Return Route
If you want to return along a route for navigation, you can use this function.
1. Press UP/ DOWN keys to highlight any route in the page of Route List
2. Press ENTER key and highlight Return item in the pop-up sub-menu by UP/ DOWN keys
3. Press ENTER key , then navigate from end back to start point ( a wait cursor appears beside
the route), “Return” become to “Stop” . Then ,if press ENTER key on it , guiding will
stop .
Firstly, the five commands have the same functions and operation steps as explained above,
secondly, they are only used for routes in navigation.

Page 19/ 36
Once a route is activated, in the pop-up sub-menu, the five commands are used for route navigation.
When you are using route navigation, you should switch to Tracking page to see your trace, and switch
to Navigation page to find out your movement status, including LAT,LON, COG,SOG,ALT. In this way,
you are enabled to find your way.
DeleteAll
Remove all Routes.
1. Press ENTER key in Route List page and see a sub-menu
2. Highlight DeleteAll item by pressing UP/ DOWN keys
3. Press ENTER key and see a massage “Sure to Delete?”
4. Choose Yes and press ENTER key to confirm your deletion; or choose No for cancellation
NOTE:
• You can not edit a route when it is in navigation.
Reference
Editin
g
a Route

Page 20/ 36
ENTER
ENTER
ESCAPE
ENTER
ESCAPE
ENTER
ESCAPE
Reference
Recordin
g
a Track
Recording a Track
1.Press UP/ DOWN key s in MENU page and highlight T-list item, press ENTER key and come into Track
page
2.Press ENTER key and Track Edit window pops up
3.Press UP/ DOWN/ LEFT/ RIGHT keys to change letter and number to give the track a name
4.Press ENTER key to confirm your naming
5.Press ESCAPE key continuously till you return into the main page of Tracking
NOTE: If you input a name which has already existed in track library, you will be informed by
a message “Name Existed”. In this case, you must change your naming. In E-trace, you can
record at most 10 tracks in total, otherwise, a prompt “Memory Full” appears.
6. When you stop your tracking, switch into Track page again and highlight “Stop Record” , then press
ENTER key.
NOTE: You may find your track not a continuous line in the display. That is because the
satellite signal reception is not steady due to some high buildings, subways or magnetic field
and etc.
Once you have some tracks recorded, you can rename and delete them, use one of them for
navigation, and check its record time, distance, speed, area and state.
Table of contents
Other EverMore GPS manuals
EverMore
EverMore SA-320 User manual

EverMore
EverMore SA-320 User manual
EverMore
EverMore GM-X205 User manual
EverMore
EverMore ST-K700 User manual
EverMore
EverMore EB-X315 User manual
EverMore
EverMore GM-R900 User manual

EverMore
EverMore SA-320 User manual
EverMore
EverMore BT-R900 User manual
EverMore
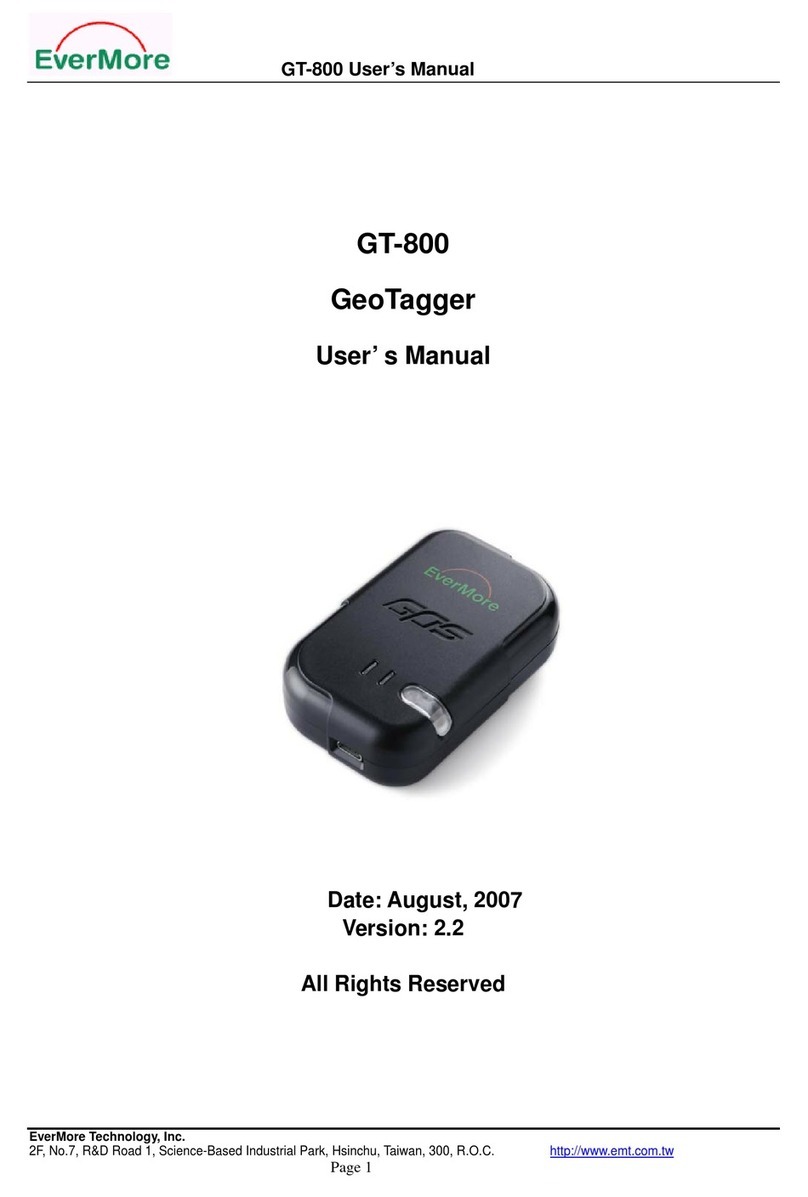
EverMore GeoTagger GT-800 User manual
EverMore
EverMore GeoTagger GT-800 User manual
