Eviant T10 Series User manual


I
Introduction
Congratulations on purchasing your Eviant Portable Digital TV.
On June 12, 2009 the conversion to digital television broadcasting
will be complete all throughout the United States and Puerto Rico.
Your portable digital television is designed to pick up both the older
analog signals as well as the new digital signals. In addition, you can
use your digital TV to view movies from a VCR or DVD player.
Use your portable digital TV at work or take it on vacation and relax
with your favorite TV programs anywhere. Please read these instructions carefully to get
the most from your new Eviant digital TV.
Important Safety Instructions
1) Read these instructions.
2) Keep these instructions.
3) Heed all warnings.
4) Follow all instructions.
5) Do not use this apparatus near water.
6) Clean only with dry cloth.
7) Do not block any ventilation openings. Install in accordance with the
manufacturer’s instructions.
8) Do not install near any heat sources such as radiators, heat registers, stoves, or
other apparatus (including amplifiers) that produce heat.
9) Do not defeat the safety purpose of the polarized or grounding-type plug. A
polarized plug has two blades with one wider than the other. A grounding type plug
has two blades and a third grounding prong. The wide blade or the third prong is
provided for your safety. If the provided plug does not fit into your outlet, consult an
electrician for replacement of the obsolete outlet.
10) Protect the power cord from being walked on or pinched particularly at plugs,
convenience receptacles, and the point where they exit from the apparatus.
11) Only use attachments/accessories specified by the manufacturer.
12) Use only with the cart, stand, tripod, bracket, or table specified by
the manufacturer, or sold with the apparatus. When a cart is used,
use caution when moving the cart/apparatus combination to avoid
injury from tip-over.
13) Unplug this apparatus during lightning storms or when unused for
WARNING: To reduce the risk of fire or
electric shock. DO NOT expose this
product to rain or moisture.

II
long periods of time.
14) Refer all servicing to qualified service personnel. Servicing is required when the
apparatus has been damaged in any way, such as power-supply cord or plug is
damaged, liquid has been spilled or objects have fallen into the apparatus, the
apparatus has been exposed to rain or moisture, does not operate normally, or has
been dropped.
15) Apparatus shall not be exposed to dripping or splashing and no objects filled with
liquids, such as vases, shall be placed on the apparatus.
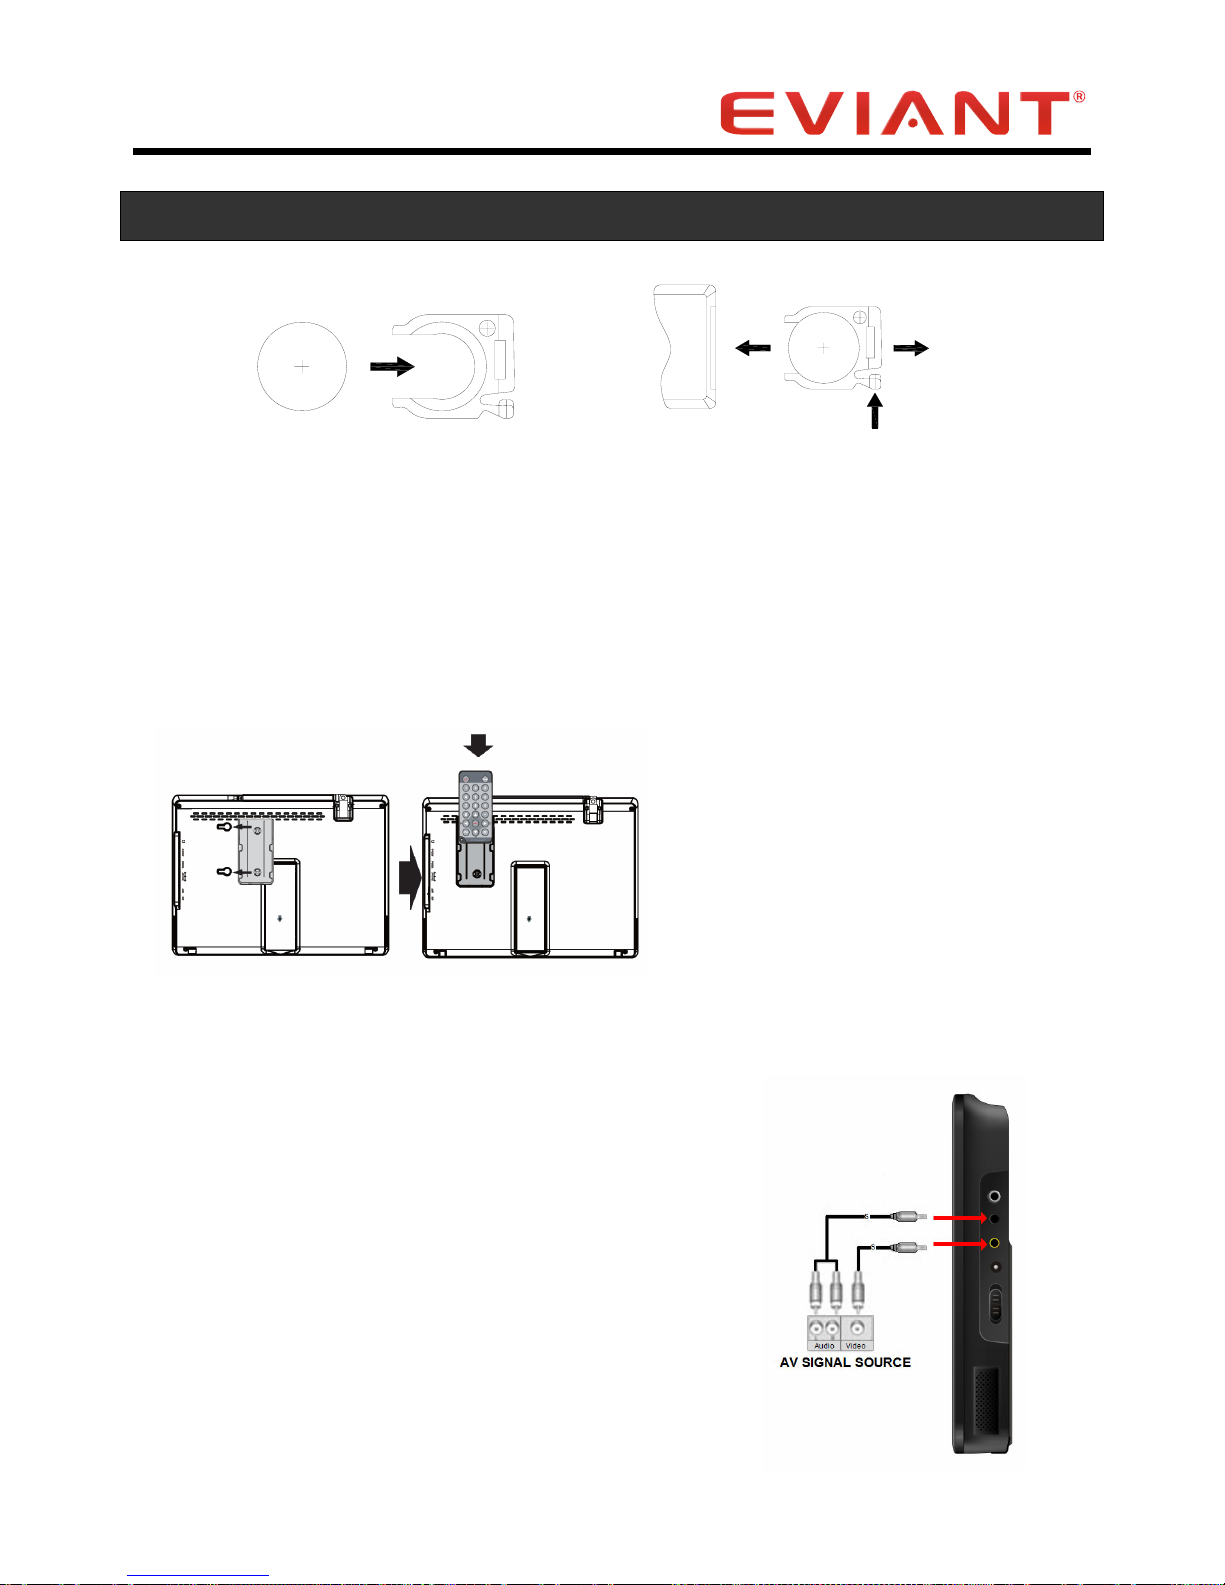
16) CAUTION: Danger of explosion if battery is incorrectly replaced. Replace only with
the same or equivalent type.
17) Warning: the battery pack or batteries installed shall not be exposed to excessive
heat such as sunshine, fire or the like.
18) Install in accordance with the manufacture’s instructions, Do not use any cover
over the TV, or enclose the AC/DC adapter, with any objects like a cloth or box
which blocks the vents, This will cause the TV to overheat and present a fire
hazard, Always leave sufficient space around the product for ventilation.
19) Apparatus does not have wall/ceiling mount function.
20) Warning: Changes or modifications to this unit not expressly approved by the party
responsible for compliance could void the user’s authority to operate the
equipment.
The MAINS plug or an appliance coupler is used as the disconnect device, the
disconnect device shall remain readily operable.
WARNING
The apparatus shall not be exposed to dripping or splashing and that no objects filled
with liquids, such as vases, shall be placed on the apparatus.
CAUTION: These servicing instructions are for use by qualified service personnel only.
To reduce the risk of electric shock, do not perform any servicing other than that
contained in the operating instructions unless you are qualified to do so.
Refer to service manual for servicing instructions. To reduce the risk of fire or electric
shock, do not expose this apparatus to rain or moisture.
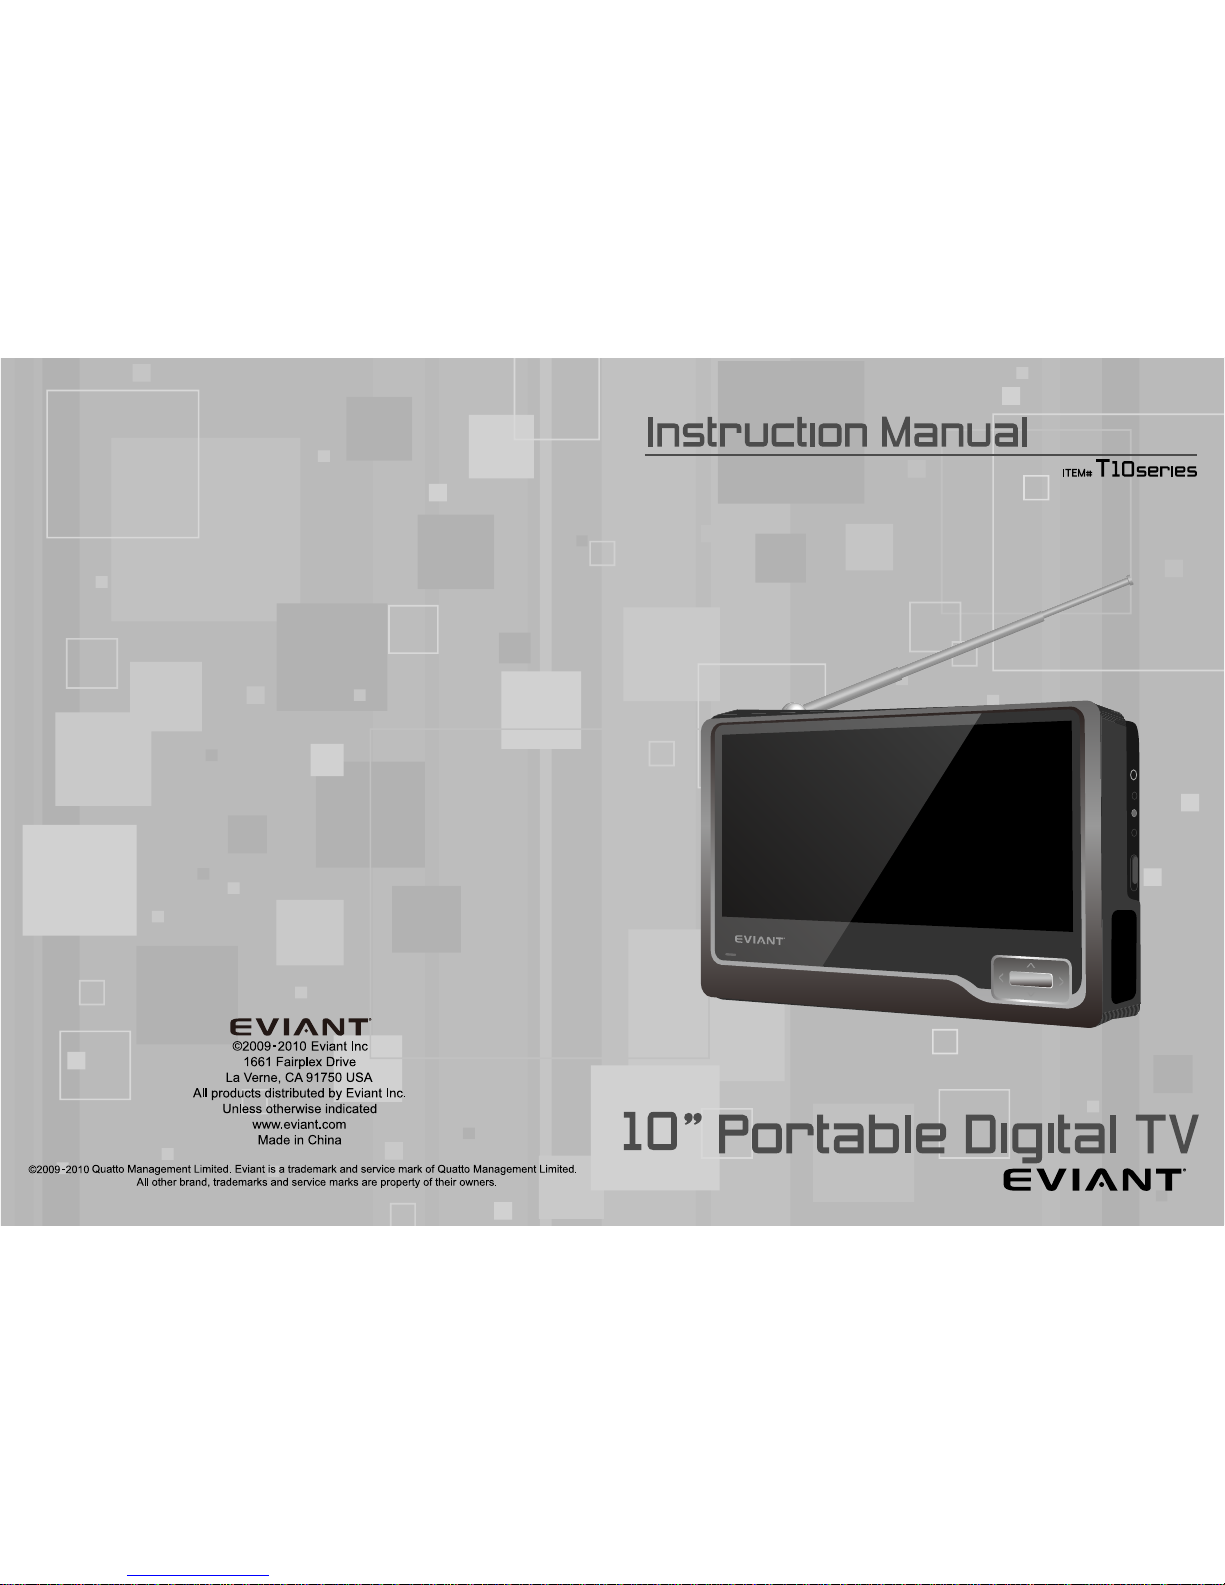
The images in this manual are only for reference and they may be different from
the actual ones.
The lightning flash with arrowhead symbol, within an equilateral triangle, is
intended to alert the user to the presence of un-insulated “dangerous
voltage” within the product’s enclosure that may be of sufficient magnitude to
constitute a risk of electric to persons.
The exclamation point within an equilateral triangle is intended to alert the
user to the presence of important operating and maintenance (servicing)
instructions in the literature accompanying the appliance.

III
FCC Compliance
This device complies with part 15 of the FCC Rules. Operation is subject to the
following two conditions:
zThis device may not cause harmful interference.
zThis device must accept any interference received, including
interference that may cause undesired operation.
This equipment has been tested and found to comply with limits for Class B digital
device, pursuant to part 15 of the FCC Rules. These limits are designed to provide
reasonable protection against harmful interference in a residential installation. This
equipment generates uses and can radiate radio frequency energy and, if not
installed and used in accordance with the instructions, may cause harmful
interference to radio or television reception, which can be determined by turning
the equipment off and on. The user is encouraged to try to correct the interference
by one or more of the following measures:
zReorient or relocate the receiving antenna on the affected receiver.
zIncrease the separation between this device and the receiver. Connect
this device into an outlet on a circuit different from that to which the
receiver is connected.
zConsult the dealer or an experienced radio/TV technician for help.
This Class B digital apparatus complies with Canadian ICES-003.
zThis Class B digital apparatus complies with Canadian ICES-003.
Accessories
The Following Items Are Included With Your TV.
1. TV Unit
2. AC Adaptor
3. Telescoping Antenna
4. Accessory Antenna
5. Car Adaptor
6. Remote Control
7. Remote Control Storage Bracket
8. Audio/Video Cable
9. Soft carrying pouch
10.Documentation
NOTE: The Telescoping Antenna comes attached to the unit.

IV
Table of Contents
Introduction
Important Safety Instructions……………………....Ⅰ
FCC Compliance……………………………………Ⅲ
Accessories………………….................................Ⅲ
Getting Started
Controls, Inputs &Outputs ....................................1
Antenna................................................................2
Using AC Adapter.................................................2
Using DC Adapter ................................................2
About Rechargeable Battery ................................2
Remote Control....................................................3
External DVD or VCR Connection........................4
Connecting to Earphones.....................................5
Display Options & Channel Setup
Picture Menu........................................................5
Audio Menu..........................................................6
Time Menu ...........................................................7
Options Menu.......................................................7
Lock Menu ...........................................................9
Channel Setup ....................................................10
Service & Support
Troubleshooting ..................................................12
Specifications ......................................................13

- 1 -
Getting Started
Controls
1. LCD Screen
2. Channel Up
(Direction Up)
3. Volume Down
(Direction Left)
4. Channel Down
(Direction Down)
5. Volume Up
(Direction Right)
6. Menu
7. Remote Sensor
8. Charge Indicator
Inputs & Outputs
1. Headphone Jack
2. Audio Input
3. Video Input
4. 12V DC Power Jack
5. Power Switch
6. Speaker
1. Telescoping Antenna
(Removable)
2. Mounting Holes (Remote
Bracket)
3. Stand

- 2 -
Getting Started (continued)
Antenna
The TV unit is supplied with a telescoping antenna that will provide good
reception in most situations. Be sure keep the TV stationary when trying to
receive a signal, any movement of the TV can result in loss of the digital signal.
Note: You can also connect your own antenna cable connected to any suitable
TV antenna or cable system to improve reception. For cable TV, see page 10
for setting the antenna option to Cable.
Your Eviant T10 is also supplied with an
external antenna that can be located a short
distance away from the TV to improve
reception.
Simply remove the telescoping antenna by
positioning the antenna vertical to the TV and
gently pull up. Insert the external antenna
plug and position the antenna for best
reception.
Using AC Adaptor
The TV unit is supplied with a 120V AC Power Adaptor for charging the internal
battery and for powering the unit. Plug the adaptor into the wall socket and plug
the small DC plug into the DC jack adjacent to the power switch.
Using DC Adaptor
The TV unit is supplied with a Car Adaptor for charging the battery in a vehicle.
To Use: Connect the car adaptor into the 12V cigarette lighter socket in a
vehicle.
Attention
¾Do not operate the unit or view video software while driving a vehicle.
¾Place the unit in a proper position for viewing.
¾Unplug the unit from the Car Adaptor when starting the vehicle.
About Rechargeable Battery
Your portable TV device comes with a built-in rechargeable Lithium-Ion battery.
Charge the battery fully before initial use. Charging time is normally about 3.5
hours. A fully charged battery delivers about 2 hours to use.
•When charging the battery, the charge indicator will turn red light. When
charging is complete, the light will turn blue.
•When the battery is weak, an indication symbol will appear on the LCD
screen and the unit will power off automatically after a few minutes.

- 3 -
Getting Started (continued)
Remote Control
NUM Description
1 Power Button
2 0-9 Number buttons: To change the channel and to select individual
menu options.
3 Volume Down ◄:Move left/change settings in menus. Decrease the
volume level in viewing mode.
4 Return button (return to the last channel): To exit a selection or to
close the menu.
5 Channel Down▼:Move down in the menus and change to the
previous channel in viewing mode.
6 Channel Up ▲: Move up in the menus and change to the next channel
in viewing mode.
7 Character button: to connect the channel no. e.g.: 1-1
8 Volume Up ►: Move right/change settings in menus. Increase the
volume level in viewing mode.
9 Mute: Press once to turn the sound off/on (mute/unmute).
10 Menu: To go back one level at a time within menus. To open/close the
menus.
11 FAV: Open or close the favorite program list.

- 4 -
Getting Started (continued)
PUSH
OPEN
If the remote controller does not operate properly, you may need to replace the
battery. When the remote controller is not being used for extended periods of
time, remove the battery to avoid possible damage from battery leakage.
Caution: The remote control uses a CR2025 button battery. Do not recharge,
disassemble, or heat the battery. Misuse of the battery may result in leakage
that will damage the remote control.
Remote Control Bracket:
Install the bracket on the rear of
the TV in the slots provided.
Slide the remote control in the
bracket when not in use.
External DVD or VCR Connection
You can also use the TV to display a program
using a DVD player or VCR.
Use the included AV cable and connect as
shown.
Pay careful attention to the color codes.
Yellow is for the video signal.
The Red and White plugs are for the audio right
and left.
Note: To change from broadcast TV mode to
external Audio/Video mode.

- 5 -
Getting Started (continued)
Connecting to Earphones
You may connect stereo earphones to the
headphone jack for private listening.
When earphones are connected, the speakers
will automatically turn off.
Caution:
Loud volume can damage your hearing.
Decrease the volume before connecting
earphones, and then raise the volume back to a
comfortable level.
Display Options & Channel Setup
Use the on-screen menus to adjust the picture, audio, channels and other
functions.
Navigate the menus with the navigation buttons on the front of the TV or the
Remote Control.
Press MENU to enter the setup modes. Press MENU again to go back or exit
the menu.
Picture Menu
Press the ◄►buttons to select .
Press the ▼button to enter.
Press the ▲▼ buttons to select the
desired sub-menu.
Source
Press the ▲▼ buttons to select Source.
Press the ◄or ►button to enter.
Press the ▲▼ buttons to select TV or AV (Audio / Video).
Wait several seconds for the mode to change before exiting the menu.

- 6 -
Display Options & Channel Setup (continued)
Picture Mode
Press the ▲▼ buttons to select Picture Mode.
Press the ◄►buttons to select Personal, Standard, Dynamic or Soft
picture quality.
Contrast (Brightness/Color/Sharpness/Tint)
Press the ▲▼ buttons to select Contrast, Color, Brightness, Sharpness
or Tint and press the ◄►buttons to adjust the value.
Press MENU button to return to the previous menu.
Power Level
The item shows 100 percent of power level when connecting the power
adapter and shows the current battery capacity level when unplugging the
power adapter.
Audio Menu
Press the ◄►buttons to select .
Press the ▼button to enter.
Press the ▲▼ buttons to select the
desired sub-menu.
Sound Mode
Press the ▲▼ buttons to select Sound Mode.
Press the ◄►buttons to select Standard, Personal.
Bass
Press the ▲▼ buttons to select Bass.
Press the ◄►buttons to adjust the level.
Treble
Press the ▲▼ buttons to select Treble.
Press the ◄►buttons to adjust the level.
Balance
Press the ▲▼ buttons to select Balance.
Press the ◄►buttons to adjust the level.
Note: When the level of Bass, Treble or Balance was changed, the sound
mode will turn to Personal automatically.

- 7 -
Display Options & Channel Setup (continued)
Audio Language
Press the ▲▼ buttons to select Audio Language.
Press the ◄►buttons to select English, French or Spanish.
Your favorite audio language will be chosen when a channel transmits in more
than one language.
Note: This item is only available under ATSC signal mode.
Time Menu
Press the ◄►buttons to select
Press the ▼button to enter.
Press the ▲▼buttons to select the
desired sub-menu.
Time Zone
Press the ▲▼ buttons to select Time Zone.
Press the ◄►buttons to select the desired time zone.
Note: This item is only available under ATSC signal mode.
Daylight Saving Time
Press the ▲▼ buttons to select Daylight Saving Time. This will adjust the
clock automatically when Daylight Savings Time is in effect. If your region
does not observe Daylight Savings Time, please turn this feature off.
Press the ◄►buttons to select ON or OFF.
Note: This item is only available under ATSC signal mode.
Clock
When it is an ATSC channel, system clock will be read from TV program
and displayed at this position.
Option Menu
Press the ◄►buttons to select
Press the ▼button to enter.
Press the ▲▼ buttons to select the
desired sub-menu.

- 8 -
Display Options & Channel Setup (continued)
Menu Language
Press the ▲▼ buttons to select Language
Press the ◄►buttons to select English, French, or Spanish.
Transparency
Press the ▲▼ buttons to select Transparency.
Press the ◄►buttons to select On or Off.
Color Mode
Press the ▲▼ buttons to select Color Mode.
Press the ◄►buttons to select Normal, Warm, or Cool.
Zoom Mode
Press the ▲▼ buttons to select Zoom Mode.
Press the ◄►buttons to select Normal or Wide.
Closed Caption
Press the ▲▼ buttons to select Closed
Caption and press the ►button to enter
the submenu.
Press ▲▼ buttons to select desired
submenu.
CC Mode
Press the ▲▼ buttons to select CC
Mode.
Press the ◄►buttons to turn closed captioning On, Off, or CC on Mute.
Basic Selection
Press the ▲▼ buttons to select Basic Selection.
Press the ◄►buttons to select CC1, CC2, CC3, CC4, Text1, Text2,
Text3 or Text4.
Advanced Selection
Press the ▲▼ buttons to select Advanced Selection and press the ◄
►buttons to select Service1, Service2, Service3, Service4, Service5 or
Service6.
Note: This selection is only available under ATSC signal.

- 9 -
Display Options & Channel Setup (continued)
Option
Press the ▲▼ buttons to select option and press the ►button to enter.
Press the ▲▼ buttons to select Mode, Font Style, Font Edge Style, Font
Edge Color, FG Color, BG Color, FG Opacity or BG Opacity. Press ◄►
buttons to set these options.
Note: This selection is only available under ATSC signal.
Restore Default
Press the ▲▼ buttons to select Restore Default.
Press the ►button to enter the submenu.
To reset all settings to factory defaults, press ◄►buttons to select “YES”
and then press ▲or▼button to confirm.
Caution: This operation will reset all settings and channels.
To keep current settings, select “NO” and press the ▼button to return.
Lock Menu
Press the ◄►buttons to select
Press the ▼button and input the password to
enter.
Press the ▲▼ buttons to select the desired
sub-menu.
Note: Default password is “0000”.
Change Password
Press the ▲▼ buttons to select Change Password.
Press the ►button to enter, input the old password, and then input new
password and confirm it again.
System Lock
Press the ▲▼ buttons to select System
Lock.
Press the ◄►buttons to select On or Off.
Note: When system lock turn on,it will ask
to input password for unrated channel.
Default password is “0000”.

- 10 -
Display Options & Channel Setup (continued)
Channel Setup
Each region has different broadcast channels. Your portable TV will scan for all
the channels in the area and remember each location. You can then go through
and add or delete channels individually as you prefer. When completed,
pressing the up / down channel buttons will take you through all of your
selected channels in sequence.
Note: If you scan for broadcast channels (Air) and then switch to Cable TV, you
will need to re-scan. Your TV tuner can
receive both analog and digital signals.
Press the ◄►buttons to select .
Press the ▼button to enter to enter.
Press the▲▼ buttons to select the desired
sub-menu.
Antenna
Press the ▲▼ buttons to select antenna
mode.
Press the ◄►buttons to select CATV or Air.
In the Air position, you can use the telescoping antenna or another external
antenna to pick up broadcast signals. CATV settings please reference
Cable System submenu.
Auto Scan
In channel menu,
Press ▲▼ buttons to select Auto Scan.
Press ►button to enter.
Cable System
For cable stations, first set Antenna to
CATV as above and then proceed as
follows:
Press the ▲▼ buttons to select Cable
System and press the ◄►buttons to select AUTO, STD, IRC or HRC.
Note: this item is only enabled when Antenna is set to CATV.

- 11 -
Display Options & Channel Setup (continued)
Start to Scan
Press the ▲▼ buttons to select Start to
Scan. Press the ►button to start scan.
The unit will automatically memorize the
available channels in sequence. After
complete scan the unit will tune to the
first channel.
To stop scanning, press Menu.
Favorite
Add channels to your favorite list as following steps:
In channel menu, press the ▲▼ buttons to
select Favorite and press the ►button to
enter the sub-menu.
In sub-menu, press ▲▼ buttons to select
the channel which you want to add to list
and then press ◄or ►buttons to sign it.
The symbol ”√” means the channel has
been added to favorite list. Press the MENU
button to save the setting and return to the
previous menu.
Show/Hide
Press the ▲▼ buttons to select Show/Hide and press ►button to enter.
Press the ▲▼ buttons to select the channel and press the ◄►buttons to
select show or hide.
Channel No.
Press the ▲▼ buttons to select Channel No. and press the ◄►buttons to
select the number.
Channel Label
Press the ▲▼ buttons to select Channel
Label. Press the ►button to enter the
menu. In this menu, press the ◄►
buttons to highlight a position and press
the ▲▼buttons to select the character or
symbol for changing Channel label.

- 12 -
Display Options & Channel Setup (continued)
Press the MENU button to return to the previous menu.
DTV Signal
In this item, it will display the signal strength of current ATSC channel.
Note: It is only available under ATSC channel.
Troubleshooting
Before contacting customer service, review the steps below to solve simple problems.
If you still suspect something wrong with this unit, immediately turn the power off,
disconnect the power connector from the unit, and contact Eviant Customer Service.
Never try to repair the unit yourself.
Problem Possible Cause Possible Solution
No broadcast signals in the
area or signals too weak
Change location or try a more
powerful antenna
Unit set to receive CATV
signal
Check antenna selection.
See page 10
Unit is in motion or
handheld
Place unit on a stationary
surface.
Signal is obstructed by
buildings or other materials
Change location or antenna
orientation
Channel selected is
unavailable
Change Channel
See Page 10
No Signal
Source is set to AV and no
DVD or VCR is connoted
Check source menu setting.
See page 5
Volume is turned down Check volume
No Sound Audio language setting is
not correct
Check audio language.
See page 7
Remote Control is out of
range
Point Remote directly at front of
TV no more than 15 feet away
Remote Control
Does Not Work Weak battery Replace CR2025 battery
Power switch is off or power
adapter is not connected
properly
Check power switch and power
adapter connection
No Display
Weak battery Charge battery with power
adapter

- 13 -
Troubleshooting (continued)
Other possibilities
Static or other external interference may cause the unit to function abnormally. In order to
reset normal status, turn off the unit and unplug the power supply and try again. If the
problem is still present, turn off the unit, disconnect the power supply and consult a
qualified technician.
Specifications
TFT screen size..................................10 inches
Resolution ..........................................800x 480
AC Power Adapter.............................. Input: 100-120V / AC 50/60Hz 1A
....................................................Output: 12V DC 2 A
Power Consumption ...........................< 18 W
Dimensions (H, W, D)......................... 188.5mm x 255mm x 30.8mm
Weight ................................................~ 860g
Design and specifications are subject to change without notice.
All products distributed by Eviant Inc. unless otherwise indicated
Eviant
1661 Fairplex Drive
La Verne, CA 91750
USA
Made in China
©2009-2010 Quatto Management Limited.
Eviant is a trademark and service mark of
Quatto Management Limited. All other brand,
trademarks and service marks are property
of their owners.
www.eviant.com
We are seriously concerned about environmental protection, and we hope that you share our
concern as well. For more information regarding our recycling program, please visit us at
http://www.eviant.com/green or call us at 1-866-935-4396.
10TH01
Other manuals for T10 Series
1
Table of contents
Other Eviant Portable TV manuals