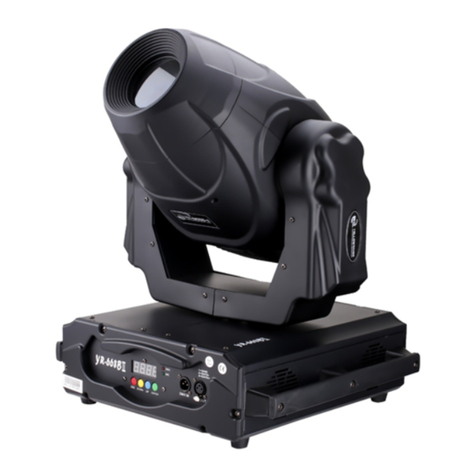
Evo-lite HYBRID 18R User manual

1
HYBRID 18R
382W HYBRID MOVING HEAD WITH OSRAM LAMP
LYRE HYBRIDE 382W A LAMPE OSRAM
User manual (p 2)
Mode d’emploi (p 23)

2
STATEMENT
The product is good packing when ship out the factory. All users should strictly abide by the
warnings and instructions stated in this manual, any damage and results due to misuse and the
neglect of this operating manual will be excluded from the deal responsibility this manual will not
informed in additionally if have technical changes.
1. PRODUCTION INTRODUCE
Thank you for choosing this product. This is our latest development of intelligent, efficient
products, beautiful and fluent, combined with the advanced technology of the stage lighting today.
It has advanced international electronic control technology and excellent human nature chemical
industry. The product is fully in conformity with the CE standard and the recipient country.
The standard DMX512 signal mode is supported by the RDM protocol.
Production enforce standard IEC 60598-1:2014,IEC60598-2-17:2017.
Channels mode:19CH;light source: OSRAM SIRIUS HRI 382W;
Voltage: 110-240V,50/60Hz;Total power: 540W;PF≥0.95;
Display: 2.8inch screen display, can reverse 180°;
Color Wheel: 13 Colors + white;
Color glass: Using special high temperature resistant raw materials, the color is bright and bright.
Fixed GOBO: 14 GOBO + white;
Rotation GOBO: 7 + white, changeable; replaceable diameters 22mm;
Rotating prism wheel 1: 8 facet prism
Rotating prism wheel 2:6 facet prism
Wheel 1 and Wheel 2 Can Overlay.
Frost: separately Frost
Beam angel: 2.5~35°linear zoom;
Lumens : 13500
Illuminance at 10 meters :
3° = 215.000 Lux (0.37 M)
38° = 11.100 Lux (1.85 M)
Dimmer : 0-100% l inear adjustment ;
Pan : 540°; 8Bit/16Bit; / Ti lt : 270°; 8Bit/16Bit ;
IP Rate: IP20;
Supporting mechanical stroboscopic and adjustable stroboscopic effects, supporting stroboscopic
macro function, retrieval reset.Positioning technology: using magnetoelectric positioning system,
using magnetic components to replace the traditional hall positioning system, with higher
precision and reliable performance; not affected by the interference of oil fume, dust and natural
light.
USB connector can set dmx address with power and upgrade the software. (RDM function)
Dimmer : 0-100% l inear adjustment ;

3
2. FIXTURE SIZE Size:404(L)×302(W)×662(H)mm
3. PARTS INTRODUCE
Each part of product structure and main composition product name description for better know the
light unit.

4
Control panel function introduction, mark for the part name on the panel, familiar with the
function of every part.
4.COLOR AND GOBO DESCRIPTION
4.1 Color wheel with 13 colors + white
4.2 Static GOBO wheel with 14gobos +white, rich GOBO;
01 —Display
02 —USB port
03 —Button
01 —DMX in
02 —DMX out
03 —Power switch
04 —Power in
05 —Fuse
01
03
04
02
05
01
02
03

5
4.3 Rotate GOBO wheel with 7 GOBO + white, smooth GOBO rotation, replace easily;
4.4 Rotating prism wheel 1: 8 facet prism,
Rotating prism wheel 2:6 facet prism
Wheel 1 and Wheel 2 Can Overlay.
Frost function is independent.
5.SAFETY INFORMATION
5.1.1 SAFETY WARNING MESSAGE
1. This product is only suitable for professional use, and does not apply to security for other
purposes.After you got the lights, please check the package whether have any damage caused by
transportation. If there is any damage, do not use this fixture, and please contact the dealer or
manufacturer as soon as possible.
2.This product is only suitable for indoor, IP20 protection class. Lamps should be kept dry to

6
avoid Moisture, overheating or dusty environment. Prevent lamps come into contact with water or
any other liquid.The use of this product should pay attention to: fire, heat, electric shock,
ultraviolet radiation, the lamp to explode and so on .
5.1.2 NEED TO READ THE INSTRUCTIONS BEFORE USE ENERGIZED
OR INSTALLING
1. Follow through the operation of security methods and pay attention to the warning signs on
the specification and equipment.
2. If you have any problem for how to safely operate the equipment. Please contact your
dealer.
5.1.3 LAMP
1.The fitting mounts a high-pressure lamp that needs an external. Immediately replace the
lamp if damaged or deformed by heat
2.The light source in this fixture shall be replaced by the manufacturer or its service agent or
similar qualification.
3.Always disconnect from mains before replacing the lamp.If the power supply is
disconnected, it is prohibited to start immediately.
4.Please wait 10 minutes before starting.
5.1.4 OPERATION IS PROHIBITED
In automatic mode, do not manually force equipment or equipment.
5.1.5 POINTING IS PROHIBITED
Never point the lights directly to the sun or other strong light source.
5.2 TO PREVENT FALLING WOUNDING
1. Please don’t move the package by one person only.
2. When Hang the fixture, please must verify that the facilities to be able to withstand the
weight of the lamps at least 10 times more.
3. Please make sure the Mounting hardware is strong enough no any damage, and insurance
for the safety rope as auxiliary security fixed in other facilities will need to verify before
installation. Installing or removing the equipment, to make the pulley below the work location.

7
5.3 UA PROTECTION AND THE BULB EXPLOSION
Prohibit straight viewpoint with exposed bulbs to avoid UV damage to the eyes;
Do not use the equipment without the lens screen and the lid;
The lens and the light head covers should be timely replaced if any damage to rupture
The Fixture should be used with the protection screen together.
5.4.1 ANTI-HIGH TEMPERATURE (Rated maximum ambient temperature)
ta=40°C
Please don’t use the equipment if the temperature above 40℃.
5.4.2 ANTI-HIGH TEMPERATURE (Maximum outer surface temperature)
tc=110°C
When the luminaire reaches the state of thermal stability, the maximum temperature on the
external surface can reach 110 degrees. Please do not touch the lamp body when the luminaire is
working.
5.5 IP PROTECTION
The product are certified at IP 20 levels only. Adequate additional protection should be taken
for outdoor use. All lamps, lights and their fittings should be kept dry. Overheating dust and
excessive humidity must be avoided.
5.6 BURST PREVENTION
1. The lens should be changed if had damaged or any problems.
2. Don’t change the non-original manufacturer len
3. Len size:¢160*57.5mm。
5.7 PREVENTION OF ELECTIC SHOCK
1.The electrical connection must only be carried out with corresponding qualifications;
2.Before installing, make sure you use the power voltage lamps must comply with the
identified power, voltage and have an overload or leakage protection;
3.Each lamp must be properly grounded, installed in accordance with the relevant standards;
4.Cut off the power when stall or replace the lamp and the fuse;
5.Prohibit the use of a lightning storm or wet environment.

8
5.8 MAINTENANCE
Before starting any maintenance work or cleaning the projector,cut off power from the mains
supply.After switching off, any part of the luminaire can not be disassembled within 10
minutes in order to avoid burns. If you need to replace the bulb, you have to wait 20 minutes
to avoid burns.
。
5.9TO PREVENT BURNING OR FIRE 15M
1.Please do not install lamps directly on the surface of ordinary combustible materials.
2.Do not short-circuit temperature protection switch or fuse, use the specified type of fuse.
3.The equipment must be installed away from flammable and explosive materials.The
shortest distance between the equipment and the flammable material is 0.5 meters.
4.The equipment should be projected range of 15 meters away objects and projectiles
temperature less than 60 ° C.
5.Fan or ventilation, at least in the range of 0.5 meters can not be an obstacle.
6.Do not place any object on the lens.
7.Handling at least allow the device to cool for 20 minutes.
8.Do not use non - original accessories.
6.PACKAGE
Packed with fly-case of two in one ,or carton .Attach follow accessory.
CONTENT
QUANTITY
USER MANUAL
1
OMEGA CLAMP
2
6.2 TRANSPORT PROTECT LOCK
In order to protect the light, there is a protect lock; During the transport , the lock catch position
need lock in the center, and the fixture keep in vertical state.
6.3 PACKING
1. Before packed, make sure power is off, and wait for at least 20mins for cooling down.
2. Before clean the fixture, make sure X, Y axis protect lock closed.
2.Before clean the fixture, make sure X, Y axis protect lock closed.
3、After packed by plastic bag, high-lift the fixture with two handles besides the product. put
the product into the fly-case up-side-down.
4.After packed the product, put the accessory into the accessory case, then closed and lock
the fly-case.

9
5.Fly-case only up stacked two layers. Prohibited upside down
6.When packed with carton box, equipment should be put into the foam first, then set into a
carton, pay attention to the vertical position.
6.4 UNPACKING
Note: Before unpacking check the damage is whether due to the transportation or not, if you
find any such damage, please do not use this item, and contact with the dealer or
manufacturer as soon as possible.
1. Open the fly-case, and discover the inside plastic bag.
2. High-lift the product by two handles beside the bottom base and move it out.
3. Before power on, make sure you have opened the X, Y axis lock!
7. INSTALLATION STANDARD
7.1 INSTALLATION OF THE RIGGING
The product can be placed on the stage or mounted on any supporting frame. The quick
locking system can quickly and easily press 2 directions to lock on the bracket.
7.2 EQUIPMENT FIXATION
1. Before installation, it is necessary to verify that the gear clamp is not damaged and can
bear at least 10 times the weight of the equipment. The verification building can bear the
weight of at least 10 times the total weight of the equipment and fixture cable attached
equipment.
2. The fixture is mounted on the base of the lamp body, inserts the fastener into the mounting
hole of the base, and holds the handle of the fastener to lock the 1/4 ring clockwise, and the
other fasteners are installed in the same way.
3. Install a safety rope that can withstand 10 times the weight of the equipment.
4、Check whether the vertical lock has been opened. There is no combustible or attached in
the verification equipment within 3 meters.Near other flammable objects.
Attention!
Must use two clamps fix the fixture,and tighten the clamps with1/4 lock, only fully clockwise
rotate 90 °then can lock the fasteners. Add one safety insurance rope on the hole of light base.
pls attention not connect to the transport handle.
7.3 DEVICE CONNECTION
Attention!
One product only can accept one input one output.DMX512 cable must use the professional shielded

10
twisted pair cable; standard loudspeaker cable is not reliable to control the long-range data.
24AWG cable is suitable for more than 300 meters long-distance signal transmission and must
add\ DMX 512 signal amplifier.
Do not use two outputs to separate the connection, if separate a continuous connection to branch,
DMX512 splitter is necessary.
If use the DMX512 splitter. At first connect DMX512 Splitter input terminal to controller .And
then connected from the splitter output terminal to next device.
Do as above guide to connect other device, and finally coupled with terminal insertion
8.AC POWER
8.1 VOLTAGE, POWER, FUSE SPECIFICATION
Input Voltage
Total Power
Frequency
110-240V
540W
50/60HZ
Fuse voltage
Electronic current
Specification
250V
10A
5×20
8.2 Power connection attention
Attention!
The device must be operated by professionals; Make sure that the voltage of power supply must be
comply with the voltage identified on the lamp, and must have an overload or leakage electrical
protection.
Attention!
The factory has been equipped with standard 3-pin plug and socket, which is connected to the
power supply correctly according to the signs listed in the table, yellow / green If the flexible cord
of the lamp is damaged, it should be replaced by the factory or its service agent or qualified
personnel. If you have any questions about installation, you can consult with a qualified lectrician.
Live wire(L)
Null(N)
Ground wire
Brown
BLUE
Yellow +Green
9. LAMP MODELAND REPLACE
9.1 LAMP
LAMP MODEL
POWER
Life / hour
OSRAM SIRIUS HRI 382W
382W
1500 hours

11
WARNING!
9.1.1 There is a safety hazard or damage if install similar bulb To reduce the
risk of damage to light ,do change the lamp before using time over 125% of lamp
life .
9.1.2 It is forbidden to project light at a certain angle for a long time! Will greatly affect
the lamp life!
9.2 LAMP REPLACE
WARNING!
9.2.1 The light source of this lamp is a non user replacement light source. If it is broken,
please replace it by the manufacturer or its agent service provider or similar qualified
person!
9.2.2 When replace the lamp is forbidden to touch lamp with bare hand, to avoid the greasy
dirt stains filament. filament must be kept clean. Disconnect the power. Before replace lamp,
fixture need 20 minutes for lamp cooling. Fasten the head with Y axis protect lock in 60 °
position.
The specific replacement steps are as follows:

12
1. 1. Use cross screwdriver to open the light body cover (picture 1)
(1)
2.After open the cover,you can see the lamp inside,please wait the lamp be cool after used but not
touch it in hot status. (picture 2)
(2)
3. One hand press the lamp holder,another hand hold the lamp,and pull out the wires (picture 3,4)
(3)(4)
4.after take apart the lamp, please check the inside glasses, clear it will make the light better
effect.(Picture 5)
(5)
5.Install the lamp after replaced.

13
10. CONTROL PANEL
The control panel has a user friendly touch screen to display the operation data and other
information.
There are four buttons on the right side.
Each button has a dedicate function.
Top button is for upward movement , lower button is for downward movement. The left button is
for exiting the selected function where the right button in for confirming the function or data.
11.CONTROL PANELMENU OPERATE
Please note that some functions are not active for this HYBRID18R model (No WDMX, No
Artnet, No CMY)
Main Menu
Submenu 1
Submenu2
Function SET
Function description
DMX ADDRESS
<<
1-512
to address 1
<
address up
>
address down
<<
to address 512
NEXT
Address up channels in this mode
SAVE
save and back
ESC
back
FEATURES
SETTING
Wire Output
(NOT WORK IN
THIS MODE):
Open
WDMX output on
(custom function))
Close
WDMX output off (custom
function)
Wire Set(NOT
WORK IN THIS
MODE):
Hold
WDMX Set up maintain
(custom function)
Clear
WDMX Set up delete
(custom function))
Channel
Mode:
19CH
19CH mode
TOUCH
SCREEN
DISPLAY
Button

14
Pan Reverse:
Off
Pan Scan Normal
On
Pan Scan Reverse
Tilt Reverse:
Off
Tilt Scan Normal
On
Tilt Scan Reverse
Opto Check:
Off
Pan/Tilt optical sensor testing off
On
Pan/Tilt optical sensor testing on
PT Speed:
Noml
Pan/Tilt Scan Speed setting
nomal
Slow
Pan/Tilt Scan Speed setting
slow
Fast
Pan/Tilt Scan Speed setting
fast
Singl Clear:
Off
keep signal data
On
clear signal data
ECO MODE:
Off
Energy saving mode off
On
Energy saving mode open
ADV.
(ADVANCED FUNCTION)
RST.
Re-setting and back
SAVE
Save and back
ESC
Back
ADVANCED
FUNCTION
Redress
ZEROSETTING
Pan:
0-255
Adjust the begging state
Tilt:
Focus:
Zoom:
Cyan:
Magenta:
Yellow:
Colour:
Static Gobo:
Rot Gobo:
GoboRot:
XGobo:
Dimmer:
Prism:
Prism Rot:
Prism2:
Prism2 Rot:
Frost:
Softern:
SAVE
Save and back
>
Value+1
<
Value-1

15
ESC
Back
ChanlDef
No function
FactSett
Only factory only
UseManage
Limit
LimitTime
No function
limitCont
No function
DefConfig
YES
Return to default
NO
back
FacConfig
SAVE
Save and back
EPRT
for factory only
ESC
back
ESC
back
UNLOCK
Verify1:
0-255
need password
Verify2:
KEY
need password
ESC
back
MANUAL
LAMP
REST
ALL
MOTER
All step motor(do not adjust it )
XY
MOTER
Pan/Tilt step motor adjust(do not
adjust it )
PART
MOTER
Local motor
YES
The chosen step motor reset
ESC
Back
TEST RUN
AUTO
Auto
SOUND
Sound
ESC
Back
SMULATE
DMX
Pan:
0-255
Control Channel on display
Pan Fine:
Tilt:
Tilt Fine:
PT Speed:
Special Fun:
Cyan:
Magenta:
Yellow:
Colour:
Colour Fine:
Virtual Color
Effect
Speed:
CMY Speed:
Beam Speed:
Effect_W:

16
Effect_R:
Effect_A:
Static Gobo:
Rot Gobo:
Gobo Rot:
GRot Fine:
Prism1:
Prism1 Rot:
Prism2:
Prism2 Rot:
Pattern_S:
Pattern_R:
Beam_S:
Beam_R:
Frost:
Zoom:
Zoom Fine
Focus:
Focus Fine:
Aoto Focus:
Strobe:
Dimmer:
Dimmer
Fine:
>
Value+1
<
Value-1
ESC
Back
ESC
Back
SYSTEM INFO
DMX
VALUE
CH00-CH39
0-255
DMX value number
REST INFO
Pan:
Right/Error
Motor reset status
Tilt:
Focus:
Zoom:
Colour:
Static Gobo:
Rot Gobo:
Gobo Rot:
Prism:
Prism Rot:
Beam:
Beam Rot:
ESC
Back

17
OTHER
INFO
LightType:
Megaplus480
Device model
Run Time:
0-99999
Machine runing hours
Run Count:
0-99999
Machine runing times
Fan 1:
0-9999
Fan 1 speed
Fan 2:
0-9999
Fan 2 speed
Temp:
xxx
Deceive temperature
DisVersion:
Vxxx
Version of display software
XY Version:
Vxxx
Version of Pan/Tilt software
M1 Version:
Vxxx
Software Version M1
M2 Version:
Vxxx
Software Version M2
ESC
Back
ESC
Back
DISPLAY
SETTING
Light Set:
1-7Lev
Back Ground light level
Light Off:
On
Keep back ground light on
1Min
Back light turn off after 1 min
2Min
Back light turn off after 2 mins
3Min
Back light turn off after 3 mins
Menu Back:
Off
Turn off the menu and back
1Min
Menu back after 1 min
2Min
Menu back after 2 mins
3Min
Menu back after 3 mins
Light Flash:
Off
Back ground light flash function
off
On
Back ground light flash function
on
Touch Cali:
Off
Touch screen calibration off
On
Touch screen calibration on
SAVE
Save and back
ESC
Back
LAMP SETTING
DeviceID
0-FFFFFFFF
RDM address
LampTime
0000-9999
Lamp time
Manual
Lamp:
Off
Lamp off by manual
On
lamp on by manual
LampState
Off
Lamp off
On
Lamp on
Lamp Off:
10M
After 10 mins no signal come in,
Lamp off
Off
No signal come in , lamp keep
lighting

18
Lamp
Default:
Off
Lamp off
On
Lamp on
Angle Cal:
Off
Turn off lamp angle calibration
On
Turn on lamp angle calibration
12.DMX CHANNELS
Channel
Value
Function
1
0-255
PAN
2
0-255
PAN FINE
3
0-255
TILT
4
0-255
TILT FINE
5
COLOR WHEEL
0-2
White
3-4
White to color 1
5-6
Color 1
7-8
Color 1 to Color 2
9-10
Color 2
11-12
Color 2 to Color 3
13-14
Color 3
15-16
Color 3 to Color 4
17-18
Color 4
19-21
Color 4 to Color 5
22-23
Color 5
24-25
Color 5 to Color6
26-27
Color 6
28-29
Color 6 to Color 7
30-31
Color 7
32-33
Color 7 to Color 8
34-35
Color 8
36-37
Color 8 to Color 9
38-39
Color 9
40-42
Color 9 to Color 10
43-44
Color 10
45-46
Color 10 to Color 11
47-48
Color 11
49-50
Color 12 to Color 13
51-52
Color 12
53-54
Color 13 to Color 14
55-56
Color 13

19
57-63
Color 13 to White
64-127
Color index
128-189
CLOCKWISE ROTATION FAST - SLOW
190-193
NO ROTATION
194-255
COUNTER-CLOCKWISE ROTATION SLOW - FAST
6
GOBO WHEEL 1
0-3
OPEN
4-6
GOBO 1
7-9
GOBO 2
10-12
GOBO 3
13-15
GOBO 4
16-18
GOBO 5
19-21
GOBO 6
22-24
GOBO 7
25-27
GOBO 8
28-30
GOBO 9
31-33
GOBO 10
34-36
GOBO 11
37-39
GOBO 12
40-42
GOBO 13
43-55
GOBO 14
56-60
GOBO 1 shake
61-65
GOBO 2 shake
66-70
GOBO 3 shake
71-75
GOBO 4 shake
76-80
GOBO 5 shake
81-85
GOBO 6 shake
86-90
GOBO 7 shake
91-95
GOBO 8 shake
96-100
GOBO 9 shake
101-105
GOBO 10 shake
106-110
GOBO 11 shake
111-115
GOBO 12 shake
116-120
GOBO 13 shake
121-127
GOBO 14 shake
128-189
CLOCKWISE ROTATION FAST - SLOW
190-193
NO ROTATION
194-255
COUNTER-CLOCKWISE ROTATION SLOW - FAST
7
GOBO WHEEL 2 (GLASS GOBO’S)
0
NO FUCNTION
1-5
WHITE

20
6-10
GOBO 1
11-15
GOBO 2
16-20
GOBO 3
21-25
GOBO 4
26-30
GOBO 5
31-36
GOBO 6
37-67
GOBO 7
68-75
GOBO 1 SHAKE
76-83
GOBO 2 SHAKE
84-91
GOBO 3 SHAKE
92-99
GOBO 4 SHAKE
100-107
GOBO 5 SHAKE
108-115
GOBO 6 SHAKE
116-127
GOBO 7 SHAKE
128-189
CLOCKWISE ROTATION FAST - SLOW
190-193
NO ROTATION
194-255
COUNTER-CLOCKWISE ROTATION SLOW - FAST
8
GOBO WHEEL 2 GOBO ROTATION
0-127
INDEXING
128-189
CLOCKWISE ROTATION FAST - SLOW
190-193
NO ROTATION
194-255
COUNTER-CLOCKWISE ROTATION SLOW - FAST
9
PRISM 1
0 - 7
NO PRISM EFFECT
8 - 255
PRISM ACTIVE
10
PRISM 1 ROTATION
0 - 127
INDEXING
128 - 189
CLOCKWISE ROTATION FAST - SLOW
190 - 193
NO ROTATION
194 - 255
COUNTER-CLOCKWISE ROTATION SLOW - FAST
11
PRISM 2
0 - 7
NO PRISM EFFECT
8 - 255
PRISM ACTIVE
12
PRISM 2 ROTATION
0 - 127
INDEXING
128 - 189
CLOCKWISE ROTATION FAST - SLOW
190 - 193
NO ROTATION
194 - 255
COUNTER-CLOCKWISE ROTATION SLOW - FAST
13
SHUTTER & STROBE
0 - 7
SHUTTER CLOSED
8 - 15
SHUTTER OPEN
Table of contents
Languages:
Other Evo-lite Floodlight manuals
