12 13
Using the
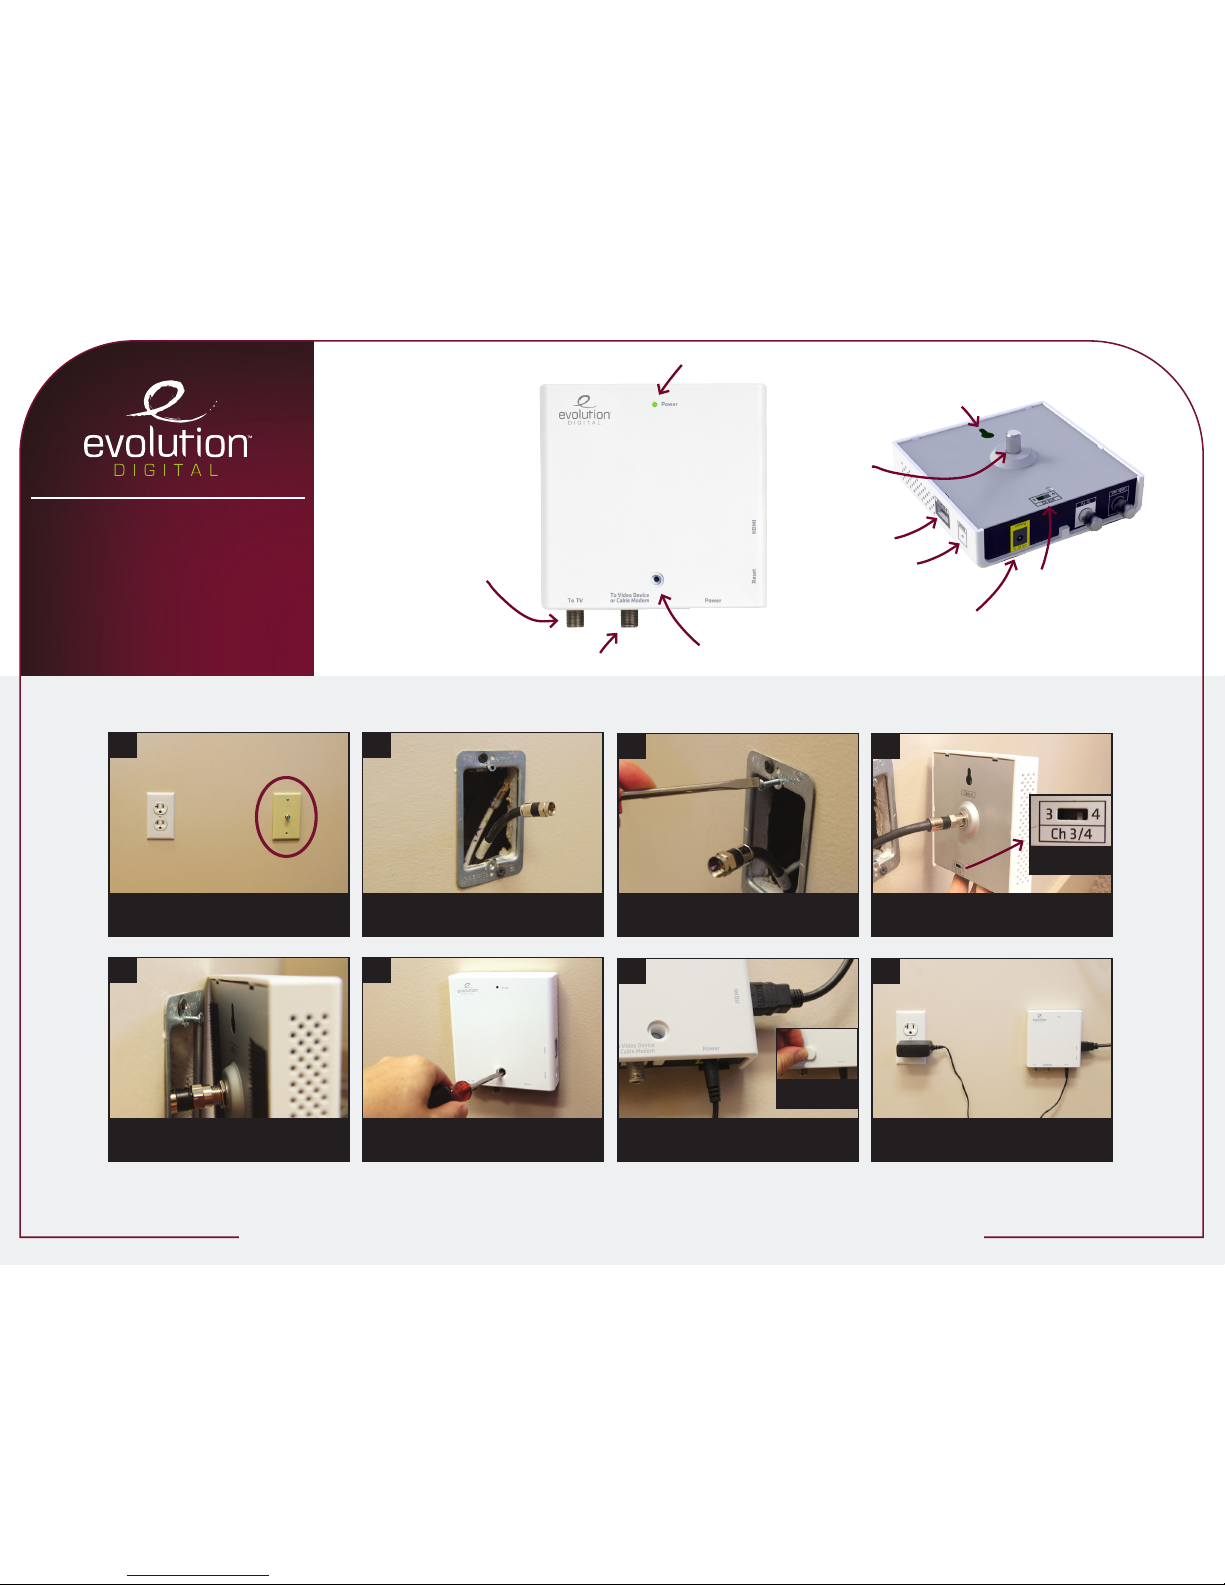
RF output?
SD Setup
Use SD Setup to
scale video to
your TV.
Select SD Setup
and press OK.
The following op-
tions are available;
Aspect Ratio, Just
Scale, Box, and Pan
and Scan.
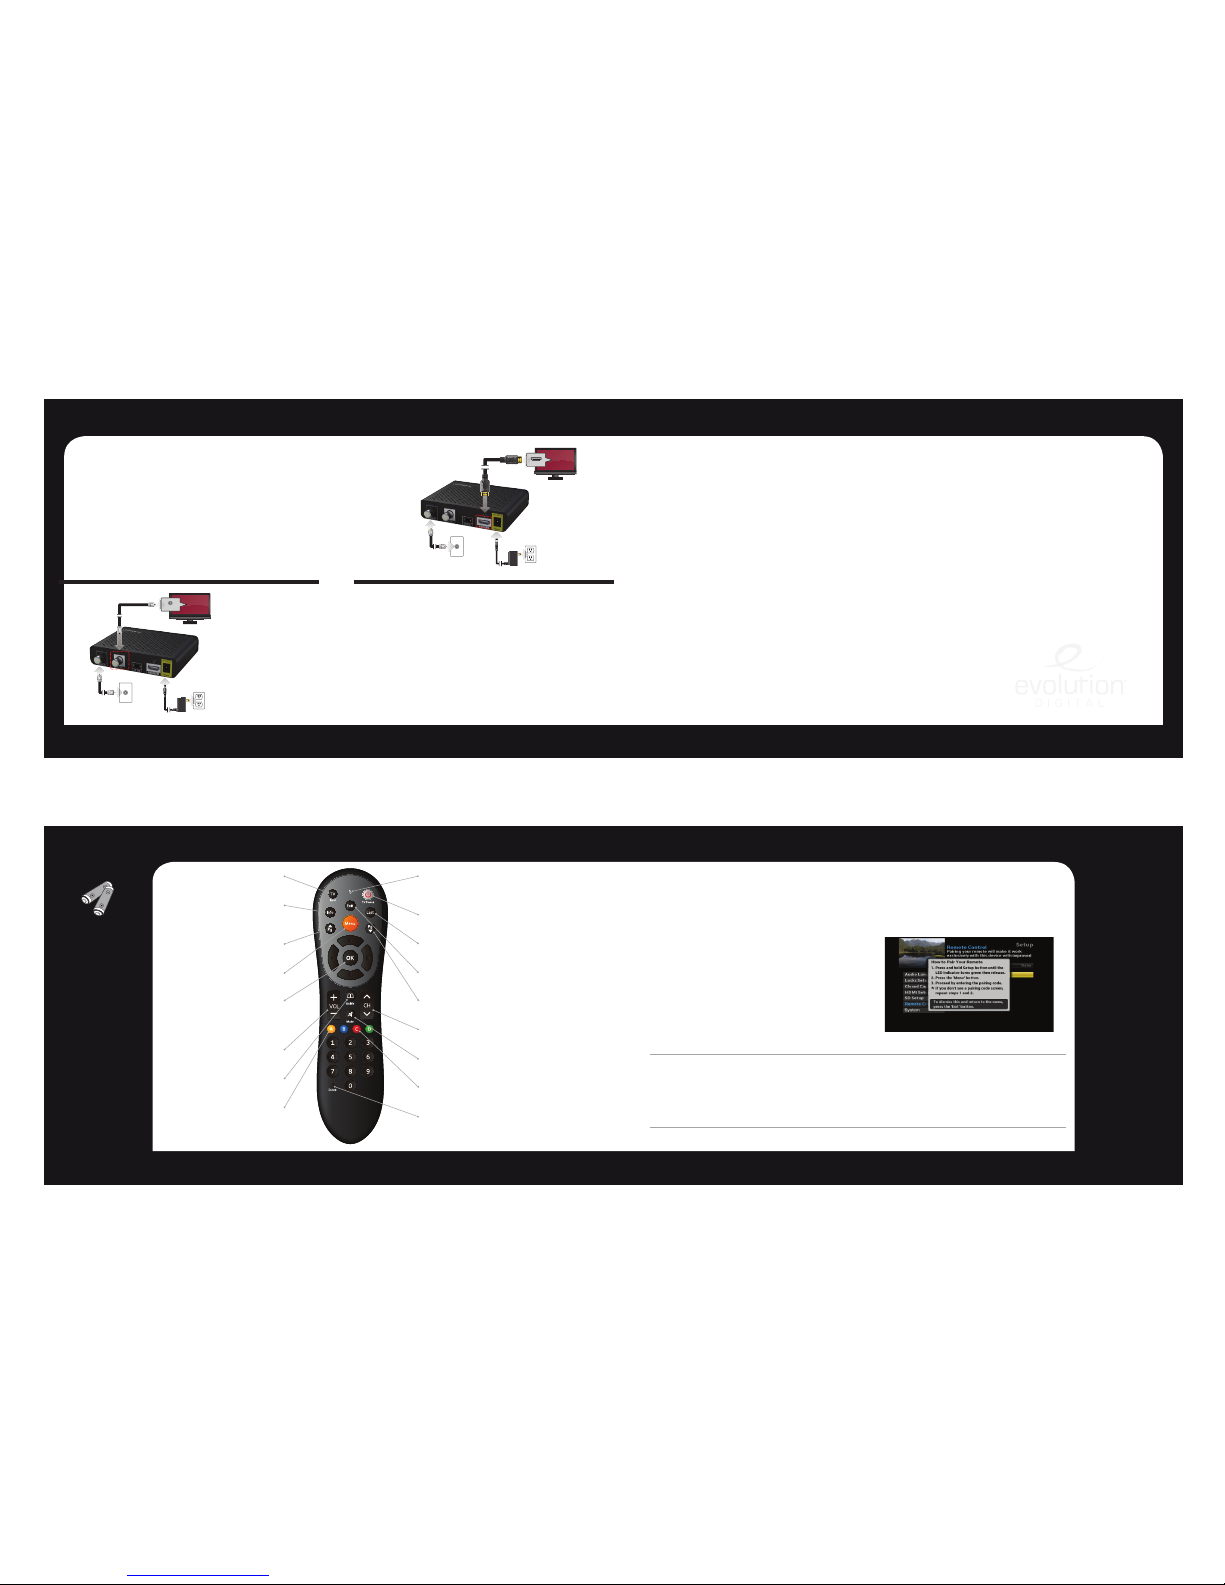
Menu Menu
Menu
Press the Menu button on your remote control to access the main menu. The menu
will allow you to update your HD set-top box settings. Press the arrow buttons to
navigate through the menu. Press Exit at anytime to return to watching live TV.
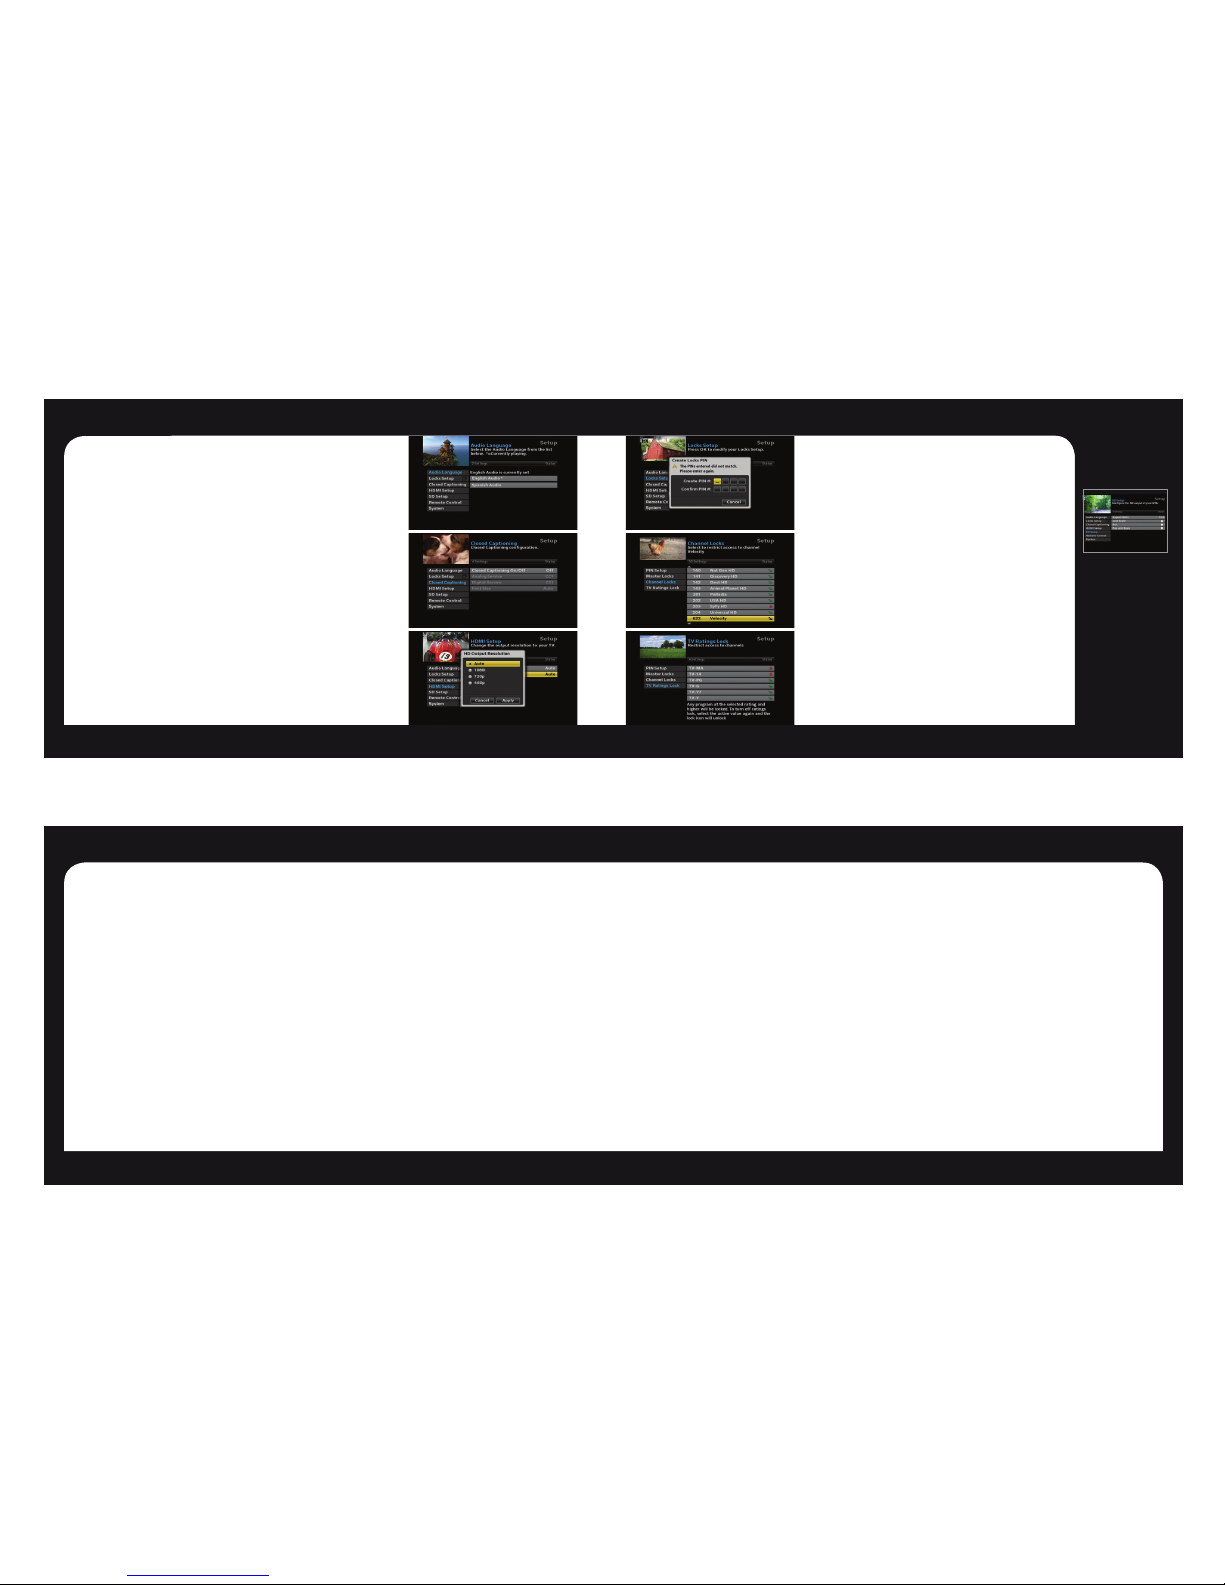
Audio Language è
Select Audio Language, press the OK button on your remote.
Scroll to select the desired Audio Language (if available).
Closed Captioning è
Select Closed Captioning, press OK to change status from On/Off.
When Closed Captioning is turned On. The following options are available;
Analog Service, Digital Service, Font Size. Scroll through the available settings
using your arrow buttons. Ensure you select Apply to change the CC setting.
HDMI Setup è
Select TV Aspect Ratio and press the OK button. Select Auto (recommended),
4:3, or 16:9 and press the OK button to select, scroll to Apply and select.
Select TV Output Resolution and press the OK button. Scroll to highlight Auto
(recommended), 1080i, 720p, or 480p and press the OK button to select, scroll
to Apply and select.
Locks Setup ç
The first time you enter Locks Setup, it will prompt you to
Create Locks PIN. Enter your desired PIN and keep that in a safe
place to refer to later. This PIN will be needed to Change PIN,
Clear PIN and set Channel Locks.
Set Channel Locks í
Select Channel Locks, a channel list will appear. Scroll up/
down to highlight the channel you would like to lock. Press the
OK button and you will see the unlock icon change to lock. This
will indicate the channel has been locked and will require a PIN
to be entered to view.
TV Ratings Lock í
Choose TV Ratings Lock to lock programs by their TV Rating.
Use the Arrow (▲/▼)buttons to highlight the TV Ratings you
want locked and select OK to lock/unlock the ratings. When you
select a rating it will lock all programs with that rating and higher.
For example if you lock TV-14 it will lock all programs with TV-14
as well as those with TV-MA.
NOTE: Not all programs will have a TV rating and any unrated programs will
never be locked regardless of the TV Ratings Lock selected.
14 15
FAQsFAQs
powered on and set to the appropriate input source.
Refer to your home theater manual for more
detailed instructions.
Why won’t my HD Set-Top Box respond when I press a
button on the remote control?
• Checkthebatteriesforpossiblereplacement.Refer
to pages 10-11 for more detailed instruction on the
remotecontrolandbatteries.
• Refertopage11forinstructionstopairyour
remote control.
What if I forgot my PIN Code?
• Contactyourcableproviderandtheywillbeabletoreset
thembacktothedefault.Thatwillallowyoutoentera
new PIN code. Refer to page 13 to learn how to change
your PIN code.
How do I control what my child watches?
• Youcanrestrictviewingofcertainmaterialonyour
TVintheLocksSetupmenu.Refertopage13
for instructions.
Is it necessary to get a new TV to watch HDTV?
• ToviewHDchannelsfromyourcableproviderintheir
nativeresolution,ahigh-definition“capable”or“ready”
televisionisrequired.
• Youwillalsoneedtouseadigitalcableconnection
suchastheHDMIcabletoviewHDchannels.Refer
totheCableConnectionssectiononpage8for
more information.
FAQs
Why won’t my HD Set-Top Box turn on?
• Doublecheckthatthepowercordisconnectedtothe
HDSet-TopBoxandtheACwalloutlet.
• IftheHDSet-TopBoxisconnectedtoanotherunit
(suchasaswitchedoutletorDVDplayer),verifythat
the unit is powered on.
Why do I have no sound when viewing cable channels?
• VerifythattheMUTEbuttononremotecontrolhasnot
beenpressed;trypressingtheMUTEbuttontorestore
soundforboththeHDSet-TopBoxandtelevision.
• VerifythatthevolumeontheHDSet-TopBoxisnot
turneddown.PressthevolumeupontheSet-TopBox
remote.Volumelevelwillbedisplayedonthebottom
of the screen.
• Doublecheckyouraudioconnections.Refertothe
CableConnectionssectiononpage8toverify
thecorrectcablesarebeingusedfortheaudioports.If
theymatchthediagrams,makesuretheyarefirmly
connectedtotheportsonboththeTVandHDSet-TopBox.
What should I do if there is no video or picture on the
TV screen?
• TryanotherchannelorenteryourPINcode,thischannel
mayberestrictedfromviewing.
• VerifythatyourTVismatchingthesettingonthe
HDSet-TopBox.Forinstance,ifyou’veconnectedusing
thecoaxialjumpercable,makesureyouhavethesame
channelselectedontheTVand3/4switchonthebackof
theHDSet-TopBox.RefertoCableConnectionssection
onpage8formoredetails.
• Doublecheckallyourcableconnections,including
verifyingyourcoaxialcableissecurelytightenedonto
boththecablewalloutletandtheINPUTportofyour
HDSet-TopBox.Verifythatallvideocablesbetweenthe
HDSet-TopBoxandtheTVarefirmlyconnected.Refer
totheCableConnectionssectiononpage8formore
detailed information regarding the correct
connectionsandalternativevideocableoptions.
• IftheHDSet-TopBoxvideooutputisconnectedtoa
hometheaterunit,verifythatthehometheaterunitis