8
PRODUCT DESCRIPTION
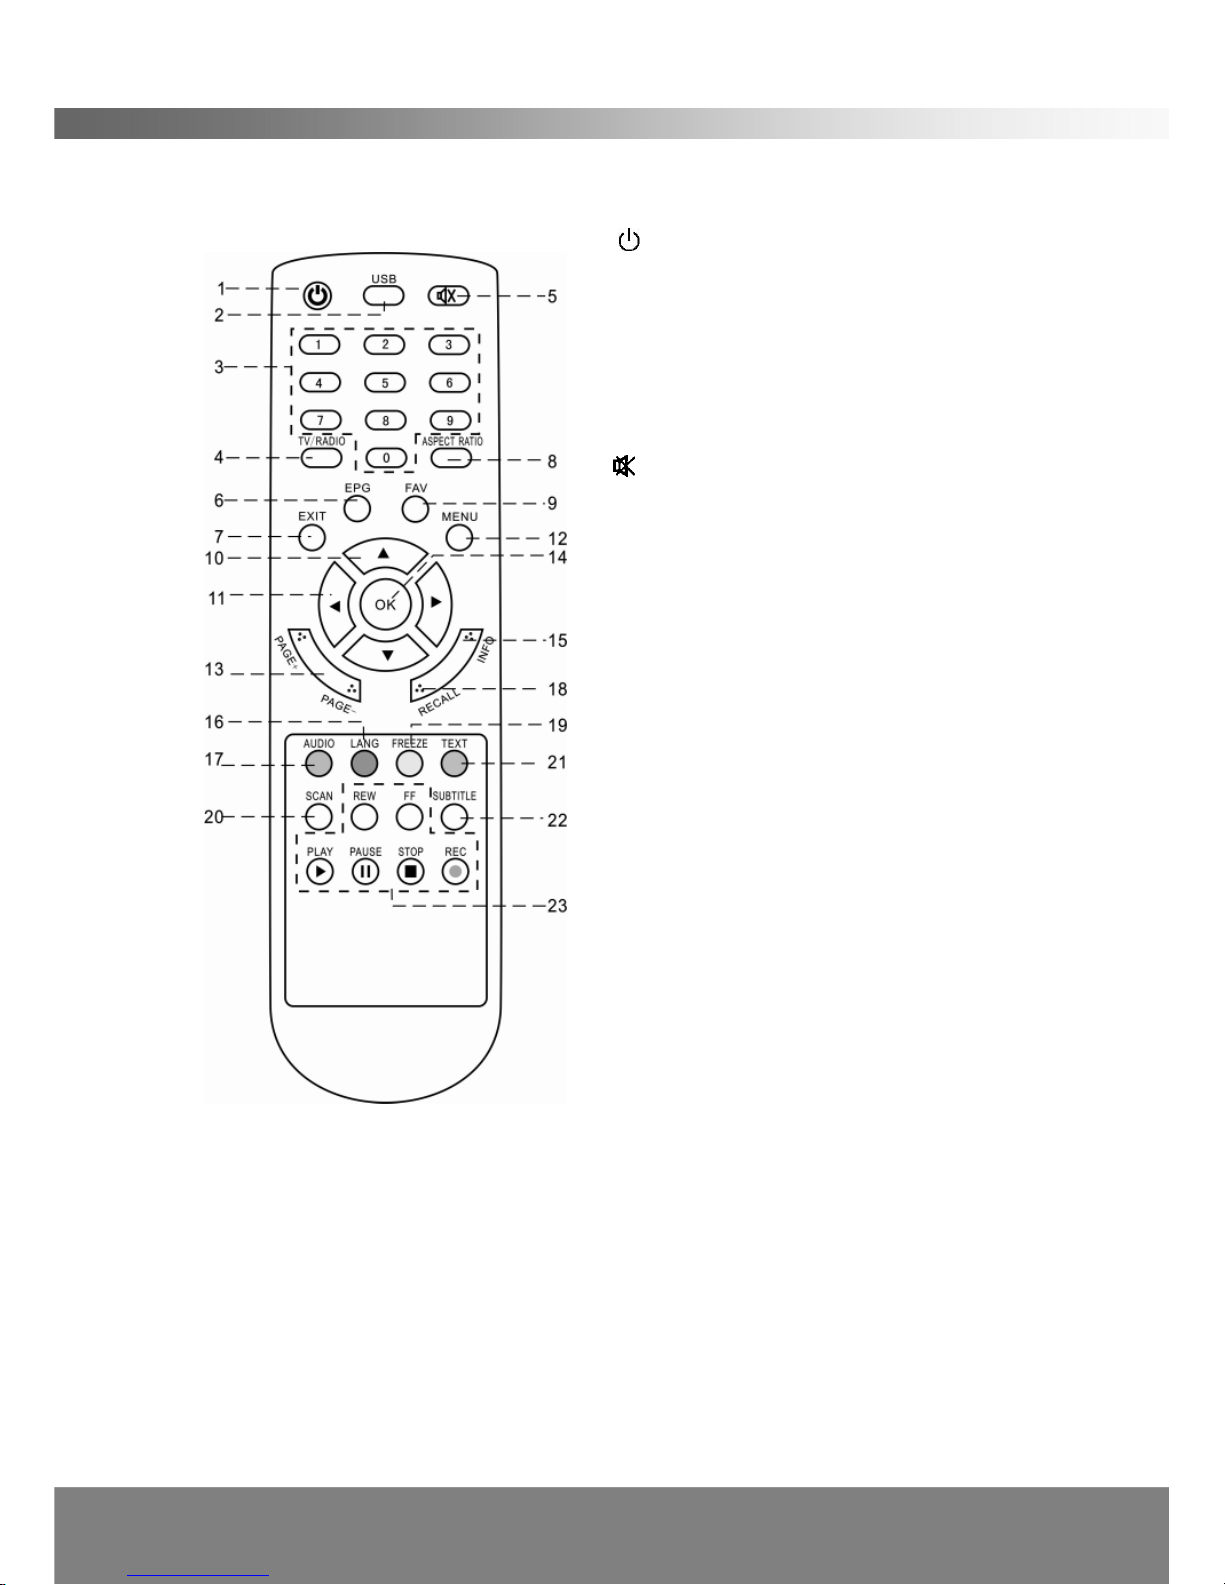
1.4 Remote Control Unit
All features of the STB can be controlled with the remote control.
1. POWER: Press to switch between
operation and standby mode.
2. USB: Press to enter the USB menu.
3. NUMERIC KEYS: Press to input Channel
Numbers, Passwords or Letters.
4. TV/RADIO: Switch between TV or RADIO
mode.
5. MUTE: Press to mute the sound.
6. EPG: Displays the Electronic Program
Guide.
7. EXIT: Press to return to the previous menu
or to exit from the current mode.
8. ASPECT RATIO: Press to select 4:3 or
16:9 aspect ratio mode. (Play Settings in the
Menu must be set to PAN & SCAN)
9. FAV: Press to display Favorite Channel
List.
10. Up▲/ Down▼:Changes the channel or
moves the cursor in the menu.
11. Left◄/ Right►:Adjusts volume or
moves the cursor in the menu.
12. MENU: Press to display the Main Menu.
13. PAGE +/ PAGE–:Press to page up/down
in the channel list.
14. OK: Press to select the item in the menu
or to list the TV/Radio channels.
15. INFO: Displays the information of the
current program.
16. LANG: Not Applicable.
17. AUDIO: Selects the audio mode.
18. RECALL: Press to return the previous channel.
19. FREEZE: Freezes the video output of the STB.
20. SCAN: Press to search program automatically.
21. TEXT: Displays the Teletext information. (Only available if network is
transmitting this data)
22. SUBTITLE: Press to view subtitles (Close captioning). Availability depends on
broadcasters’services.
23. REW / FF / PLAY / PAUSE / STOP / REC: Special keys designated for playing
MP3s on a USB drive, or for recording/playing programs to a USB drive.