Evtec move&charge CHAdeMO User manual
User Manual
move&charge

Introduction
Thank you for your trust and your decision in favour of our fast
chargers.
move&charge 3in1 has been developed as a flexible DC and AC fast
charge device follo ing the Electric safety, EMC, CHAdeMO and
Combined Charging (CCS) protocol. It as designed to be compatible
ith CEE three-phase plug (IEC-60309-2) ithout additional
installation cost.
move&charge has the follo ing advantages:
•Easy, user-friendly operation
•Plug&play CEE plug
•No additional installation cost
•Mobile and flexible operation in the orkshop
or «on the move»
•Much faster charging than conventional AC onboard charger
•Compact, robust design
•Indoor and Outdoor use (IP54)
In order to achieve reliable and long-lasting operation, please read the
user manual carefully and follo the instructions.
Thank you!

User Manual | move&charge | coffee&charge | 2
Content
Safety Instructions ............................................................................................... 3
View of the device ....................................................................................................
Overview Screen .................................................................................................... 12
Home Screen..................................................................................................... 12
Authentication Screen ........................................................................................ 12
Charge Screen ................................................................................................... 12
Home Screen during charging session ............................................................... 13
Gewählte Technologie ohne Steckerverbindung ................................................. 13
Start-up ................................................................................................................. 14
Charging process ................................................................................................... 1
Connect the vehicle ........................................................................................... 1
Select charging technology (during charging session) ......................................... 1
Authentication of the charging session ............................................................... 16
Start DC CCS charging operation ...................................................................... 18
Start DC CHAdeMO charging operation ............................................................. 19
Start AC Type 2 charging operation ................................................................... 21
Explanations of the display in AC charging mode ............................................... 23
Complete the charging process or end it before it is completed.......................... 24
Settings .................................................................................................................. 27
Navigation in the Service Menu .......................................................................... 28
Function Text Input ............................................................................................ 29
Function Value Selection .................................................................................... 31
Selecting the language settings .......................................................................... 32
Adjust the device to the actual mains power....................................................... 3
RFID Train Whitelist ............................................................................................ 37
Enter License Key .............................................................................................. 39
Troubleshooting ..................................................................................................... 41
Error description ................................................................................................ 41
Residual current circuit breaker .......................................................................... 47
Technical Data ....................................................................................................... 0
Certificates ............................................................................................................. 3
Instructions for disposal ..........................................................................................
Manual ve
rsion 3.0 EN
Suitable for ECP Version 2.x

3
Safety Instructions
For your safety and for the optimal use of the device, read this
user manual carefully before installing and using the device. To
avoid any unnecessary errors and accidents, it is important that
all persons using the device are familiar with its operation and the
safety regulations. Keep this user manual in a safe place, and
pass it on to any subsequent owners of this device.
General safety instructions
•No changes may be made to the technical features or the product
itself for reasons of safety.
•Only specialists are allowed to carry out any repairs to the device.
Contact the manufacturer or distributor of the device. Always insist
on the use of original spare parts.
•The device is tested and approved in accordance with the standard
for the charging infrastructure of electric vehicles (IEC 618 1-1).
Start-up
•When unpacking, check if the device is damaged. If in doubt, con-
sult the manufacturer or distributor of the device. Do not use the
device if it is damaged.
•Remove all the packaging materials before use.
•If any installation work is required to connect the device, this must
be done by a qualified installer or another qualified individual.
Use

User Manual | move&charge | coffee&charge | 4
•The components inside the device are always live when the device
is in use. Under no circumstances should you open the device
when it is connected to the network/mains. Furthermore, all plugs
must be unplugged and stored on the cable holders (CCS, type 2,
CHAdeMO).
•Do not unplug the device from the mains socket whilst it is charg-
ing.
•Never use the device if the power cord, charging cable, plug, con-
trol panel or the housing of the device is damaged.
•Only press the Emergency stop button in an emergency!
To end a normal charging session see section “Charging proce-
dure” p. 2
•People (including children) who are unable to use this device safely,
due to their lack of experience or knowledge, or due to their physi-
cal or mental ability, should not use this device without the supervi-
sion or instruction of a responsible person.
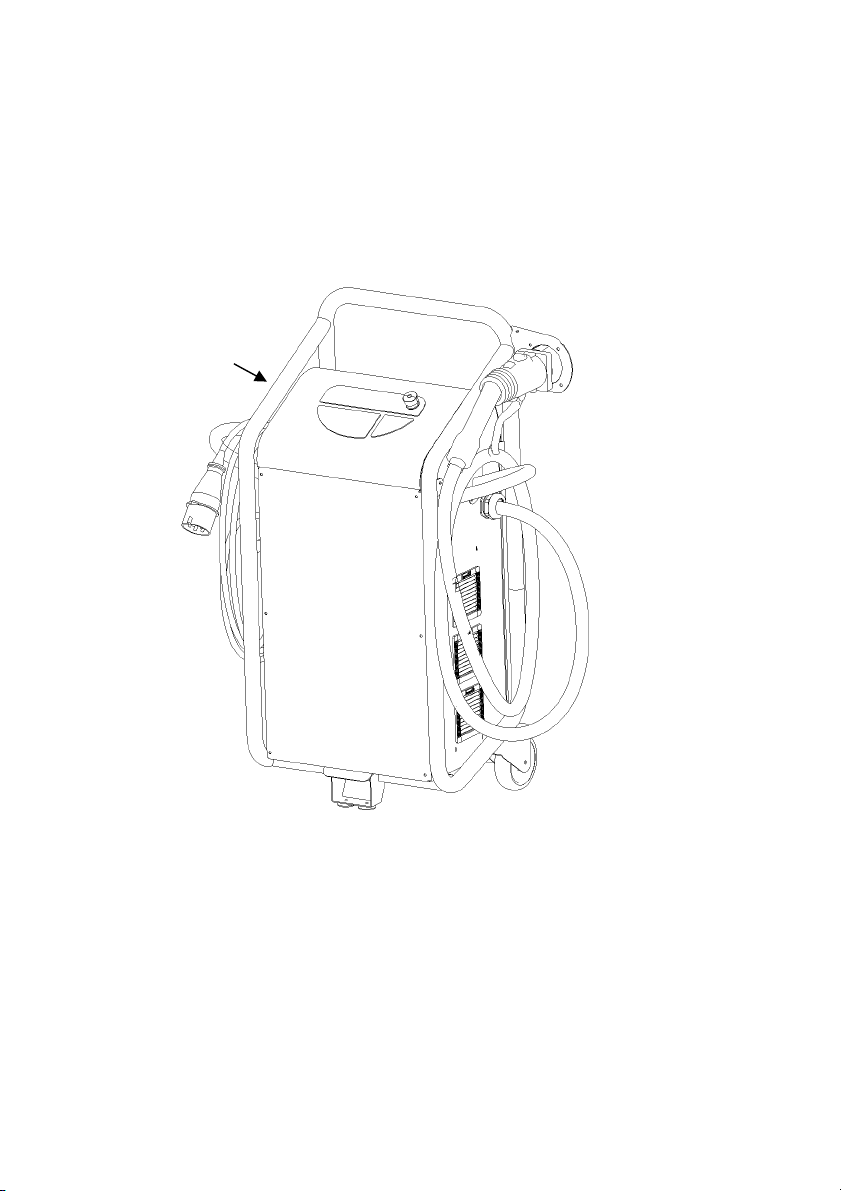
View of the device
move&charge CHAdeMO
Operating panel,
Emergency stop switch,
Plug holder
Optional: AC type2 charging socket (AC interface for your
charging cable: Renault, Smart, Tesla, etc),
CHAdeMO plug (DC quick charger plug for your electric vehicle:
Citroen, Mitsubishi, Nissan, Peugeot, Subaru, Toyota, etc.),
Cable holder, Grid connection, Front cover

User Manual | move&charge | coffee&charge | 6
move&charge Combo2
Operating panel,
Emergency stop switch,
Plug holder
Optional: AC type2 charging socket (AC interface for your
charging cable: Renault, Smart, Tesla, etc),
CCS plug (DC quick charger plug for your electric vehicle:
BMW, GM, VW etc.), Cable holder, Grid connection,
Front cover
7
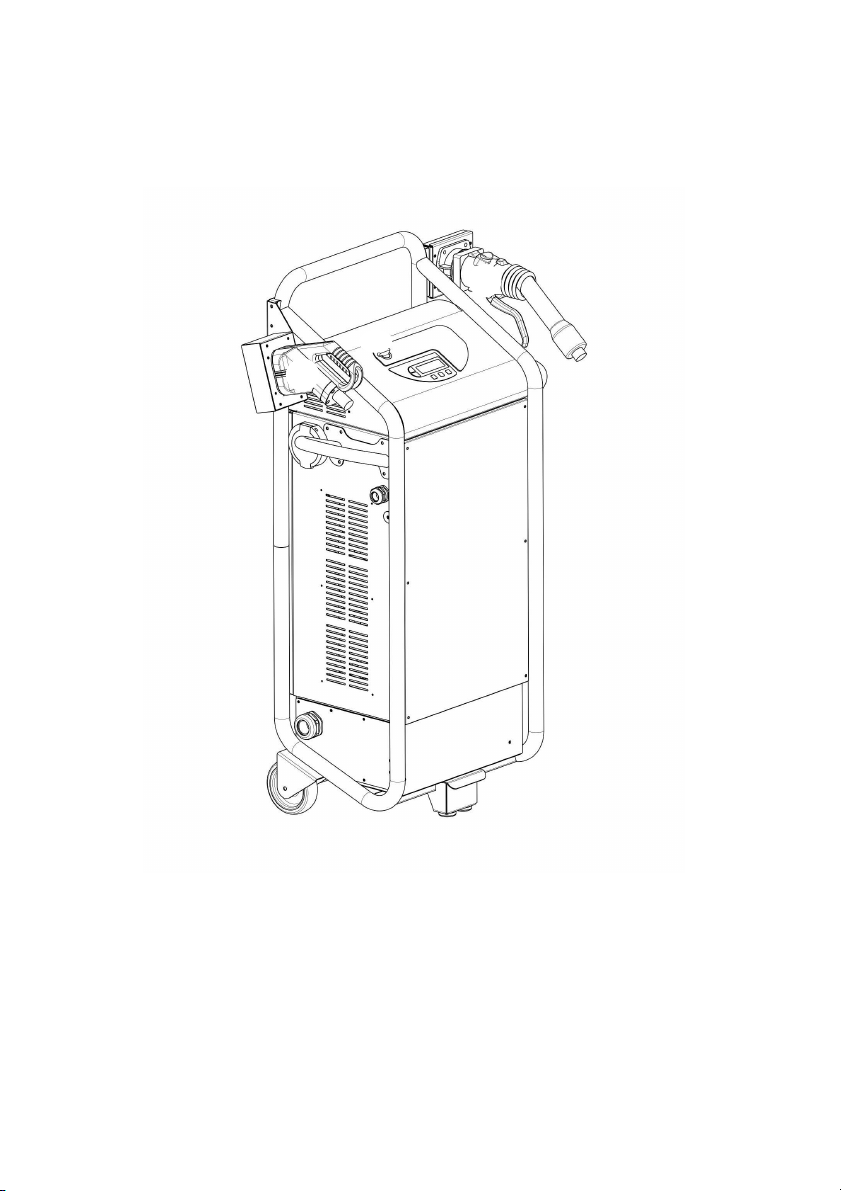
move&charge 3in1
Operating panel,
Emergency stop switch,
Plug holder
AC type2 charging socket (AC interface for your charging cable:
Renault, Smart, Tesla, etc),
CCS plug (DC quick charger plug for your electric vehicle:
BMW, GM, VW etc.), CHAdeMO plug (DC quick charger plug
for your electric vehicle: Citroen, Mitsubishi, Nissan, Peugeot,
Subaru, Toyota, etc.), Front cover
User Manual | move&charge | coffee&charge | 8
coffee&charge CHAdeMO
Operating panel,
Emergency stop switch,
Plug holder
AC type2 charging socket (AC interface for your charging cable:
Renault, Smart, Tesla, etc);
CHAdeMO plug (DC quick charger plug for your electric vehicle:
Citroen, Mitsubishi, Nissan, Peugeot, Subaru, Toyota, etc.),
Maintenance flap, Front cover

9
coffee&charge Combo2
Operating panel,
Emergency stop switch,
Plug holder
AC type2 charging socket (AC interface for your charging cable:
Renault, Smart, Tesla, etc);
CCS plug (DC quick charger plug for your electric vehicle:
BMW, GM, VW etc.),
Maintenance flap, Front cover

User Manual | move&charge | coffee&charge | 10
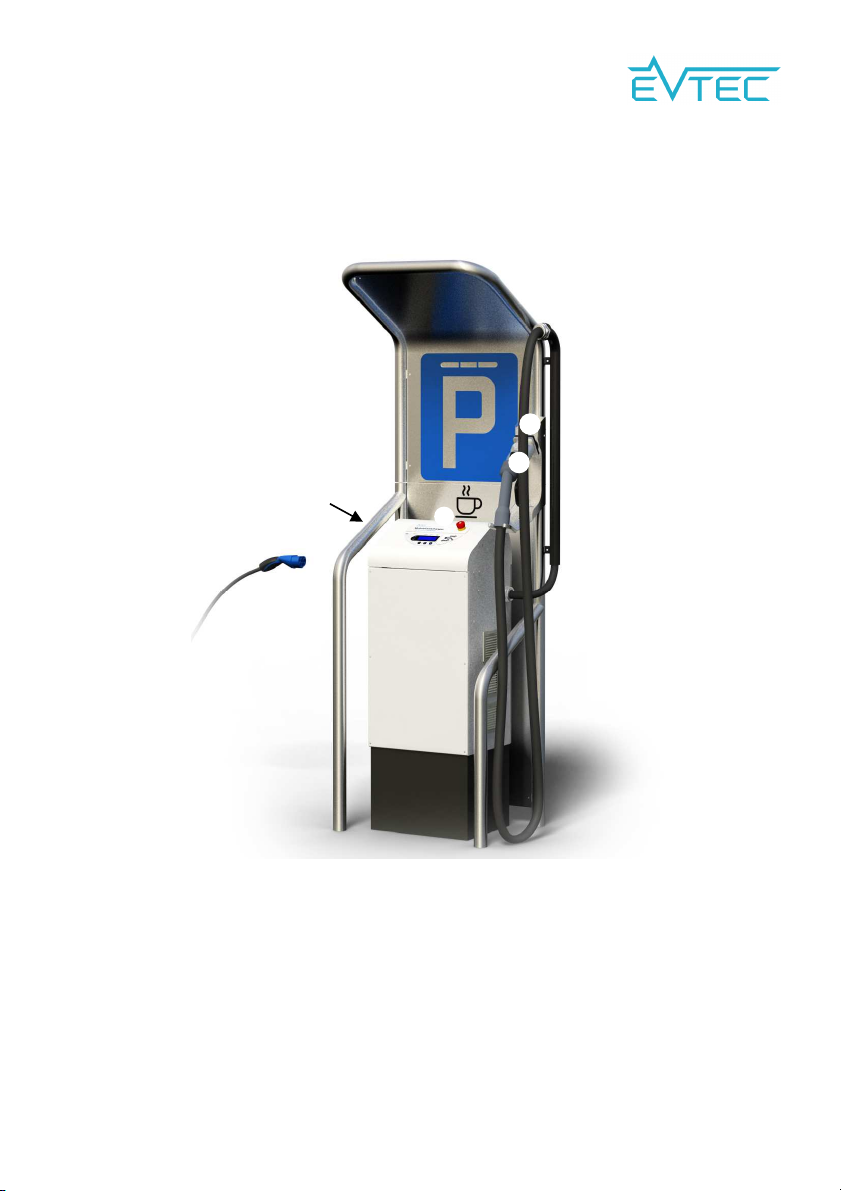
coffee&charge 3in1
Operating panel,
Emergency stop switch,
Plug holder
AC type2 charging socket (AC interface for your charging cable:
Renault, Smart, Tesla, etc); CHAdeMO plug (DC quick charger
plug for your electric vehicle: Citroen, Mitsubishi, Nissan, Peugeot,
Subaru, Toyota, etc.),
CCS plug (DC quick charger plug for your electric vehicle:
BMW, GM, VW etc.), Maintenance flap, Front cover
11
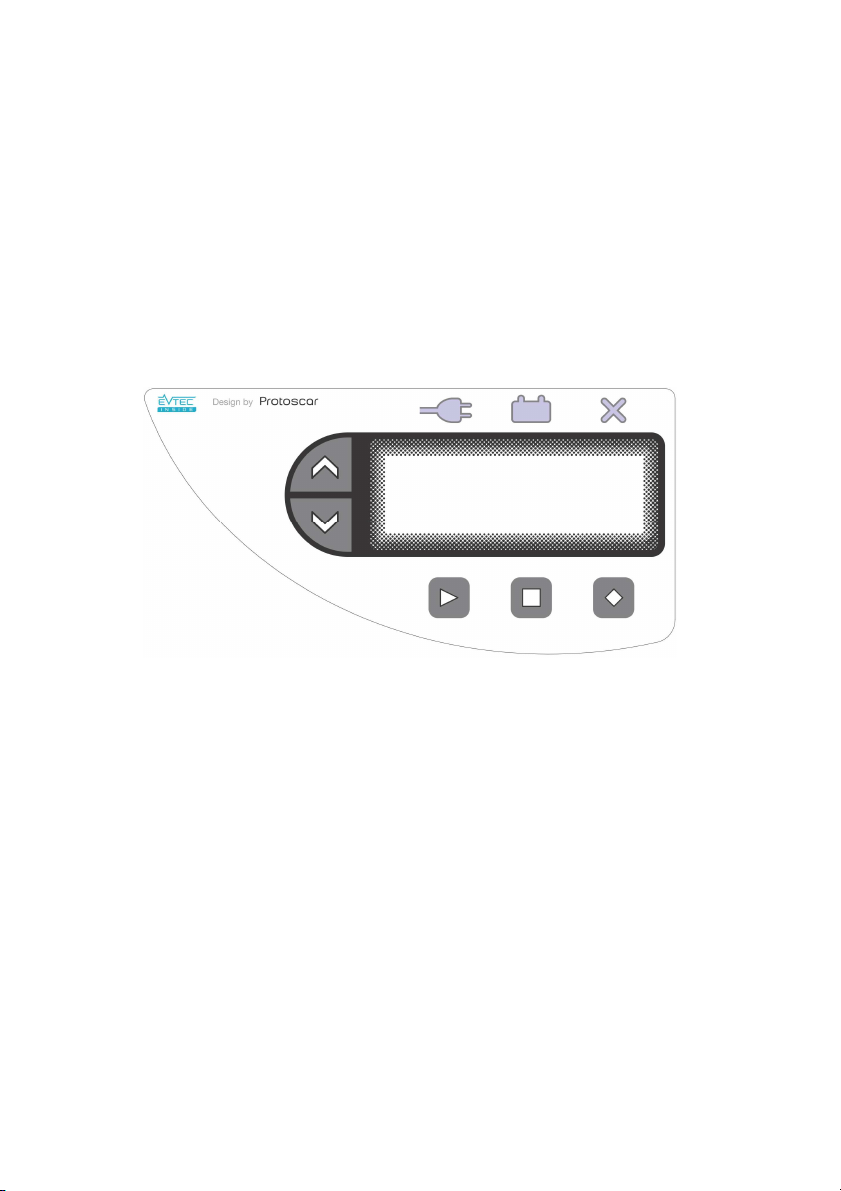
Operating panel
Display,
Charging plug display,
Charge indicator,
Error indicator,
Selection keys up / down,
Start key,
Stop key,
Diamond key (home screen)

User Manual | move&charge | coffee&charge | 12
Overview Screen
Home Screen
Authentication Screen
Charge Screen
Remaining 00:36:30
Energy 0.01kWh
Power 20.1kW
█████░░░░░░░░░░░░░░▕
Please Au hen ica e
wi h RFID card / key
oder by mobile app
Please selec plug
▶DC CCS
>DC CHAdeMO
>AC Type 2

13
Home Screen during charging session
Gewählte Technologie ohne Steckerverbindung
DC CHADEMO
Pls. connec vehicle
Sprachwahl
Please selec plug
▶DC CCS :plugged
>DC CHAdeMO
>AC Type 2

User Manual | move&charge | coffee&charge | 14
Start-up
The unit can be connected to a CEE 32A connector (IEC 60309-2,
400 V AC, 4 -6 Hz) or CEE 63A connector due to the ordered cable
configuration. At a 63A connector two cars can be charged simulta-
neously, one at a DC connector and an additional one at the Type 2
socket (two user operation).
The self-test starts once the quick charging station is connected with
the mains power. The following screen display appears (the display
may vary slightly depending on the version of the device):
Home screen
You are now in the home screen and can carry out a “Charging op-
eration” p. 1 .
If nothing appears on the display, check whether the mains voltage is
on. If there is an error message on the display, you can find help in
the section “Troubleshooting” p. 39.
Please selec plug
▶DC CCS
>DC CHAdeMO
>AC Type 2

1
Charging process
Connect the vehicle
Depending on the configuration there are three charging technologies
available. The charging technology will be automatically detected by
connecting the vehicle by means of the matching connector to the
charging station.
Select charging technology (during charging session)
After the charging session started the screen is set back to the home
screen. In order to check the charging status you can reselect the
plug in use by manual selection.
Usually by using the Diamond key you return to the Home screen.
Please note that charging from 80% to 100% can take long-
er than the quick charging process from 0% to 80%(to pro-
tect the vehicle batteries against overloading).
Home screen during charging session
Please selec plug
▶DC CCS :plugged
>DC CHAdeMO
>AC Type 2

User Manual | move&charge | coffee&charge | 16
1. By plugging the car the connector is automically selected. The
used plugs are indicated. For checking the status during the
charging session, use the Selection keys / to select the
charging technology you currently use.
2. Confirm your selection by pressing the Start key .
The different charging processes are described in the following chap-
ters.
Authentication of the charging session
If the Authentication mode is activated, you are asked to iden-
tiy after connecting the plug to the vehicle.
Authentication
Please Au hen ica e
wi h RFID card / key
oder by mobile app

17
Identifcation
Acceptance
Unidentified user
Connec ing o server
Card no valid
Checking user ID

User Manual | move&charge | coffee&charge | 18
Start DC CCS charging operation
With the DC CCS process, the batteries of your vehicle are charged
with DC. The quick charging process charges the batteries of your
vehicle up to 100%. The charging operation can also be terminated
manually before it is completed.
1. Make sure that the charging station is prepared as described
in the section "Start-up" p. 12.
2. Set your vehicle to Charging mode (follow the instructions in
the user manual of your vehicle for this purpose).
3. Insert the CCS plug into the corresponding quick charging
socket of your vehicle.
4. The charging station checks the connection and establishes a
communication line with your vehicle (the green charging plug
indicator lights up). This takes about 1 seconds. Then a
display similar to the following one will appear:
The charging process will now start. The charging indicator
will be flashing on the control panel. Depending on the tem-
perature conditions and vehicle configuration, the cooling sys-
tem in your vehicle, and the one in the charging station, will
start running.
Remaining 00:36:30
Energy 0.01kWh
Power 20.1kW
█████░░░░░░░░░░░░░░▕

19
Start DC CHAdeMO charging operation
With the DC CHAdeMO process, the batteries of your vehicle are
charged with DC. The quick charging process charges the batteries
of your vehicle up to 80%.
1. Make sure that the charging station is prepared as described
in the section "Start-up" p. 12.
2. Set your vehicle to charging mode (follow the instructions in
the user manual of your vehicle for this purpose).
3. Insert the CHAdeMO plug into the corresponding quick
charging socket of your vehicle. To do this, put the
CHAdeMO plug directly in the charging socket of your vehicle
and lock the connection with the lever.
This manual suits for next models
5
Table of contents
Other Evtec Batteries Charger manuals


