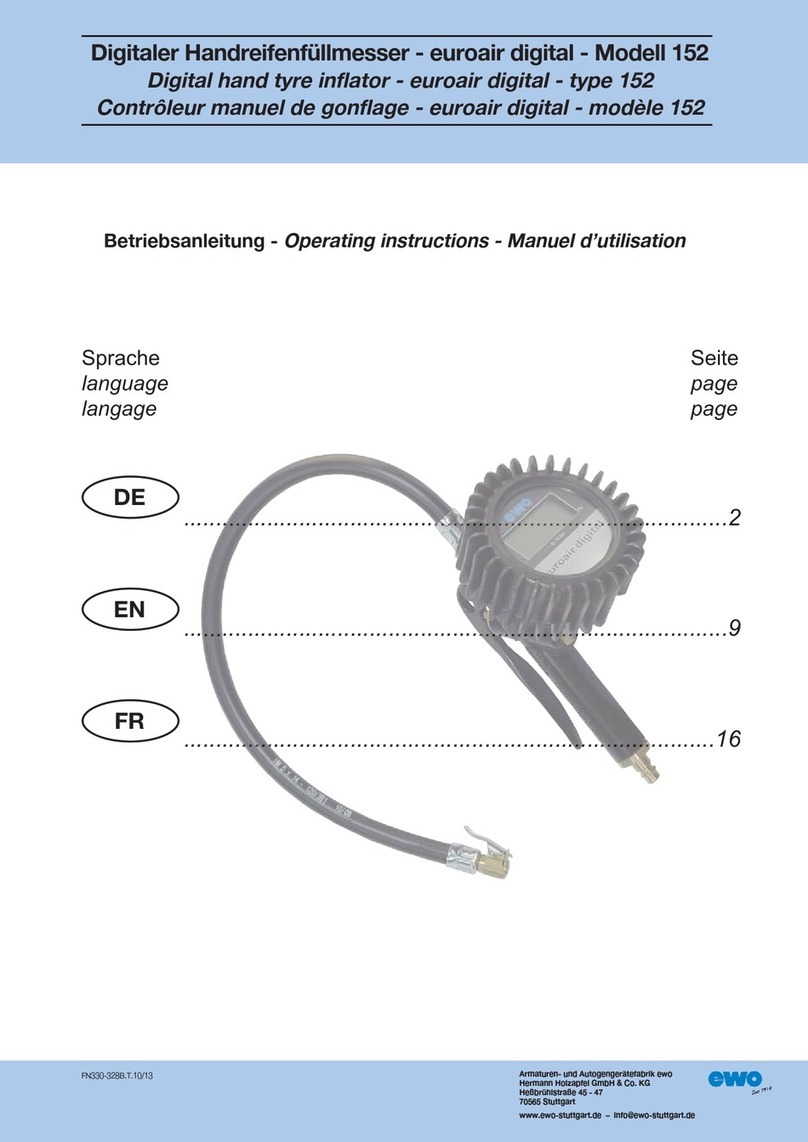
ewo 151 User manual

Betriebsanleitung für Handreifenfüllmesser
euroair – Modell 151
Operating instructions for manual hand tire inflator
euroair – type 151
Mode d'emploi pour contrôleur manuel de gonflage
euroair – modèle 151
DE
EN
Seite 3
page 4
F page 5
Lesen Sie bitte die folgenden Anweisungen sorgfältig durch, bevor Sie die Geräte in Gebrauch nehmen. Der
störungsfreie und sichere Betrieb der Geräte ist nur dann gewährleistet, wenn die hier genannten Anweisun-
gen, Hinweise und Sicherheitsvorschriften beachtet werden.
Please read the following instructions carefully before you take these units into service. Trouble-free and safe operating
can only be guaranteed if recommendations, safety guidelines and conditions stated in this manual are respected.
Veuillez lire les consignes suivantes avec attention avant de mettre en service l'appareil. Le fonctionnement sans faille et
en toute sécurité de l'appareil n'est garanti que si les consignes et indications mentionnées ci-après sont respectées.

DE
Verpackungsrückstände ins Gerät gelangen. Luftschlauch an-
schließen (Kupplung oder Verschraubung).
BEDIENUNG
1) Nach Abnahme der Staubschutzkappe am Reifenventil,
Doppeltankstellenstecker, ebel stecker, Momentstecknip-
pel oder Quick-Stecker auf Reifen ventil aufstecken, so
dass eine dichte Verbindung entsteht. Der vorhandene Rei-
fendruck kann am Manometer abgelesen werden.
2) Zum Füllen muss der ebel ganz durchgezogen werden.
3) Zum Ablassen, falls erforderlich, darf der ebel nur halb
durchgezogen werden.
4) Zum Prüfen muss der ebel in Ruhestellung (Ausgangs-
stellung) gebracht werden.
5) Füllventil schnell vom Reifenventil abziehen, um Druckver-
luste zu vermeiden.
WA TUNG
Der andreifenfüllmesser arbeitet praktisch wartungsfrei. Das
Manometer ist durch eine Schutzkappe weitgehend ge-
schützt. Durch Vermeiden von Schlägen und harten Umgang
wird die Genauigkeit lange Zeit erhalten.
EPA ATU
Zur Demontage sind für verschiedene Teile Spezialwerkzeuge
erforderlich. Ein konformitätsbewertetes Gerät muss nach der
Reparartur erneut dem Konformitätsverfahren unterzogen
werden. Deshalb empfehlen wir bei Störungen, das Gerät zur
Überprüfung dem Fachhändler bzw. ins Werk einzusenden.
Entölte Druckluft verwenden, nicht zum Füllen oder Prüfen
von wassergefüllten Ballastreifen oder mit Korrosionsmittel
behandelten Reifen verwenden.
TECHNISCHE DATEN
Druckversorgung: max. 6 bar/87 psi
max. 18 bar/261 psi
max. 25 bar/362 psi
Maximaler Fülldruck: 4,0 bar/56 psi
12,0 bar/174 psi
25,0 bar/350 psi1)
Maximale Abweichung: £4 bar: ± 0,08bar/1,2 psi
> 4 – £10 bar: ± 0,16bar/2,3 psi
> 10 bar: ± 0,25bar/3,6 psi
Füllschlauch: 500 mm
Versorgungsanschluss: Innengewinde G 1/2 mit Kupp-
lungsstecker DN 7,2
Temperaturbereich: -10 °C bis +60 °C
Gewicht: ca. 1,0 kg
1) keine Konformitätsbewertung möglich
BESTIMMUNGSGEMÄSSE VE WENDUNG
Der andreifenfüllmesser euroair Modell 151 ist ausschließlich
für folgenden Zweck vorgesehen:
Kontrollieren, Befüllen und Ablassen von Reifen für Motorfahr-
zeuge mit Druckluft oder Stickstoff. Reifen von Luftfahrzeugen
können mit 25 bar-Geräten befüllt werden.
Er ist nicht geeignet für Reifen z. B. von Fahrrädern, Kinder-
fahrzeugen, Schubkarren und Rollstühlen.
Jede andere oder darüber hinausgehende Verwendung gilt
als unsachgemäß. Die Druckluftangaben der Reifen- und
Fahrzeughersteller sowie die am Verwendungsort vorhande-
nen Druckluftangaben sind zu beachten.
SICHE HEITSHINWEISE
Der Reifenfüller ist ausschließlich für Druckluft/Stickstoff vor-
gesehen. Jede Benutzung außerhalb dieses Zwecks sowie
Modifikationen an dem Produkt werden als unsachgemäßer
Gebrauch angesehen. Der ersteller ist für Schäden, die
durch einen unsachgemäßen Gebrauch entstehen, nicht haft-
bar. Das Risiko liegt allein beim Benutzer.
Dieses Produkt kann gefährlich sein, wenn es unsachgemäß
benutzt wird. Kinder dürfen dieses Gerät nicht bedienen. Eine
falsche Bedienung kann zur Explosion des Reifens führen!
Der Reifenfüller darf nicht zum Füllen und Prüfen von mit Was-
ser gefüllten Ballastreifen oder mit Korrosionsmittel behandel-
ten Reifen verwendet werden.
Für Schäden, die durch Nichtbeachtung dieser Bedienungs-
anleitung entstehen, kann keine aftung übernommen wer-
den!
BAUA TZULASSUNG UND
KONFO MITÄTSE KÄ UNG
Der klassische andreifenfüllmesser besitzt eine EWG Bau -
artzulassung (außer 25 bar Ausführung). Mit dem Mess- und
Eichgesetz (MessEG) vom 25.07.2013 und der neuen Mess-
und Eichverordnung (MessEV) vom 11.12.2014 wird für Ge-
räte mit innerstaatlicher Bauartzulassung das bisherige Eich-
verfahren durch eine Konformitätsbewertung ersetzt. Der
ersteller ewo erstellt in alleiniger Verantwortung eine Konfor-
mitätserklärung über die Übereinstimmung des Gerätes mit
den gesetzlichen Vorgaben. Die Konformität mit dem Bewer-
tungsverfahren wird durch die Zeichen „DE-M“ eingerahmt
und durch die letzten zwei Ziffern der Jahreszahl belegt. Die
Jahreszahl kennzeichnet das Jahr der Konformitätsprüfung.
Der Kontrollaufkleber mit der Kennnummer wird von der Prüf-
stelle angebracht und ist der Nachweis der bestandenen Pro-
duktprüfung:
DE-M17 0103
Konformitätszeichen Kennnummer der
mit Jahreszahl Prüfstelle - Bsp.
Die Gültigkeit beträgt 2 Jahre. Danach ist eine erneute Prü-
fung fällig.
INBET IEBNAHME
Gerät sorgfältig auspacken und darauf achten, dass keine
3

4
EN
of residues of packing material. Connect air tube (screw con-
nection and coupling).
OPE ATION
1) After taking off the valve sealing cap, put on dual filling sta-
tion connector, lever connector, connecting nipple or in
order to archieve tight connection. The existing tyre pres-
sure can be read off from the pressure gauge.
2) For filling, the lever must be entirely pulled through.
3) If necessary, the lever may only be pulled by half a turn for
deflating.
4) For testing, the lever must be in its initial position (starting
position).
5) Quickly pull off filling valve from tyre valve in order to avoid
pressure losses.
MAINTENANCE
The manual tyre filling gauge is virtually mainte nance-free. The
pressure gauge is to a great extent protected by a protecting
cap. Precision of the instrument can be preserved for a long
time by avoiding blows and incautious handling.
EPAI
When dismantling the device, special tools are necessary for
various parts. A conformity proofed device has to have a
new conformity assessment procedure after its repair. In case
of problems we therefore recommend sending the device to
the specialist retailer and / or back to the factory for exami-
nation.
Use only oil and water free compressed air. Do not use for in-
flating or checking pressure of water-filled tyres or those con-
taining corrosives.
TECHNICAL DATA
Pressure supply: max. 6 bar/87 psi
max. 18 bar/261 psi
max. 25 bar/362 psi
Max. fill pressure: 4,0 bar/56 psi
12,0 bar/174 psi
25,0 bar/350 psi1)
Max. deviation: £4 bar: ± 0,08bar/1,2 psi
> 4 – £10 bar: ± 0,16bar/2,3 psi
> 10 bar: ± 0,25bar/3,6 psi
Fill hose: 500 mm
Supplyconnector: Female screw thread G 1/2
with coupling plug DN 7,2
Working temperature: -10 °C up to +60 °C
Weight: approx. 1,0 kg
1) conformity proof not possible
APP OP IATE USE
The hand tyre inflator euroair type 151 is intended exclusively
for the following purpose:
Filling and deflation of tyres on motorised vehicles with air or
nitrogen – as well as for checking the fill level. Aircraft tires can
be filled with 25 bar devices.
It is not suitable for use on the tyres of bicycles, toy vehicles,
wheelbarrows and wheelchairs.
Any other use as well as any modifications to the product shall
be viewed as inappropriate use.
In this process, always observe the specifications on the
amount of pressurised air as indicated in the place of use
(along with those set forth by the tyre and vehicle manufactu-
rers).
SAFETY GUIDELINES
The tyre inflator is designated solely for pressurised air/nitro-
gen. The use of any other substance (as well as any modifi-
cations to the product) shall be viewed as inappropriate use.
The manufacturer is not liable for any damages which result
from any inappropriate use. The user bears the full risk.
This product may be dangerous if used improperly. Children
may never operate this device. Faulty operation of the device
may lead to the explosion of the tyre!
The tyre inflator may not be used for filling and checking bal-
last tyres filled with water; the same applies to tyres treated
with anti-corrosive agents.
No liability can be assumed for damages which occur as a re-
sult of the failure to observe the instructions indicated in this
operation guide!
TYPE APP OVAL
The classic manual tyre filling gauge is homologated accor-
ding to its design and has an EEC test approval mark (excep-
tion: 25 bar version). The measurement and calibration law
(MessEG) from 25/07/13 and the new measuring and verifi-
cation ordinance (MessEV) from 11/12/14 replace the former
calibration procedure for devices with type-approval on the
national level by a conformity assessment procedure. The ma-
nufacturer ewo authors with his sole responsibility a certificate
of conformity concerning the accordance of the device with
the legal guidelines. The conformity to the assessment pro-
cedure is framed by the sign “DE-M”, and is proven by the
last 2 numbers of the year date. The year date shows the year
of conformity proof. The control sticker with a identification
number is attached by the testing laboratory and is the proof
of the passed product assessment:
DE-M17 0103
Conformity symbol Control sticker of testing
with year date aboratory – example
The initial calibration remains valid for two years. After the
elapse of this interval, the device must have a new conformity
assessment procedure.
INITIAL OPE ATION
Carefully unpack the device and ensure that the device is free

F
tériel d’emballage ne pénètre pas dans celui-ci. Brancher le
flexible d’air comprimé (vissage ou couplage).
MODE D’EMPLOI
1) Après avoir retiré le bouchon pare-poussière, brancher sur
la valve de pneu le double raccord station-service, le rac-
cord à levier, le raccord instantané, ou le connecteur rapide
pour établir une liaison étanche. La pression régnant dans
le pneu peut être lue au manomètre.
2) Pour gonfler, serrer la poignée à fond.
3) Pour dégonfler, si nécessaire, ne serrer la poignée qu’à
moitié.
4) Pour contrôler, la poignée doit être ramenée en position
de repos (position initiale).
5) Retirer rapidement l’embout de gonflage de la valve du
pneu, pour éviter une perte de pression.
ENT ETIEN
Le contrôleur manual de gonflage ne nécessite pratiquement
pas d’entretien. Le manomètre est largement protége par un
cache de protection. La précision de l’appareil est longtemps
conservèe si l’on évite les coups et le maniement brutal.
ÉPA ATION
Des outils spéciaux sont nécessaires pour démonter certaines
pièces. Après réparation, pour l’appareil avec vérification de
conformité un nouveau test de conformité doit être procédé.
C’est pourquoi, en cas d’incident, nous conseillons d’envoyer
l’appareil au re v en deur spécialisé ou à l’usine pour vérifica-
tion.
Utiliser de l’air comprimé filtré et déshuilé. Ne pas utiliser pour
le gon flage on le contrôle de pneus les tés à l’eau on conte-
nant des produits corrosifs.
CA ACTÉ ISTIQUES TECHNIQUES
Alimentation en
air comprimé : max. 6 bar/87 psi
max. 18 bar/261 psi
max. 25 bar/362 psi
Pression max. : 4,0 bar/56 psi
12,0 bar/174 psi
25,0 bar/350 psi1)
Variation maxi : £4 bar: ± 0,08bar/1,2 psi
> 4 - £10 bar: ± 0,16bar/2,3 psi
> 10 bar: ± 0,25bar/3,6 psi
Tuyau : 500 mm
Raccord : Filetage intérieur G 1/2
avec raccord DN 7,2
Plage de temp. : -10 °C – +60 °C
Poids : ca. 1,0 kg
1) vérification de conformité pas possible
5
UTILISATION CONFO ME À SA DESTINA-
TION
Il est impératif d’utiliser le contrôleur de gonflage euroair mo-
dèle 151 uniquement :
Pour effectuer des contrôles et gonfler ou dégonfler les pneus
de motocyclettes et motos avec air ou azote. Pneus d'aéro-
nefs peuvent être remplis avec 25 bar appareils.
Cet appareil n’est pas adapté aux pneus de vélo, de véhicules
pour enfants, de brouettes ou fauteuils roulants.
Toute utilisation ne correspondant pas aux fins d’utilisation
auxquelles l’appareil est considérée comme utilisation non
conforme.
Il est important de tenir compte des indications sur l’air com-
primé signalées sur le lieu d’utilisation ainsi que celles émises
par le fabricant de pneus et de véhicule.
CONSIGNES DE SÉCU ITÉ
Le contrôleur de gonflage est uniquement prévu pour foncti-
onner avec de l’air comprimé/azote. Toute utilisation ne cor-
respondant pas aux fins d’utilisation auxquelles l’appareil est
prévu ou toute modification effectuée sur l’appareil est consi-
dérée comme utilisation non conforme. Le fabricant ne peut
être tenu comme responsable de dommages résultant d’une
utilisation non conforme. L'utilisateur de cet appareil assume
seul l'ensemble des risques. Le présent produit peut être dan-
gereux s’il n’est pas utilisé conformément aux fins d’utilisation
auxquelles il a été prévu. Il est interdit aux enfants d’utiliser
cet appareil. Une manipulation incorrecte de l’appareil risque
de faire exploser le pneu! Il est interdit d’utiliser le contrôleur
de gonflage à seule fin de remplir ou de contrôler des pneus
lestés à l’eau ou traités avec des substances anticorrosion.
Nous déclinons toute responsabilité pour des dommages ré-
sultant du non respect du présent manuel d’utilisation !
APP OBATION DE MODÈLE
Ce type de contrôleur de gonflage classique est homologué,
il dispose d’une approbation CEE (exception: modèle 25 bar).
La loi sur la mesure et vérification (MessEG) du 25/07/2013
et la nouvelle mesure et règlement de calibration (MessEV) du
11/12/2014 sont remplacé par une évaluation de conformité
avec une homologation nationale. Le fabricant ewo a créé par
sa propre responsabilité une déclaration de conformité, cor-
respondantes et conforme aux exigences légales. La confor-
mité avec la procédure d’évaluation est encadré par les
caractères « DE-M » et mis en évidence par les deux der-
niers chiffres de l’année. L’année indique l’année de vérifica-
tion de conformité. La vignette d’inspection avec le numéro
d’identification doit être marquée par l’organisme de contrôle
qui certifie la réussite de l’examen.
DE-M17 0103
Marque de conformité numéro d’identification de
avec chiffres de l’année l’organisme de contrôle – exemple
La validité est de 2 ans. Ensuite un nouveau test doit être pro-
cédé.
MISE EN SE VICE
Déballer soigneusement l’appareil en veillant à ce que du ma-

2
45
7
6
1
E SATZTEILLISTE
Pos. Bezeichnung Bestell-Nr.
1 Schlauch mit ebelstecker kompl. 356-12
ebelstecker 151.25
2 Schlauch mit Momentstecker kompl. 356-25
Momentstecker 151-183
3 Schlauch mit Tankstellenstecker kompl. 356-15
Tankstellenstecker 151.51
Schlauch mit Quick-Stecker (o. Abb.) 356-65
Quick-Stecker (o. Abb.) 356-64
4 Manometer komplett
0 – 4 bar/56 psi 151-139
0 – 12 bar/140 psi 151-140
0 – 25 bar/140 psi 151-141
5 Dichtkegel* 105-95
6 Kupplungsstecker 308-173
7 Druckbolzen* 151-195
* Verschleißteile
LISTE DE PIÈCES DE ECHANGE
No. Désignation Décret-No.
1 Raccord avec le levier complet 356-12
Connecteur levier 151.25
2 Raccord avec un couple complet 356-25
Plug moment 151-183
3 Flexibles avec connecteur de
la station de gaz complet 356-15
Connect. de la station de gaz 151.51
Raccord avec le connecteur rapide (s. ill.) 356-65
connecteur rapide (s. ill.) 356-64
4 Gauge complètement
0 – 4 bar/56 psi 151-139
0 – 12 bar/140 psi 151-140
0 – 25 bar/140 psi 151-141
5 Cierge* 105-95
6 Prise d'accouplement 308-173
7 Boulon de pression* 151-195
* Usure
SPA E PA TS LIST
No. Article Order No.
1 ose with lever-valve connector 356-12
Lever-valve connector 151.25
2 ose with clip connector 356-25
clip connector 151-183
3 ose with double sided
push-on connector 356-15
Double sided push-on conn. 151.51
ose with quick connector (not illustrated) 356-65
Quick-Stecker (not illustrated) 356-64
4 Gauge with protection cap
0 – 4 bar/56 psi 151-139
0 – 12 bar/140 psi 151-140
0 – 25 bar/140 psi 151-141
5 Valve* 105-95
6 Plugs 308-173
7 Bolt* 151-195
* wear parts
3
6

FN330-308.15.cw.10/17
Armaturen- und Autogengerätefabrik ewo
Hermann Holzapfel GmbH & Co. KG
Heßbrühlstraße 45 – 47
70565 Stuttgart
Table of contents
Languages:
Other ewo Power Tools manuals

