ewo euroair digital 152 User manual
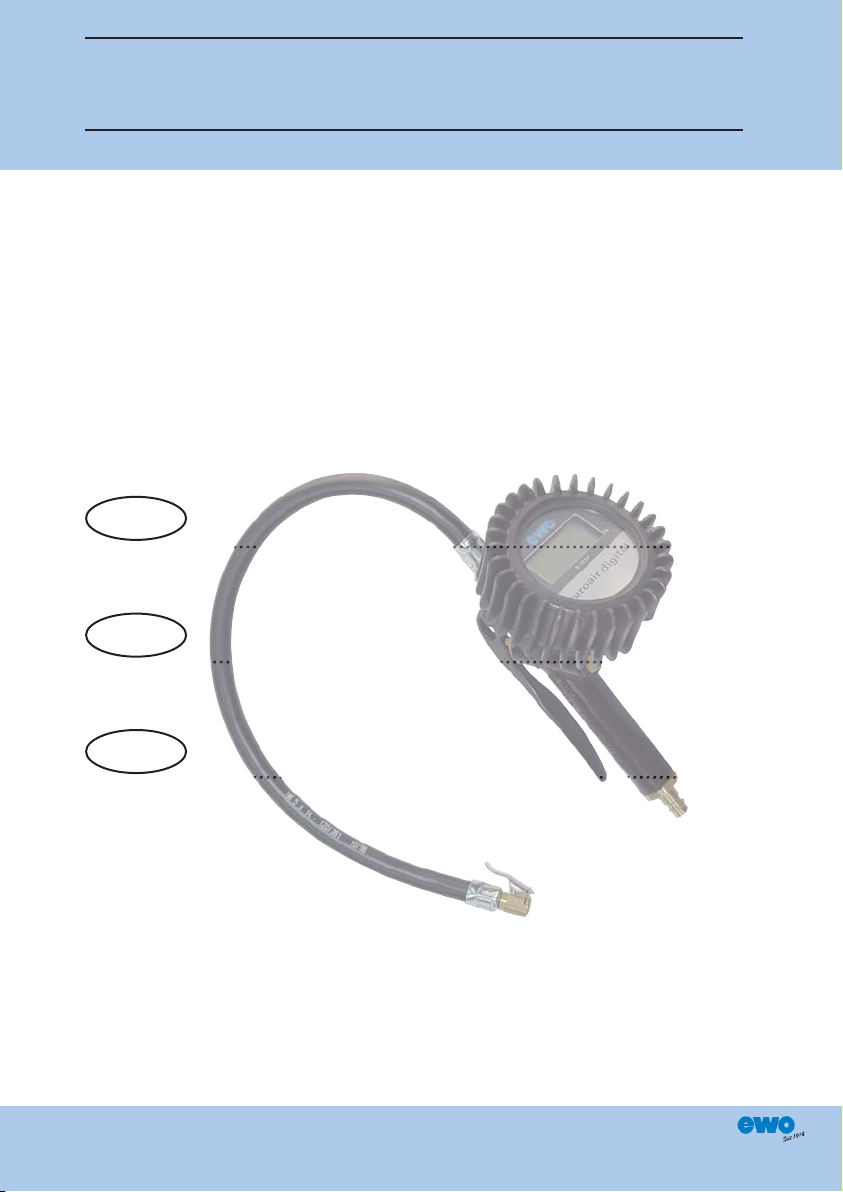
Digitaler Handreifenfüllmesser - euroair digital - Modell 152
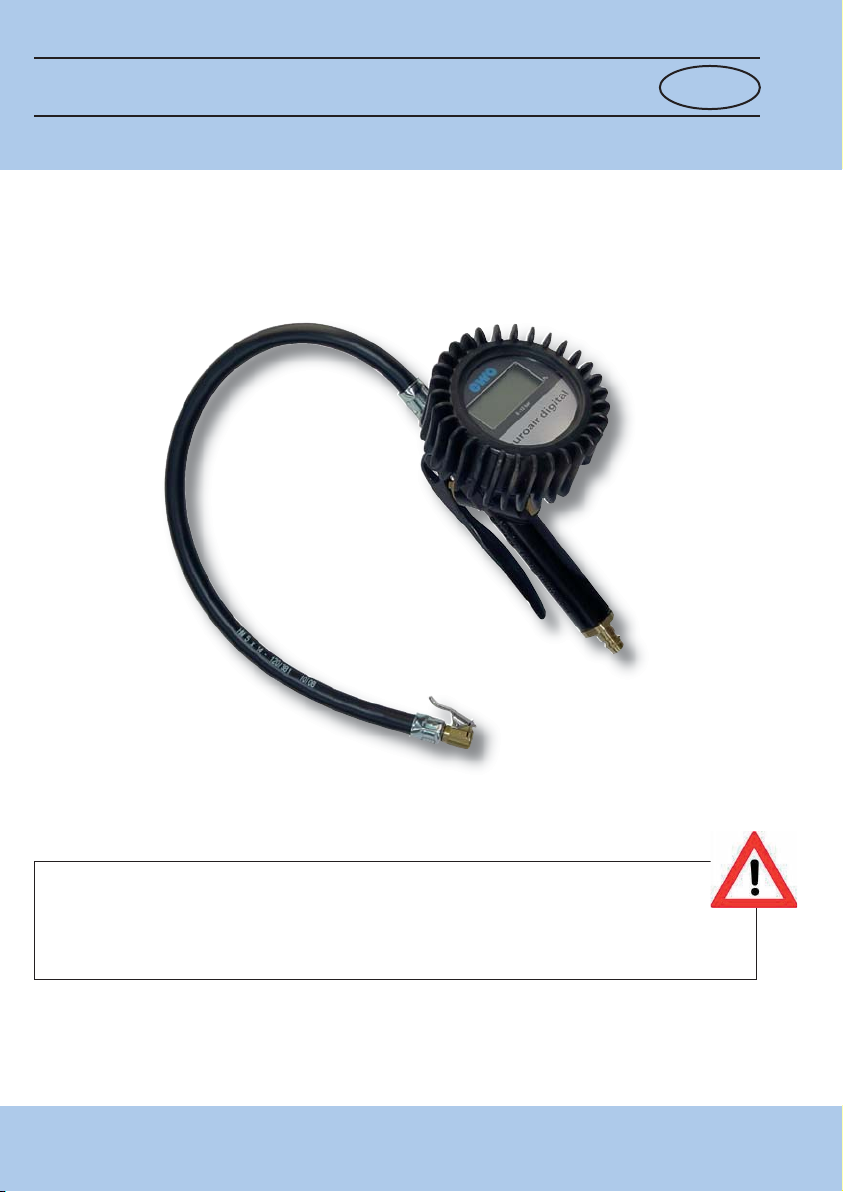
Digital hand tyre inflator - euroair digital - type 152
Contrôleur manuel de gonflage - euroair digital - modèle 152
Sprache Seite
language page
langage page
.....................................................................................2
.....................................................................................9
...................................................................................16
FN330-328B.T.10/13 Armaturen- und Autogengerätefabrik ewo
Hermann Holzapfel GmbH & Co. KG
Heßbrühlstraße 45 - 47
70565 Stuttgart
DE
EN
Betriebsanleitung -
Operating instructions - Manuel d’utilisation
FR
– 2 –
Digitaler Handreifenfüllmesser - euroair digital - Modell 152 DE
Lesen Sie bitte die folgenden Anweisungen sorgfältig durch, bevor Sie das Produkt
in Betrieb nehmen. Der störungsfreie und sichere Betrieb ist nur gewährleistet, wenn
die hier genannten Empfehlungen und Hinweise beachtet werden.

– 3 –
BESTIMMUNGSGEMÄSSE VERWENDUNG
Der digitale Handreifenfüllmesser - euroair digital - Modell 152 ist ausschließlich für
folgenden Zweck vorgesehen:
Kontrollieren, Befüllen und Ablassen von Reifen für Motorfahrzeuge
mit Luft oder Stickstoff.
Er ist nicht geeignet für Reifen z. B. von Fahrrädern, Kinderfahrzeugen, Schubkarren und
Luftfahrzeugen.
Jede andere oder darüber hinausgehende Verwendung gilt als unsachgemäß. Für daraus
entstehende Schäden übernehmen wir keine Haftung.
Die Druckluftangaben der Reifen- und Fahrzeughersteller sowie die am Verwendungsort
vorhandenen Druckluftangaben sind zu beachten.
BAUARTZULASSUNG / EICHUNG
Der digitale Handreifenfüllmesser besitzt eine Innerstaatliche Bauartzulassung.
(BAM- Zulassungszeichen: 18.08 / 09.02.)
Geräte für den Gebrauch an öffentlichen Tankstellen und Werkstätten sind von der Eichbehörde
zugelassen und geeicht (siehe Eichplakette auf der Manometerscheibe, diese zeigt das Jahr
an, in dem die Eichung endet). Die Gültigkeit der Ersteichung beträgt 2 Jahre. Nach Ablauf der
Eichfrist muss das Gerät nachgeeicht werden.
• Das Gerät sorgfältig auspacken und darauf achten, dass keine Verpackungsrückstände ins
Gerät gelangen. Reifenfüller erst dann mit dem Kupplungsstecker an das Druckluftnetz
anschließen.
• Der Reifenfüller darf nur mit gefilterter und entölter Druckluft betrieben werden. Die Druck-
luftversorgung muss mit den notwendigen Wasser- und Schmutzfiltern ausgestattet werden,
um Schmutzansammlungen im Leitungssystem des Reifenfüllers minimal zu halten.
INBETRIEBNAHME
18.08
09.02
BEDIENUNG
1. Nach Abnahme der Staubschutzkappe am Reifenventil, den Doppeltankstellenstecker, Hebel-
stecker oder Momentstecknippel (je nach Ausführung) auf das Reifenventil aufstecken, so
dass eine dichte Verbindung entsteht. Der vorhandene Reifendruck wird direkt danach im
Digitalmanometer angezeigt.
Ist der Befüllschlauch mit Stecknippel nicht mit einem Reifenventil verbunden,
besteht die Gefahr, dass der Schlauch bei Betätigung des Abzugshebels unkon-
trolliert durch die Luft schlägt. Dadurch besteht Verletzungsgefahr.
2. Zum Füllen des Reifens muss der Hebel ganz durchgezogen werden. Während der
Befüllung wird der Reifendruck nicht angezeigt.
Ein zu langes Betätigen des Abzugshebels kann zum Platzen des Reifens durch
Überdruck führen! Nur kurz füllen und dazwischen immer wieder prüfen!
3. Zum Ablassen, falls erforderlich, darf der Hebel nur halb durchgezogen werden.
4. Zum Prüfen muss der Hebel in Ruhestellung (Ausgangsstellung) gebracht / belassen werden.
5. Nach Fertigstellung das Füllventil schnell vom Reifenventil ziehen, um Druckverluste zu
vermeiden.
6. Nach Beendigung der Reifenkontrolle (Reserverad nicht vergessen) Gerät in den Halter einhängen.
KOMPONENTEN
• Durchmesser: 80mm
• Anzeigebereich: 0-12bar, mit CE-Kennzeichen, eichfähig.
• LCD- Anzeige: 3,5-stellig, 7-Segment-Anzeige , Höhe 15mm
• Bei Druckbeaufschlagung schaltet die Anzeige ein und nach 20 Sekunden ohne Druck wieder aus.
• Varianten: Gerät ist auch mit 0-174psi-Anzeige erhältlich, diese Ausführung kann
jedoch
nicht
geeicht werden!
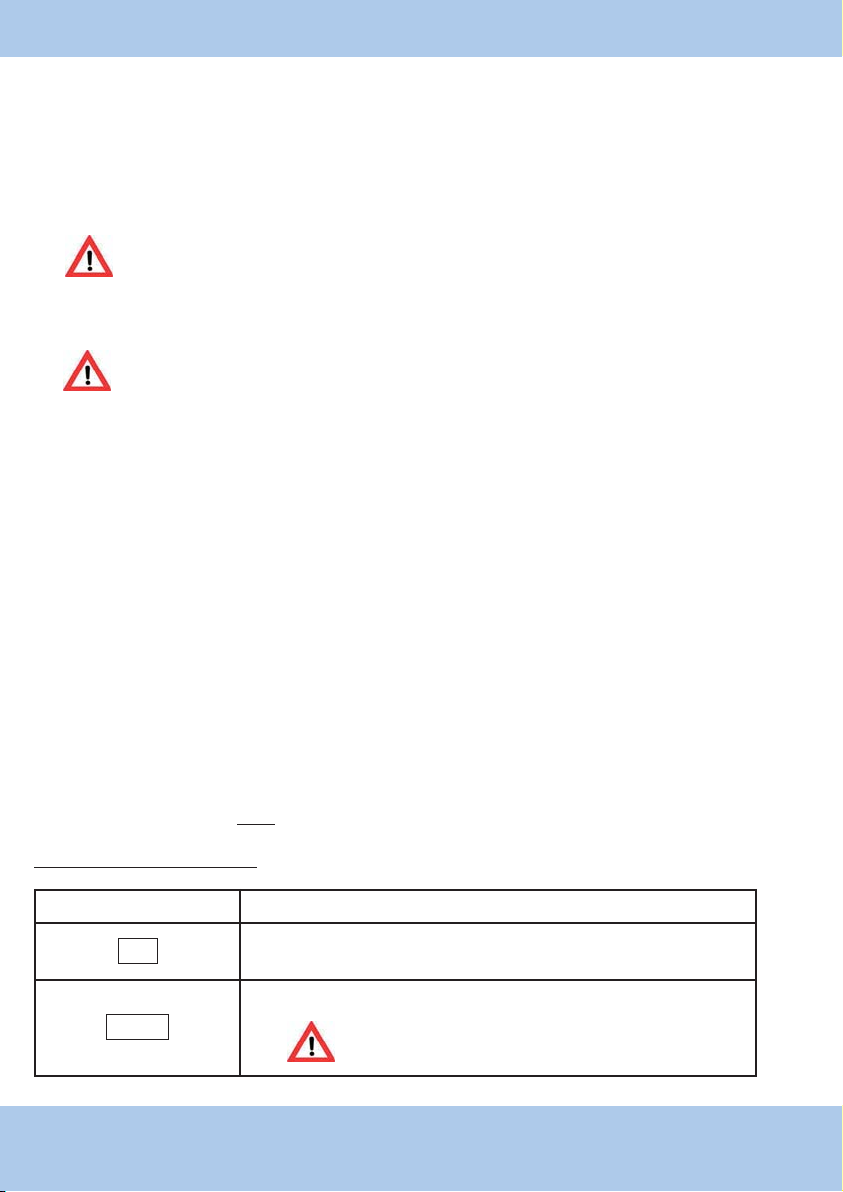
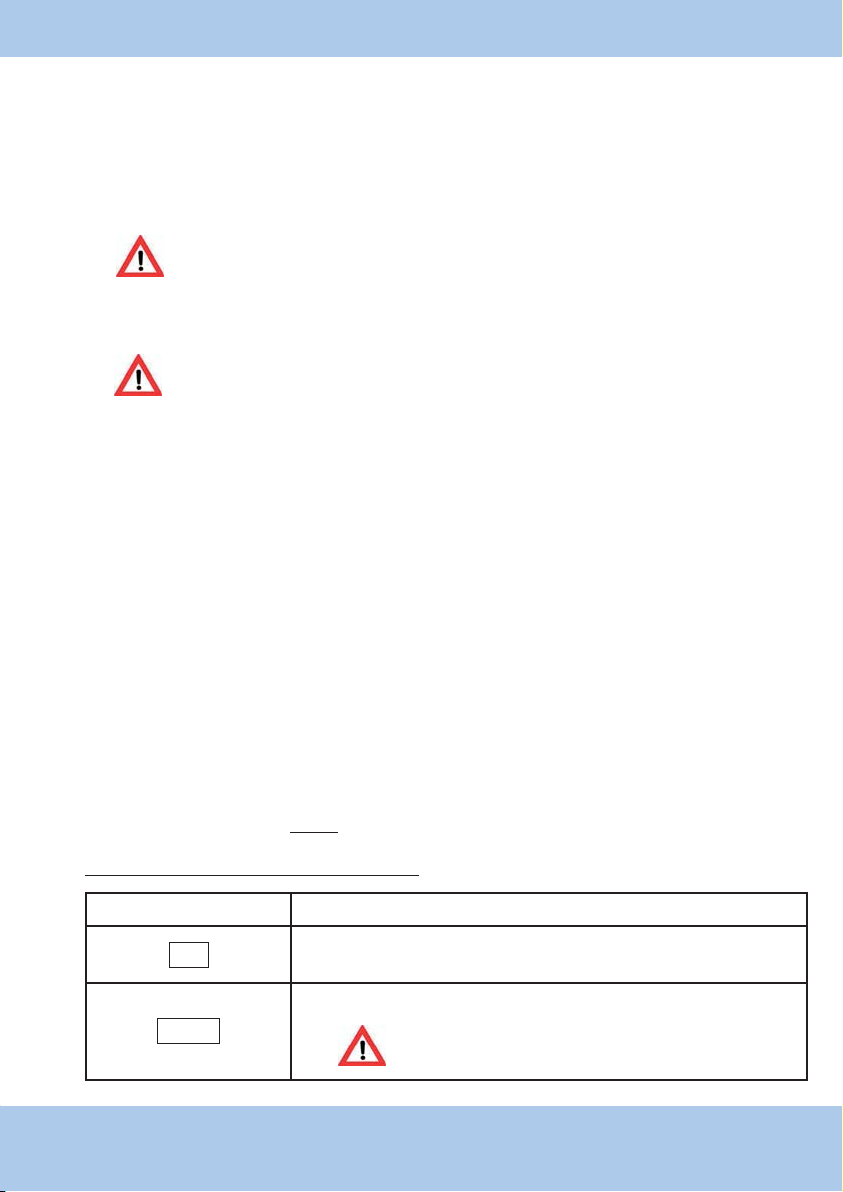
Hinweis- und Fehleranzeigen
Digitalmanometer
Anzeige im Display Bedeutung / Handlungshinweise
LO Batterie leer; Knopfzelle muss ausgetauscht werden
(die Lebensdauer der Batterie beträgt ca. 2 Jahre)
- --
Der Reifendruck beträgt mehr als 12bar.
Reifendruck sofort vermindern! Zu hoher Reifen-
druck kann zum Platzen des Reifens führen!
– 4 –

– 5 –
TECHNISCHE DATEN
Schutzart: IP54
Druckversorgung: max. 16bar/174psi
Maximaler Fülldruck: 12,0bar/174psi
Ablesegenauigkeit: 0,05bar/0,7psi
Maximale Abweichung: < 0,08bar/1,16psi
Füllschlauch: 500mm
Versorgungsanschluss: Innengewinde G1/2“ mit Kupplungsstecker DN7,2
Temperaturbereich: -10°C bis +60°C
Gewicht: ca. 1,0kg
Stromversorgung: 3V Knopfzelle CR2450
Gültige Normen: EU-Richtlinie elektromagnetische Kompatibilität
(89/336/EEC) Version 93/31/EEC, EN61000-6-3(2011),
EN61000-6-2(1999)
Batteriewechsel
Der Batteriewechsel muss ohne Demontage des Manometers erfolgen, sonst erlöscht die Eichung!
1. Gummi-Schutzkappe nach unten stülpen, Batteriefach freimachen.
2. Batteriefach (grün) herausziehen.
3. Batterie auf die richtige Polarität achtend auswechseln.
4. Batteriefach wieder hineinschieben und Schutzkappe über das Manometer ziehen.
(Kontrolle: Display leuchtet kurz auf, als sog. Segmentprüfung)
Werden bei der Segmentprüfung nicht alle Segmente im Display angezeigt, darf der
euroair digital
nicht mehr
verwendet werden.
Schicken Sie das Gerät zur Reparatur zum Fachhändler oder Hersteller ein!

– 6 –
WARTUNG
Der Handreifenfüllmesser arbeitet praktisch wartungsfrei. Das Manometer ist durch eine Schutz-
kappe weitgehend geschützt. Schläge und harter Umgang sollen trotzdem vermieden werden.
Der Reifenfüller ist ausschließlich für Druckluft/Stickstoff vorgesehen. Jede Benutzung außerhalb
dieses Zwecks sowie Modifikationen an dem Produkt werden als unsachgemäßer Gebrauch an-
gesehen. Der Hersteller ist für Schäden, die durch einen unsachgemäßen Gebrauch entstehen,
nicht haftbar. Das Risiko liegt allein beim Benutzer.
Dieses Produkt kann gefährlich sein, wenn es unsachgemäß benutzt wird. Kinder dürfen die-
ses Gerät nicht bedienen. Eine falsche Bedienung kann zur Explosion des Reifens führen!
Der Reifenfüller darf nicht zum Füllen und Prüfen von mit Wasser gefüllten Ballastreifen oder mit
Korrosionsmittel behandelten Reifen verwendet werden.
Für Schäden, die durch Nichtbeachtung dieser Bedienungsanleitung entstehen, kann keine
Haftung übernommen werden!
SICHERHEITSHINWEISE
REPARATUR
Zur Demontage sind für verschiedene Teile Spezialwerkzeuge erforderlich.
Ein eichpflichtiges Gerät muss nach der Reparatur von der zuständigen Eichbehörde geeicht
werden. Deshalb empfehlen wir, bei Störungen das Gerät dem Fachhändler bzw. ins Werk zu
senden.
RECYCLING UND ENTSORGUNG
Batterien dürfen nicht über den Hausmüll entsorgt werden, wenn sie leer sind. Verbrauchte
Batterien gehören in die extra dafür vorgesehenen Sammelbehälter, die überall dort zu finden
sind, wo Batterien verkauft werden. Ist kein Sammelbehälter in der Nähe, können gebrauchte
Batterien auch bei den Problemstoffsammelstellen der Gemeinden abgegeben werden.
Das Gerät darf nicht im Hausmüll entsorgt werden. Für eine sachgerechte Entsorgung setzen
Sie sich bitte mit uns in Verbindung.

– 7 –
Pos. Ersatzteil Bestell-Nr.
1Füllschlauch mit Hebelstecker kpl. 151-26A
2Füllschlauch mit Momentstecker kpl. 151-182
3Füllschlauch mit Tankstellenstecker kpl. 151-26B
Hebelstecker (einzeln) 151.25
Momentstecker (einzeln) 151-183
Tankstellenstecker (einzeln) 151.51
4Digitalmanometer mit Schutzkappe, 0-12bar 152-3
Digitalmanometer (ohne Schutzkappe) 152-1
Gummi-Schutzkappe für Manometer 152-2
Batterie (Lithium 3V Knopfzelle CR2450) 152-4
5Dichtkegel 105-95
6Kupplungsstecker 308-173
7Druckbolzen 151-195
ERSATZTEILE
2
3
4
5
7
6
1
– 8 –
Der Lieferant
Armaturen- und Autogengerätefabrik ewo
Hermann Holzapfel GmbH & Co. KG
Heßbrühlstraße 45-47
70565 Stuttgart
erklärt in alleiniger Verantwortung, dass das Produkt
Digitaler Handreifenfüllmesser - euroair digital - Modell 152
den Anforderungen nachfolgender Richlinien und Normen entspricht:
- 89/336/EEC und 2004/108/EG (EMV-Richtlinie zur elektromagnetischen Verträglichkeit)
Version 93/31/EEC, EN61000-6-3 (2011), EN61000-6-2 (1999)
- 2006/95/EG Niederspannungsrichtlinie
- 2002/96/EG Elektro-Altgeräte Richtlinie
Stiftung elektro-altgeräte register®(ear): WEEE-Reg.-Nr. DE 51604370
Das Produkt ist mit folgendem Symbol gekennzeichnet:
Stuttgart, 16.9.2013
Ulrich Löffler
Leiter Technik
EG-KONFORMITÄTSERKLÄRUNG

– 9 –
Digital hand tyre inflator - euroair digital - type 152 EN
Please read the following instructions carefully before using this product.
Trouble free and safe operating of the unit can only be guaranteed if recommen-
dations and conditions stated in this manual are respected.

– 10 –
APPROPRIATE USE
The digital hand tyre inflator - euroair digital - type 152 is intended exclusively for the following
purpose:
Filling and deflation of tyres on motorised vehicles with air or nitrogen -
as well as for checking the fill level.
It is
not
suitable for use on the tyres of bicycles, toy vehicles, wheelbarrows and aircraft/
aerodynes.
Any other use as well as any modifications to the product shall be viewed as inappropriate use.
The manufacturer is not liable for any damages which result from any inappropriate use.
In this process, always observe the specifications on the amount of pressurised air as
indicated in the place of use (along with those set forth by the tyre and vehicle manufacturers).
TYPE APPROVAL
The digital manual tyre fill-level gauge has been type-approved on the national level.
(BAM permit reference no.: 18.08/09.02.)
Devices designated for use at public filling stations and at shops are approved by the Board of
Weights and Measures and calibrated accordingly (see calibration sticker on the manometer
pane, it shows the year when the validity of calibration ends). The initial calibration remains valid
for two years. After the elapse of this calibration interval, the device must be re-calibrated.
• Carefully unpack the device and ensure that no packaging residue falls into the device. Only
then should you connect the device to the pressurised air mains using the coupling plug.
• The tyre inflator may only be operated with filtered and de-oiled pressurised air. The pressu-
rised air supply must be equipped with the necessary water/dirt filters in order to minimise the
accumulation of dirt in the tyre filler's ductwork.
COMMISSIONING
18.08
09.02
– 11 –
OPERATION
1. After removing the dust-cover cap on the tyre valve, place the dual filling-station plug, the
trigger plug or the instant plug nipple (according to the corresponding version) onto the tyre
valve so as to create an airtight connection. The prevailing tyre pressure is indicated imme-
diately thereafter in the digital manometer.
If the fill hose (with the male coupling) is not connected to a tyre valve, this presents
the hazard that the hose may (upon activation of the trigger) will be tossed uncon-
trollably through the air. This poses the risk of injury!
2. To fill the tyre, the trigger must be completely drawn. During the filling process, the tyre
pressure is not displayed.
Activating the trigger for too long may lead to a tyre blowout (as a result of excess
pressure). Only fill for short intervals and continue checking the level in the meantime.
3. If necessary, the trigger may only be half-drawn for deflation.
4. To check the air level, the trigger must be placed and/or left in its rest position (default position).
5. After completing the filling process, quickly remove the fill valve from the tyre valve in order
to avoid loss of pressure.
6. After completing the check of the tyre (do not forget the spare tyre!), hang the device on its holder.
COMPONENTS
• Diameter: 80mm
• Display range: 0-12bar, with CE label, calibratable.
• LCD display: 3,5-digit, 7-segment LCD display, height 15mm
During pressurisation, the display switches on; after 20sec. without pressure,
it switches off again.
• Versions: The device is also available in the range of 0-174psi. A device with a psi
display
canno
t be calibrated!
Informations and error indicators on display
Digital manometer
Display shows... Meaning / instructions
LO Battery is dead; the coin cell must be replaced.
(The useful life of the battery amounts to approx. two years)
- --
The tyre pressure is higher than 12bar.
Lessen the pressure level immediately! Excess tyre
pressure can lead to a tyre blowout.
– 12 –
TECHNICAL DATA
Protection class: IP54
Pressure supply: max. 16bar/174psi
Maximum fill pressure: 12.0bar/174psi
Accuracy of readings: 0.05bar/0.7psi
Maximum deviation: < 0.08bar/1.16psi
Fill hose: 500mm
Supply connector: Female screw thread G1/2“ with coupling plug DN7.2
Temperature range: -10°C up to +60°C
Weight: approx. 1.0kg
Power supply: 3V coin cell CR2450
Valid norms: EU guideline on electromagnetic compatibility (89/336/EEC)
version 93/31/EEC, EN61000-6-3(2011), EN61000-6-2(1999)
Changing the battery
The battery must be changed without disassembling the manometer; otherwise, the calibration
will expire!
1. Pull the rubber safety cap down and clear the battery case.
2. Pull the (green) battery case out.
3. Always change the battery while maintaining the correct polarity.
4. Re-insert the battery case and cover the manometer with the safety cap.
(Check: The display screen illuminates briefly, as a so-called "segment test")
If - during the segment test – not all segments are indicated on the display screen, the
euroair digital may
no longer be used
to check and correct tyre pressure! Instead,
it must be sent in to a specialised dealer or to the manufacturer for repair.

– 13 –
MAINTENANCE
The manual tyre fill-level gauge works practically maintenance-free. The manometer is safegu-
arded to a great extent by a safety cap. Nevertheless, avoid impacts and rough handling.
The tyre inflator is designated solely for pressurised air/nitrogen. The use of any other substance
(as well as any modifications to the product) shall be viewed as inappropriate use. The manu-
facturer is not liable for any damages which result from any inappropriate use. The user bears
the full risk.
This product may be dangerous if used improperly. Children may never operate this device.
Faulty operation of the device may lead to the explosion of the tyre!
The tyre inflator may not be used for filling and checking ballast tyres filled with water; the same
applies to tyres treated with anti-corrosive agents.
No liability can be assumed for damages which occur as a result of the failure to observe the
instructions indicated in this operation guide!
SAFETY GUIDELINES
REPAIR
For the disassembly of various parts, special tools are required.
After its repair, a device subject to mandatory calibration must be calibrated by the competent
Board of Weights and Measures. Therefore, in the event of any malfunctions, we recommend
sending the device to a specialised dealer or to the factory.
RECYCLING AND DISPOSAL
Dead batteries may not be disposed of with residential refuse. Such batteries must be placed
in specially-designated collection containers, which can be found in any place where batteries
are sold. If there is no collection container nearby, used batteries can also be dropped off at the
municipal disposal site for problematic waste.
The devices themselves may not be disposed of along with residential refuse. Please contact
us for proper disposal.

– 14 –
Pos. Spare part Order No.
1Fill hose with lever-valve connector, as complete set 151-26A
2Fill hose with clip connector, as complete set 151-182
3Fill hose with double-sided push-on connector, as complete set 151-26B
Lever-valve connector (single) 151.25
Clip connector (single) 151-183
Double-sided push-on connector (single) 151.51
4Digital gauge with rubber safety cap, 0-12bar 152-3
Digital gauge (without rubber safety cap) 152-1
Rubber safety cap for digital gauge 152-2
Battery (Lithium 3V coin cell CR2450) 152-4
5Conical nipple 105-95
6Coupling plug 308-173
7Pressure pin 151-195
SPARE PARTS
2
3
4
5
7
6
1

– 15 –
The deliverer
Armaturen- und Autogengerätefabrik ewo
Hermann Holzapfel GmbH & Co. KG
Heßbrühlstraße 45 - 47
70565 Stuttgart
herewith declares that the
Digital hand tyre inflator - euroair digital - type 152
complies with the following directives:
- 89/336/EEC and 2004/108/EG EMV-directive (electro-magnetic compatibility)
version 93/31/EEC, EN61000-6-3 (2011), EN61000-6-2 (1999)
- 2006/95/CE Low voltage directive
- 2002/96/CE electronic waste directive
Stiftung elektro-altgeräte register®(ear): WEEE-Reg.-Nr. DE51604370
This product is labeled with die indicated mark:
Stuttgart, 16.9.2013
Ulrich Löffler
Technical director
EC DECLARATION OF CONFORMITY

– 16 –
Contrôleur manuel de gonflage - euroair digital - modèle 152 FR
Prière de lire attentivement les consignes suivantes avant toute utilisation et mise en
oevre. Le bon fonctionnement ne pourra être garanti que si les recommandations
consignées ont été respectées.

– 17 –
UTILISATION CONFORME À SA DESTINATION
Il est impératif d’utiliser le contrôleur de gonflage uniquement:
Pour effectuer des contrôles et gonfler ou dégonfler
les pneus de motocyclettes et motos avec air ou azote.
Cet appareil n’est pas adapté aux pneus de vélo, de véhicules pour enfants, de brouettes
ou d’aéronefs.
Toute utilisation ne correspondant pas aux fins d’utilisation auxquelles l’appareil est consi-
dérée comme utilisation non conforme. Le fabricant ne peut être tenu comme responsable
de dommages résultant d’une utilisation non conforme.
Il est important de tenir compte des indications sur l’air comprimé signalées sur le lieu
d’utilisation ainsi que celles émises par le fabricant de pneus et de véhicule.
APPROBATION DE MODÈLE / ÉTALONNAGE
Le contrôleur de gonflage manuel numérique dispose d’une approbation
intra-nationale. (Numéro d’approbation de modèle : 18.08/09.02.)
Le présent appareil est admis et étalonné par l’office d’étalonnage pour un emploi en stations
essence publiques et garages (vignette apposée sur le disque du manomètre; elle déclares
l’année, dans laquelle l’étalonnage expire). La validité du premier étalonnage est de 2 ans. Une
fois ce délai passé, l’appareil doit être étalonné à nouveau.
• Déballer l’appareil avec précaution en veillant à ce qu’aucun matériau d’emballage n’y
pénètre. Ne brancher le contrôleur de gonflage avec son raccord au réseau d’air comprimé
qu’une fois entièrement déballé.
• Le contrôleur de gonflage ne doit fonctionner qu’avec de l’air comprimé filtré et déshuilé.
L’alimentation en air comprimé doit être dotée des filtres nécessaires pour la dépollution de
l’eau et des impuretés, afin que les dépôts de pollution dans le tuyau du contrôleur de
gonflage restent faibles.
MISE EN SERVICE
18.08
09.02

– 18 –
MODE D’EMPLOI
1. Après avoir retiré le bouchon pare-poussière, brancher le double raccord station-service,
le raccord à levier ou le raccord instantané sur la valve de pneu (en fonction du modèle) pour
établir une liaison étanche. La pression régnante dans le pneu peut ensuite être lue sur le
manomètre numérique.
Si la contre-pièce du tuyau de remplissage n’est pas reliée à la valve du pneu, il
existe un risque que celle-ci soit projetée bruralement et de façon non contrôlée
dans l’air, au moment où la poignée est actionnée. Risque de blessures.
2. Pour gonfler le pneu, serrer la poignée à fond. La pression du pneu n’est pas affichée
pendant le gonflage.
Une action prolongée sur la poignée peut entraîner l’explosion du pneu par pression
trop élevée. Gonfler brièvement et contrôler régulièrement le gonflage!
3. Pour dégonfler le pneu, si nécessaire, ne serrer la poignée qu’à moitié.
4. Pour effectuer un contrôle; la poignée doit être ramenée en position de repos (position initiale).
5. Retirer rapidement l’embout de gonflage de la valve du pneu pour éviter une perte de pression.
6. Une fois le contrôle des pneus terminé (ne pas oublier la roue de secours), raccrocher
l’appareil à son support.
COMPOSANTS
• Diamètre: 80mm
• Plage d’affichage: 0-12bar, avec marquage CE, homologable.
• Affichage par cristaux liquides: 3,5 chiffres, 7 segments, hauteur 15mm
Dès que la pression monte, l’affichage démarre. Il s’arrête au
bout de 20 secondes si aucune pression n’est enregistrée.
• Variantes: Disponible aussi avec 0 à 174psi. L’appareil proposant un
affichage en psi
ne peut
être étalonné!
Affichages d’erreurs
Manomètre numérique
Affichage Sense / Instructions
LO Pile vide; la pile bouton devra être changée
(La pile est prévue pour un fonctionnement d’environ 2 ans.)
- --
La pression du pneu est supérieure à 12bar.
Réduire sans délai la pression de pneu! Une pression
trop importante peut entraîner l’explosion du pneu.
– 19 –
CARACTÉRISTIQUES TECHNIQUES
Type de protection: IP54
Alimentation en air comprimé: max. 16bar/174psi
Pression maximale: 12,0bar/174psi
Précision de lecture: 0,05bar/0,7psi
Variation maxi: < 0,08bar/1,16psi
Tuyau: 500mm
Raccord: Filetage intérieur G1/2“ avec raccord DN7,2
Plage de températures: -10°C à +60°C
Poids: ca.1,0 kg
Alimentation en courant: 3V pile bouton CR2450
Normes en vigueur: Directive UE relative à la compatibilité électromagnétique
(89/336/CEE) Version 93/31/CEE, EN61000-6-3(2011),
EN61000-6-2(1999)
Changement de la pile
Le changement de la pile se fait sans démonter le manomètre, sinon l’étalonnage devient caduc!
1. Tirer le cache de protection en caoutchouc vers le bas, dégager le logement de la pile.
2. Extraire le logement de la pile (vert).
3. Changer la pile en veillant à respecter la polarité.
4. Repousser le logement de la pile puis le cache de protection en caoutchouc sur le
manomètre.(Contrôle : l’écran s’allume brièvement, test de segment)
Si l’ensemble des segments n’est pas affiché sur l’écran lors du test, il n’est plus
permis d’utiliser le manomètre euroair digital pour le contrôle ou la correction de la
pression de pneus. Il devra alors être envoyé chez un revendeur spécialisé ou le
fabricant pour être révisé.

– 20 –
ENTRETIEN
Le contrôleur manuel de gonflage ne nécessite pratiquement pas d’entretien. Le manomètre est
largement protégé par le cache de protection. La précision de l’appareil est longtemps con-
servée à condition d’éviter les coups ou un maniement brutal.
Le contrôleur de gonflage est uniquement prévu pour fonctionner avec de l’air comprimé/azote.
Toute utilisation ne correspondant pas aux fins d’utilisation auxquelles l’appareil est prévu ou
toute modification effectuée sur l’appareil est considérée comme utilisation non conforme. Le
fabricant ne peut être tenu comme responsable de dommages résultant d’une utilisation non
conforme. L'utilisateur de cet appareil assume seul l'ensemble des risques
Le présent produit peut être dangereux s’il n’est pas utilisé conformément aux fins d’utilisation
auxquelles il a été prévu. Il est interdit aux enfants d’utiliser cet appareil. Une manipulation in-
correcte de l’appareil risque de faire exploser le pneu!
Il est interdit d’utiliser le contrôleur de gonflage à seule fin de remplir ou de contrôler des pneus
lestés à l’eau ou traités avec des substances anticorrosion.
Nous déclinons toute responsabilité pour des dommages résultant du non respect du présent
manuel d’utilisation!
CONSIGNES DE SÉCURITÉ
RÉPARATION
Des outils spéciaux sont nécessaires pour démonter certaines pièces.
Après réparation, l’appareil assujetti à l’étalonnage doit être de nouveau étalonné par l’office
mandaté pour ce type de procédure. C’est pourquoi nous conseillons, en cas d’incident, d’en-
voyer l’appareil à un revendeur spécialisé ou à l’usine pour vérification.
RECYCLAGE ET ÉLIMINATION
Les piles usagées ne sont pas des déchets domestiques! Elles doivent être déposées dans un
lieu de collecte de piles usagées partout où se vendent des piles. Si aucun récipient de collecte
n’est disponible, il est aussi possible de les donner à un organisme de collecte communal spé-
cialisé dans les déchets sensibles.
Lorsque l’appareil arrive en fin de vie, ne le jetez pas dans une poubelle classique. Informez-
vous des possibilités d’élimination écologique ou contactez-nous.
Other manuals for euroair digital 152
1
Table of contents
Languages:
Other ewo Power Tools manuals


