Excel SW Series User manual

OPERATION MANUAL

Introduction
Thank you for your purchase of SW88 / SW118 SCREW CONVEYOR.
This Operation Manual is intended to help you operate the machine correctly, perform routine
maintenance and take a simple troubleshooting action as necessary, so you can always use the
machine in good condition.
Please read this Operation Manual before you start using the machine, and keep it close to the
machine for easy reference.
We recommend the use of our own brand supplies. We will not be liable for any damage caused by the use of
third party supplies in this machine.
The supplier cannot be held responsible for any damage caused by deviating machine
specifications.
This manual has been complied with the utmost of care. The supplier accepts no responsibility for
any errors in this manual and/or the results of misinterpretation of this manual.
The supplier is not liable for damages and/or problems that arise from using spare parts that are not
supplied by the supplier.
The supplier reserves the right to change specifications and/or spare parts without prior notification.
All rights reserved. No part of this publication may be reproduced by photocopy, printing or in any
other way without prior consent from the supplier.
Liability
We exclude all liability in so far as it is not provided for by law.
Our liability shall never exceed the total amount of the order in question.
Barring the generally applicable legal rules of public order and good faith we are not liable to pay for
any damage of any sort whatsoever, directly or indirectly, including business losses, to movable or
immovable property, or to persons, either at the other party or at third parties.
We are in any case not liable for damages arising from or cause by the use of the product supplied
or by the unsuitability of it for the goal for which the other party purchased it.

Table of Contents
1. Important safeguards.............................................................................5
2. Transport, installation and connection.................................................6
2.1. Supply.................................................................................................................................6
2.2. Storage and conservation....................................................................................................6
2.3. Information on liability..........................................................................................................6
2.4. Transportation.....................................................................................................................6
2.4.1. Machine weight ...............................................................................................................6
2.4.2. Transporting the machine mounted on pallet, with a forklift or forklift truck ......................7
2.5. Installation...........................................................................................................................7
2.5.1. Preparations....................................................................................................................7
2.5.2. Place machine.................................................................................................................7
2.5.3. Procedure........................................................................................................................7
2.6. Changing the installation location........................................................................................9
2.7. Dismantling .........................................................................................................................9
2.7.1. Requisite qualifications....................................................................................................9
2.7.2. Scrapping and disposal...................................................................................................9
3. Description of the machine..................................................................10
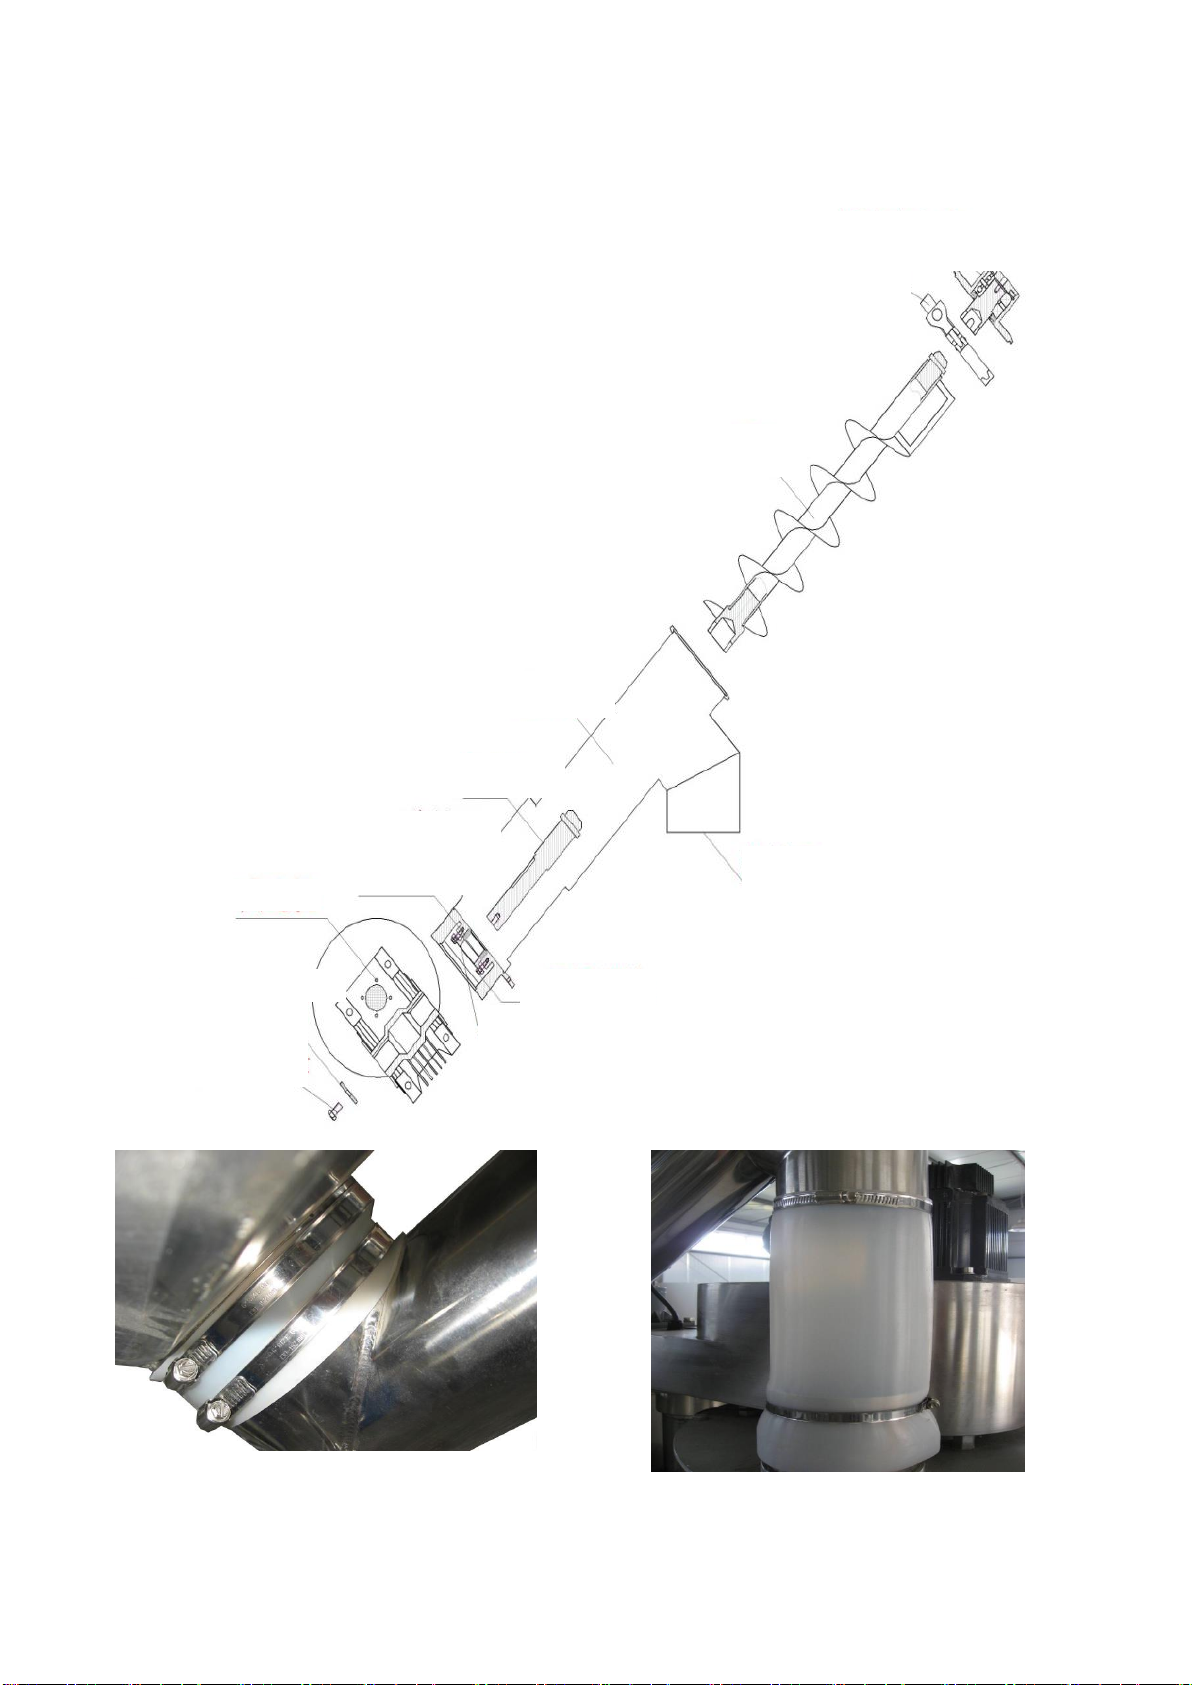
3.1. Main items in the standard machine..................................................................................10
3.2. Working principle...............................................................................................................10
3.3. Machine specifications ......................................................................................................11
3.3.1. Specification of the delivered machine...........................................................................11
3.3.2. Specification of the standard machine...........................................................................11
4. Operation...............................................................................................12
4.1. Operating panel.................................................................................................................13
4.1.1. Operating switches, buttons and indications..................................................................13
4.2. Machine controls...............................................................................................................14
4.3. Settings at the machine.....................................................................................................14
4.3.1. Adjusting the incline angle.............................................................................................14
4.4. Cleaning and product changeover.....................................................................................14
5. Problem solving....................................................................................15
5.1. General.............................................................................................................................15
5.2. Operator observations-summary.......................................................................................16

5.2.1. General machine functions............................................................................................16
6. Maintenance and care ..........................................................................17

5
1. Important safeguards
For your protection, please read these safety instructions completely before operating the machine
and keep this manual for future reference.
Carefully observe all warnings, precautions and instructions on the machine, or the one described in
the operating manual and adhere to them.
Power Source
This machine should be operated only from the
type of power source indicated on the machine’s
nameplate. If you are not sure of the type of
electrical power supplied to your factory, consult
your dealer or local power company.
Overloading
Do not overload wall outlets, extension cords or
convenience receptacles beyond their capacity,
since this can result in fire or electric shock.
Attachments
Do not use attachments not recommended by
the manufacturer, as they may cause hazards.
Cleaning
Unplug the machine from the wall outlet before
cleaning. Use the correct cleaner suitable for
your production.
Power-Cord Protection
Route the power cord so that it is not likely to be
walked on or pinched by items placed upon or
against them.
Ventilation
The slots and openings in the machine are
provided for necessary ventilation. To ensure
the reliable operation of the machine, these
slots and openings must never be blocked or
covered.
Damage Requiring Service
Unplug the machine from the wall outlet and
refer servicing to qualified service personnel
under the following conditions:
-When the power cord or plug is damaged or
frayed.
-If liquid has been spilled or objects have
fallen into electrical box.
-If it has been exposed to rain or water.
-If it has been subject to excessive shock.
-If it does not operate normally when
following the operating instructions. Adjust
only those controls that are specified in the
operating instructions. Improper adjustment
of other controls may result in damage and
will often require extensive work by a
qualified technician to restore the machine
to normal operation.
-When the machine exhibits a distinct change
in performance.
Servicing
Do not attempt to service the machine yourself
as opening or removing parts may expose you
to dangerous voltage or other hazards.
Refer all servicing to qualified service
personnel.
Replacement Parts
When replacement parts are required, be sure
the service technician had used replacement
parts specified by the manufacturer that have
the same characteristics as the original parts.
Unauthorized substitutions may result in fire,
electric shock, or other hazards.

6
2. Transport, installation and connection
2.1. Supply
Compare the entire scope of supply with the order and the shipping note.
Check if shipment is complete
Check if shipment is complete using the attached shipping not! Otherwise we refer to our general
conditions for the supply of machines.
Report damage
In case of damage caused by insufficient packing or during transport by the forwarding agents, the
insurance company and the machine supplier are to be informed immediately after delivery of the
machine with all accessories.
2.2. Storage and conservation
In order to maintain the machine in a good condition if is not used for a long period, pay attention to
the following:
The storage room must be dry and clean;
The machine must not be exposed to extreme heat or cold;
Place the machine on level ground in order to avoid torsion;
Clean the entire machine. All bright metal parts must be lightly coated with acid-free oil;
Cover entire machine so that no dirt or dust can get in.
2.3. Information on liability
Storage of the machine
The supplier does not take any warranty for corrosive damage that occurs due to improper storage.
Claims
The supplier would like to point out that improper transportation does not entitle to replacement or
warranty. In case of doubt please contact the supplier before transportation. If a service engineer is
present, he can be asked for advice concerning matters of transportation. However, he does not
assume any responsibility for transportation and any damage arising there from.
Rights
The supplier reserves all rights in drawings, software and other documents also in the event of patent
applications. The supplier reserves all rights of disposal and copies.
2.4. Transportation
2.4.1. Machine weight
See type plate on the machine

7
2.4.2. Transporting the machine mounted on pallet, with a forklift or
forklift truck
The driver must have a license to drive the forklift truck;
Move the fork of the forklift or forklift truck between the longitudinal beams of the pallet. Once the
pallet has been removed, introduce the fork of the forklift truck from the left or right side
underneath the machine between the adjustment feet;
Before lifting the machine, all persons must be beyond the working range of the forklift truck;
Lift only slightly, it should be no more than 5 cm;
Do not produce torsion during transportation.
2.5. Installation
2.5.1. Preparations
The machine must be installed based on the installation drawing. The space where the machine is to
be placed must be free of vibration and the floor must have enough bearing capacity.
2.5.2. Place machine
Install the machine in the position according to purpose;
Inspect the machine for transport damages;
Unscrew the pallet;
Lift the machine and remove the pallet;
Lower the machine onto the floor;
Clean the entire machine. Avoid complete degreasing. If necessary, lubricate all bare and moving
machine parts lightly with machine oil.
2.5.3. Procedure
Install the machine in the position according to purpose;
To install the auger conveyor, please follow the following assembly sequence:Feeding tube →
Driveshaft →Auger screw→Auger screw spud →Clamp. You can disassembly the auger conveyor
in the reverse order.
Feeding tube: Mounting the feeding tube on the gearbox unit and tighten by bolts;
Driveshaft: Insert the driveshaft into the gearbox from the feeding tube inlet. Fixed the driveshaft
at the other end of the gearbox by the bolt and spacer;
Auger screw: Placing the feeding tube horizontally and insert the auger screw into the feeding
tube. Please make sure the lower end of the auger screw is engaging with the driveshaft
correctly;
Auger screw spud: Placing the auger screw spud on the top of the auger screw. Please make
sure the pin of the auger screw is inserted into the slots of the spud lower end;
Clamp: Using the clamp to connect the feeding tube and auger screw spud;
Mounting the feeding tube back to correct position of the machine using the screw. Install the
supporting frame into the feeding tube if provided;
Using the silicon tube to connect between the hopper outlet and feeding tube inlet, and also the
feeding tube discharge and related equipment. Fixing the silicon tube on the equipment by the
clamps;

8
Connect the power supply correctly. There are 3 live wires and 1 neutral wire for 3 phase power
supply.
Check the condition of the machine before machine started.
Using the silicon tube to connect between the
hopper outlet and feeding tube inlet.
Using the silicon tube to connect between the
feeding tube outlet and related equipment
Auger screw spud
Clamp
Discharge
Feeding tube
Auger screw
Driveshaft
Feeding tube
inlet
Gearbox
Spacer
Fixing
nut and bolt

9
2.6. Changing the installation location
Always disconnect the machine from all external energy supplies, even if displacing the machine
slightly!
Consult the manual to reconnect the machine at the other location, and commission it.
2.7. Dismantling
2.7.1. Requisite qualifications
The machine may only be dismantled and disassembled by skilled personnel subject to compliance
with local safety regulations.
2.7.2. Scrapping and disposal
Prior to dismantling, whether for recycling or scrap, remove any residue oils and other water-
jeopardizing substances. The machine frame and all mechanical subassemblies consist of steel,
lightweight metals and plastics. These materials can be separated for recycling. Dispose of any
problem substances that are no longer usable, such as lubricants, batteries or electrical components,
in compliance with the statutory regulations as special waste.

10
3. Description of the machine
3.1. Main items in the standard machine
Ref
Description
Function
1
Discharge
Product discharge
2
Feeding tube
Hold the auger screw.
3
Control box
Setting machine functions, starting, stopping, etc.
4
Casing supporter
Supports the screw conveyor incline angle.
5
Clean out
Clean remaining products
6
Half-open cover*
Hygienic storage of product in hopper.
7
Product hopper
Store product to convey.
8
Vibrator
Eccentric vibrator fitted to assist feed.
9
Gear motor
Gear motor direct coupled to the screw.
10
Caster wheel
Enable the machine to be easily moved.
3.2. Working principle
This machine is designed for transporting general and fine powder from low position to high position.
The gear motor drive the auger screw when the machine receives a signal, in order to convey
products. It is applicable to milk powder, sugar, coffee, starch, additives, dextrose, monosodium
glutamate etc.
10
9
8
7
6
3
2
1
4
5

11
3.3. Machine specifications
3.3.1.Specification of the delivered machine
The equipment and the structure of the machine and the description of the functions correspond to
the order confirmation
.
3.3.2.Specification of the standard machine
Model
SW 88
SW 118
Conveying capacity
≤1 cbm/hr
3 - 5 cbm/hr
Hopper volume
110 litre
220 litre
Conveying height
≤3 meters
Discharge height
Built-to-order
Connected electrical load
1.0kVA
2.2kVA
Compressed air requirement
n/a
Machine dimensions
Built-to-order
Weight
approx. 80 kgs
approx. 120 kgs
Noise emission
≤75 dB(A)

12
4. Operation
For your safety
Requirements of personnel
Who is allowed to operate the machine?
Persons who are entitled to carry out such work because of their training and qualification;
Persons who are assigned to carry out such work by the operator of the machine.
DANGER OF BEING INJURED
The machine is a source of danger, if it is operated improperly or not in a
good condition;
Avoid from any method of work that is of questionable safety;
Do not start machine before all guard and safety devices e.g. guard
devices that can be taken off, emergency stop devices, extraction devices
are installed and in operative condition.
Before starting the machine ensure that nobody is endangered by the start-up of the machine.
Shutdown in case of emergency (EMERGENCY STOP)
DANGER
Pushing the emergency stop button on the front side of the operating panel will
immediately stop the machine. If one of the doors is opened during production,
the machine will immediately stop.
Before switching on the machine again, determine the cause of the
emergency stop;
Eliminate an existing emergency situation;
Unlock the impact button emergency stop by pulling out.
CAUTION
Only press the impact button emergency stop in case of danger.
Consequential faults can occur;
Additional measures should be taken before continue production.

13
4.1. Operating panel
4.1.1. Operating switches, buttons and indications
The main functions can be accessed and viewed through discrete switches and indications.
Function
1
Power light indicator
2
Operation mode
Choose between Automatic and Manual mode to allow the machine be controlled by input
signal or manual control respectively.
The machine will stop if the switch is at the middle position.
3
Screw direction switch
Turn the switch to the right, the auger screw will convey the product forward (upward);
Turn the switch to the left, the auger screw will convey the product reverse (backward );
4
Hopper vibration arch breaker switch.
5
Variable speed control
Controls the speed of the screw.
6
Emergency stop.
6
5
4
1
3
6
4
2

14
4.2. Machine controls
4.3. Settings at the machine
4.3.1. Adjusting the incline angle
The incline angle of the screw conveyor can be adjusted within a
limitation of ±25mm to increase or decrease conveying height.
Proceed as follows:
There casing supporter are positioned by two screws.
Loosen the locking nuts;
Adjust the length of the position screw, shorter it lower
conveying height or longer it to increase conveying height;
Tighten the locking nuts.
4-3 Casing supporter
4.4. Cleaning and product changeover
Proceed as follows:
Loosen the butterfly screw and remove the quick release
clamp Fig 4-4 ;
Open the clean out cover, position a container to collect
the drop off from the clean out;
CAUTION: Draw in and crush hazard! Keep hands off
from auger screw.
Switch to manual mode and auger direction to reverse;
The machine will discharge product from the clean out;
Disconnect power; remove the casing and auger for
cleaning.
4-4 Clean out
Re-fill signal from
packaging machine
Re-fill signal from
hopper sensor
Optional timer
Re-fill delay setting
Automatic operation mode
Manual operation mode
Screw conveyor start
Screw direction: Forward
Screw direction: Reverse

15
5. Problem solving
5.1. General
Overview
This chapter provides a structured procedure for troubleshooting and problem solving of the most
common problems. The operator can indicate the problem by an observation or as a text message on
the operator panel.
Day-to-day problem solving
Day-to-day problem solving is a part of the operator’s task and is amounted to activities that keep the
equipment running.
Repair
Repair and re-adjustment is preserved to service engineers and is amounted to activities to fix
problems.
Preparations foregoing to problem solving
Switch off the machine;
Secure the machine against an accidental switch on;
Attach a warning sign to the main switch;
Guard off the working area;
Inform all operating personnel and nominate a supervisor.
Measures foregoing to switching on the machine
Check all safety devices;
Check if the doors of the control cabinet are closed.

16
5.2. Operator observations-summary
5.2.1. General machine functions
Machine start-up
Operator observation
Possible cause
Solution
Ref
Machine does not start
Screw direction switched
to Off
Switch screw direction to
forward or reverse
4.1
The emergency stop is
pressed
Check all safety then release
the emergency stop button
4.1
No input signal for
Automatic mode
Test if machine function under
Manual mode, if yes, then check
input signal
Safety switch* for
protective cover is not
positioned correctly
Install and position safety device
that comes with the machine
*optional
The plug is disconnected
Connect the power cord from
the control box to the wall outlet
Noise
Operator observation
Possible cause
Solution
Ref
Grinding noise
Auger shaft protective
silicon wears off
Replace the silicon rubber
between the auger shaft and
gear motor

17
6. Maintenance and care
Regular maintenance of the machine increases the lifetime and reliability. It is essential that the
machine is serviced regularly to guarantee operation and to keep the machine in optimal condition.
The guarantee automatically expires due to overdue or sloppy maintenance.
Always disconnect the main power supply when maintenance is performed on the machine;
Do not wet the electronic parts and control during maintenance;
If there are doubts about the maintenance activities or if the machine fails to work correctly
always contact the supplier.
Daily maintenance
Clean the machine on time at the end of each work-shift. Clear out any residuals in the
hopper, screw and inner parts of the machine to avoid any moisture that would affect the next
shift of operation.
Weekly maintenance
Check regularly for loosening of fix screws at every component, to ensure a reliable
operation.
Monthly maintenance
Clean the screw centre core bearing which is located on the top of the machine.

18
For your Notes
This manual suits for next models
3
Table of contents