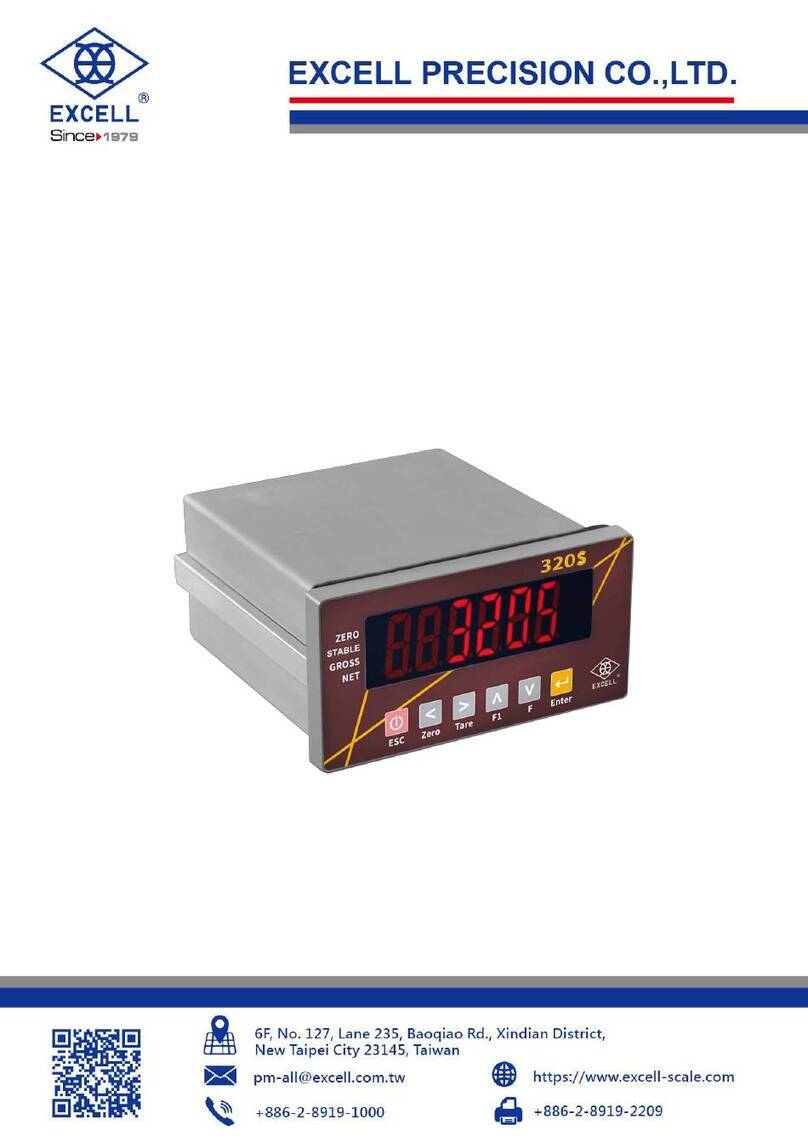
Excell FB530 User manual

FB530/630
Indicator
User manual
©EXCELL PRECISION CO., LTD. 2022. All rights reserved worldwide.
The information contained herein is the property of EXCELL PRECISION CO., LTD. and is
supplied without liability for errors or omissions. No part may be reproduced or used except
as authorized by contract or other written permission. The copyright and the foregoing
restriction on reproduction and use extend to all media in which the information may be
embodied.

EXCELL PRECISION CO., LTD.
0201810XZSME300000292
1
Table of Contents
PREPARING TO USE THE SCALE .................................................................................. 2
PRECAUTIONS FOR USE................................................................................................ 2
CHAPTER 1 INTRODUCTION .......................................................................................... 4
1-1 PRODUCTION INTRODUCTION....................................................................................... 4
1-2 DISPLAY DESCRIPTION ................................................................................................ 4
1-3 KEYPAD FUNCTIONS DESCRIPTION............................................................................... 5
1-4 POWER DESCRIPTION ................................................................................................. 5
1-5 ERROR MESSAGES ..................................................................................................... 5
CHAPTER 2 GENERAL OPERATION DESCRIPTION..................................................... 6
2-1 BACKLIGHT FUNCTION................................................................................................. 6
2-2WEIGHING MODE........................................................................................................ 6
2-2-1 Units Selection .................................................................................................. 6
2-2-2 Zero Function.................................................................................................... 6
2-2-3 Tare Function.................................................................................................... 6
2-2-4 Check Weighing Mode ...................................................................................... 7
2-2-5 Totalizing........................................................................................................... 9
2-3 COUNTING FUNCTION................................................................................................ 10
2-3-1 Sampling ......................................................................................................... 10
2-3-2 Check Weighing.............................................................................................. 11
2-3-3 Totalizing......................................................................................................... 11
CHAPTER 3 GENERAL FUNCTION SETTING............................................................... 11
3-1 F4 CHECK WEIGHING CONFIGURATIONS..................................................................... 12
3-2 F5 RS232 AND MINI PRINTER OUTPUT SETTING (OPTION)........................................... 13
3-3 F6 EXIT FUNCTION.................................................................................................... 19
3-4 F7 INTERNAL VALUE DISPLAY MODE .......................................................................... 19
3-5 F8WEIGHT HOLD MODE SETTING.............................................................................. 19
3-6 F11 ID CODE SETTING.............................................................................................. 20
3-7 F12 PRINT KEY ( ) FUNCTION SETTING.................................................................. 21
3-8 F14 CUSTOMIZED HEADER SETTING (R N P6,R N P7)................................................ 22
APPENDIX 1 OPTION CARD DESCRIPTION ................................................................ 23
APPENDIX 2 LOAD CELL PIN........................................................................................ 23
APPENDIX 3 PRINTER INSTALLATION......................................................................... 24
APPENDIX 4 LOAD HOOK INSTALLATION................................................................... 25
APPENDIX 5 7-SEGMENT DISPLAY CHARACTERS.................................................... 25
Check Firmware Version
Turn on scale and hold key during countdown. Display firmware version 02018.
Turn off scale and turn on scale and hold key during countdown. Display
maintenance number 10X where X is ranged from 0~9. Turn off and turn on scale to
return to weighing mode.

EXCELL PRECISION CO., LTD.
0201810XZSME300000292
2
Preparing to Use the Scale
1. Locate the scale on a firm level surface free from vibrations for accurate weight readings.
Adjust the four leveling feet to centre the leveling bubble on the scale.
2. Avoid hot sunshine directly on the scale or near the exhaust port of ventilating system.
3. Please use a separate power source plug to avoid the disturbance of other electric
appliances.
4. There should be no weight on the scale when power is turned on.
5. Commodity should be placed at the centre of platter when being weighed, and its size
should not exceed the dimension of the platter.
6. Please warm the scale 15 ~ 20 minutes before using.
7. Please note that when symbol appears on the screen, the scale needs to be
charged.
8. Any suggestion is warmly welcome.
Precautions for Use
1. Please operate or charge the scale in an open area. Do not squeeze the power cord to
avoid wire on fire.
2. Please keep scale in a cool and dry place. Do not store under high temperatures.
3. Please keep the scale clean and free from insect infestation.
4. Avoid impacting with other items or overloaded with excessively heavy weights (The
load must not exceed the maximum capacity of thescale).
5. If the scale is not going to be used for some time, please clean it and store it in a plastic
bag in dry condition. A desiccant sachet may be included to prevent moisture from
building up.
6. Operating temperature: -10℃~ + 40℃
7. It is recommended to be used indoors and in environments with a height of less than
2000m
8. If the product is used in a manner not specified by the manufacturer, product warranty
may be limited.
Thank for your purchasing of our EXCELL Weighing
Scale. To guide you to use our product correctly,
please read this User Manual carefully to extend the
life of machine and to avoid error.

EXCELL PRECISION CO., LTD.
0201810XZSME300000292
3
No burning
Caution Corrosion
Due to the storage battery adopt the advanced free-maintaining technique, customers need
not to replenish electrolyte.
The scale should be recharged every 3 months to prevent failure of the internal
rechargeable battery.
1. The battery should be charged for 8~10 hours.
2. The temperature of battery should below 45℃.
Maintaining
1. Please do not discharge with over-current when using the battery. Please charge the
battery after discharging current.
2. Please take down the battery when the scale is not used for a long time or break the
connection of cathode.
3. Do not short the battery terminals to check whether there is current. Please check
whether the connection point is firm to guarantee good connection.
4. The battery should be replaced by specialized person. No reverse-battery or the
product will be damaged.
a) Anode of battery should be connected with Anode of product battery(usually red
cable)
b) Cathode of battery should be connected with Cathode of product battery (usually
brown cable or black cable)
c) See the picture following
Safety warnings
1. The electrolyte of battery is caustic which causes metal, cotton, etc to corrode.
2. The hydrogen will be resolved when using or charging the battery and it will cause
explosion when approaches fire.
Brown cable(or black cable)
connected with Anode of
battery
Red cable connected with
Cathode of battery
Warning explosion
Children faraway

EXCELL PRECISION CO., LTD.
0201810XZSME300000292
4
.
..
...
....
Pcs
Chapter 1 Introduction
1-1 Production Introduction
1. High performance A/D converter
2. According to different resolution to do linearity calibration
Ordinary resolution models (below 10000)
Do specification calibration first then do weight calibration
High resolution models (10000~30000)
Do linearity calibration firstspecification calibration weight calibration at last
3. LCD display with LED backlight, powered by battery or plug-in mains, automatic
power-off function to ensure the stability of the scale. When battery voltage is lower than
the system voltage, scale is automatically powered off to ensure the accuracy and
stability of the scale.
4. Check Weighing function for high limit and low limit and OK range.
5. 5 HOLD functions including animal scale HOLD
6. Depending on actual space, a RS232 card and/or a relay card can be installed.
8. FB530 can choose EPSON(M-150II)16L mini printer output as an option, but relay card
is not optional in FB530.
10. Appearance size: 276 X 172 X 153mm ( L x W x H )(no back display)
276 X 202 X 153mm ( L x W x H )(with backdisplay)
1-2 Display Description
HI
:
High limit value
▼1
“Stable” indication
OK
:
OK range within HI
and LO limits
▼2
:
“Pre-tare mode”indication
LO
:
Low limit value
▼3
:
(M+) “Accumulation mode”indication
kg
:
“kg”unit
▼5
:
( ) “Samples insufficient” indication
lb
:
“lb”unit
▼6
:
( ) “Unit weight insufficient” indication
Pcs
:
Counting mode
▼7
:
“Viss” unit (Burma unit)
%
:
Percent indication
→O←
:
“Zero”indication
Net
:
“Net weight”
indication
For Dual Range Models, the indicator 5 and 6
will be defined as below:
0.3 uv/D high sensitivity
zero point adjustable range -2mV~ +5mV
Sampling speed 15 times/second
use range -4mV ~ +30mV
non-linear scale 0.01% full scale
load cell stimulate power source 5V DC ±2% 100mA

EXCELL PRECISION CO., LTD.
0201810XZSME300000292
5
:
“Low battery
power”indication
▼6 is Range 1 ▼5 is Range 2
1-3 Keypad Functions Description
1-4 Power Description
Power
Battery
6V 4Ah Rechargeable battery
Plugged in
110V / 220V AC
Power
consumption
with 1X350Ω
load cell
without printer
No backlight
26 mA
Single display with
backlight
32 mA
Dual display with
backlight
40 mA
with printer
When not in printing
20mA
While in printing
40mA
Low Power Alarm
Please note when the ( ) symbol keeps flashing on the left down corner of the
display, the batteries should be recharged.
When the low battery warning symbol shows up, scale is turned off automatically after
5~10 hours if it is used without backlight (1~2 hours if it is used with backlight). Then scale
must be fully recharged, before operating again.
Please recharge at once when the symbol shows in order to keep the weight
accuracy.
Memory power supply for FB530
When AC battery is cut off and Lead acid battery voltage is lower than 3V, the data in
RTC IC can maintain for 24 hours.
1-5 Error Messages
oL Weight exceeds 9d of maximum capacity. (d=division)
E1 Zero value after power on is over +10% FS.
Loop select from the preset units
Go into counting mode
Preset weight and quantity for
weight check or quantity check
Press this key to sample
Accumulate weight or quantity
Press this key to confirm
Tare to deduct the container weight
Press this key to enable/disable
backlight
Set preset tare
Press this key to print
Recall the totalization value, preset
value and pre-tare value
Press this key to input number
0~9
Clear the totalization value, preset
value and pre-tare value.
Press this key to feed the paper
Zero the scale.

EXCELL PRECISION CO., LTD.
0201810XZSME300000292
6
E2 Zero value after power on is less than -10% FS.
JP105 on PCB board of AW, HW, FD, RW, TW) and GTW or JP5 on PCB board of
FB530:
If short circuit E1, E2 warning. If open circuit t no E1, E2 warnings
E4 Unstable zero return, unstable over 10 sec. Press to leave E4.
E6 Zero is too high when calibrating. (over internal value 350,000)
E7 Zero is too low when calibrating. (under internal value 80,000)
E10The scale is not in level status.(only available with level detector equipment.)
- - - - - - For weight < -20d without tare or pretare device in operation.
Chapter 2 General Operation Description
2-1 Backlight Function
Press key to select the display backlight mode:
.“Auto Backlight” mode. When the weight is over 10d or any key is
pressed, the display backlight will be switched on. When the
weight returns to zero (the weight on platform is less than 10d),
the display backlight will switch off after 10 seconds.
.Display backlight is on all the time.
.Display backlight is off.
2-2 Weighing Mode
2-2-1 Units Selection
1. After indicator is turned on, use key to select a unit from kg, lb, tael or viss,
as the screen indicated.
2. The selected unit will be memorized when you turn the indicator off. And the
memorized unit will appear after you turn on the indicator next time.
2-2-2 Zero Function
Press key to re-zero the display with no load on the platter. When zero is set,
the (→0←) symbol will be displayed.
2-2-3 Tare Function
1. When the weight of the container is unknown ( )
Place the container on the platter, after stable and press key, the weight
E10 Level Switch (option)
Make JP2 on PCB board of FB530 to be open circuited. Then connect signal to CN1 on
PCB of FB530. CN1 is open circuited, display shows E10 after 2 seconds and all keys stop
working in the mean time. When CN1 is short circuited, display resumes and can continue
weighing. If you do not need level switch, make JP2 short circuited.

EXCELL PRECISION CO., LTD.
0201810XZSME300000292
7
value returns to zero and net indication (Net) is on.
Place goods into the container, then the indicator shows the net weight of goods.
Clear tare value
When removing the container and goods, the display shows the negative weight
value of the container. Then press key to clear tare value. The indicator
returns to zero and net indication (Net) is on.
Recall tare value
Press then key the display shows tare value
Multiple tare operation Users can continuously increase or decrease the tare
value by pressing the key.
The total tare value (tare value + pre-set tare value) can equal the full capacity of the
indicator.
2. When the weight of the container is known ()
Press key and the display shows..
Use and keys to input weight value of the container. After finishing the
procedures, the net indication (Net) and pretare indication “”is on.
Place goods into the container, then the indicator shows the net weight of goods.
Clear pretare value
Press then key, and then press key to clear pretare value.
When the indicator returns to zero, net indication (Net) and pretare indication “”off.
Recall pretare value
Press then key the display shows pretare value
In Tare mode, the Preset tare function is disabled.
The indicators with two weighing ranges can NOT pre-set the tare value larger than the
first weighing range. For example: a 30 kg indicator is set by two weighing ranges. The
first range is 0 to 15 kg, and the second range is 15 to 30 kg. The pre-set tare value can
not be larger than 15 kg.
2-2-4 Check Weighing Mode
1. Preset “ High limit”, “Low limit” and “ Beeper value” operation
Use and key to preset values.
For example:
Preset “Low limit” ( Low limit 10d ) e.g. Low limit = 20 kg
Press key the display shows.
Press key 1 time the display shows .

EXCELL PRECISION CO., LTD.
0201810XZSME300000292
8
Press key 2 times the display shows .
Press key 4 times the display shows .
Preset “High limit” ( High limit Low limit ) e.g. High limit = 25 kg
Press key 1 time the display shows.
Press key 1 time the display shows .
Press key 2 times the display shows .
Press key 1 time the display shows .
Press key 5 times the display shows .
Press key 3 times the display shows .
Preset “Beeper value” ( Refer to Note ) e.g. Beeper value = 22
Press key 1 time the display shows
Press key 2 times the display shows
Press key 1 time the display shows
Press key 2 times the display shows
Press key 1 times the display shows .
Preset Single point (preset low limit only):
After “preset low limit” procedures is completed and the display shows.
, then press key again, the display shows . . This means that the
“preset single point” procedure is completed.
NOTE
_ _ _ xx
A B
ASetting for the status that LCD is on and the beeper beep:
0 = when stable, the beeper beeps and LCD is on.
1 = when stable, the beeper beeps; whether stable or not, LCD is on.
2 = whether stable or not, the beeper beeps and LCD is on.
3 = open warning device: when the weight is higher than HI value and the
weight is stable, LCD is on and Relay Card open.
B Setting for the beep status:
0 = No beep
1 = OK (when the weight is over Low Limit & under or equal to High Limit.),
the beeper beeps.
2 = When the weight is under or equal to Low Limit & over High Limit, the

EXCELL PRECISION CO., LTD.
0201810XZSME300000292
9
beeper beeps.
Under Status in Preset Low Limit (preset single point only)
The BEEP, LCD mode should be fixed as follows:
When over “Low Limit”, the beeper beeps and is off
Whether stable or not, the beeper beeps and LCD indication is on
Warning device setting
Set HI value and value of the beep, LCD mode should be fixed as follows:
A
When the weight equals to HI value, Relay Card open and the weight is accumulated.
Press CE key to dismiss the warning sound and the range of accumulated weight is
[000.000]~[999999].
Clear warning accumulation
Press key first and then press key to clear all accumulated data.
Accumulated data is cleared automatically under in following conditions
a. when shift among weight mode, counting mode and warning accumulation mode.
b. when shift the units
c. turn off the scale
LCD indication:
10d Low Limit High Limit
◆To exit preset mode, please press key.
2. Recall Check-weighing Values
Press key then press key Recall “Low limit value”
Then press key againRecall “High limit value”
Then press key again Recall “Beeper value”
Then press key again Back to the beginning
3. Clearing Check-weighing Values
Press key then press key, and then press key Recall “Low limit value”
Then press key again Clear “High limit value”and “Beeper value”
Press key then press key 6 times continuously Clear all values.
2-2-5 Totalizing
1. Weight Totalizing
Place goods on the platter, after stable and press key to save the weight value.
Then the display shows the total number of additions and the totalized weight value.
And the (M+) indication “” will flash on the display. The indicator will recover to show

EXCELL PRECISION CO., LTD.
0201810XZSME300000292
10
.
..
...
....
the weight value of the goods on the platter after 3 seconds and the (M+) indication
“” is on.
The indicator allows the next totalizing operation, even when the weight value does
not return back to zero. The key is functional, when the weight value changes
by more than 10d. The indicator will save the totalized weight value after the weight is
stable.
The indicator can totalize positive or negative weight but can’t do both at the same
time. The totalized weight store must be reset to zero before it is possible to select
positive or negative totalizing mode.
The totalizing function can be used up to a maximum of 9999 times before it must be
reset. The totalizing display is limited to 6 digits maximum.
When totalizing, RS-232 and Mini Printer will also output. ( Refer to F5 setting)
2. Clear Totalized Weight Values
Press then key to clear all totalized weight values.
When changing between weighing and counting mode, or selecting weighing unit,
the indicator will automatically clear all the totalized weight values.
The indicators will automatically clear all the totalized weight values after turning on.
3. Recall Totalized Weight Values
Press key to display the total number of additions and the totalized weight value.
And the (M+) indication “”will flash on the display. The indicator will return to the
weighing mode after 3 seconds.
The indicator will not display the negative sign “-” for negative totalized weight values
when recalling a totalized weight value, but when printing, the negative sign “-” will be
printed out (transmitted serially) for each negative weight and negative totalized weight.
2-3 Counting Function
2-3-1 Sampling
Press key to select sample quantity from 10, 20, 50,100 and the display
shows , , ,accordingly.
Select sample quantity and then place samples on the platter, and then press
key,the display shows “
”.
After stable, the scale enters into counting mode and the display shows sample
quantity.
Sample Too Small ( ) Sample is less than 20 divisions.

EXCELL PRECISION CO., LTD.
0201810XZSME300000292
11
Pcs
Unit Weight Too Small ( ) Unit weight is less than 0.2 division.
(0.1 d for Brazil regulation)
When sampling, the above two symbols indications are on. Under such conditions,
the scale can still work, but may result in lower count precision.
When using 2-segment weighing mode, the above two symbol indications change to
Range 2 and Range 1 and the two symbol indications are off.
2-3-2 Check Weighing
Refer to the operation of check weighing in weighing function.
2-3-3 Totalizing
Refer to the operation of totalizing in weighing function.
Chapter 3 General Function Setting
Switch on the scale. While the scale is counting down to zero, press and hold key
until
the display shows the software version number 02018. Release the key, the
scale enters into the configuration setting mode and display F0.
key ⇒upward key
key ⇒downward key
key ⇒to confirm
F4
Check Weighing Configurations
F5
RS232 and Mini Printer Output
Setting (option)
F6
Exit Function
F7
Internal Value Display Mode
F8
Weight Hold Mode Setting
F11
ID Code Setting
F12
Print Key Function Setting
F14
Customized Header Setting
(r n P 6, r n P 7)
press
press
press
press
press
press
press
press
F0~F3, F9, F10, F13, F15 are reserved.

EXCELL PRECISION CO., LTD.
0201810XZSME300000292
12
Press key
Press key
Press key
3-1 F4 Check Weighing Configurations
If hold mode (F8) is set, accessing to F4 is denied.
Use or key to select F4
Preset “LO value”
(LO value 10d)
Press and
key to set “ LO value”
E.g. LO value = 2 kg
Preset “HI value”
(HI value LO value)
Press and
key to set “HI value”
E.g. LO value = 2.5 kg
Preset “Beeper value”
Press and
key to set “HI value”
E.g. Beeper value = 22
Press key for 5 times
to clear HI, OK, LO values
.kg
.kg
Press key
.kg
key = Increase the flash value by one (from 0 to 9)
key = Confirm key
.
kg
AB
A 0 = After stable, the beeper beeps and the
indications are on
1 = After stable, the beeper beeps; whether
stable or not, the indications are on.
2 = whether stable or not, the beeper beeps
and the indications are on.
3 = open warning device: when the weight is
higher than HI value and the weight is
stable, LCD is on and Relay Card open.
B 0 = No beep
1 = OK (when the weight is between Low limit
& High limit.), the beeper beeps.
2 = When the weight is under or equal to Low
limit (must be over 10d) & over or equal
to High limit, the beeper beeps.
LCD indication description:
10d Low limit value High limit value
.kg
kg
kg
Press key

EXCELL PRECISION CO., LTD.
0201810XZSME300000292
13
3-2 F5 RS232 and Mini Printer Output Setting (option)
The mini printer interface default setting is 9600, N, 8, 1, and it also contains the RTC
setting.
Our company provides the printing title editing software. If you would like this service,
please contact your local dealer.
Use or key to select F5
Transmission mode:use key to select r n P 0 ~ r n
P 14 and press to save
RS-232 baud rate:use key to select 1200~9600 and
press to save
Press key
Press key
Press key
Below need to connect to Mini Printer before continue (only available in FB530)
Press key
Press key
Press key
Press key
Press key
Press key
Mini Printer Printing Languages: Use key to select
0~3, and press key to save.
Default is 0 ⇒ Iran font (date output is based on the solar calendar)
1 ⇒English font; 2 ⇒Traditional Chinese font;
3 ⇒Simplified Chinese font
Date Printing Order Setting:use key to select
F0~F2, and press key to save. Default is F0 ⇒YY MM DD
F1 ⇒MM DD YY; F2 ⇒DD MM YY
Input Year, Month, Day: use key and key to
enter. F0 ⇒YY MM DD; F1 ⇒MM DD YY; F2 ⇒DD MM YY
Input Hour, Minute, Second: use key and
key to enter HH MM SS

EXCELL PRECISION CO., LTD.
0201810XZSME300000292
14
RS-232 Interface Format
I . Mode:UART Signal of EIA-RS0232 C
II . Format :
1. Baud rate : 1 200, 2 400, 4 800, 9 600 bits/second
2. Data bits :8 bits
3. Parity bit : None
4. Stop bits :1 bit
5. Code :ASCII (Exchange code of American standard)
Start bit Data bits Stop bit
RS-232 Data Format
Stable transmission (r n P 1), Continuous (r n P 2), Press key to transmit (r n P
8)
1. gram as weight unit
1
2
3
4
5
6
7
8
9
10
11
12
13
14
15
16
17
g
HEAD , HEAD , ± DATA UNIT CR LF
2. kg or lb as weight unit
1
2
3
4
5
6
7
8
9
10
11
12
13
14
15
16
17
18
kg/lb
HEAD , HEAD , ± DATA UNIT CR LF
HEAD1 ( 2 BYTES )
HEAD2 ( 2 BYTES )
OL - Overload , Under load
TR - TARE Mode
ST - Display is Stable
NT - NET Mode
US - Display is Unstable
GS - GROSS Mode
DATA ( 7 or 8 BYTE )
2B ( HEX ) = “ +” ( PLUS)
r n P 0 No transmission.
r n P 1 Stable transmission.
r n P 2 Continuous transmission.
r n P 3 Press key to transmit totalized simple format.
r n P 4 Press key to transmit totalized complete format.
r n P 5 Stable transmission in totalizing mode. Same format as (r n P 3).
r n P 6 Press key to transmit simple free format. Please refer to F14.
r n P 7 Press key to transmit complete Free format. Please refer to F14.
r n P 8 While use Hold, press key to transmit same format as (r n P 1) and (r n P 2).
r n P 11 Print after removing goods (5% mode).
r n P 12 Print after removing goods (OK mode).
When FB530 has mini printer, it only works in r n p 3~ r n p 7, and r n p 1, 2, 8, 11, 12 are
disabled.

EXCELL PRECISION CO., LTD.
0201810XZSME300000292
15
2D ( HEX ) = “ –” ( MINUS )
2E ( HEX ) = “ .” ( DECIMAL POINT )
UNIT ( 2、3 or 4 BYTE )
kg
=
6B ( HEX )
;
67 ( HEX )
lb
=
6C( HEX )
;
62 ( HEX )
tl.T
=
74 ( HEX )
;
6C ( HEX )
;
2E ( HEX )
;
54 ( HEX )
hkg
=
68 ( HEX )
;
67 ( HEX )
viss
=
76 ( HEX )
;
69 ( HEX )
;
73 ( HEX )
;
73 ( HEX )
Transmission examples: (r n P 2) RS-232 continuous transmission
1. The gross weight (+0.876 kg) shows as below, after stable: (no tare or pre-tare mode)
S
T
,
G
S
,
+
0
.
8
7
6
k
g
<CR>
<LF>
HEAD1 , HEAD2 , DATA UNIT CR LF
2. The net weight (-1.568 lb) shows as below without weight stability: (under tare or pre-tare
mode)
U
S
,
N
T
,
-
1
.
5
6
8
l
b
<CR>
<LF>
HEAD1 , HEAD2 , DATA UNIT CR LF
Press key to transmit totalized simple format (r n P 3)
S/N WT/UNIT ( kg / lb )
- - - - - - - - - - - - - -
0001 1.0000 Press or key
0002 1.0000 Press or key
0003 1.0000 Press or key
0004 1.0000 Press or key
0005 1.0000 Press or key
- - - - - - - - - - - - - -
0005 5.0000 Press twice to print TOTAL

EXCELL PRECISION CO., LTD.
0201810XZSME300000292
16
Press or key
Press key to transmit totalized complete format (r n P 4)
G = GROSS T = TARE N = NET
Stable Transmission in totalizing mode (r n P 5)
S/N WT/UNIT ( kg / lb )
- - - - - - - - - - - - - -
0001 1.0000 The scale is stable
0002 1.0000 The scale is stable
0003 1.0000 The scale is stable
0004 1.0000 The scale is stable
0005 1.0000 The scale is stable
- - - - - - - - - - - - - -
0005 5.0000 Press twice to print TOTAL
Press key to transmit simple free format (r n P 6)
Same format as (r n P 3). Print the complete format for the first time. Then only print NET
weight. Please refer to F14 for details.
Press key to transmit complete free format (r n P 7)
Same format as (r n P 4). Print the complete format all the time. Please refer to F14 for
details.
Press or key
Press or key
Press twice to print TOTAL
TICKETS NO. 0001
G 1.000kg
T 0.000kg
N 1.000kg
(3 blank lines)
TICKETS NO. 0002
G 1.000kg
T 0.000kg
N 1.000kg
(3 blank lines)
TICKETS NO. 0003
G 1.000kg
T 0.000kg
N 1.000kg
(3 blank lines)
TOTAL NUMBER
OF TICKETS 0003
TOTAL
NET 3.000kg
(3 blank lines)

EXCELL PRECISION CO., LTD.
0201810XZSME300000292
17
While use Hold, press key to transmit (r n P 8)
1. If there is only RS232, press key to print out the HOLD value on display in HOLD
MODE.
2. Mini printer data transmission format in HOLD condition
When ChAr is set as 0, 1 (Iranian or English font),
The format for 1.000kg is as follows:
1
.
0
0
0
k
g
<CR>
<LF>
Remarks
1. Printer fonts differ from different countries.
2. RS232 is always in English font (ASCII)
Print after Removing Goods (5% mode) (r n P 11)
Stage
Condition(s)
Action(s)
1: Goods placed
and weighed on
platter
Weight has become stable.
Weight > zero point
Weight ≥20 weighing units
(i.e. 5% x Weight ≥1 weighing unit)
Beeper beeps twice, and
printing data (stable weight
compliant with conditions on
the left) is ready to be sent.
2: Just removed
goods from platter
Instantaneous weight reading drops
below 95% of last stable weight (stable
weight of Stage 1)
Printing data of Stage 1 is
sent to the printer (same
printing formats as those of
(r n P 1).
Print after Removing Goods (OK mode) (r n P 12)
Stage
Condition(s)
Action(s)
1: Goods placed
and weighed on
platter
Weight has become stable.
Weight > zero point
Check weighing OK status (within a
predetermined weight range)
Beeper beeps twice, and
printing data (stable weight
compliant with conditions on
the left) is ready to be sent.
2: Just removed
goods from platter
Instantaneous weight reading drops
below 95% of last stable weight (stable
weight of Stage 1).
Printing data of Stage 1 is
sent to the printer (same
printing formats as those of
(r n P 1).
F5
Function
Press key
Press key
Press key
twice after zeroing
r n p 0
RS232 command mode
Once received read weight command, transmit weight in
same format as r n p 1.
r n p 1
Stable transmission
After return to zero, transmit next stable weight.
r n p 2
Continuous transmission.
RS232 transmit continuously. Keypad has no effect.
r n p 3
Press key to transmit
totalized simple format
Transmit when
weight change
>±10d,
Transmit when
weight change
>±10d,
Print TOTAL and
clears totalized
values
r n p 4
Press key to transmit
totalized complete format.
Transmit when
weight change
>±10d,
Transmit when
weight change
>±10d,
Print TOTAL and
clears totalized
values
r n p 5
Stable transmission in totalizing
mode (After return to zero,
transmit next stable weight which
is > +10d)
No transmission
No transmission
Print TOTAL and
clears totalized
values

EXCELL PRECISION CO., LTD.
0201810XZSME300000292
18
When FB530 is installed with optional mini printer, only r n p 3~r n p 7 will work. Other “r
n p” formats are closed.
<CR>=ASCII carriage return character, hexadecimal is 0D.
<LF>=ASCII line feed character, hexadecimal is 0A.
Self-test Function of Printer (option)
Hold key and switch on the printer, it will automatically print self-test data.
------------
VERSION:10004010 Program version
DATE:2000/01/04 Printer date
TIME:20:06:50 Printer time
MODE:TAIWAN Printer language
MEMORY TEST OK Printer status
The test of Printer
1. Press and hold key to enter into.
Default:20
2. Press or key to adjust the number.
3. Press key to print.
4. Input the proper value to adjust the word space. An example is shown below.
r n p 6
Press key to transmit
simple free format
Transmit when
weight change
>±10d,
Transmit when
weight change
>±10d,
Print TOTAL and
clears totalized
values
r n p 7
Press key to transmit
complete free format
Transmit when
weight change
>±10d,
Transmit when
weight change
>±10d,
Print TOTAL and
clears totalized
values
r n p 8
While use Hold, press key
to transmit same format as (r n P
1) and (r n P 2)
No transmission
Transmit as
stable weight
>±10d
No transmission,
totalized values not
cleared
r n p 11
Print after removing goods (5%
mode)
After placing item and become stable, beep twice. RS232
transmit item weight after item is removed.
r n p 12
Print after removing goods (OK
mode)
RS232 transmit only “OK” item weight after item is removed.
No transmission while in “HI” or “LO”.
word space too high
please adjust it to a lower value

EXCELL PRECISION CO., LTD.
0201810XZSME300000292
19
5. Press key to restart the printer.
3-3 F6 Exit Function
Use or to select F6. Then press to count down to zero and exit the
setting.
3-4 F7 Internal Value Display Mode
Use or to select F7. Then press to display internal value. Press
again will see F7.
3-5 F8 Weight Hold Mode Setting
Use key or key choose F8
Before setup, please switch the SWA1 on
MINI JUMPER to ADJ position
After setup, please switch the SWA1 on
MINI JUMPER back to LOCK position
In hold mode, press key, to print the
hold value as shown on display.
(It’s not related to the settings of F5
transmission mode, but it needs to select the
proper Baud rate according to the
transmission of the receiver.)
(To setup transmission rate, please refer to
F5 RS-232 Interface Output Setting (option))
Use key to select a value from hold 0 ~
hold 5 and then press key to complete
setup.
Press key Press key
Press key Press key
Press key
Press key
good word space
word space too low
please adjust it to a higher value
This manual suits for next models
1
Table of contents
Other Excell Measuring Instrument manuals
Popular Measuring Instrument manuals by other brands
Electron Plus
Electron Plus CTL503 user manual
Rice Lake
Rice Lake Dyna-Link 2 MSI-7300 Technical manual

inbody
inbody BSM170 user manual
Hanna Instruments
Hanna Instruments HI 93752 instruction manual

Apogee
Apogee MQ-100 owner's manual

Spectris
Spectris PARTICLE MEASURING SYSTEMS AirSentry II Operation manual
