Exhausto MB-GATEWAY User manual

EXHAUSTO A/S
Odensevej 76
DK-5550 Langeskov
Tel. +45 65 66 12 34
Fax +45 65 66 11 10
exhausto@exhausto.dk
www.exhausto.dk
Art.-no. GAUMBGATEWAY001
P0101_BO_0001
• Network Module
MB-gateway
Technical manual
3005392-2015-10-28

2
TABLE OF
CONTENTS
1 INTRODUCTION....................................................................................................................... 3
2 INSTALLATION MANUAL .................................................................................................. 3
2.1 Connection ...................................................................................................................... 3
2.2 Installation ....................................................................................................................... 4
2.3 Conguring .................................................................................................................... 4
2.4 Restoring factory defaults .......................................................................................... 4
2.5 Updating of the rmware using MicroSD card ................................................... 4
2.6 FTP server ......................................................................................................................... 5
3 MODULE WEB INTERFACE ................................................................................................ 6
4 WEB CONTROL OF THE AIR HANDLING UNIT WITH PRV AUTOMATICS ... 8
4.1 Main window .................................................................................................................. 8
4.2 Temperature setting window .................................................................................... 9
4.3 Fan speed setting window ......................................................................................... 10
4.4 Fault List window .......................................................................................................... 11
4.5 Menu window ..................................................................................................................12
4.6 Settings window. Set the “BOOST” function time .............................................. 13
4.7 Settings window. Set the desired CO2 level ........................................................ 14
4.8 Settings window. Night-time cooling function settings ................................. 15
4.9 Date and time Settings window ...............................................................................16
4.10 Filter timer settings window ....................................................................................17
4.11 State monitoring window ........................................................................................ 18
4.12 Weekly schedule setting window ..........................................................................19
4.13 Weekly schedule setting window. Copying of day’s events ........................ 20
5 PROGRAMMER’S GUIDE ................................................................................................... 21
5.1 HTTP requests ................................................................................................................. 21
5.2 Modbus transmitter ..................................................................................................... 21

3
INTRODUCTION 1
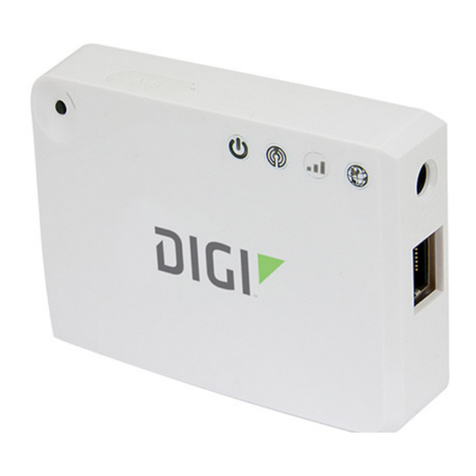
Network Module MB-GATEWAY is used to connect EXHAUSTO air handling units to the computer network
(Ethernet). Module functions:
• TCP/IP Modbus gateway
• IPV4 protocol
• WEB server
• FTP server
• Building of Modbus commands using HTTP requests
• Authorized connection
• Automatic data communication between Modbus units
• Updating of the module rmware using MicroSD memory card (the update can be loaded using
FTP client as well)
• RT clock
• Galvanically insulated RS485 communication line
If the network module is not installed factory, you may install it as an option. To do this you need an ins-
tallation kit consisting of:
1. MB-GATEWAY module with 4GB MicroSD memory card;
2. Sticker with a MAC address and elds for writing down connection settings
3. UTP cable (0.5 m)
4. RS485 communication cable with RJ11 plugs (2 m)
5. Adapter
6. Installation Manual
EN
1 and 2 – power supply connection (e.g. from another (standalone)
power supply). 12 V DC/ AC to 25 V DC/AC supply voltage is used,
power supply should be at least 2 W. Polarity of the power supply
terminals is not important.
3 – GND of RS485 communication line
4 – D0 (-) of RS485 communication line
5 – D1 (+) of RS485 communication line
Note: Communication line is galvanically insulated from the power
supply.
External PS – power supply with AC/DC adapter (included).
Ethernet RJ45 – network adapter connector.
RS485 RJ11 – RS485 communication line connector.
12345
Ethernet
RJ45
Supply
24V
AC/DC
GND
RS485
RJ11
External PS
AC/DC 24V
2.1/2.5
D0 (-)
D1 (+)
INSTALLATION MANUAL 2
2.1 Connection

4
2.2 Installation
2.3 Conguring
EN
2
The module can be installed in any convenient for user place (mounting rail is recommended), where
the following conditions are ensured:
• ambient temperature -20 ... 70 °C
• relative humidity 30% ... 85% (without condensation);
• protection against vertical falling water drops (IP 20).
If you are going to use some MB-GATEWAYs in the same LAN, you need to change their IP addresses. LAN
cannot have more than one unit using the same IP address, thus for conguring of the MB-GATEWAY you
need to connect it directly to the PC.
Step-by-step conguration:
1 Apply static TCP/IP settings for the network interface card in the PC that will be used to connect the
unit. These settings depend on the OS used, see the OS documentation:
• IP address should begin with 192.168.0 and end with number 1 to 254 except 51, for example:
192.168.0.11
• Subnet mask: 255.255.255.0.
2 Connect the power supply (included).
3 Connect the MB-GATEWAY to the properly congured PC using UTP (RJ45) cable (included). If the
connection does not work (the PC does not support Auto MDI-X), connect the PC and MB-GATEWAY to
the switch.
4 Enter the MB-GATEWAY IP address (the default one is 192.168.0.51) into the browser (Google Chro-
me is recommended) address bar.
5 Each page is password protected. When you open the conguration page, you will be asked to en-
ter user name and password. Default user name is “admin”, password – “admin”. We recommend to change
password for security. If you forget your login details you can restore the parameters to factory default
settings (see “Restoring factory defaults”).
6 If you performed the above steps properly, the MB-GATEWAY conguration page opens. Here you
can select the language, set IP address, Modbus (RS485) baudrate, Modbus (RS485) parity, date and time,
change user name and password, page theme, open the help le, air hand¬ling unit controller’s WEB
page.
If you cannot connect to the device (have forgotten the password, IP address etc.), you always can restore
the factory defaults. Steps of restoring the factory defaults:
1 Turn o the power supply.
2 Open the top ap.
3 Holding down the button turn on the power supply.
4 When you release the button, the factory defaults are restored (note: you will need to re-enter set-
tings).
Step-by-step rmware update:
1 Download (http://salda.lt/lt/products/category/products/) the update FIRMWARE.BIN and save to
the MicroSD root directory:
a. if you update using FTP client, you do not need to turn o the power supply;
2.5 Updating of the rmware using MicroSD card
2.4 Restoring factory defaults

5
2
b. If you save the le to the MicroSD card that is removed from the module, turn o the module power
supply before inserting the card back. When you have the card inserted, turn the power supply on.
2 If there is a proper le, the module will start the update procedure. Every ~1 second RJ45 LEDs are
ashing in an alternating way. Do not turn o the power supply until the process is not nished.
3 In ~2 min. the module will nish the update and restart to the normal state.
4 When the update is nished, the le FIRMWARE.BIN is automatically deleted.
Indications of the RJ45 connector LEDs:
• Both LED indicators ashes slowly and synchronously – MB-GATEWAY has no rmware installed.
• LED indicators ashes slowly in an alternating way – the rmware is being updated.
• LED indicators are o – no power supply and/or connection to the Ethernet.
2.6 FTP server
This module has the built-in FTP server too, so you do not need to remove the MicroSD memory card to
access and edit the data on it. FTP server has the same connection data as the protected WEB pages. For
the FTP client software use the “Passive Mode” setting.
EN

6
MODULE WEB INTERFACE
3
EN
B1
B2
B3
B4
B5
B6
S1
S2
S3
I1
S4
S5
S6
S7
B7
B9
B8
B10
B11
B12
B13
Number Function
Click to switch to the English language
Click to switch to the Lithuanian language
Click to switch to the Russian language
Click to switch to the French language
Click to switch to the German language
Click to switch to the Italian language
Click to open the control window of automatics. The automatics is recognised
automatically. If parameters of the RS485 communication line are wrong or
the device is connected improperly, after clicking B7 the message that control
board is not found will be displayed.
Click to save the MB-GATEWAY module settings
Click to open the PDF help le
Click to switch to the green theme
B1
B2
B3
B7
B8
B9
B10
Number Function
Displays the MAC address of the MB-GATEWAY module
I1
B4
B5
B6

7
3
Number Function
The IP address of the MB-GATEWAY module is set
The baud rate of MB-GATEWAY module RS485 communication line is set
The parity of MB-GATEWAY module RS485 communication line is set
The date and time of MB-GATEWAY module is set
The user name of the MB-GATEWAY module is set
The password of the MB-GATEWAY module is set
The password of the MB-GATEWAY module is repeated
S1
S5
S2
S6
S3
S7
S4
EN
Click to switch to the blue theme
Click to switch to the black theme
Click to switch on/o the display of this window during start up
B11
B12
B13

8
4 WEB CONTROL OF THE AIR HANDLING UNIT
WITH PRV AUTOMATICS
4.1. Main window
Number Function
Displays the remaining time of the BOOST function in minutes It is displayed
when the BOOST function is active.
Displays the date and time
Displays the outdoor air temperature
Displays the extract (room) air temperature
Displays the supply air temperature
Displays the extract air humidity
I1
I4
I2
I5
I3
I6
Number Function
Click to open the menu window
Click to select the language
Click to select the system mode: "OFF", "MANUAL CONTROL", " BY SCHEDULE"
B1
B2
B3
EN
B1
B7
B8
B3
B4
B5
B9
I5
I3
I1
B6
B2
I2
I4
I6

9
Number Function
Click to set the entered temperature and to return to the main window
Click to increase/decrease the temperature
Click to select one of four recent temperature settings
Number Function
Displays the temperature setting
Click to turn on/o the ventilation
Click to turn on/o the "BOOST” function (now it is active)
Click to turn on/o the "Stand-by" mode
Click to open the Alarms list window. It is displayed when there is at least one
active fault message
Click to open the temperature setting window
Click to open the fan speed setting window
B1
B4
I1
B4
B2
B5
B3
B6
B7
B8
B9
4
4.2 Temperature setting window
EN
B1
B2
B3
B4
I1

10
4.3 Fan speed setting window
4
Number Function
Click to return to the main window
Click to activate the "Stand-by" mode
Click to turn on the fan speed 1
Click to turn on the fan speed 2
Click to turn on the fan speed 3
Click to turn on/o the "BOOST" function
B1
B4
B2
B5
B3
B6
EN
B5
B3
B6
B2
B4
B1

11
4
4.4 Alarm list window
Number Function
Click to return to the main window
Click to clear alarms and to restart the system
Number Function
Displays the message about active protection (see the table in pg. 11)
B1
I1
B2
EN
B1
B2
I1
Meaning
Plate heat exchanger frost protection function
Fire alarm
Dirty lter alarm
Fans overheat alarm
Low voltage
DJT(100) temperature sensor alarm
Exhaust air temperature sensor alarm
Supply air temperature sensor alarm
DTJ(100) HUMIDITY sensor alarm (controller works, in determining the moisture content
of 70%)
Return water temperature sensor alarm
Outside air temperature sensor alarm
Overheat alarm

12
4.5 Menu window
Number Function
Click to return to the main window
Click to open the settings window
Click to open the status monitoring window
Click to open the weekly schedule setting window
Click to switch to the green theme
Click to switch to the blue theme
Click to switch to the black theme
B1
B4
B2
B5
B3
B6
B7
4
EN
B1
B2
B5
B6
B3
B4
B7

13
4.6 Settings window. Set the “BOOST” function time
Number Function
Click to return to the settings window
Click to increase/decrease the „BOOST" function time
Click to open the BOOST function timer setting window (currently open)
Click to open the desired CO2 level setting window. The selection is active
when the CO2 sensor is used (currently inactive)
Click to open the night-time cooling function settings window
Click to open the date and time settings window
Click to open the lter timer settings window
Click to open the MB-GATEWAY module settings window which is shown
when it is connected for the rst time
Number Function
Displays the setting of the BOOST function time in minutes
I1
B1
B2 B3
B4
B5
B6
B7
B8
B9
4
EN
B1
B3
B5
B6
B9
I1
B2
B4
B7
B8

14
4.7 Settings window. Set the desired CO2 level
4
Number Function
Click to return to the settings window
Click to increase/decrease the CO2 level setting
Number Function
Displays the desired CO2 level setting (PPM)
I1
B1
B2 B3
EN
B2 B3
I1
B1
The selection is active when the CO2 sensor is used.

15
4.8 Settings window.
Night-time cooling function settings
Number Function
Click to return to the settings window
Click to turn on/o the night-time cooling function (now it is turned on)
Click to increase/decrease the maximum outdoor air temperature setting
Click to increase/decrease the room air temperature setting
Click to increase/decrease the minimum outdoor air temperature setting
Click to increase/decrease the air change interval setting in hours
B1
B2
B3 B4
B5 B6
B7 B8
B9 B10
4
Number Function
Displays the maximum allowable outdoor air temperature setting
Displays the room air temperature setting
Displays the minimum allowable outdoor air temperature setting
Displays the air change interval setting in hours
I1
I4
I2
I3
EN
I3 I4
I1 I2
B2
B1
B3
B7
B6
B10
B4
B8
B5
B9

16
4.9 Date and time settings window
4
Number Function
Click to return to the settings window
Click to synchronize the time with the PC clock
Click to increase/decrease the day setting
Click to increase/decrease the month setting
Click to increase/decrease the year setting
Click to increase/decrease the hour setting
Click to increase/decrease the minute setting
B1
B2
B3 B8
B4 B9
B5
B6
B7
B10
B11
B12
Number Function
Displays the day
Displays the month
Displays the year
Displays hours
Displays minutes
I1
I4
I5
I2
I3
EN
B8 B10
B3
B4
B5
I1
I2 I4
I3
B1
B2
B9
B12
B7
I5
B6
B11

17
4.10 Filter timer settings window 4
Number Function
Click to return to the settings window
Click to reset the lter timer
B1
B2
Number Function
Displays the remaining lter time in hours
Displays the set lter timer limit in hours
Displays working time in hours
I1
I2
I3
EN
B1
B2
I1 I2
I3

18
4.11 State monitoring window
4
Number Function
Exhaust air temperature
Supply air temperature
Outdoor air temperature
Extract (room) air temperature
Percentage of the extract air fan speed
Percentage of the supply air fan speed
Fan speed setting
The state of the fan power circuit (turned on/o)
Set Point system temperature
Extract air humidity
Active system mode
The state of the heater power circuit (turned on/o)
The state of the by-pass valve
The state of the stand-by function
The state of the BOOST function
I1
I4
I5
I2
I3
This window is for monitoring of system status. Amount of the information changes dy-
namically depending on the conguration.
I6
I9
I10
I7
I8
I11
I14
I15
I12
I13
EN
B1
I2 I3
I4
I8
I7
I12
I11
I15
I1
I5
I6
I9
I10
I13
I14

19
Numeris Funkcija
Click to return to the menu window
B1
4.12 Weekly schedule setting window
Number Function
Click to return to the menu window
Click to open the previous event page
Click to open the next event page
Click to open the weekdays copying window
Click to delete the event
Click to copy the event details
B1
B2
B3 B13
B4
B5
B6
B12
Number Function
Displays the event number. 8 total events per day
Displays the selected weekday
Displays the hour of event beginning
Displays the minute of event beginning
Displays the set event fan speed
Displays the set event temperature
Displays details of deleted event
I1
I4
I6
I5
I7
I2
I3
4
EN
I1
B5
B8
B12
B14
B16
B13
I3
B7
B6
B10
B1
B2 B3
B9
B11
B15
B17
B4I2
I4
I5
I6
I7

20
4.13 Weekly schedule setting window.
Copying of day’s events
4
Number Function
Click to close the copying window
Click to copy day's events to clipboard
Click to delete weekday events
Click to paste day's events from clipboard
B1
B4
B2
B3
Click to paste copied details of another event
Click to decrease/increase hour value
Click to decrease/increase minute value
Click to decrease/increase the set fan speed value
Click to decrease/increase the set temperature value
B7
B8 B9
B10 B11
B14 B15
B16 B17
EN
B1
B2
B4
B3
This manual suits for next models
1
Table of contents
Popular Gateway manuals by other brands
HMS
HMS Intesis INKNXFGL016O000 user manual
Flying Voice Technology
Flying Voice Technology G201N4 user manual
Breezeline
Breezeline HitronGateway installation guide

ZyXEL Communications
ZyXEL Communications EX5501-B0 user guide
Juniper
Juniper SRX5600 Removing guide
SMC Sierra Monitor
SMC Sierra Monitor FieldServer QuickServer FS-QS-2 0 Series manual
