Exo Terra PT2456 User manual

Operating Instructions
Mode d’emploi
Gebrauchsanleitung
Manual de Instrucciones
Modalità d’uso
Gebruiksaanwijzing
Thermostat
100W Electronic
ON/OFF Thermostat
PT2456

2
INDEX
ENGLISH 3
FRANÇAIS 11
DEUTSCH 21
ESPAÑOL 30
ITALIANO 39
NEDERLANDS 48
Thermostat 100W
PT2456

Thank you for purchasing the Exo Terra®Thermostat 100W.
Please read this operation manual carefully before use and operate
according to the instructions provided for maximum safety and
performance. We recommend that you keep this manual handy for
future reference.
• Accurately controls terrarium temperatures
• Ideal for use with Heat Mats and Heat Cables
• From 20°C up to 35°C (68°F – 95°F)
• Waterproof remote sensor
• Controls heating devices up to 100W
Can be used with the following Exo Terra®heating sources:
Heat Mat
Heat Cable
Ceramic Heater
Reptiles are ectotherm, and use heat from an external source to
thermoregulate their optimal body temperature. Most reptiles use
direct radiant heat from the sun in combination with conductive heat
from sun-heated surfaces such as branches, rocks or other heat
accumulating structures. Providing such an appropriate, species
related, temperature gradient in the terrarium is an important factor
in successful reptile keeping. With the Exo Terra®100W Electronic
ON/OFF Thermostat you can create a well controlled heating system
that allows you to maintain the required temperature conditions
similar to those found in a desert or tropical environment. The
Thermostat will also help to prevent overheating and undercooling
during hot summer days or cold winter nights. The electronic Triac
switch keeps the temperature at the desired setpoint with a much
higher accuracy compared to conventional thermostats and virtually
eliminates temperature swings in the terrarium. Simply connect your
Heat Mat, Heat Cable or Ceramic Heater to the Exo Terra®ON/OFF
Thermostat, set the preferred temperature and place the heat sensor
in the desired spot. The Red LED heat indicator will light up when the
heating device is ON and will shut off once the desired temperature
has been reached. The recessed dial of the thermostat will prevent
accidental temperature change if the device is being handled.
The Thermostat comes with a 3.6 foot / 110cm power-cord with
grounded plug & receptacle for increased safety and to allow the use
of a power outlet strip. The waterproof remote sensor can be safely
used in highly moist terrariums and aquatic environments.
The Exo Terra®Thermostat should be set according to the needs
of the animals. Thoroughly research the preferred optimum
temperature range (POTR) for your specific reptile, so you can create
the correct temperature gradients inside the terrarium to allow your
reptiles to thermoregulate.
THERMOSTAT
Operating
Instructions
ENGLISHFRANÇAISDEUTSCHESPAÑOLITALIANO
NEDERLANDS

4
READ INSTRUCTIONS THOROUGHLY PRIOR TO INSTALLATION
AND OPERATION.
INSTRUCTIONS PERTAINING TO A RISK OF FIRE, ELECTRIC
SHOCK, OR INJURY TO PERSONS
IMPORTANT SAFETY
INSTRUCTIONS
WARNING:
To guard against injury,
basic precautions should be observed
when handling the appliance, including
the following:
1. READ AND FOLLOW ALL
SAFETY INSTRUCTIONS
and all
important notices on the appliance
before using. Failure to do so
may result in in personal injury or
damage to the unit.
2. DANGER –
For each of the
following situations, do not attempt
repairs yourself; return the product
to an authorized service facility for
service if it is still under warranty
or discard the appliance. Do not
operate the appliance if it has a
damaged electrical cord or if it is
malfunctioning or if it is dropped or
damaged in any manner.
A. For INDOOR HOUSEHOLD USE ONLY,
NOT for commercial use.

B. Carefully examine the appliance
after installation. It should not be
plugged in if there is water on parts
not intended to be wet.
C. Do not operate any appliance if it
has a damaged cord or plug, or if it
is malfunctioning or if it is dropped
or damaged in any manner. The
power cord of this appliance is a
Z type attachment and cannot be
replaced; if the cord is damaged,
the appliance should be discarded.
Never cut the cord.
D. To avoid the possibility of the
appliance plug or electrical socket
getting wet, position the unit to one
side of a wall mounted socket to
prevent water from dripping onto
the socket or plug. A “drip-loop”
should be arranged. The “driploop”
is that part of the cord below the
level of the socket, or the connector
if an extension cord is used, to
prevent water from traveling along
the cord and coming into contact
with the socket. If the plug or socket
does get wet, DO NOT unplug the
ENGLISHFRANÇAISDEUTSCHESPAÑOLITALIANO
NEDERLANDS

6
cord. Disconnect the fuse or circuit
breaker that supplies power to the
appliance. Then unplug and examine
for the presence of water in
the socket.
3. Read and observe all the important
notices on the appliance.
4. This appliance can be used by
children aged from 8 years and
above and persons with reduced
physical, sensory or mental
capabilities or lack of experience
and knowledge if they have been
given supervision or instruction
concerning use of the appliance
in a safe way and understand the
hazards involved. Children shall not
play with the appliance. Cleaning
and user maintenance shall not
be made by children without
supervision.
5. To avoid injury, do not contact
hot surfaces.
6. Always unplug an appliance from
an outlet when not in use, before
putting on or taking off parts, and
before cleaning. Never yank cord to

pull the plug from the outlet. Grasp
the plug and pull to disconnect.
7. Do not use the appliance for other
than intended use. The use of
attachments not recommended or
sold by the appliance manufacturer
may cause an unsafe condition.
8. Do not install or store the appliance
where it will be exposed to weather
or to temperatures below freezing.
Do not expose the unit to
direct sunlight.
9. If an extension cord is necessary,
ensure the connection is watertight
and dust proof. A cord with a proper
rating should be used. A cord rated
for less amperes or watts than the
appliance rating may overheat. Care
should be taken to arrange the cord
so that it will not be tripped over or
pulled. The connection should be
carried out by a qualified
electrical installer.
10.Ensure that the appliance is placed
on a flat, even surface.
ENGLISHFRANÇAISDEUTSCHESPAÑOLITALIANO
NEDERLANDS

8
SAVE THESE INSTRUCTIONS FOR
FUTURE REFERENCE
Only close adherence of these
installation, electrical and maintenance
guidelines will ensure the safe and
efficient use of this appliance.
EXO TERRA®THERMOSTAT 100W INSTALLATION INSTRUCTIONS
INSTALLATION in Exo Terra®Natural Terrariums
Follow this installation procedure to install the Exo Terra®
Thermostat on any size of Exo Terra®Natural Terrarium:
1.
Unlock the top screen cover and lift it off the terrarium.
2.
Slide one of the inlet holes (located on the back of the screen
top on either side) to the open position, so the wiring will
fit through.
3.
Feed the wire with sensor through the first available inlet hole
on the preferred side on the back of the terrarium.
4.
Position the sensor inside your terrarium, in the location where
you want to reach the temperature set on the dial. This can
be on top of the substrate if you are using a Heat Mat or Heat
Cable, but this can also be on a branch, cave or pile of stones if
you are using a Ceramic Heater to heat up a certain
basking area.
5.
Place the top screen cover back on the terrarium and lock it
into position.
6.
Close the remaining inlets by sliding the slider against the
tubing or wires to prevent escape from feeding insects and
smaller animals.
7.
Place the Exo Terra
®
Thermostat on a solid, level surface.
8.
Connect your heating device (Heat Mat, Heat Cable, Ceramic
Heater, etc.) to the receptacle of the thermostat.
INSTALLATION in other Terrarium Models
1. Refer to your terrarium’s instruction manual for instructions on
how to install equipment, wiring and sensor cables inside the
terrarium.
2. Position the sensor inside your terrarium, in the location where
you want to reach the temperature set on the dial. This can be
on top of the substrate if you are using a Heat Mat or Heat Cable,
but this can also be on a branch, cave or pile of stones if you are
using a Ceramic Heater to heat up a certain basking area.
3. Place the
Exo Terra
®
Thermostat
on a solid, level surface.
4. Connect your heating device (Heat Mat, Heat Cable, Ceramic
Heater, etc.) to the receptacle of the thermostat.
WARNING: Do not overload the Exo Terra®Thermostat by
connecting heat devices with outputs greater than 100W.
Damage from overloading is considered misuse and is exempt
from the guarantee.

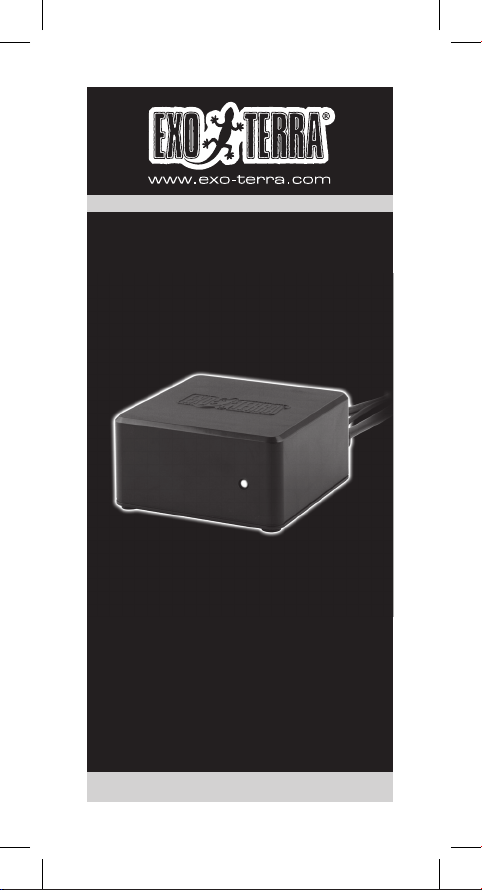
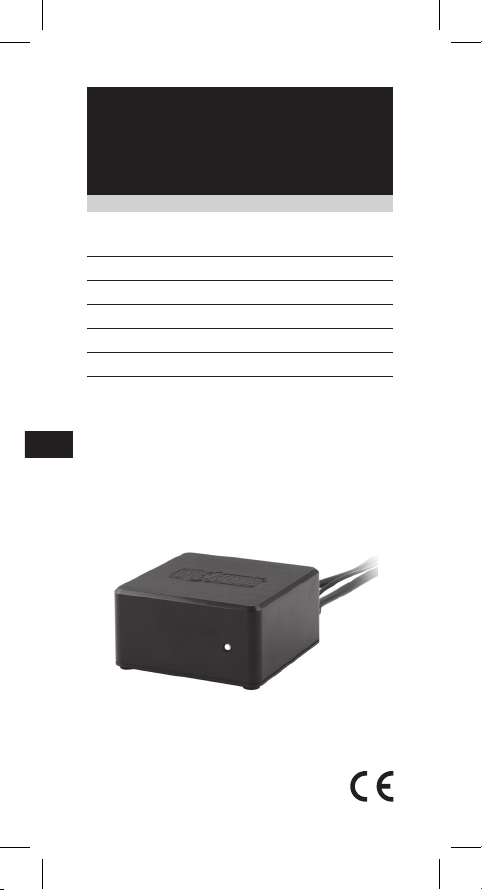
OPERATING INSTRUCTIONS
The Exo Terra®Thermostat should be set according to the needs
of the animals. Thoroughly research the preferred optimum
temperature range (POTR) for your specific reptile, so you can
create the correct temperature gradients inside the terrarium to
allow your reptiles to thermoregulate.
Always use a thermometer to monitor the inside temperatures
of your terrarium. Adjust the Exo Terra®thermostat according to
the required temperature range for your pet’s environment.
To set the preferred temperature: turn the temperature dial on the
backside of the thermostat, using a flathead screwdriver or other
tool. A red LED will light up, to indicate that the Thermostat is
powering the connected heating device, until the set temperature
has been reached on the location of the sensor.
1.
Red LED lights up: heating device is powered
2.
Red LED turned off: heating device is no longer powered, set
temperature has been reached
“Please note that the Red LED indicates power to the attached
heating device and not mains power to the Exo Terra
®
thermostat.”
Troubleshooting
1.
There is no Red LED indicator illuminated on the unit:
• The Red LED indicator is switched off because the set
temperature has been reached
• Check if the device is connected to a power source
GUARANTEE
This product is guaranteed for defects in material or workmanship
for a period of 2 years from date of purchase. The guarantee is valid
with proof of purchase only. The guarantee is limited to repair or
replacement of the unit only and does not cover consequential loss
or damage of or to animate or inanimate objects. This guarantee
is valid only under normal operating conditions for which the unit
is intended. It excludes any damage caused by unreasonable
use, improper installation, negligence, tampering, or abuse of the
unit. The warranty does not cover commercial use. For guarantee
service or spare parts contact your local pet dealer or write to the
representative in your country. This guarantee does not affect your
statutory rights.
RECYCLING
This item bears the selective sorting symbol for waste
electronic and electrical equipment (WEEE). This
means that the product must be handled pursuant to
European Directive 2012/19/EU in order to be recycled or
dismantled to minimize it’s impact on the environment.
For further information please contact your local or regional
Authorities. Electronic products not included in the selective sorting
process are potentially dangerous for the environment and human
health due to the presence of hazardous substances.
ENGLISHFRANÇAISDEUTSCHESPAÑOLITALIANO
NEDERLANDS

10
SERVICE
If you have any problem or question about the operation of this
product, please consult your Exo Terra®specialist retailer in the first
instance. Most problems can be resolved in store, but in the unlikely
event it cannot, please return the unit with a valid proof of purchase
to the retailer for a replacement under the two year warranty. When
you call (e-mail or write) our Customer Service Department, please
have all relevant information such as model number and/or part
numbers available, as well as the nature of the problem:
Customer Service and Authorized Warranty Repair Service:
U.K.:
Rolf C. Hagen (UK) Ltd.
California Dr. Whitwood Industrial Estate
Castleford, West Yorkshire WF10 5QH
mail to: http://faq.hagencrm.com/?uk
Helpline Number 01977 521015. Between 9:00 AM and 5:00 PM,
Monday to Thursday and 9:00 AM and 4:00 PM on Friday (excluding
Bank Holidays).
France :
Hagen France S.A. PARISUD 4 – Bd. Jean Monnet,
F-77388 Combs-la-Ville.
Service à la clientèle: (+33) 01-64881418
Du lundi au jeudi : 9H00-12H30 et 13H30 –17H00.
Le vendredi : 9H00-12H30
Germany:
HAGEN Deutschland GmbH & Co. KG, Lehmweg 99-105, 25488 Holm
Service-Hotline: +49 (0) 4103 / 960-2000
Montag – Freitag von 9:00 – 16:00 Uhr
Spain:
Rolf C Hagen España, S.A.,Avda de Beniparrell 11 y 13, P.I. L’Alteró,
46460 Silla (Valencia)
e-mail: [email protected]
Malaysia:
Rolf C.Hagen (Sea) Sdn.Bhd.
Lot 14A, Jalan 3A, Kawasan Perusahaan
Cheras Jaya, Balakong 43200 Cheras,
Selangor Darul Ehsan, Malaysia.
Tel: 603-9074 2388
Fax: 603-9074 2389
For general information on our whole product range, explore our
websites at: www.exo-terra.com or www.hagen.com.
Distributed by:
Canada: Rolf C. Hagen Inc., Montreal, QC H9X 0A2
U.K.: Rolf C. Hagen (U.K.),W. Yorkshire WF10 5QH
Germany: HAGEN Deutschland GmbH & Co. KG, 25488 Holm
France : Hagen France S.A. PARISUD, F-77388 Combs-la-Ville
Spain: Rolf C Hagen España, S.A. P.I. L’Alteró, 46460 Silla (Valencia)
Malaysia: Rolf C. Hagen (SEA) SDN, 43200 Cheras, Selangor D.E.

Nous vous remercions d’avoir acheté le Thermostat Exo TerraMD à
interrupteur marche-arrêt 100W. Veuillez lire attentivement le mode
d’emploi avant d’utiliser l’appareil et suivre les instructions fournies
pour obtenir le meilleur rendement possible, et ce, de la façon la plus
sûre qui soit. Nous vous recommandons de garder ce mode d’emploi
à portée de la main pour consultation ultérieure.
• Contrôle précis de la température du
terrarium
• Utilisation idéale avec les pellicules
chauffantes et les câbles chauffants
• Températures de 20 à 35 °C (de 68 à 95 °F)
• Capteur à distance étanche
• Contrôle d’appareils de chauffage jusqu’à
100 W
Le thermostat peut être utilisé avec les appareils de chauffage
Exo TerraMD suivants:
Pellicule chauffante
Câble chauffant
Émetteur de chaleur en céramique
Puisqu’ils sont ectothermes, les reptiles régulent la température
optimale de leurs corps grâce à la chaleur provenant d’une source
externe. Pour la plupart des reptiles, cette source constitue la
chaleur rayonnante directe du soleil en combinaison avec la chaleur
conduite par les surfaces chauffées par le soleil, telles que les
branches, les pierres ou toute autre structure qui emmagasine la
chaleur. L’un des facteurs importants pour garder un reptile est le
maintien d’un gradient de température adéquat dans le terrarium
selon l’espèce de reptile gardée. Le Thermostat Exo TerraMD à
interrupteur marche-arrêt 100W permet de créer un système de
chauffage contrôlé afin d’offrir les conditions stables idéales aux
reptiles, comme celles d’un environnement désertique ou tropical.
Le thermostat contribue aussi à prévenir la surchauffe pendant
les chaudes journées d’été ou le froid extrême pendant les froides
soirées d’hiver. Par ailleurs, l’interrupteur électronique triac maintient
la température à la valeur désirée de façon beaucoup plus précise
que les thermostats habituels, en plus d’empêcher virtuellement
les variations de température dans le terrarium. Il suffit de brancher
le Thermostat Exo TerraMD à interrupteur marche-arrêt 100 W à la
pellicule chauffante, au câble chauffant ou à l’émetteur de chaleur
en céramique, de régler la température souhaitée, puis de placer
le capteur de chaleur à l’endroit désiré. Le voyant à DEL rouge
s’allumera lorsque l’appareil de chauffage sera en marche, puis
s’éteindra lorsque la température désirée sera atteinte. De plus,
THERMOSTAT
Mode d’emploi
ENGLISHFRANÇAISDEUTSCHESPAÑOLITALIANO
NEDERLANDS

12
le cadran encastré des températures prévient les changements
accidentels de température lorsque l’appareil est manipulé. Son
cordon d’alimentation de 110 cm (3,6 pi) est muni d’une fiche et
d’une prise mises à la terre pour augmenter la sûreté de l’appareil
et pour permettre l’utilisation d’une barre multiprise. Finalement,
puisque le capteur à distance est étanche, il peut être utilisé sans
danger dans les terrariums et les environnements aquatiques à haut
taux d’humidité.
Le Thermostat Exo TerraMD à interrupteur marche-arrêt 100 W doit
être réglé en fonction des besoins des reptiles gardés. Il importe
donc de faire des recherches précises sur les espèces gardées afin
de connaître leur plage de températures optimales préférentielles
(PTOP), et ainsi d’offrir les gradients de température adéquats à la
thermorégulation de ces espèces dans le terrarium.
BIEN LIRE LE MODE D’EMPLOI AVANT D’INSTALLER ET DE FAIRE
FONCTIONNER L’APPAREIL.
INSTRUCTIONS SE RAPPORTANT À UN RISQUE D’INCENDIE, DE
DÉCHARGE ÉLECTRIQUE OU DE BLESSURES AUX PERSONNES
MESURES DE SÉCURITÉ
IMPORTANTES
AVERTISSEMENT :
Pour éviter
toute blessure, il faut observer des
précautions élémentaires de sécurité
lorsque l’appareil est manipulé,
notamment celles qui suivent.
1.LIRE ET RESPECTER TOUTES
LES CONSIGNES DE SÉCURITÉ
et tous les avis importants sur
l’appareil avant de l’utiliser. Le
non-respect de ces précautions
risque d’entraîner des blessures aux
personnes ou des dommages
à l’appareil.
2.DANGER –
Dans chacune des
situations suivantes, ne pas essayer

de réparer l’appareil soi-même;
le retourner plutôt à un service de
réparations autorisé s’il est encore
sous garantie ou le jeter. Ne pas faire
fonctionner un appareil dont la fiche
ou le cordon est endommagé, qui ne
fonctionne pas correctement ou qui
est tombé ou a été endommagé de
quelque manière que ce soit.
A. POUR USAGE DOMESTIQUE ET À
L’INTÉRIEUR SEULEMENT, ET NON
pour usage commercial.
B. Examiner attentivement l’appareil
après l’installation. Ne pas le
brancher si de l’eau se trouve sur
des pièces qui ne doivent pas
être mouillées.
C. Ne pas faire fonctionner un appareil
dont la fiche ou le cordon est
endommagé, qui ne fonctionne pas
correctement ou qui est tombé ou a
été endommagé de quelque manière
que ce soit. Le cordon d’alimentation
de cet appareil est de type Z et ne
peut être remplacé; si le cordon est
endommagé, il faut jeter l’appareil.
Ne jamais couper le cordon.
ENGLISHFRANÇAISDEUTSCHESPAÑOLITALIANO
NEDERLANDS

14
D. Afin d’éviter que la fiche de
l’appareil ou la prise de courant
entre en contact avec de l’eau,
installer l’appareil à côté d’une prise
de courant murale pour empêcher
l’eau de s’égoutter sur la prise ou
la fiche. Il faut former une « boucle
d’égouttement » avec le cordon
d’alimentation qui relie l’appareil à
la prise. La « boucle d’égouttement
» est la partie du cordon qui se
trouve sous la prise de courant,
ou le raccord si une rallonge est
utilisée, afin d’empêcher l’eau de
glisser le long du cordon et d’entrer
en contact avec la prise de courant.
Si la fiche ou la prise de courant
entre en contact avec de l’eau, NE
PAS débrancher l’appareil. Mettre
d’abord hors circuit le fusible ou le
disjoncteur qui fournit l’électricité
à l’appareil. Débrancher ensuite
l’appareil et vérifier qu’il n’y a pas
d’eau dans la prise.
3. Lire et suivre tous les avis
importants apparaissant sur
ce produit.

4. Cet appareil peut être utilisé par
des enfants de 8 ans et plus
ainsi que par des personnes aux
capacités physiques, sensorielles ou
mentales réduites, ou qui manquent
d’expérience et de connaissances, si
elles sont toutes sous surveillance.
De plus, des directives doivent leur
être fournies quant à l’emploi sûr de
l’appareil et aux dangers possibles.
Les enfants ne doivent pas jouer
avec l’appareil. S’ils en effectuent
le nettoyage et l’entretien, ils doivent
être surveillés.
5. Pour éviter toute blessure, ne
toucher aucune pièce chaude.
6. Toujours débrancher l’appareil
lorsqu’il n’est pas utilisé, avant
d’ajouter ou de retirer des pièces,
et avant d’en effectuer le nettoyage.
Ne jamais tirer sur le cordon
d’alimentation pour débrancher
l’appareil. Prendre plutôt la fiche
entre les doigts, puis tirer.
7. Ne pas se servir de l’appareil pour
un autre usage que celui pour lequel
il a été conçu. L’emploi de fixations
ENGLISHFRANÇAISDEUTSCHESPAÑOLITALIANO
NEDERLANDS

16
ni recommandées ni vendues par
le fabricant de l’appareil peut être
source de situations dangereuses.
8. Ne pas installer ni ranger l’appareil
où il sera exposé aux intempéries
ou à des températures sous le point
de congélation. Ne pas exposer
l’appareil à la lumière directe
du soleil.
9. Si une rallonge électrique est
nécessaire, vérifier qu’elle est
étanche à l’eau et à la poussière,
et qu’elle est d’un calibre suffisant.
Un cordon d’alimentation de
moins d’ampères ou de watts que
l’appareil peut surchauffer. Il faut
placer le cordon d’alimentation de
façon à éviter qu’on tire la rallonge
ou qu’on trébuche sur celle-ci.
Le raccordement doit être effectué
par un électricien qualifié.
10.S’assurer que l’appareil est placé
sur une surface plane.

CONSERVER CES INSTRUCTIONS
POUR CONSULTATION
ULTÉRIEURE
Seul le respect ces directives
d’installation, d’électricité et d’entretien
assurera l’emploi sûr et efficace de
cet appareil.
INSTRUCTIONS D’INSTALLATION DU THERMOSTAT EXO TERRAMD
INSTALLATION dans les terrariums naturels Exo TerraMD
Suivre les étapes d’installation du Thermostat Exo TerraMD pour les
aquariums naturels Exo TerraMD de n’importe quel format.
1. Déverrouiller le couvercle grillagé et le soulever du terrarium.
2. Dégager l’une des ouvertures (situées à l’arrière du couvercle
grillagé de chaque côté) afin d’y passer le fil de l’appareil.
3. Passer le fil doté du capteur dans la première ouverture du côté
désiré à l’arrière du Terrarium.
4. Placer le capteur à l’endroit désiré à l’intérieur du terrarium,
c’est-à-dire où la température réglée sur le cadran sera atteinte.
Le capteur peut être installé sur le substrat si une pellicule
chauffante ou un câble chauffant est utilisé, ou encore sur une
branche, une grotte ou un amas de pierres si un émetteur de
chaleur en céramique est utilisé pour chauffer un espace pour
lézarder particulier.
5. Replacer le couvercle grillagé et le verrouiller en place.
6. Bloquer les ouvertures en glissant le curseur sur les fils pour
empêcher les insectes servant au nourrissage ou les très petits
animaux de s’enfuir.
7. Installer le Thermostat Exo TerraMD sur une surface solide
et plane.
8. Brancher l’appareil de chauffage (pellicule chauffante, câble
chauffant, émetteur de chaleur, etc.) à la prise du thermostat.
INSTALLATION dans les autres modèles de terrariums
1. Consulter le mode d’emploi du terrarium pour les étapes
d’installation de l’équipement, des fils et des câbles capteurs à
l’intérieur du terrarium.
2. Placer le capteur à l’endroit désiré à l’intérieur du terrarium,
c’est-à-dire où la température réglée sur le cadran sera atteinte.
Le capteur peut être installé sur le substrat si une pellicule
chauffante ou un câble chauffant est utilisé, ou encore sur
une branche, une grotte ou un amas de pierres si un émetteur
de chaleur en céramique est utilisé pour chauffer un espace
particulier pour lézarder.
3. Installer le Thermostat Exo TerraMD sur une surface solide
et plane.
4. Brancher l’appareil de chauffage (pellicule chauffante, câble
chauffant, émetteur de chaleur, etc.) à la prise du thermostat.
ENGLISHFRANÇAISDEUTSCHESPAÑOLITALIANO
NEDERLANDS

18
AVERTISSEMENT : Pour éviter une surcharge, ne pas brancher
le thermostat Exo TerraMD à des appareils de chauffage de
plus de 100W. Les dommages causés par une surcharge sont
considérés comme étant le résultat d’une mauvaise utilisation
de l’appareil et ne sont donc pas couverts par la garantie.
INSTRUCTIONS D’UTILISATION
Le Thermostat Exo TerraMD à interrupteur marche-arrêt 100W
doit être réglé en fonction des besoins des reptiles gardés.
Il importe donc de faire des recherches précises sur les
espèces gardées afin de connaître leur plage de températures
optimales préférentielles (PTOP), et ainsi d’offrir les gradients
de température adéquats à la thermorégulation de ces espèces
dans le terrarium.
Toujours utiliser un thermomètre pour surveiller la température
à l’intérieur du terrarium. Régler le thermostat Exo TerraMD selon
la température requise dans l’environnement du reptile.
Pour régler la température préférentielle : à l’aide d’un tournevis
plat ou de tout autre outil, tourner le cadran des températures situé
à l’arrière du thermostat. Un voyant à DEL rouge s’allumera pour
indiquer que le thermostat alimente l’appareil de chauffage branché.
Le voyant s’éteindra lorsque la température désirée sera atteinte à
l’endroit où le capteur est installé.
1. Voyant à DEL rouge allumé : le thermostat alimente l’appareil
de chauffage.
2. Voyant à DEL rouge éteint : le thermostat n’alimente plus
l’appareil de chauffage puisque la température désirée a
été atteinte.
“Prière de noter que le voyant à DEL rouge indique l’état de marche
de l’appareil de chauffage branché, et non du thermostat
Exo TerraMD.”
Dépannage
1. Le voyant à DEL rouge sur l’appareil ne s’allume jamais :
• Le voyant à DEL rouge est éteint parce que la température
désirée a été atteinte.
• L’appareil n’est peut-être pas branché à une prise de courant.
GARANTIE
Ce produit est garanti contre tout défaut de matériaux et de
fabrication pour une période de deux (2) ans à partir de la date
d’achat. La garantie est valide uniquement avec une preuve d’achat.
La présente garantie se limite à la réparation ou au remplacement
de l’appareil seulement et ne s’applique ni aux pertes ni aux
dommages indirects causés aux objets animés ou inanimés.
La garantie est valide seulement dans les conditions normales
d’utilisation pour lesquelles l’appareil a été conçu. Elle exclut
tout dommage résultant d’un usage inapproprié, d’une mauvaise
installation, d’une modification ou d’un usage excessif. La garantie
ne couvre pas l’usage commercial. Pour le service sous garantie ou
pour des pièces de rechange, communiquez avec votre détaillant
de produits pour animaux de compagnie local ou écrivez au
représentant de votre pays. La présente garantie ne modifie pas vos
droits prévus par la loi.

RECYCLAGE
Cet article porte le marquage de la collecte sélective
des déchets d’équipements électriques et électroniques
(DEEE), ce qui signifie que l’on doit éliminer ce produit
conformément à la directive européenne 2012/19/
EU, afin de le recycler ou de le désassembler pour
minimiser ses répercussions sur l’environnement. Pour plus
d’information, contactez les autorités locales ou régionales. Les
produits électroniques non compris dans le processus de collecte
sélective sont potentiellement dangereux pour l’environnement et la
santé humaine en raison de la présence de substances dangereuses.
SERVICE
Si vous rencontrez un problème ou avez des questions concernant
le fonctionnement de cet article, veuillez d’abord communiquer
avec votre détaillant spécialisé en produits Exo TerraMD. Bien que
la plupart des problèmes puissent rapidement être réglés en vous
rendant chez votre détaillant, il peut arriver que ce ne soit pas le cas;
veuillez alors retourner l’appareil accompagné de la preuve d’achat
au détaillant pour remplacer cet appareil dans le délai de deux
(2) ans prévu dans la garantie. Lorsque vous nous téléphonez (ou
écrivez), veuillez fournir tous les renseignements pertinents comme
le numéro de modèle ou le numéro des pièces ainsi que la nature
du problème.
Service à la clientèle et Service de réparations autorisé sous
garantie :
France :
Hagen France S.A. PARISUD 4 – Bd. Jean Monnet,
F-77388 Combs-la-Ville
Service à la clientèle : (+33) 01-64881418
Du lundi au jeudi : de 9 h à 12 h 30 et de 13 h 30 à 17 h
Le vendredi : de 9 h à 12 h 30
Allemagne :
HAGEN Deutschland GmbH & Co. KG, Lehmweg 99-105, 25488 Holm
Service-Hotline: +49 (0) 4103 / 960-2000
Montag – Freitag von 9:00 – 16:00 Uhr
Espagne :
Rolf C Hagen España, S.A.,Avda de Beniparrell 11 y 13, P.I. L’Alteró,
46460 Silla (Valencia)
e-mail: [email protected]
Pour de l’information générale sur notre gamme complète de
produits, visitez nos sites Web au www.exo-terra.com ou au
www.hagen.com.
ENGLISHFRANÇAISDEUTSCHESPAÑOLITALIANO
NEDERLANDS

20
Distributed by:
Canada : Rolf C. Hagen inc., Montréal (Québec) H9X 0A2
R.-U. : Rolf C. Hagen (U.K.), W. Yorkshire WF10 5QH
Allemagne : HAGEN Deutschland GmbH & Co. KG, 25488 Holm
France : Hagen France S.A. PARISUD, F-77388 Combs-la-Ville
Espagne : Rolf C Hagen España, S.A. P.I. L’Alteró, 46460 Silla
(Valencia)
Malaisie : Rolf C. Hagen (SEA) SDN, 43200 Cheras, Selangor D.E.,
Malaysia
Table of contents
Languages:
Other Exo Terra Thermostat manuals
Popular Thermostat manuals by other brands

Salus
Salus Rogers Smart Thermostat 7 Series Setup guide

Honeywell
Honeywell THX9000 Prestige HD System installation guide

Behler-Young
Behler-Young KSACN0601AAA owner's manual

Excel
Excel TH-2005 E-Series user guide

Osaka
Osaka Smart Box Simple manual

Vaillant
Vaillant VRT 392 OPERATING AND INSTALLATION Manual