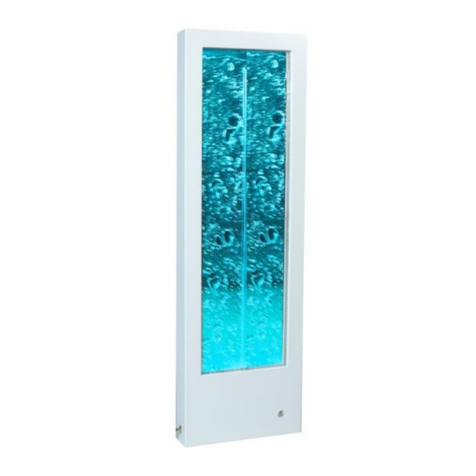
Experia 12 00 01 User manual

Waterbed
12 00 01
12 00 02
12 00 13
Product Manual

Congratulations on the purchase of your Waterbed.
For optimal results, please read and follow instructions carefully
Please ensure you read and follow these Instructions carefully before installing or operating the unit.
Please keep this manual for future reference.
Heed all warnings on the product and within this manual. If upon receipt of this product, the user suspects that the
product is defective, and/or requires service or repair due to malfunction or damage to the product, please contact
the manufacturer immediately. Please be aware that improper installation and/or use or misuse of this product
may result in injury, death, or adverse reactions to its user. This product is intended to be installed and/or use by a
trained professional. Failure to comply with these precautions or with specific warnings elsewhere in this manual
violates safety standards of design, manufacture, and intended uses of the product.
Features
Anti-wave technology built in
Hard wearing vinyl cover
Waterbed heater and thermostat
Easy to use
Easy to clean
Stylish design
Quick Start Guide
Before use make sure the waterbed has been heated sufficiently.
Lay down and enjoy!
Pack contents
1 x Waterbed heater
1 x Waterbed thermostat
1 x Waterbed bladder
1 x Foam surrounds
1 x Vinyl Cover
1 x Waterbed liner
1 x Instruction Manual
Unpacking your Waterbed
Check packaging for signs of damage before opening.
Do not use sharp objects during unpacking.
Check the parts received against the Pack Contents.
Read the product manual before use.

Positioning of your waterbed.
It is advised not to position the waterbed hard up against a wall but to leave a gap of at least 50mm (5cm).
If you have a plinth or base then please ensure they are level when in position.
Installation
If you have a base or plinth for your water bed position it where you intend the waterbed to be located. It is advised
to leave a minimum gap of 50mm between the waterbed and a wall.
Position the waterbed vinyl cover on top of the base or plinth (or floor if none supplied) with the zip end facing a wall
and un-zip the top.
Place the (long) side foam pieces inside the cover.
And then place the head and foot foam pieces inside the cover.
Shuffle the foam sides, head and foot pieces so they form a closed rectangle.
If you have a massage element (blue pad in the picture) then fit it at the head of the bed before fitting the heating
element.
Fit the heating element centrally in the bed and make sure it is flat with no creasing. As we don’t know when manu-
facturing the location of the electrical supply we don’t create a hole for the heater cable. Decide the best place cor-
ner for the heater cable to exit the waterbed and cut slit in the vinyl with a craft knife to suit the connector. Prefera-
bly in an area facing a wall. Feed the heater cable between the foam inserts and out of the slit you have cut.

Before proceeding we advise you to test the heating element. This is done by connecting it up and switching on.
Place your hand on the heating element and once you feel it getting warm switch it off.
DO NOT LEAVE THE HEATING ELEMENT SWITCHED ON AS IT WILL CAUSE DAMAGE!
Fit the safety liner (a thick vinyl sheet) inside the foam rectangle making sure the corners are positioned correctly in
the corners of the foam.
Place the waterbed bladder inside the safety liner with the water inlet at the foot of the bed and once again make
sure the corners are correctly positioned.
Vinyl safety liner Waterbed bladder
IMPORTANT Read any guidelines printed on the bladder before continuing.

Now fill you waterbed with water leaving a gap of approximately 20mm (2cm) below the top of the foam inserts.
When “filled” the waterbed bladder should not be tight with water.
Remove as much air in the waterbed as possible by pushing it out from the head of the bed towards the foot of the
bed. This can be done by carefully rolling yourself from the bed head to the water inlet. Or you can simply push the
air out.
Once the air has been removed add a full bottle of conditioner.
Replace the stopper in the water inlet and try the bed out for comfort. Remove or add water to suit the user.
Wipe away any spilt water, fold the surplus from the vinyl liner over the bladder and zip back up the waterbed cover
removed earlier.
Your waterbed has now been installed and you may plug in and switch on the heating element. The heating element
will take several hours to warm up the waterbed. In regular use the waterbed heater can be switched off for a time
as per the heater instructions. When not in regular use the heater can be switched off but needs several hours to
warm up the bed again.
Please note: Only use the transformer supplied. Use of a different transformer may result in damage to the
product and void the warranty. For warranty information please see separate warranty card supplied.

How to fill your waterbed without a pump.
Before starting to fill your waterbed bladder check the positioning carefully because once the mattress is full of water
it will be impossible to move.
Using a suitable tap/faucet connector attach a hose pipe to your nearest available tap/faucet.
Make sure it attached firmly and ensure the hose is clean. Hoses that have been stored outside for a period of time,
or that have dirt inside them may introduce enzymes, bacteria, or other contamination into your waterbed. Rinse
these hoses for ten minutes by letting water run through the hose.
Attach the waterbed hose attachment (pictured above) tightly onto the hose. Remove the fill cap and seal from the
waterbed bladder and screw the attachment into the fill hole. Be sure it is tight enough yet do not over tighten and
strip the thread. A towel might be handy to soak up any leakage during the filling process both at the waterbed end
and the tap/faucet.
Double check the tap/faucet and waterbed connections one final time and start filling. Using a mixture of cold and
hot water will mean less time heating the waterbed later.
Once the waterbed bladder is within 20mm (2cm) of the foam sides you can shut off the tap/faucet. Remove the
hose pipe from the waterbed and put the cap on quickly to prevent any air getting into the bladder.
Air Removal
To remove any air from inside the mattress remove the seal and cap. Using a broomstick or similar, slide it from the
head of the bed toward the fill hole. Remove all the bubbles to prevent noise from the mattress. A new mattress will
periodically need to be "burped" to remove the air. Remember to install the seal and cap afterwards.
This burping valve can be a
useful aid when removing un-
wanted air from the waterbed.

How to drain you waterbed without a pump.
If you need to move your waterbed or swap the heater you need to empty the waterbed bladder. A waterbed drain
pump makes it easy to drain all of the water from the mattress, but a pump can seem like an unnecessary expense
given how rarely most people use it. Gravity can drain the bed for you if you want to avoid the added expense of a
pump.
1. Remove any sheets and mattress cover from the bed , un-zip the vinyl cover and unplug the water heater. IT
IS IMPORTANT THE HEATER IS UNPLUGGED AS IT WILL BURN OUT IF LEFT ON WHEN THERE IS LIT-
TLE OR NO WATER IN THE WATERBED.
2. Route a garden hose from your bed to an area where the water can drain freely without creating a flood. So
long as the end of the hose is lower than the waterbed the water will flow from the bed to the end of the hose.
3. Attach a waterbed hose connector (below) to the end of the garden hose to have it ready to insert into the
mattress drain plug.
4. Locate the drain plug at the foot of the mattress. Open the plug and immediately attach the garden hose to it
via the hose connector. When the garden hose is secure, weigh it down on the bed next to the drain plug so
that it sits slightly lower than the rest of the mattress.
5. Prop up the head of the mattress with objects that lack sharp edges after most of the water has drained to
help push the remaining water towards the drain plug.
6. Remove the garden hose from the mattress drain plug when the bed is empty and immediately replace the
plug’s cap to prevent air from getting into the drained mattress.
7. This method may take one to two hours to empty your waterbed.

Cleaning and Maintenance
The unit should be cleaned with a damp soft cloth. A non abrasive cleaning agent may be used for stubborn stains.
No sharp objects should come into contact with the waterbed at any time.
A full bottle of waterbed conditioner is required annually to help maintain the waterbed. If treated annually there is no
requirement to replace the water.
Waterbed Accessories & Spares
Conditioner,
Burping Valve,
Heater & Thermostat,
Crystals,
Patch Kit,
Hose Pipe attachment
Troubleshooting
Q. The heater doesn’t work.
A1. Is it switched on? If so,
A2. Has the heater had several hours to warm up the water? If yes,
A3. Please contact us.

Guarantee
All products manufactured by ourselves are backed with a three year guarantee.
All other items carry a manufacturers 1 year guarantee.
All guarantees are collect and return.
If your product needs to be returned to our factory we will arrange collection of the item and return it to you when
repaired, all we ask is you pack the product securely.
If in the unlikely event that a product purchased from us develops a fault please contact us on
Freephone 0800 612 6077 or email us and our technical team will assist
Experia Registered Office:
Acorn Phase 3
High Street
Grimethorpe
S72 7BD
If you have any questions or need information about any of our products and services please call us on
Freephone 0800 612 6077
If you would like a FREE Sensory Brochure you can request one by telephone or visiting our website.
For more information on Experia Free 3D Room Designs or to schedule an onsite visit from our sales team then
please request a visit by telephone, email or by using the form on our website.
Support Contact Details
For USA please email support@experia-usa.com
For Canada please email support@experia-canada.com
For UK and rest of the world email support@experia-innovations.co.uk
Telephone: 0044 (0) 800 612 6077.
Please note: email is our support teams preferred communication and this takes precedence over telephone calls.
Manufactured in the UK by:
Experia, Acorn Phase III, High Street, Grimethorpe, Barnsley, South Yorkshire, S72 7BD
© Copyright 2015 Experia All rights reserved Experia. Experia is a registered trademark
This manual suits for next models
2
Table of contents
Other Experia Indoor Furnishing manuals
Popular Indoor Furnishing manuals by other brands

LDI Spaces
LDI Spaces Safco 4214 Assembly instructions

modway
modway EEI-4895 Assembly instructions

VERTBAUDET
VERTBAUDET 70501-0811 quick start guide

Evan furniture
Evan furniture URBINO DR1 Assembly instruction

Great Little Trading
Great Little Trading L5245 quick start guide

VIPACK
VIPACK BILLY BIKO1314 Assembly instructions