manuals.online logo
Brands
  1. Home
  2. •
  3. Brands
  4. •
  5. Expert Mounts
  6. •
  7. TV Mount
  8. •
  9. Expert Mounts SL001 User manual

Expert Mounts SL001 User manual

1
Thank You for your purchase of an
Expert Mount. The SL001 is designed
to securely attach a Flat Panel LCD to
a cabinet or an armoire. It will allow
the ability to pull the TV out and
swivel.
Safety Warning: If you do not understand these
directions, or have any doubts about the safety of
the installation, please call a qualified contractor
or contact Expert Mounts at 855.5MOUNTS or
www.ExpertMounts.com. Check carefully to
make sure that there are no missing or defective
parts. Our customer service representatives can
quickly assist you with installation questions and
missing or damaged parts. Replacement parts for
products purchased through authorized dealers
will be shipped directly to you. Never use
defective parts. Improper installation may cause
damage or serious injury. Do not use this product
for any purpose that is not explicitly specified by
Expert Mounts. Expert Mounts will not be liable
for damage or injury caused by incorrect
mounting, incorrect assembly, or incorrect use.
Please call Expert Mounts before returning
products to the point of purchase.
Step 1: Mounting the slide unit.
Properly align the slide unit to the desired
location on the surface the SL001 is to be
mounted on. Using a drill and a ¼” drill bit, drill
a hole in each location (6 total) in the Shelf.
(Make sure each slide bracket is equal distance
from the leading edge of the shelf)
Note: The front edge of the mounting bracket is
even with the mounting surface for the TV. (For
Example: If your TV is 3” thick and you want
the recess the TV 1”, you would need to start the
mounting bracket 4” from shelf edge. If you
want the TV to be flush with the edge, set the
mounting bracket back the same depth of the TV.
If you want the TV to protrude 1” you would set
the mounting bracket (3”-1” =2”) 2” from the
leading edge of the shelf.)
WARNING: It is the responsibility of
the installer to verify the surface the
SL001 is mounted to is secured so that
it will NOT tip forward when the
television is pulled out into its
extended position. The mounting
surface must be capable of supporting
the total weight of the television and
the mount.
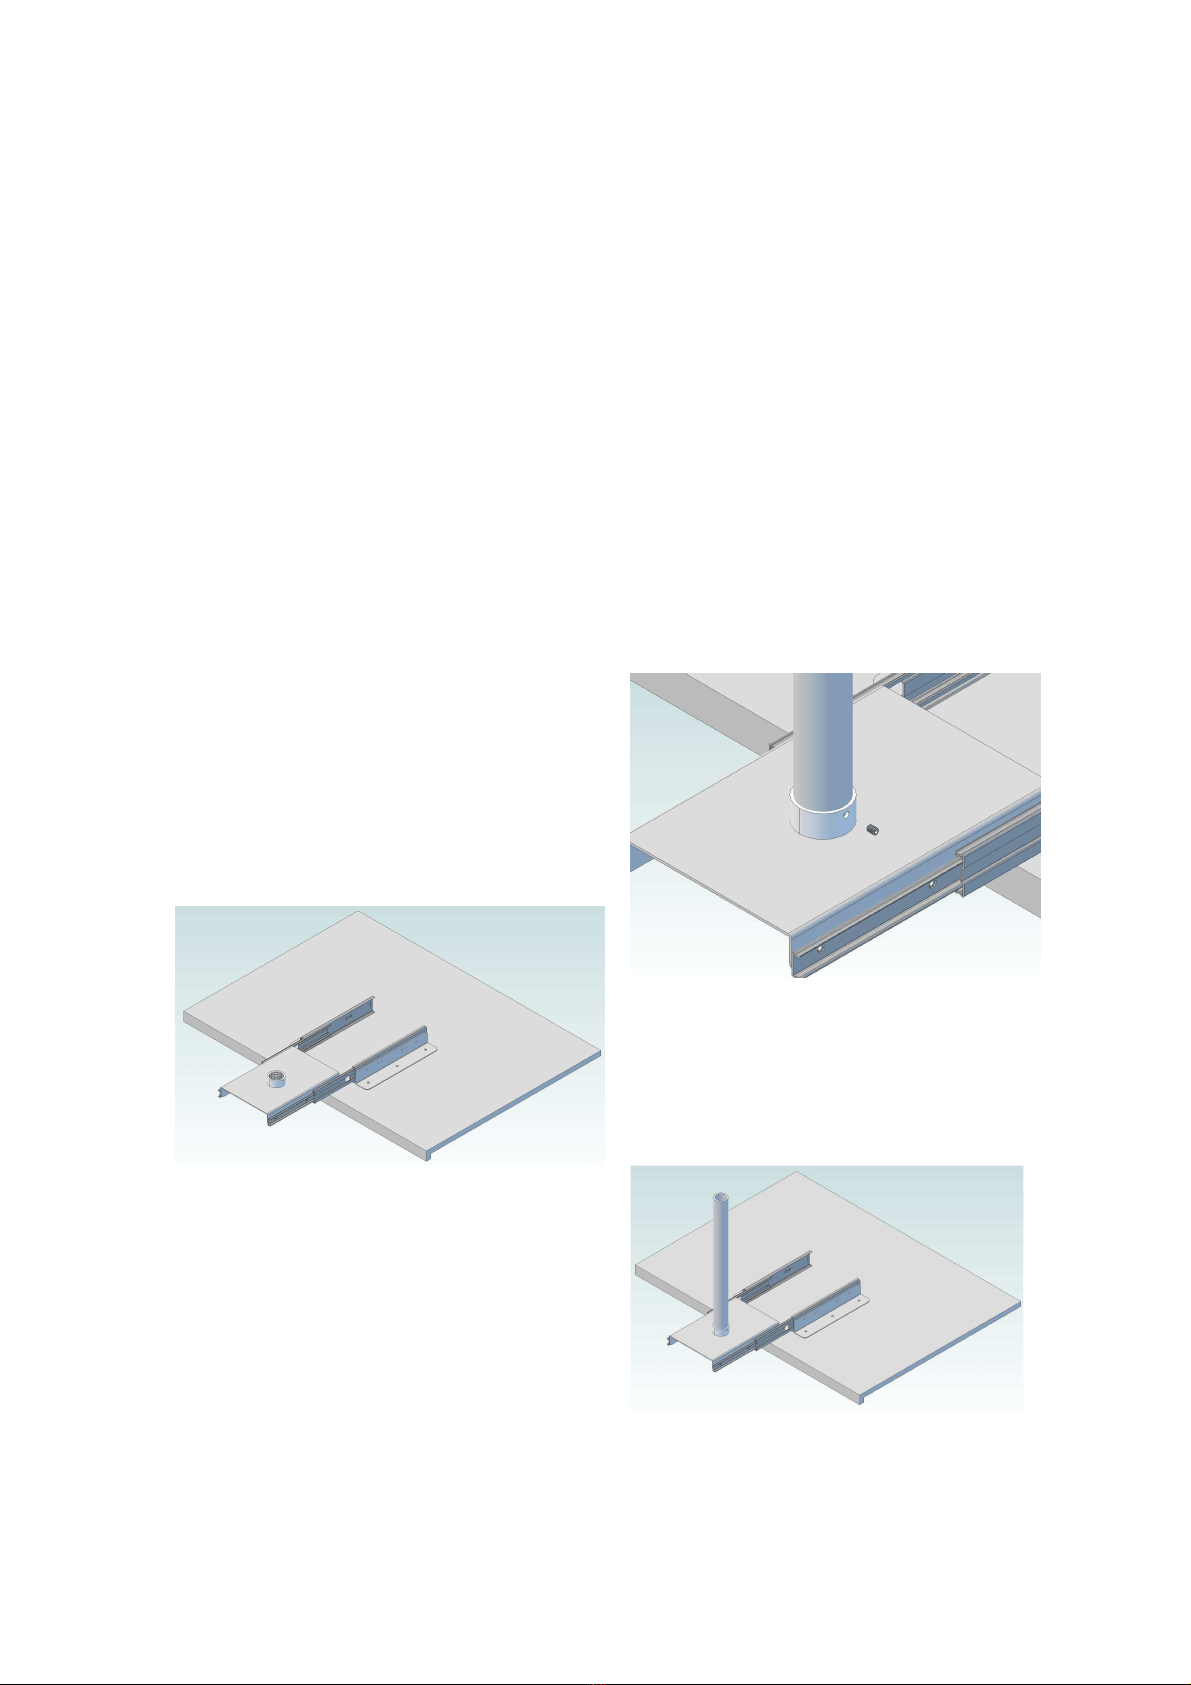
Step 2: Installing the support pole
Thread the support pole into the female coupler
on the top of the slide unit. The pole may not
thread all the way into the coupler. Make sure
that the pole is threaded far enough in so that the
set screw comes in contact with the threaded
portion of the pole.
2
Install the supplied set screw to secure the
support pole into place
.
Step 3: Attaching the Mounting
bracket
Install the large set collar onto the support pole
and adjust to the proper height. The height of
the collar should be at a minimum height to
allow the TV to properly swivel on the support
pole. This height should be at a measurement of
half the overall height of your TV minus 4
inches. Example if the overall height of your TV
is 20”, you should set the collar at a minimum
height of 6” on the support pole from the slide
unit surface. This will give you the proper
clearance to allow the TV to swivel.
Next attach the “Wall Plate” to the NPT Pipe
adaptor with the supplied (6) bolts and nylon
lock nuts.
Slip the NPT Pipe adaptor on the support pole
and allow it to rest on the set collar.
Step 4: Attaching bracket to TV
Attach the upright rails to the TV/ Monitor both
at equal heights with the tilt control lever to the
outside of the TV. Use the supplied hardware to
attach the rails to the TV. If your TV/ Monitor
has recessed holes or an obstruction on the back
that prevents the rail from sitting flush against
the TV, install the nylon spacers between the
TV/ Monitor and the mounting rail. The screws
should not be over tightened nor should the
screw bottom out. The mounting rails should be
centered on the back of the TV.
3
Step 5: Installing the TV on the Slide
nit
First hook the TV Rails over the top of the Wall
Plate and allow the hang. Next slide the locking
tabs up and tighten screws. Make sure that the
TV is center on the wall plate for even weight
distribution.
Warning: When extending the
SL001 with the TV mounted make
sure the weight does not cause the
armoire or cabinet to tip forward.
Attaching the unit to the wa may
be required.
If you have any questions or
concerns, p ease contact one of our
customer service representatives.

This manual suits for next models

1

Popular TV Mount manuals by other brands

New Star FPMA-W835 instruction manual

New Star

New Star FPMA-W835 instruction manual

AVLink SF801 user manual

AVLink

AVLink SF801 user manual

Omnimount L27-OM1100149-CON-021810vC instruction manual

Omnimount

Omnimount L27-OM1100149-CON-021810vC instruction manual

ViewZ VZ-WM50 installation instructions

ViewZ

ViewZ VZ-WM50 installation instructions

ViewZ VZ-CMKiT-01 installation manual

ViewZ

ViewZ VZ-CMKiT-01 installation manual

Rocket Fish RF-TVMFM03 Quick setup guide

Rocket Fish

Rocket Fish RF-TVMFM03 Quick setup guide

One Forall DYNAMIC WM5660 Quick installation guide

One Forall

One Forall DYNAMIC WM5660 Quick installation guide

Tripp Lite DMC1342S owner's manual

Tripp Lite

Tripp Lite DMC1342S owner's manual

VOGELS WALL 3325 Mounting instructions

VOGELS

VOGELS WALL 3325 Mounting instructions

Omnimount IQLP60F instruction manual

Omnimount

Omnimount IQLP60F instruction manual

Omnimount CI175TPL user guide

Omnimount

Omnimount CI175TPL user guide

VOGELS PUC 1011 Mounting instructions

VOGELS

VOGELS PUC 1011 Mounting instructions

New Star NeoMounts FL40-430BL14 instruction manual

New Star

New Star NeoMounts FL40-430BL14 instruction manual

RED ATOM REDLCM125 instruction manual

RED ATOM

RED ATOM REDLCM125 instruction manual

Sim-Lab VARIO TRIPLE MONITOR MOUNT instruction manual

Sim-Lab

Sim-Lab VARIO TRIPLE MONITOR MOUNT instruction manual

VOGELS VFF 624 manual

VOGELS

VOGELS VFF 624 manual

Gianni Industries Z-400N Bracket specification

Gianni Industries

Gianni Industries Z-400N Bracket specification

RCA MC3255T installation manual

RCA

RCA MC3255T installation manual

manuals.online logo
manuals.online logoBrands
  • About & Mission
  • Contact us
  • Privacy Policy
  • Terms and Conditions

Copyright 2025 Manuals.Online. All Rights Reserved.