RCZT-01W
6 8
7 4
3 8 8
4 9
5 4
!
RCZT-02P
1 2
3 4
5
1
95mm
3
2
4
5
10 8
5
6
75
6
9
1 2 3
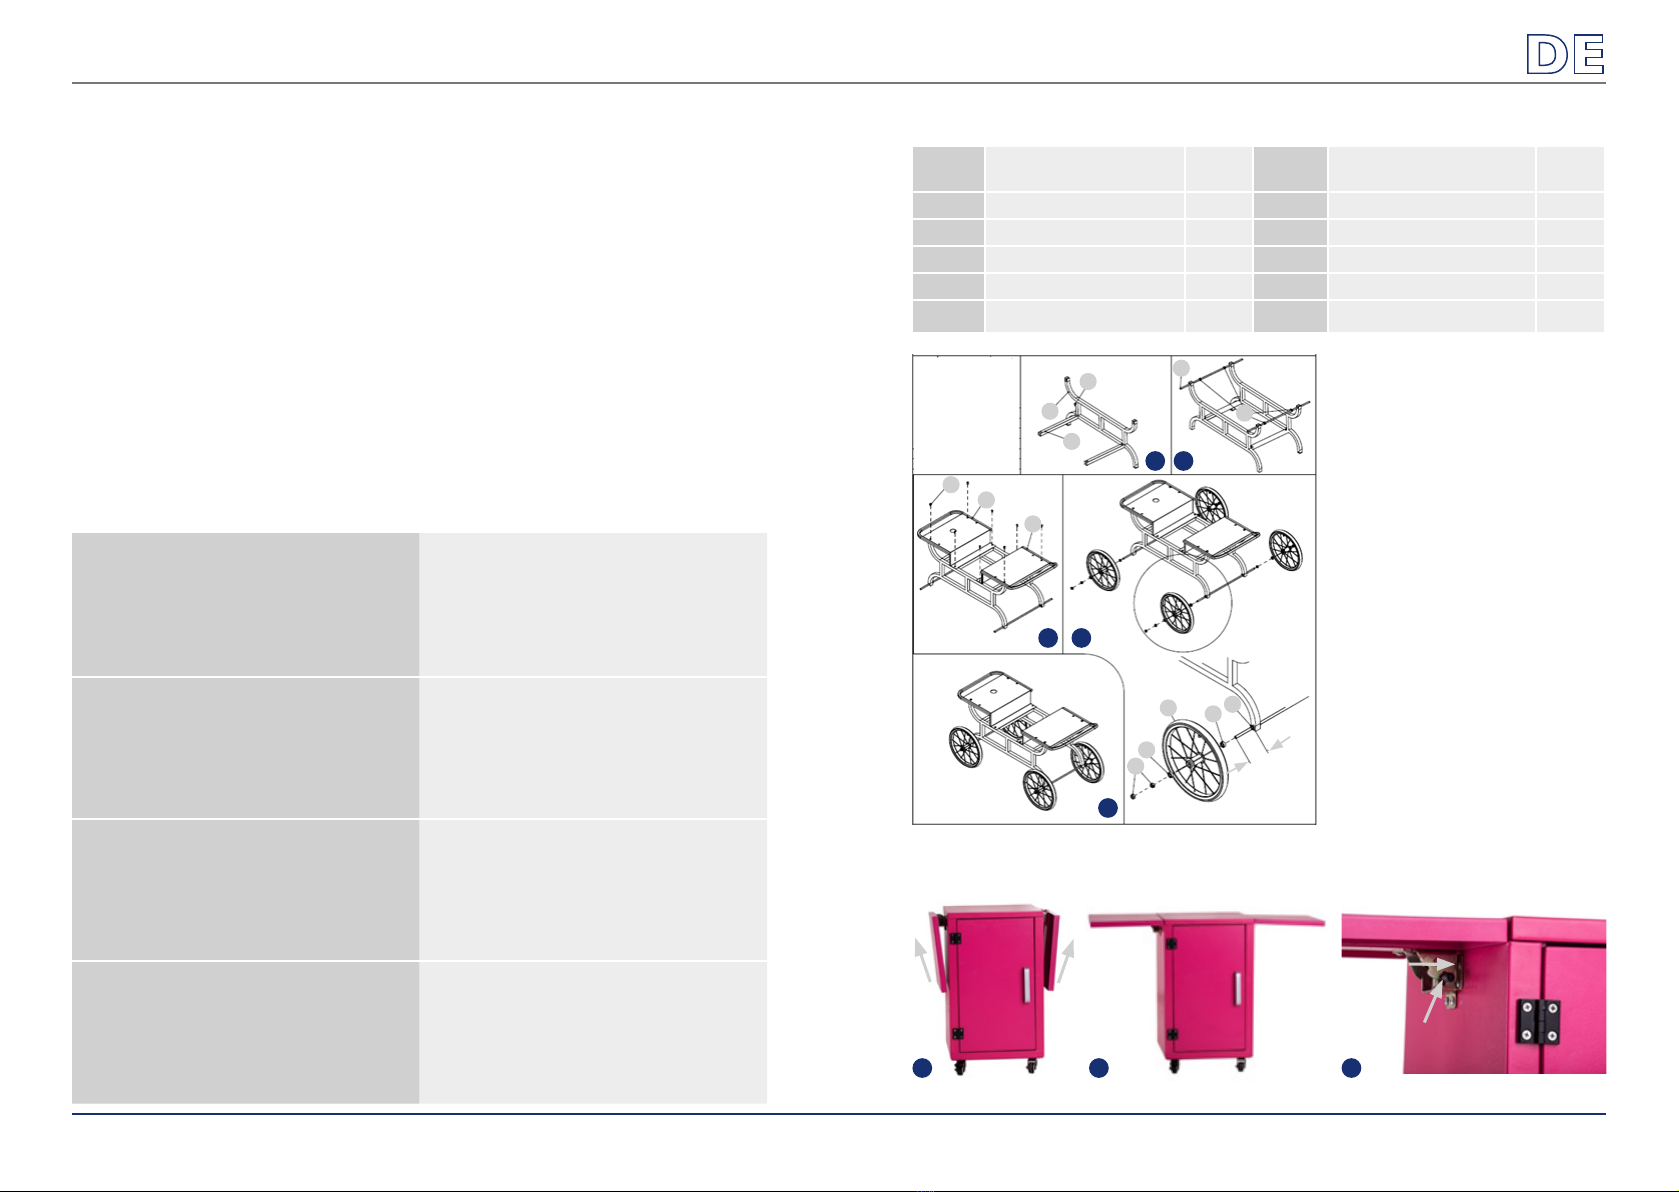
RCZT-01W
Liste des éléments
Numéro des
éléments
Dénomination Nombre Numéro des
éléments
Dénomination Nombre
1 Cadre 2 6 Roulement 8
2 Élément de liaison 2 7 Roues 4
3 Vis M6x10 8 8 Plaque latérale A 1
4Tiges letées M10 2 9 Plaque latérale B 1
5 Écrous M10 16 10 Vis M8x12 4
1. Reliez les deux cadres (1) avec les
éléments de liaison (2) grâce aux
vis (3) (ATTENTION! Ne vissez pas
trop fortement pour faciliter la suite
du montage).
2. Placez et xez les tiges letées (4)
avec 4 écrous (5) sur le cadre (1)
(ATTENTION! Ne vissez pas trop
fortement pour faciliter la suite du
montage).
3. Fixez et serrez les deux plaques
latérales (8, 9) avec une vis (10, 3)
(ATTENTION! Ne vissez pas trop
fortement pour faciliter la suite du
montage).
4. Vissez les écrous (5) aux tiges letées
(4) de sorte que les tiges ressortent
d‘au moins 95 mm des deux côtés.
Serrez-les ensuite avec les écrous
(5), placez ensuite un roulement (6),
une roue (7), un roulement (7) et
deux écrous (5).
5. Effectuez et xez tous les raccords
avec les vis.
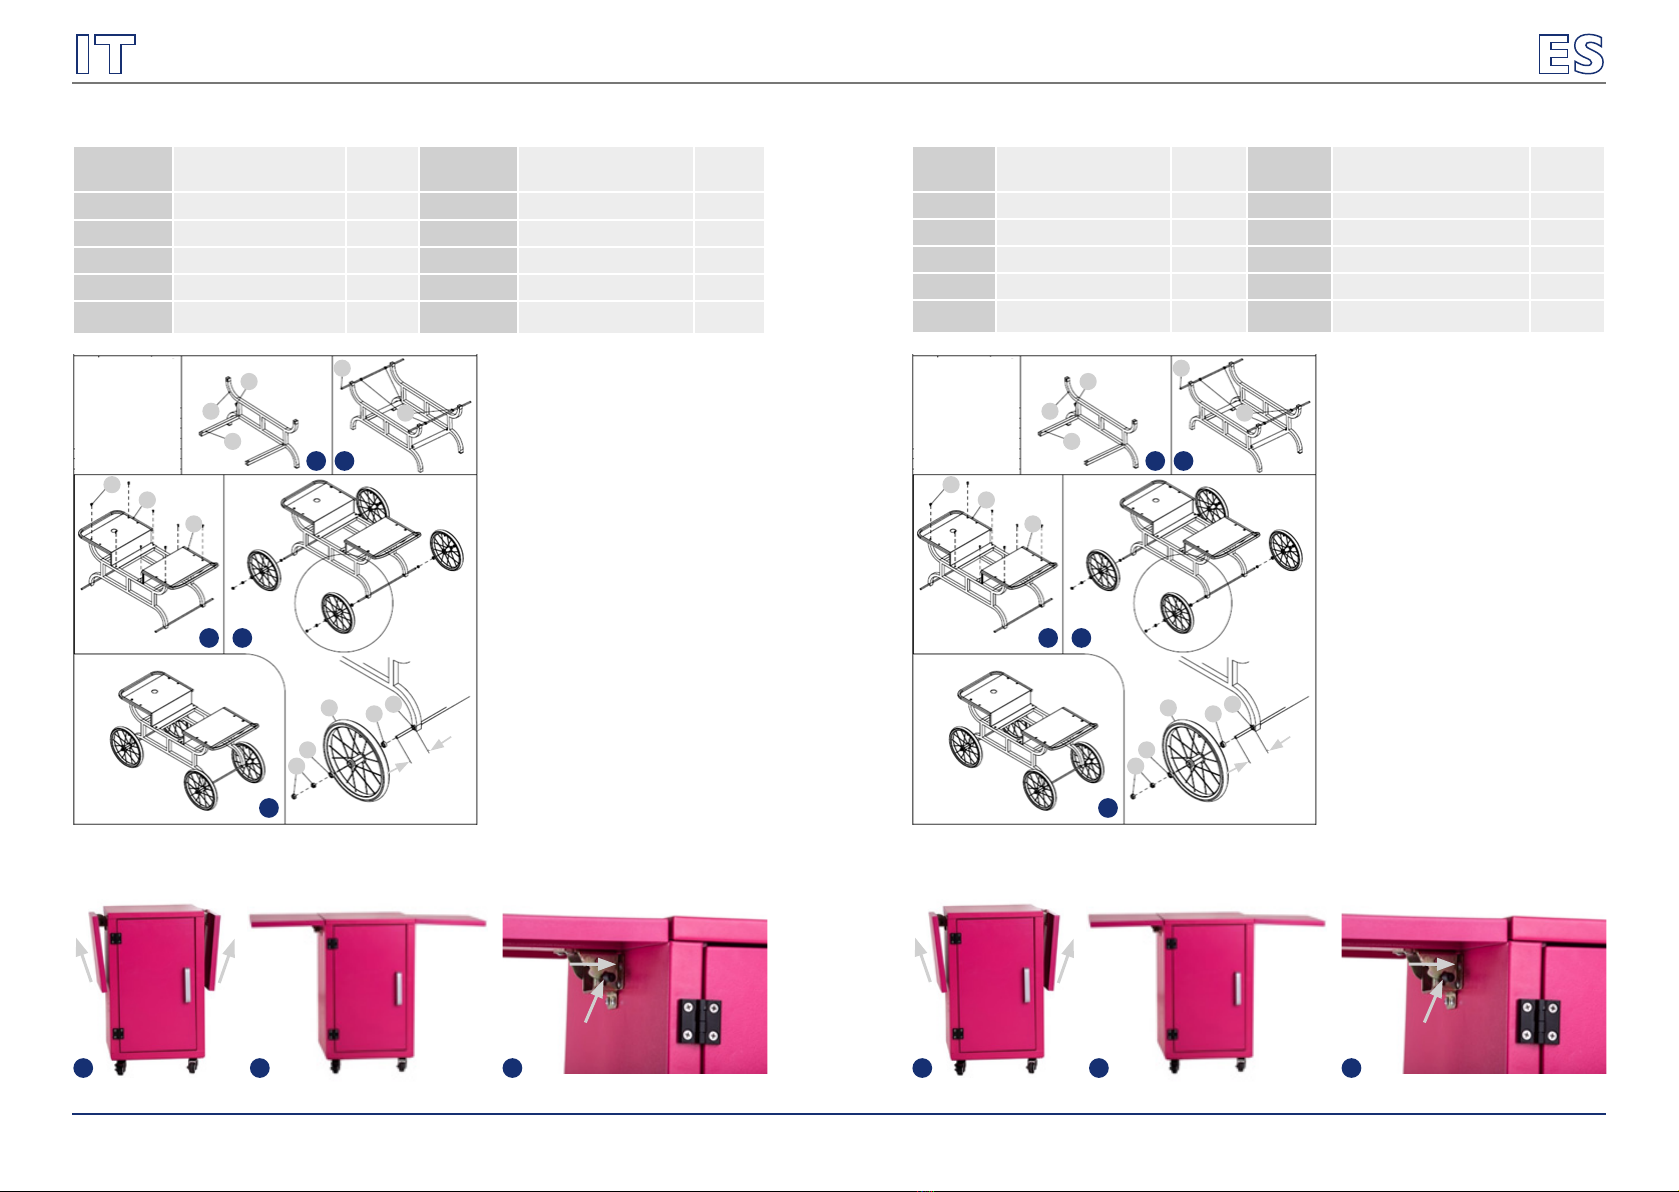
RCZT-02P
Montez les plaques latérales comme illustrés ci-dessous.
1 2
3 4
5
1
95mm
3
2
4
5
10 8
5
6
75
6
9
1 2 3
6Rev. 07.07.2017 7
Rev. 07.07.2017