manuals.online logo
Brands
  1. Home
  2. •
  3. Brands
  4. •
  5. Extech Instruments
  6. •
  7. Measuring Instrument
  8. •
  9. Extech Instruments MO25 User manual

Extech Instruments MO25 User manual

MO25‐EN‐SP‐DE‐FR‐IT‐PTv1.13/14
1
2
3
4
5
1
2
3
4
51
2
3
4
5

MO25MOISTUREMETERUSERGUIDE
Introduction
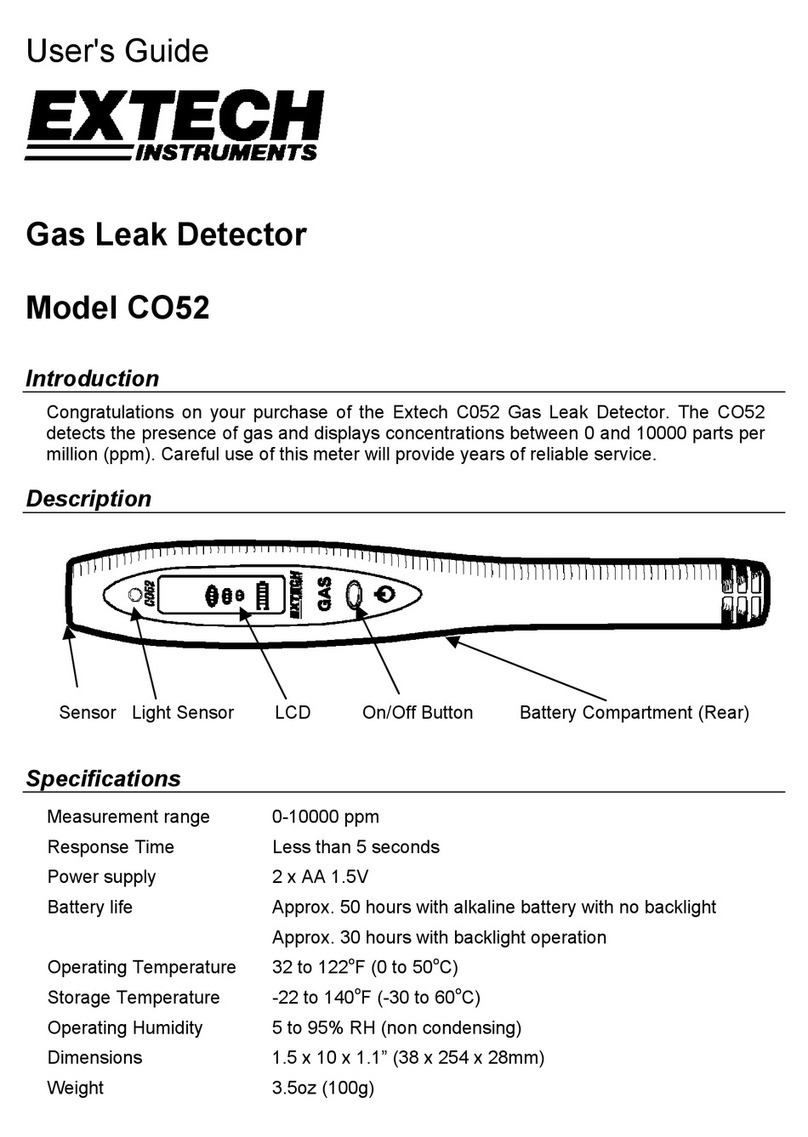
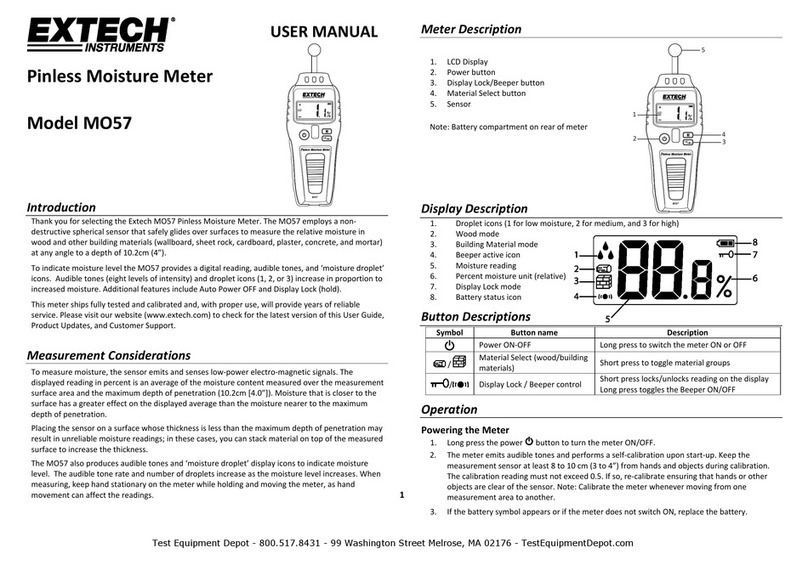
TheMO25measuresmoisture(%WME)inwood,brick,concrete,
paper,&fabricandtracesleakageinsidewalls,ceilings,andfloors.
Description
1. Contactpins(replaceable)
2. Power/Holdbutton
3. LEDlamps
4. Pocketclip
5. Batterycompartment
Operation
CAUTION:Electrodepinsareextremelysharp,usecare.Coverthepins
withtheprotectivecapwheninstrumentisnotinuse.
1. PressandholdPOWERbuttonfor3secondstoswitchONorOFF.
OneLEDlampflasheswhenthemeterisONidling.Themeter
automaticallyswitchesOFFafter1minute(ifreadingis<5%).
2. Removetheprotectivecaptoexposeelectrodepins.
3. Carefullypushthepinsintothematerialundertest.Insertthepins
perpendiculartowood’sfiberstructure.
4. Takeseveralreadingsinvariouslocationsforthebest
representationofthemoisturepresent.
5. ReadtheLEDlampsasfollows:
GreenLEDscaleindicateswoodmoisturefrom5.0to12.0%.
RedLEDscaleindicateswoodmoisturefrom14.0to40.0%.
6. PressPOWER/HOLDbuttonmomentarilytofreezeameasurement
reading.PressagaintodisabletheHoldfunction.
7. Replacetheprotectivecapwhenfinished.
BatteryCheckandReplacement
Whentheunitpowersupthestatusofthebatteryisindicatedbythe
5LEDlamps(5lampslit:fullpower;1lamplit:minimumpower).To
replacebatteryremovethePhillipsheadscrewtoaccessthebattery
compartmentandthenreplacethe1x1.5VDC‘AAA’battery.Please
securethecompartmentbeforeuse.
Specifications
DisplayDualscaleredandgreenLEDlamps
Measurementprinciple Electricalresistance
MeasurementRange 5to40%WME
ElectrodepinsIntegrated,replaceable
AutoPowerOFF After1minute(withreading<5%)
Powersupply1x1.5VDCAAAbattery
BatterystatusindicatorsLampsindicatestatusonpower‐up
MeterhousingImpact‐proofplastic
Dimensions136x25x21mm(5.4x1.0x0.8”)
Weight33g.(1.2oz.)withoutbattery

Copyright ©2014FLIRSystems,Inc.
Allrightsreservedincludingtherightofreproductioninwholeorinpartinanyform
www.extech.com


GUÍADELUSUARIOMEDIDORDEHUMEDADMO25
Introducción
ElMO25midehumedad(%WME)enmadera,ladrillo,
concreto/hormigón,papelytela,yrastreafugasdentrodeparedes,
techos,ypisos.
Descripción
1. Agujasdecontacto(reemplazables)
2. BotónTensión/Retención
3. LucesLED
4. Clipparabolsillo
5. Compartimientobatería
Operación
PRECAUCIÓN:Lasagujaselectrodosonextremadamentefilosas,usecon
cuidado.Cubralasagujasconlacubiertaprotectoracuandoelinstrumentono
estéenuso.
1. PresioneysostengaelbotónTENSIÓNdurante3segundospara
encenderyapagar.UnaluzLEDdestellacuandoelmedidorestá
encendidoenespera.Elmedidorautomáticamenteseapaga
despuésdeun(1)minuto(silalecturaes<5%).
2. Quitelacubiertaprotectoraparaexponerlasagujasdelelectrodo.
3. Cuidadosamenteinsertelasagujasenelmedidoraprueba.Inserte
lasagujasperpendicularesalaestructuradelafibradelamadera.
4. Tomevariaslecturasendiferentessitiosparalamejor
representacióndelahumedadpresente.
5. InterpretelaslámparasLEDlámparasdelasiguientemanera:
LaescalaLEDVerdeindicahumedadenmaderade5.0a12.0%.
LaescalaLEDRojoindicahumedadenmaderade14.0a40.0%.
6. PresionemomentáneamenteelbotónTENSIÓN/RETENCIÓNpara
inmovilizarlecturademedidas.Presionedenuevoparadesactivar
lafunciónderetención.
7. Reemplacelacubiertaprotectoraalterminar.
Pruebayreemplazodelabatería
Cuandolaunidadenciendeindicaelestadodelabateríamediantelas5luces
LED(5lucesencendidas:potenciatotal;1luzencendida:potenciamínima).Para
reemplazarlabateríaquiteelTornillocabezaPhillipsparaentraral
compartimientodelabateríayluegoreemplacelabatería1x1.5VCD‘AAA’.Por
favorcierrelatapadelcompartimientoantesdeusar.
Especificaciones
PantallaDobleescalalucesLEDrojoyverde
PrincipiodemediciónResistenciaeléctrica
Escalademedición5a40%WME
AgujaselectrodoIntegrado,reemplazable
ApagadoautomáticoDespuésde1minuto(conlectura<5%)
FuentedeenergíaBatería1x1.5VDCAAA
IndicadoresdeestadodelabateríaLaslucesindicanelestadoalencender
CajadelmedidorPlásticoapruebadeimpacto
Dimensiones136x25x21mm(5.4x1.0x0.8”)
Peso33g.(1.2oz.)sinbatería

Copyright ©2014FLIRSystems,Inc.
Reservadostodoslosderechos,incluyendoelderechodereproduccióntotaloparcialencualquiermedio
www.extech.com


MO25FEUCHTIGKEITSMESSER‐BEDIENUNGSANLEITUNG
Einleitung
DerMO25misstFeuchtigkeit(%WME)inHolz,Ziegelsteinen,Beton,Papier&
TextilienundspürtLacksimInnerenvonWänden,DeckenundBödenauf.
Beschreibung
1. Kontaktstifte(austauschbar)
2. Betrieb/Hold‐Taste
3. LED‐Lampen
4. Taschenclip
5. Batteriefach
BETRIEB
WARNUNG:DieElektrodenstiftesindextremscharf,bitteVorsichthandhaben.
DeckenSiedieStiftewährenddesNichtgebrauchsmitderSchutzkappeab.
1. HaltenSiediePOWER‐Taste3Sekundenlanggedrückt,umdasGerät
EIN‐oderAUSZUSCHALTEN.EineLED‐Lampeblinkt,wenndasGerätim
Ruhezustandist.DasGerätschaltetsichnach1Minuteautomatisch
AUS(beieinerAnzeigevon<5%).
2. EntfernenSiedieSchutzkappe,umdieElektrodenstiftefreizulegen.
3. SteckenSiedieStiftevorsichtigindaszumessendeMaterial.Führen
SiedieStiftedabeisenkrechtzurHolzfaserstrukturein.
4. FührenSiefüreineoptimaleMessungderFeuchtigkeitmehrere
MessungenanunterschiedlichenStellendurch.
5. ErläuterungderLED‐Anzeigen:
DiegrüneLED‐SkalaweistaufeineHolzfeuchtigkeitzwischen5,0und
12,0%hin.
DieroteLED‐SkalaweistaufeineHolzfeuchtigkeitzwischen14,0und
40,0%hin.
6. DrückenSiekurzdiePOWER/HOLD‐Taste,umdenMesswert
einzufrieren.Erneutdrücken,umdieHold‐Funktionzudeaktivieren.
7. BringenSiedieSchutzkappewiederan,wennSiefertigsind.
Batterieüberprüfenundersetzen
BeimEinschaltendesGerätswirdderBatteriestatusvonden5LED‐Lampen
angedeutet(5Lampenleuchten:Batterievoll;1Lampeleuchtet:minimale
Leistung).UmdieBatteriezuersetzen,entfernenSiedieKreuzschlitzschraube,
umdasBatteriefachzuöffnen.ErsetzenSiedanndie1x1,5VDC„AAA“Batterie.
SchließenSiedasBatteriefachvordemweiterenGebrauch.
TechnischeAngaben
LCD‐DisplayZweiteiligeroteundgrüneLED‐Lampen
MessprinzipElektrischerWiderstand
Messbereich 5bis40%WME
MessspitzenIntegriert,auswechselbar
AutomatischAUSNach1Minute(beieinerAnzeigevon<5%)
Energieversorgung1x1,5VDCAAABatterie
Batteriestatusanzeige:LampendeutenBatteriestatusbeimEinschaltenan
GehäusedesMessgerätesSchlagfesterKunststoff
Hauptgerät136x25x21mm(5,4x1,0x0,8Zoll)
Gewicht33g(1,2oz.)ohneBatterie


Copyright©2014FLIRSystems,Inc.
AlleRechtevorbehalteneinschließlichdesRechtsaufvollständigeoderteilweiseVervielfältigunginjeglicherForm
www.extech.com
MO25‐EN‐SP‐DE‐FR‐IT‐PTv1.13/14
1
2
3
4
5
1
2
3
4
5
1
2
3
4
5

HUMIDIMÈTRE,MODÈLEMO25‐MANUELD’UTILISATION
Introduction
LeMO25permetdemesurerletauxd’humidité(%WME)dansdubois,des
briques,dubéton,dupapieretdutissuetdedécelerdesfuitesdansdesmurs,
desplafondsetdesplanchers.
Description
1. Brochesdecontact(remplaçables)
2. BoutonPower/Hold
3. LampesLED
4. Clipceinture
5. CompartimentàPiles
Opération
ATTENTION:Lesbrochesd’électrodesontextrêmementpointues;faites
trèsattention.Recouvrezlesbrochesaveclecouvercledeprotection
lorsquevousn’utilisezpasl’appareil.
1. AppuyezsurleboutonPOWERetmaintenez‐leenfoncépendant3
secondespourmettrel’appareilSOUSouHORStension.Unelampe
LEDclignotelorsquel’appareilestenmodeveille.L’appareilsemet
automatiquementHORStensionauboutde1minute(encasde
lecture<5%).
2. Retirezlecouvercledeprotectionpourdécouvrirlesbroches
d’électrode.
3. Enfoncezlesbrochesavecprécautionaussiloinquepossibledansle
matériautesté.Insérezlesbrochesperpendiculairementàlastructure
defibredubois.
4. Effectuezplusieursrelevésàplusieursemplacementssurlematériau
pourobtenirunebonnereprésentationdutauxd'humiditéprésent.
5. InterprétezleslampesLEDcommesuit:
L’échelleLEDverteindiqueuntauxd’humiditédansleboissituéentre
5,0et12,0%.
L’échelleLEDrougeindiqueuntauxd’humiditédansleboissituéentre
14,0et40,0%.
6. AppuyezsurleboutonPOWER/HOLDpourfigeruncourtinstantune
lecturedemesure.Appuyezànouveausurceboutonpourdésactiver
lafonctiondemaintiendesdonnées.
7. Replacezlecouvercledeprotectionlorsquevousavezterminé.
Vérificationetremplacementdelapile
Lorsquel’appareilsemetsoustension,l’étatdelapileestindiquépar5lampes
LED(5lampesallumées:Pleinepuissance;1lampeallumée:puissance
minimum).Pourremplacerlapile,retirezlavisàtêtecruciformepouraccéder
aucompartimentàpile,puisremplacezla1xpile«AAA»1,5VDC.Veuillezbien
refermezlecompartimentavantd’utiliserl’appareil.
DonnéesTechniques
Descriptifdel’écran: LampesLEDrougeetverteàdoubleéchelle
Principedemesure Résistanceélectrique
Amplitudedemesure 5à40%WME
Pointes‐électrodesIntégrées,remplaçables
MisehorstensionAutomatiqueAuboutde1minute(aveclecture<5%)
Alimentation1xpileAAAde1,5VDC
Indicateurdel’étatdelapile:Leslampesindiquentl’étatlorsdelamisesoustension
Boîtierdel’appareilPlastiquerésistantauxchocs
Instrumentprincipal136x25x21mm(5,4x1,0x0,8po)
stockagePoids33g(1,2on)sanspile

Copyright©2014FLIRSystems,Inc.
Tousdroitsréservés,ycomprislareproductionpartielleoutotalesousquelqueformequecesoit
www.extech.com


IGROMETROMO25MANUALEUTENTE
Introduzione
L’igrometroMO25rileval'umidità(%WME)inlegno,mattoni,cemento,cartae
tessuti,eindividuaperditeall'internodipareti,soffittiepavimenti.
Descrizione
1. Pindicontatto(sostituibili)
2. PulsantePower/Hold
3. IndicatoriLED
4. Clipdatasca
5. VanoBatterie
Utilizzo
CAUTELA:glielettrodipinsonomoltoaffilati,maneggiareconcura.Coprireipin
conilcappuccioprotettivoquandolostrumentononèinuso.
1. TenerepremutoilpulsantePOWERper3secondiperaccendereo
spegnerelostrumento.UnodegliindicatoriLEDlampeggia
quandolostrumentoèaccesomainattivo.Lostrumentosispegne
automaticamentedopo1minuto(selaletturaè<5%).
2. Rimuovereilcappuccioprotettivoperesporreglielettrodipin.
3. Spingerecondelicatezzaipinnelmaterialesottopostoatest.
Inserireglielettrodipinperpendicolarmenteallastrutturadella
fibradellegno.
4. Eseguirevarieletture,indiversipunti,perottenerelamigliore
rappresentazionedell'umiditàpresente.
5. LeggeregliindicatoriLEDcomesegue:
ilLEDverdeindicaunapresenzadiumiditànellegnodal5,0al
12,0%.
ilLEDrossoindicaunapresenzadiumiditànellegnodal14,0al
40,0%.
6. PremereilpulsantePOWER/HOLDpercatturarelaletturadella
misurazione.Premerenuovamenteperdisattivarelafunzionedi
cattura.
7. Rimettereilcappucciodiprotezionequandosihaterminato.
Controlloesostituzionedellabatteria
Quandol'unitàèaccesa,lostatodellabatteriaèindicatoda5LED(5indicatori
accesi:batteriacarica;1indicatoreacceso:batteriascarica).Persostituirela
batteria,rimuoverelaviteacroceeaccederealvanobatterie,quindisostituire1
batteriaAAAda1,5VCC.Fissarecorrettamenteilcoperchiodelvanobatterie
primadell'uso.
Specifiche
DisplayIndicatoriLEDadoppialuce,rossaeverde
Principiodimisurazione Resistenzaelettrica
CampoMisurazione Dal5al40%WME
ElettrodipinIntegrato,sostituibile
SpegnimentoAutomaticoDopo1minuto(conlettura<5%)
Alimentazione1batteriaAAAda1,5VCC
IndicatoridistatobatteriaIndicanolostatodicarica
InvolucrostrumentoPlasticaaprovad'impatto
Dimensioni136x25x21mm(5,4x1,0x0,8”)
Peso33g(1,2oz.)senzabatteria
Copyright©2014FLIRSystems,Inc.
Tuttiidirittiriservati,compresoildirittoaqualsiasitipodiriproduzioneintotooinparte
www.extech.com

MEDIDORDEUMIDADEMO25‐GUIADOUSUÁRIO
Introdução
OMO25medeaumidade(%WME‐WoodMoistureEquivalent–‘umidade
equivalenteemmadeira’)emmadeira,tijolo,concreto,papel,tecidos,erastreia
vazamentosdentrodeparedes,tetosepavimentos.
Descrição
1. Pinosdecontato(substituíveis)
2. BotãodeAlimentação/Manter
3. LâmpadasLED
4. Clipedebolso
5. CompartimentoBateria
Funcionamento
AVISO:Ospinosdemediçãodoeletrodosãoextremamenteafiado,usecom
cuidadoCubraospinoscomatampaprotetoraquandooinstrumentonão
estiveremuso.
1. PressioneesegureobotãoPOWERpor3segundosparaLIGARou
DESLIGAR.UmalâmpadaLEDpiscaquandoomedidorestáligado
emmarchalenta.Omedidorsedesligaautomaticamenteapós1
minutose(sealeiturafor<5%).
2. Removaatampaprotetoraparaexporospinosdoeletrodo.
3. Empurrecuidadosamenteospinosparadentrodomaterialem
teste.Insiraospinosperpendicularmenteàestruturadafibrada
madeira.
4. Tomeváriasleiturasemvárioslocaisparaobteramelhor
representaçãodaumidadepresente.
5. LeiaaslâmpadasLEDdaseguinteforma:
AescalaLEDverdeindicaumidadedamadeirade5,0a12,0%.
AescalaLEDvermelhaindicaumidadedamadeiradede14,0a
40,0%.
6. PressioneobotãoALIMENTAÇÃO/MANTERmomentaneamente
paracongelarumaleiturademedição.Pressionedenovopara
desativarafunçãoManter.
7. Recoloqueatampaprotetoraquandoterminar.
Verificaçãoesubstituiçãodabateria
Quandooaparelhoéenergizado,ostatusdabateriaéindicadopelas5
lâmpadasLED(5lâmpadasacesas:potênciamáxima;1lâmpadaacesa:potência
mínima).ParasubstituirabateriaremovaoparafusodecabeçaPhillipspara
acessarocompartimentodabateriae,emseguida,troqueabateria1x1.5VCC
‘AAA’.Fixeocompartimentoantesdeusar.
Especificações
Tela

LâmpadasLEDdeescaladuplavermelhaseverdes
Princípiodamedição

Resistênciaelétrica
Faixademedição

5a40%WME
PinosdoEletrodo

Integrados,substituíveis
DesligamentoAutomático(AutoPowerOff)

Após1minuto(comaleitura<5%)
FontedeEnergia

1x1.5VDCAAAbattery
Indicadoresdestatusdabateria

Aslâmpadasindicamostatusnaenergização
Caixaexternadomedidor

Plásticoàprovadeimpato
Dimensõens

136x25x21mm(5,4x1,0x0,8”)
Peso

33g.(1.2oz.)semabateria
Copyright©2014FLIRSystems,Inc.
Todososdireitosreservadosincluindoodireitodereproduçãonotodoouempartesobqualquerforma
www.extech.com

Other Extech Instruments Measuring Instrument manuals

Extech Instruments CO10 User manual

Extech Instruments

Extech Instruments CO10 User manual

Extech Instruments LT45 User manual

Extech Instruments

Extech Instruments LT45 User manual

Extech Instruments 401027 User manual

Extech Instruments

Extech Instruments 401027 User manual

Extech Instruments SDL700 User manual

Extech Instruments

Extech Instruments SDL700 User manual

Extech Instruments RPM33 User manual

Extech Instruments

Extech Instruments RPM33 User manual

Extech Instruments Oyster-16 User manual

Extech Instruments

Extech Instruments Oyster-16 User manual

Extech Instruments 461995 User manual

Extech Instruments

Extech Instruments 461995 User manual

Extech Instruments AN250W User manual

Extech Instruments

Extech Instruments AN250W User manual

Extech Instruments 380560 User manual

Extech Instruments

Extech Instruments 380560 User manual

Extech Instruments ExStik PH100 User manual

Extech Instruments

Extech Instruments ExStik PH100 User manual

Extech Instruments AN310 User manual

Extech Instruments

Extech Instruments AN310 User manual

Extech Instruments MO297 User manual

Extech Instruments

Extech Instruments MO297 User manual

Extech Instruments HDV7C-55-HD-1 User manual

Extech Instruments

Extech Instruments HDV7C-55-HD-1 User manual

Extech Instruments MO220 User manual

Extech Instruments

Extech Instruments MO220 User manual

Extech Instruments MO290-NISTL User manual

Extech Instruments

Extech Instruments MO290-NISTL User manual

Extech Instruments LT250W User manual

Extech Instruments

Extech Instruments LT250W User manual

Extech Instruments AN100 User manual

Extech Instruments

Extech Instruments AN100 User manual

Extech Instruments 407510 User manual

Extech Instruments

Extech Instruments 407510 User manual

Extech Instruments MO53 User manual

Extech Instruments

Extech Instruments MO53 User manual

Extech Instruments EasyView EA33 User manual

Extech Instruments

Extech Instruments EasyView EA33 User manual

Extech Instruments CO40 User manual

Extech Instruments

Extech Instruments CO40 User manual

Extech Instruments SDL350-NIST User manual

Extech Instruments

Extech Instruments SDL350-NIST User manual

Extech Instruments SDL800-NIST User manual

Extech Instruments

Extech Instruments SDL800-NIST User manual

Extech Instruments EC600 User manual

Extech Instruments

Extech Instruments EC600 User manual

Popular Measuring Instrument manuals by other brands

Unit UTD4000 Series operating manual

Unit

Unit UTD4000 Series operating manual

Aqualytic AL100 instruction manual

Aqualytic

Aqualytic AL100 instruction manual

Silvercrest KH 2610 operating instructions

Silvercrest

Silvercrest KH 2610 operating instructions

Sofar solar CHINT DDSU666 Series Quick installation guide

Sofar solar

Sofar solar CHINT DDSU666 Series Quick installation guide

red lion PAX2D user manual

red lion

red lion PAX2D user manual

Blue I HYDROGUARD HG-202 user manual

Blue I

Blue I HYDROGUARD HG-202 user manual

Co2meter SAN-0001 manual

Co2meter

Co2meter SAN-0001 manual

Bin Master SMARTBOB TS1 Installation and operating instructions

Bin Master

Bin Master SMARTBOB TS1 Installation and operating instructions

MPFiltri ICM Guide

MPFiltri

MPFiltri ICM Guide

Technoline WS 7060 manual

Technoline

Technoline WS 7060 manual

Impact Subsea ISA500 Installation & operation manual

Impact Subsea

Impact Subsea ISA500 Installation & operation manual

B+K precision 309 instruction manual

B+K precision

B+K precision 309 instruction manual

Phase Technologies JFA-70X user guide

Phase Technologies

Phase Technologies JFA-70X user guide

AutoMeter Remy BCT-200J instruction manual

AutoMeter

AutoMeter Remy BCT-200J instruction manual

Laser Works LW450SPI operating instructions

Laser Works

Laser Works LW450SPI operating instructions

AutoMeter RC-300 Operator's manual

AutoMeter

AutoMeter RC-300 Operator's manual

Pro's Kit MT-3112 user manual

Pro's Kit

Pro's Kit MT-3112 user manual

red lion CUB4RT manual

red lion

red lion CUB4RT manual

manuals.online logo
manuals.online logoBrands
  • About & Mission
  • Contact us
  • Privacy Policy
  • Terms and Conditions

Copyright 2025 Manuals.Online. All Rights Reserved.