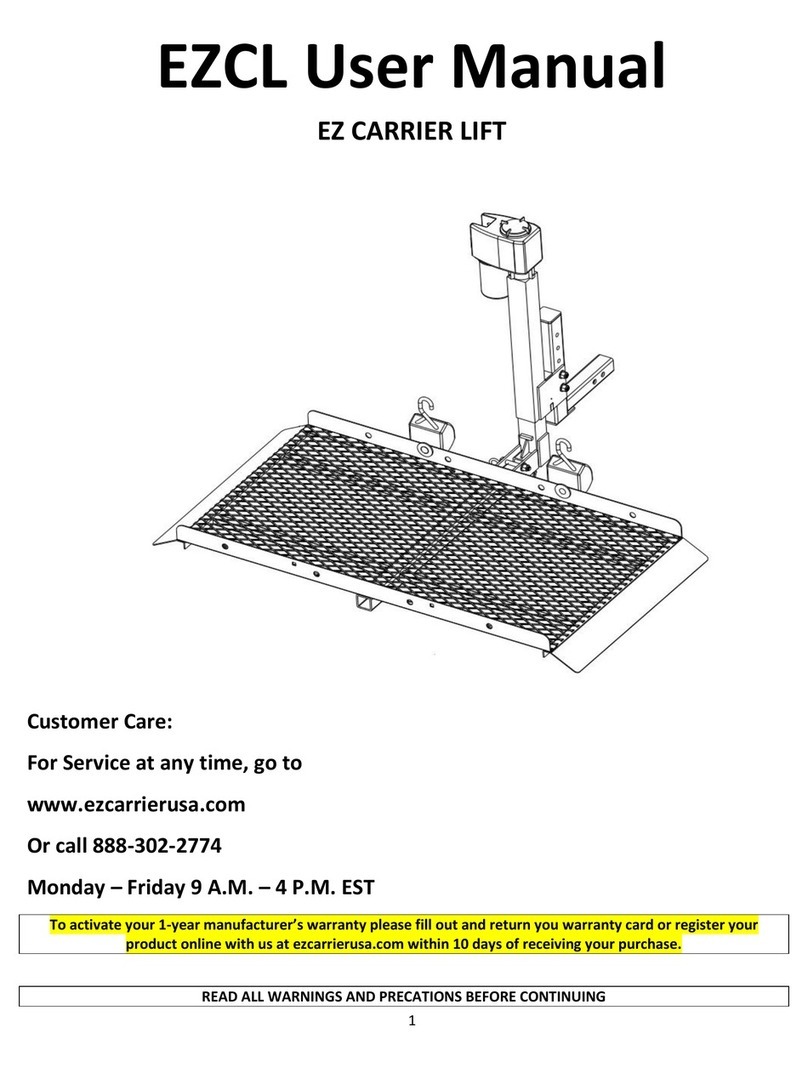
EZ Carrier EZCLA User manual

1
EZCLA User Manual
EZ CARRIER LIFT AUTOMATIC
Customer Care:
For Service at any time, go to
www.ezcarrierusa.com
Or call 888-302-2774
Monday –Friday 9 A.M. –4 P.M. EST
To activate your 1-year manufacturer’s warranty please fill out and return you warranty card or register your
product online with us at ezcarrierusa.com within 10 days of receiving your purchase.

2
READ ALL WARNINGS AND PRECAUTIONS BEFORE CONTINUING
TABLE OF CONTENTS
IMPORTANT SAFETY WARNINGS &
PRECAUTIONS
PAGE 3
INSTALLATION
PAGE 4
PART IDENTIFCATION CHART
PAGE 5
ASSEMBLY –CLASS II RECIEVER ATTACHMENT
PAGE 6
ASSEMBLY –CLASS III RECIEVER ATTACHMENT
PAGE 7
ASSEMBLY –ATTACHING SWING-AWAY OPTION
PAGE 8
ASSEMBLY –MOUNTING THE ACTUATOR AND H-
FRAME
PAGE 9
ASSEMBLY –ATTACHING THE PLATFORM
PAGE 10
ASSEMBLY –CONNECTING THE WIRE HARNESS
PAGE 11
ASSEMBLY –ATTACHING THE CARGO BUCKLE
PAGE 12
OPERATING YOUR CARRIER –RAISING AND
LOWERING THE PLATFORM AND FOLDING INTO
THE STORAGE POSITION
PAGE 13
FAQS
PAGE 14
NOTES
PAGE 15
RETURN AND CANCELLATION POLICY
PAGE 16
LIMITED WARRANTY
PAGE 17
LIABILITY DISCLAIMER
PAGE 19
Dear Customer,
Thank you for your purchase of an EZ Carrier product! We truly appreciate your business and look forward to supporting
you as a customer. We are highly confident you will be satisfied with your carrier no matter its application. From
transporting mobility devices to outdoor recreational equipment and gear to general cargo carrying, we are sure your EZ
Carrier product will meet all your needs.
Before continuing, make sure to CAREFULLY READ AND FAMILIARIZE yourself with this instruction manual, as it provides
crucial instructions for proper use and maintenance of your EZ Carrier product.
Technical specifications, supporting documents, and operator’s manuals for your product can be found online at
www.ezcarrierusa.com.
You can reach us directly by email at service@ezcarrierusa.com or by phone at (888) 302-2774.

3
IMPORTANT SAFETY WARNINGS & PRECAUTIONS
IMPORTANT!:
READ ALL WARNINGS AND PRECATIONS BEFORE CONTINUING
•Always Inspect your carrier prior to operation, checking to confirm no parts are worn or damaged. If ANY
parts are worn or damaged, DO NOT USE THE CARRIER. Failure to properly tighten bolts and insert pins
where required may cause assembly failure, serious injury or death. Always check that all bolts are securely
fastened and pins are locked in place before use of the product. Ensure you always secure your mobility
device before driving.
•A carrier and cargo add weight to the vehicle and improperly or under inflated tires may cause unexpected
movement, serious injury or death. Always check the vehicle tires are properly inflated before using the
carrier.
•A carrier and cargo add weight to the vehicle and lengthens the time and distance that it takes to merge
with or pass other vehicles as well as stopping your vehicle. Failure to allow additional time and distance for
these actions may result in an accident, serious injury or death. Review the guidelines provided by your
automobile manufacturer’s manual and adjusts your riding accordingly, allowing extra time and distance for
these actions. Likewise, always drive slowly over potholes, unpaved roads, railroad tracks, speed bumps or
uneven terrain. Failure to follow these precautions WILL damage your carrier and WILL NOT BE covered by
the warranty.
•Vehicles parked on an incline or too close to curbs, steps and uneven surfaces may cause unexpected
movement of the load or load tip over resulting in physical damage, serious injury or death. Always park the
vehicle on a flat surface and engage the parking brake before placing a load on the carrier and moving the
platform. Check the area around the platform is clear of the curb, flat and free of debris. Never stand
between the vehicle and the platform.
•Positioning any part of your body close to the moving platform when loading and unloading may cause
serious injury or death. Always maintain a safe distance away from the moving platform and all body parts.
Never lie or reach underneath the platform without adequately blocking the space between the platform
and ground.
•Use of the carrier for purposes other than the stated intent may cause physical damage, serious injury or
death. Never allow children to climb, play or ride on the carrier. Do not place animals or unstable loads on
the carrier. Do not overload the carrier, check the maximum weight capacity for your hitch class and vehicle.
Remember to drive with EXTREME CARE while transporting your mobility device on the carrier to avoid
damages to persons or property.
•When manually raising or lowering the platform the crank handle may unexpectedly spin when released
causing serious injury or death. Always unplug the wiring and maintain control of the emergency crank
handle and keep body parts (head, eyes etc.) away from the handle. NEVER push the rocker switch to the
ON position when using the crank handle.
•Movement of the carrier assembly and platform may create pinch points that could cause serious injury or
death. Always keep all body parts, long hair, loose clothing and jewelry away from moving parts when using
the carrier.
•Changing or adding unauthorized parts to the carrier and removing parts from the carrier may adversely
affect the functionality of the product. These actions are not recommended and will void the warranty

4
INSTALLATION
PROFESSIONAL INSTALLATION IS REQUIRED. When installing your carrier practice safe working habits. NEVER attempt
to install the lift without two persons present. Wear all proper personal protective equipment (gloves, safety glasses,
etc.) during installation. To avoid damage to parts and hardware do not use power tools to assemble or install your
carrier. Prior to assembly locate your hardware bag and verify its contents with the provided hardware list before
continuing. Do not dispose of any packing materials until installation has been completed. Installation should not be
performed in inclement weather that endangers the installer’s safety or ability to perform the task in a safe manner.
DO NOT continue with installation of the carrier if the vehicle or hitch has severe wear, rust, structural damage, a
possible suspension issue or the battery condition or age are in question. If you fail to follow this precaution, you do so
knowing your warranty will by VOID. If at any time you have concerns or question about installation DO NOT continue
with installation, and instead seek assistance from a qualified technician, as failure to properly install the carrier can lead
to property damage and serious personal injury.
IMPORTANT!:
EZ Carrier is not liable for any damages, injuries or deaths due to improper installation. Please remember to always
inspect your carrier for loose bolts, pins, wear or damage prior to use.
Wrench (9/16”, 5/8”, 3/4”, 7/8”)
Socket Wrench (9/16”, 5/8”, 3/4”, 7/8”)
Allen Hex Wrench (5/32”)
Phillips Screwdriver
Pliers or Crimping Tool
Wire Strippers
Heat Gun
Tape Measure

5
PART IDENTIFCATION CHART
Before reading further please familiarize yourself with the parts that are labeled in the drawing below:

6
ASSEMBLY –CLASS II RECIEVER ATTACHMENT
WARNING!:
Failure to properly tighten bolts and insert pins where required may cause assembly failure, serious injury or death.
Always check that all bolts are securely fastened and pins are locked in place before use of the product.
Class II
1.) Place the collar on the 3/8 Hex Head Bolt
2.) Insert the Receiver Attachment Connector into the receiver hitch.
3.) Slide the Receiver Attachment into the hitch receiver on the vehicle and align the holes between the two. (Note:
It is recommended that you align the holes to the second hole on the arm).
4.) Place the washer over the threaded end of the bolt and screw the nut onto the bolt.
5.) Using a 9/16 wrench and socket wrench, tighten the nut and bolt with a wrench until the Attachment is securely
fastened to the receiver hitch. Unscrew the spring nut from the bolt.

7
ASSEMBLY –CLASS III RECIEVER ATTACHMENT
WARNING!:
Failure to properly tighten bolts and insert pins where required may cause assembly failure, serious injury or death.
Always check that all bolts are securely fastened and pins are locked in place before use of the product.
1.) Remove the cotter pin from the Silent Hitch Pin™.
2.) Unscrew the spring nut from the pin.
3.) Insert the spring nut into the shank tube of the Receiver Attachment. Align the spring and threads on the spring
nut with the shank tube holes (Note: It is recommended that you align the spring nut to the second hole on the
arm).
4.) Slide the Receiver Attachment into the hitch receiver on the vehicle
5.) and align the holes between the two.
6.) Insert the pin, split locking washer and washer into the spring nut and screw tight. Using a 7/8 wrench or socket,
the pin should be tightened between 30 and 60 ft-lb of torque (e.g., similar to tightening a lug nut on a car
wheel).
7.) Remove the cap from the lock and use the provided keys to secure the lock onto the pin. Pull on the lock to
check that it is securely fastened.
8.) Replace the cap on the lock to protect the internal mechanism in the lock from the elements when not in use.

8
ASSEMBLY –ATTACHING SWING-AWAY OPTION
WARNING!:
NEVER open the Swing-Away with a load on the carrier. You will damage the Swing-Away and carrier while also
potentially damaging the vehicle and the mobility device. Any of these actions will VOID your warranty.
WARNING!:
DO NOT open the Swing-Away on unleveled ground. Opening the Swing-Away on unleveled ground may cause you
to lose control of the carrier, resulting in personal injury and damage to property.
WARNING!:
When operating the Swing-Away be sure to stay clear of moving parts and pinching points to avoid personal injury.
The clevis pin must be installed and locked in the Swing-Away securely before transit to avoid damage and injury.
1.) Remove pre-installed hardware from the Swing-Away mounting bracket (1/2 x 3.5 hex bolts, washers and lock
nuts).
2.) Align the holes on the Swing-Away mounting bracket with the holes on the Receiver Attachment.
3.) Insert the 1/2 x 3.5 bolt and washer into the upper holes. Attach the washer and nut but do not
a. tighten at this point.
4.) Adjust the tilt of the Swing-Away by turning the adjustment bolt until you have the desired angle (Note: It is
recommended the top of the Swing-Away tilts slightly towards the vehicle). Tighten the nut on the adjusting bolt
to secure the setting of the adjusting bolt.
5.) Insert the second 1/2 x 3.5 hex bolt with the washers and nut into the lower slotted holes.
6.) Using a 3/4 wrench and socket wrench, firmly tighten the nuts on the 1/2 x 3.5 hex bolts.
7.) Connect the wiring harness from the Swing-Away to the quick-connect on the Powerhead.

9
ASSEMBLY –MOUNTING THE ACTUATOR AND H-FRAME
IMPORTANT!:
The Actuator has 18” or 24” of travel. Position the Lift Assembly as high as possible, typically the distance from the
ground to the upper bolt is as follows: 18” Actuator: 24 to 26 inches or 24” Actuator: 30 to 32 inches.
1.) Align the holes on the Actuator with the holes on the Receiver Attachment (or optional Swing-Away).
2.) Insert the 1/2 x 3.5 bolt and washer into the upper holes. Attach the washer and nut but do not tighten at this
point.
3.) Adjust the tilt of the Actuator by turning the adjustment bolt until you have the desired angle (Note: It is
recommended the top of the Actuator tilts slightly towards the vehicle). Tighten the nut on the adjusting bolt to
secure the setting of the actuator.
4.) Insert the second 1/2 x 4 hex bolt with the washers and nut into the lower, slotted holes.
5.) Using a 3/4 wrench and socket wrench, firmly tighten the nuts on the 1/2 x 4 hex bolts.

10
ASSEMBLY –ATTACHING THE PLATFORM
1.) Unscrew the access cap from top of the Powerhead and insert the square head end of the Manual Crank Handle
onto the post inside the Powerhead (Note: If the Crank Handle is not available a 3/8 drive extension can be
used).
2.) Rotate the crank clockwise to lower the Actuator and H-Frame to approximately 6 inches above the ground.
3.) Place the Platform on top of the H-Frame so the EZ Carrier stickers face away from the vehicle.
4.) Align the four square holes in the Platform with the holes in the H-Frame.
5.) Insert each of the 3/8 x 1 carriage bolts through the square holes in the platform.
6.) From underneath the H-Frame, place the washers and lock nuts onto
a. the bolts.
7.) Using a 9/16 wrench or socket wrench firmly tighten the nuts.
8.) Attach the included safety reflectors to the platform

11
ASSEMBLY –CONNECTING THE WIRE HARNESS
WARNING!:
Failure to have a fuse between the battery and Powerhead may result in damage to the Powerhead. You must have
a 30-amp inline fuse (INCLUDED) between the battery and the Powerhead or damage to the Powerhead will not be
covered under the warranty.
1.) Run the Wire Harness from the rear of the vehicle under the car to the battery –Make sure to properly secure
the Wire Harness to the underside of the vehicle with zip ties.
2.) Trim the Wire Harness to the proper length once it has been secured to the underside of the vehicle.
3.) Split the gray coating down the middle to expose the black and white wire. Using wire strippers remove
approximately 1/8 to 1/4 of an inch from both the black and white wire.
4.) With crimping tool or pliers crimp the Orange Fuse Line onto the black wire and heat the yellow permaseal
connector with a heat gun until it completely seals. Secure the Orange Fuse Line to the Positive (+) terminal of
the battery.
5.) Crimp and solder an eye terminal on the white ground wire and secure the ground wire to the frame of the
vehicle near the battery.
6.) Connect the quick-connect from the Powerhead to the quick-connect at the rear of the vehicle.

12
ASSEMBLY –ATTACHING THE CARGO BUCKLE
1.) Insert the 7/16-14 X 1 carriage bolt into the square hole.
2.) Place the 5/8 washer over the carriage bolt.
3.) Place the carriage bolt through the cargo buckle.
4.) Place the lock nut on the screw and firmly tighten using a 5/8 wrench or socket wrench.
5.) Confirm that the cargo buckle is securely attached.

13
OPERATING YOUR CARRIER –RAISING AND LOWERING THE PLATFORM AND FOLDING INTO
THE STORAGE POSITION
WARNING!:
The Lift Arm will release from the “V” bracket when the platform is lowered. When raising the platform to fold and
store, guide the Lift Arm into the “V” bracket using the rubber handle. When operating your carrier be sure to stay
clear of moving parts and pinching points to avoid personal injury. NEVER set the Lift arm in the “V” bracket while
the cargo is loaded on the carrier.
WARNING!:
Platform must be all the way down to load mobility devices. Make sure to stay away from uneven surfaces curbs,
steps, etc. that may cause the platform to tip or be off balance.
1.) Raise, or lower, the carrier until you are able to guide the Lift Arm into the “V” bracket.
2.) With the Lift Arm set in the “V” bracket, use the toggle switch and raise the platform up until it is in the storage
position.
3.) With the Lift Arm set in the “V” bracket, use the toggle switch and lower the platform until the platform rests
evenly on the ground.
4.) Load your cargo and secure it to the platform
5.) Raise the Carrier upward until the Powerhead reaches the end of its travel. DO NOT guide the Lift Arm into the
“V” bracket with a load on the carrier. Instead let the hexagon shaped contact point on the Actuator lock into
position on the H-Frame to hold the load in a stable position. You will hear a built in torque limiter click when
you have reached the end of travel distance. PROLONGED OPERATION OF THE TORQUE LIMITER IS NOT
RECOMMENDED.

14
FAQS
How do I clean and maintain my carrier to get the longest life and best performance?
Prior to each use, inspect the carrier for any wear or damage –immediately address any concerns as wear
or damage to the carrier can cause property damage or severe personal injury. Routinely hand wash your
carrier with water to remove salt, dirt and other road debris to prolong the life of your carrier. At regular
interval (6 months –1 year depending on environmental conditions) grease any moving parts.
The powdercoat on my carrier has become scratched, chipped, etc. What should I do?
Wear on powdercoat is expected during the life of the carrier and is only cosmetic. Your powdercoat finish
can be touched up with a quality aerosol paint as needed.
My lift will not go up or down
The motor is dead, or
There is a mechanical bind in the actuator that the motor cannot overcome. First unplug the quick-
connect from the Powerhead. To try and free the bind, use the provided manual override crank handle to
move the lift up or down. Once you have confirmed the actuator moves retry with the motor. If the lift
moves up and down, you have freed the bind and the lift will function properly. Reconnect to quick-
connect to the Powerhead. If your lift does not move up and down with the power of the motor it will
need to be replaced.
I need to remove or install a Powerhead on the Actuator
The Power head can be removed from your unit by first unplugging the quick connect from the
powerhead. Next, unscrew the ground screw from the Powerhead to the Actuator using a Phillips
screwdriver. After all wiring has been disconnected, use a 5/32 Allen key to undo the 3 set screws holding
the Powerhead to the Actuator and pull the unit off. To install a Powerhead, first using the Manual Crank
Handle align the keyway in the top of the Actuator with the posts on the Powerhead so that the toggle
switches are on the driver’s side of the vehicle. Back out the set screws in the Powerhead so that they do
not interfere with placing the Powerhead on the Actuator. Slip the Unit onto the actuator and tighten the
3 set screws with a 5/32 Allen key. Install the ground wire on the side of the actuator with a Phillips screw
and screw driver. Connect the quick connect from the Powerhead to the power supply. Your Powerhead
unit is now installed.

15
NOTES
__________________________________________________________________________________________________
__________________________________________________________________________________________________
__________________________________________________________________________________________________
__________________________________________________________________________________________________
__________________________________________________________________________________________________
__________________________________________________________________________________________________
__________________________________________________________________________________________________
__________________________________________________________________________________________________
________________________________________________________________________________________________
__________________________________________________________________________________________________
__________________________________________________________________________________________________
__________________________________________________________________________________________________
__________________________________________________________________________________________________
__________________________________________________________________________________________________
__________________________________________________________________________________________________
__________________________________________________________________________________________________
__________________________________________________________________________________________________

16
RETURN AND CANCELLATION POLICY
Return Policy
In an effort to keep our prices as low as possible, we do not build extra fees for returns into our prices. We are happy to
accommodate customers who wish to return a product, however we must recover the costs we have incurred as a
result. Please read our policy in its entirety before you purchase a carrier so that there is a mutual understanding when
you make your purchase. Thank you! When your new product arrives you have 10 days to inspect it for any defects or
damage. If there are any defects or damage, the manufacturer will repair it at no cost to you, or replace it at the
manufacturer’s option. The item to be returned must be in new condition, with original packaging, instructions, and
warranty material.
If the product is delivered and there are no defects in materials or workmanship, but you do not like it for any reason,
you have 10 days following delivery to return it. Simply call our customer service number at 888-302-2774 and let us
know what it is you want to return. We will send you a Return Authorization Release Form. Upon the return of your
signed form we will issue a Return Authorization Number. You the customer are responsible for packaging and shipping
the product to us. If you do not have the original box one may be purchased from us, at the cost of the box plus
shipping. Once received at the manufacturer’s facility in like new condition, we will refund your purchase price of the
product, less a 20% restocking fee and the original outbound freight charges. If original shipping fees cannot be
established, we will use our current shipping rates.
Cancellation Policy
Our products are normally in stock and we try to ship the same day we receive your order. If you need to cancel an order
for any reason, please notify us as soon as possible. If we have not shipped your order, there is no fee for cancellation,
but if your order has already shipped, our return policy, as stated above, is in effect. This is due to the fact that the item
must be re-packaged once the shipper has returned it to us, and we incur shipping charges outbound and inbound for
shipping either way.

17
Disclaimer of implied warranties. EXCEPT FOR THE EXPRESS WARRANTIES SET FORTH HEREINAFTER IN THE SECTION
TITLED “LIMITED WARRANTY”, SELLER MAKES NO WARRANTY WHATSOEVER REGARDING THE GOODS, INCLUDING ANY
(1) WARRANTY OF MERCHANTABILITY; OR (2) WARRANTY OF FITNESS FOR A PARTICULAR PURPOSE; WHETHER ARISING
BY LAW, COURSE OF DEALING, COURSE OF PERFORMANCE, USAGE OF TRADE, OR OTHERWISE. BUYER ACKNOWLEDGES
THAT IT HAS NOT RELIED ON ANY REPRESENTATION OR WARRANTY MADE BY SELLER, OR ANY OTHER PERSON ON
SELLER’S BEHALF, EXCEPT AS SPECIFICALLY PROVIDED IN THE SECTION TITLED “LIMITED WARRANTY” OF THIS
AGREEMENT.
LIMITED WARRANTY
To activate your Limited Warranty please fill out and return you warranty card or register your product online with us at
ezcarrierusa.com within 10 days of receiving your purchase.
Limited Warranty. Seller warrants to Buyer that:
1. For a period of one year from the date of shipment of goods (the Warranty Period), such goods will be free from
any defect in materials used in the manufacture, and/or workmanship at the time of its manufacture.
2. Buyer will receive good and valid title to the goods, free and clear of all encumbrances and liens of any kind.
Warranty Limitations. The warranties under this Section do not apply where the goods have
1. been subjected to abuse, misuse, neglect, negligence, accident, improper testing, improper installation,
improper storage, improper handling, abnormal physical stress, abnormal environmental condition, or use
contrary to any instructions issued by Seller;
2. been reconstructed, repaired, or altered by persons other than Seller or its authorized representative; or
3. been used with any third-party product, hardware, or product that has not been previously approved in writing
by Seller.
Exclusive remedy for Defective Goods. Notwithstanding any other provision of this Agreement, this Article contains
Buyer’s exclusive remedy for goods that do not conform to the warranties listed in Section [list section number]
(Defective Goods). Buyer’s remedy under this Article is conditioned on Buyer’s compliance with its obligations under this
Article. During the Warranty Period, regarding any allegedly Defective Goods,
1. Buyer shall notify Seller, in writing, of any alleged claim or defect within [five] business days from the date Buyer
discovers, or on reasonable inspection should have discovered, such alleged claim or defect (but in any event
before the expiration of the applicable Warranty Period);
2. Buyer shall ship, at [Buyer’s] expense and risk of loss, the allegedly nonconforming goods to Seller’s facility
designated by Seller for inspection and testing by Seller;
3. If Seller’s inspection and testing reveals, to Seller’s reasonable satisfaction, that such Defective Goods and any
such defect has not been caused or contributed to by any of the factors described under Section [list section
number], Seller shall in its sole discretion, and at its expense, (a) repair or replace Defective Goods or (b) credit
or refund the price of Defective Goods less any applicable discounts, rebates, or credits; and
4. If Seller exercises its option to repair or replace, Seller shall, after receiving Buyer’s shipment of Defective Goods,
ship to Buyer, at [Buyer’s] expense and risk of loss, the repaired or replaced goods to the delivery location
designated by Seller.
5. Any part replaced under the warranty will be covered for the remaining period of the Warranty Period.
6. Any parts replaced under the warranty must be returned to EZ Carrier, LLC and will become the property of EZ
Carrier, LLC. EZ Carrier, LLC may, at its discretion make any repairs or replacement of defective parts but such
work shall not be deemed to be any admission of liability.

18
7. EZ Carrier will bear labor charges for work carried out under the warranty. The warranty may not be transferred
to subsequent owners for the balance of the remaining Warranty Period.
8.
Buyer has no right to return for repair, replacement, credit, or refund any goods except as set forth in this Section. In no
event shall Buyer reconstruct, repair, alter, or replace any goods, in whole or in part, either itself or by or through any
third party.
THIS SECTION SETS FORTH BUYER’S SOLE REMEDY AND SELLER’S ENTIRE LIABILITY FOR ANY BREACH OF THE LIMITED
WARRANTY SET FORTH IN SECTION [LIST SECTION NUMBER].
Other Conditions and Exclusions:
The product must not have been used for competition, misused, inadequately maintained, or incorrectly
serviced or maintained.
The product must not have been subject to any modification, repair, or replacement other than as
authorized by EZ Carrier, LLC.
Defects caused by faulty adjustment, neglect, or repairs and alterations performed by anyone other than EZ
Carrier, LLC are not covered by this warranty.
Defects caused by the use of parts and accessories not authorized by EZ Carrier, LLC are not covered by this
warranty.
The warranty does not cover the cost of transportation of the product to or from EZ Carrier, LLC, or
expenses incurred while the product is out of use and under warranty repairs.
The warranty does not cover product used on a commercial basis.
The warranty does not cover defects, which have not been reported to EZ Carrier, LLC within the immediate
discovery of the defect.
Should a warranty claim become necessary, EZ Carrier, LLC shall not be liable for loss of use, inconvenience,
lost time, commercial losses or other incidental or consequential damages.
If for any reason, the carrier does not appear to be in good and sound condition, it must not be used. Any
loss as a direct or indirect result of the use of the carrier in a compromised condition is the sole liability of
the user.
Paint finish will diminish, scratch, and chip over a period of time due to normal use and therefore paint is
not covered under warranty, nor is rust that has resulted from exposed surfaces.
Actuator and motor on the lifts carry no warranty other than that of the manufacturer of them; actuators,
90 days; motors, one year (EZ Carrier LLC does not make these specific parts).
Must present copy of this paper work along with copy of proof of purchase as in copy of credit card
statement or such at time of warranty work.
Any statement, condition, representation, description or warranty otherwise contained in any other
publication or advertisement shall not be construed as enlarging, varying or overriding anything contained
herein.
EZ Carrier, LLC reserves the right to make alterations or improvements without notification to any model
without obligation to do so to products already sold.

19
LIABILITY DISCLAIMER
The purchaser of the carrier is solely responsible for the installation, use, and the securing of any item being carried. In
no event shall EZ Carrier, LLC be liable for any damages whatsoever, including but not limited to any direct, indirect,
special, consequential, punitive or incidental damages, or damages for loss of use, profit, or other intangibles, or the
cost of procurement of substitute goods and services, arising out of or related to the use, inability to use, unauthorized
use, performance or nonperformance of our products. Even if EZ Carrier, LLC has been advised previously of the
possibility of such damages and whether such damages arise in contract, negligence, tort, under statute, in equity, at law
or otherwise. In no circumstance shall EZ Carrier be liable for any losses or damages whatsoever. All matters are
interpreted under Michigan law.
Table of contents
Other EZ Carrier Lifting System manuals
Popular Lifting System manuals by other brands

morse
morse 195 Series Operator's manual

Euroscreen
Euroscreen SI-H 100 Installation and maintenance manual

edmolift
edmolift PL 2002 owner's manual

Kuzar
Kuzar K-40 user manual

Presto Lifts
Presto Lifts PL Series Installation, operation and service manual

ITALGARAGE equipment
ITALGARAGE equipment K300S manual