EZ DRAIN Auto Draining Winter Cover User manual

PRE INSTALLATION CHECK LIST
FOR ABOVEGROUND POOLS
If it doesn’t have a continuous barrier then it’s not an EZ Drain!
TM
If you have everything listed above you are ready
to install your EZ DrainTM Winter Cover.
ITEMS REQUIRED WHERE IT IS PACKED?
EZ-DrainTM Cover and Cable In the cover box
Cable Fastener In the cover box
Cover Connection Kit In the cover box
Tension Clips In the cover box
Drain Hose In the cover box
Skimmer Winterizing Plate
This item is Sold separately
Confirm that your pool is compatible with the EZ DrainTM
Winter Cover System (See next page)

FOR ABOVEGROUND POOLS
If it doesn’t have a continuous barrier then it’s not an EZ Drain!
TM
1
•Please note that the EZ DrainTM
Cover will not work on pools
equipped with non-standard
returns such as Doughboy,
Lomart, Muskin and pools with
Aqualuminator lighting systems
•In order for your EZ DrainTM Cover
to work correctly you must
maintain normal water height in
your pool during the winter.
•To avoid damaging your thru wall
skimmer you must protect it with a
Skimmer Winterizing Plate.
(This item is sold separately)
23
Check the height of
your Return Fitting
Minimum
24”
Above the
Ground
How to check if your thru wall
return fitting is compatible with
the EZ Drain
TM
Winter Cover System
Remove Directional return
from Thru Wall Fitting.
You should have
1-1/2” Female Threads.
Locking ring
1-1/2” female
threads
Ball
Ball seat
WILL AN EZ DRAINTM COVER
WORK ON YOUR POOL?

∂Water Preparation
a. Thoroughly clean and vacuum pool prior to adding Winterizing Chemicals.
b. Adjust pH to 7.2-7.4
c. Add only winter grade chemicals.
Never use chlorine-based chemicals when winterizing.
Chlorine vapors will damage your cover.
∑Skimmer Preparation
EZ DRAIN™ WINTER COVER SYSTEM
INSTALLATION INSTRUCTIONS
•See your dealer for recommended Winterizing Chemicals.
∏Converting your returnfitting to a drain port.
Remove directional return from pool wall. Your directional return
consists of 3 components: (1) Locking Ring; (2) Ball; (3) Ball seat
a. Remove locking ring
b. Remove eyeball
c. Insert seat removal tool into ball seat
Turn counter clockwise until ball seat is completely removed
After directional return has been removed, you should have a
1-1/2” opening with female threads exposed.
Prepare your hose adapter fitting by putting Teflon Tape around the
threads. Then screw fitting into opening in wall. HAND TIGHTEN ONLY.
Use Teflon tape on threads
Hose Adapter
Insert Hose adapter fitting
Directional Return
Remove
Directional Return
from Thru Wall Fitting.
Insert seat removal
tool into ball seat
Turn counter clockwise
until ball seat is
completely removed
ï
a. b.
c.
Using seat removal tool
1
3
2
a. Winterize your Thru Wall Skimmer opening with the correct size
Skimmer Winterizing Plate.
b. Make sure water level in pool is as high as possible but does not
exceed the top of the skimmer
•See your dealer for recommended Skimmer Winterizing Plate.

πInstall the drain elbow in base of the drain assembly
Located under your
EZ Drain™ Cover.
Use Teflon tape
on threads.
Hand tighten only.
Secure with a
Stainless Steel
Clamp.
Drain Assembly
Drain Elbow
Drain Elbow
Stainless
Steel
Clamp
Hose
∫Connect one end of the drain hose to Drain elbow
you just installed.
5
4
Installing cover on pool
a. Unpack cover and fold in half.
b. Place cover over half of pool with drain
assembly and hose in center.
c. Use cover tension clips to hold cover in
place temporally.
d. Cut hose between cuffs to correct length.
Hose should be as straight as possible
but not taut.
e. Attach hose to hose adapter in wall.
f. Secure with a Stainless Steel clamp.
g. Fold cover over to cover entirepool.
Use cover tension clips to hold cover in place
temporally.
h. Weave cable through grommets around
perimeter of cover. Exposed cable should be
over the larger distance between grommets.
i. Attach a hose (not supplied) to hose fitting
on outside of pool to drain water away from
pool site.
Only cut hose between cuffs
Place clamp over flat area of hose cuff
6

ºSecure cable using the Crank and Lock
supplied with your cover
a. Place Cable (supplied with Pool Cover) through grommets in pool cover.
b. Your Crank’n Lock is used to tighten cable and cover around outside of pool,
as shown below.
c. Place one end of cable, now threaded in cover, through hole on left side of
Crank’n Lock winch outer frame, and other end of cable through hole on
right side of winch frame.
d. Pass left cable through top hole in center shaft and right cable through
bottom hole in center shaft. Pull tight to remove slack.
e. Slowly turn handle on winch to wrap cable around center shaft until cable
is tight. DO NOT OVER TIGHTEN! Once cable is tight, place lock through
handle and cable shown below and secure.
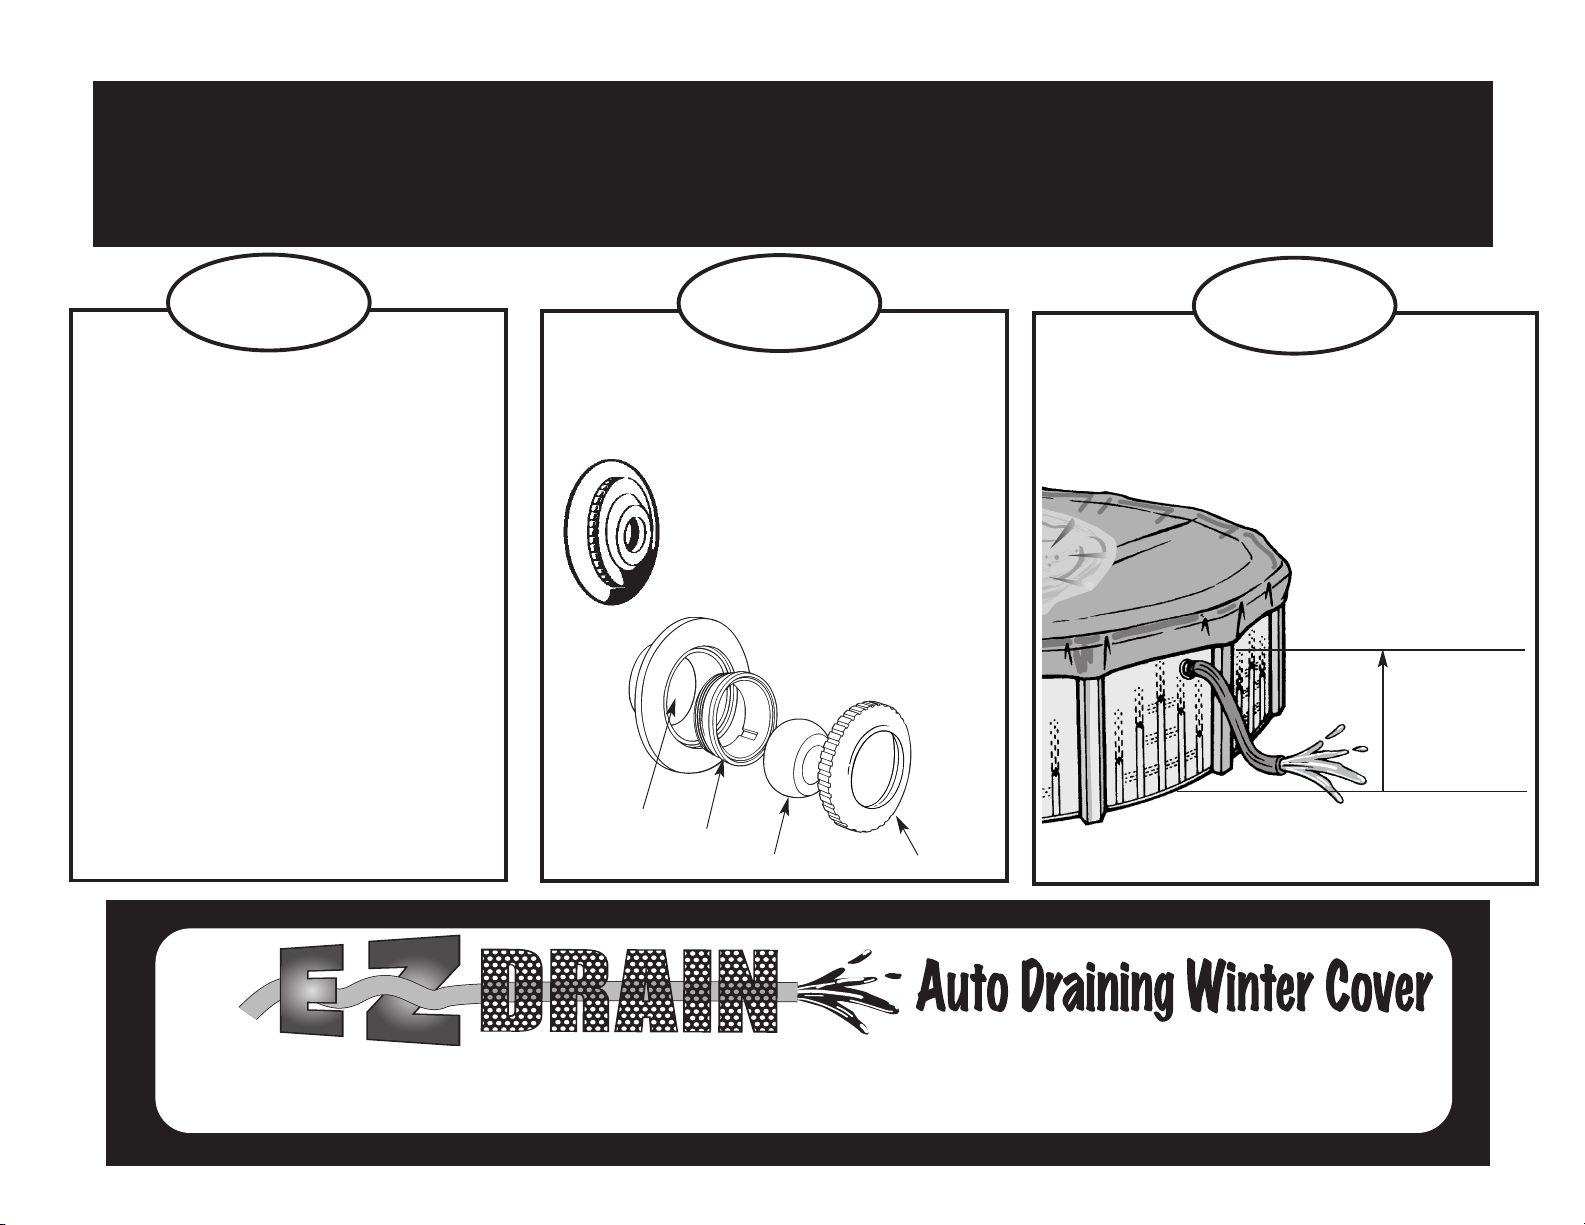
ΩBasic Winter Maintenance
a. Your new EZ Drain™ winter cover system is designed to reduce maintenance
during the winter by automatically removing excess water. Your cover’s
continuous barrier will maintain enough water on top of the cover to protect it
from wind damage. To ensure that the cover’s drain system will work correctly,
you will need to periodically check the following:
• The height of the water in your pool (adjust if necessary)
•Accumulation of debris on or around drain
(Debris can easily be removed with a Swimming Pool Leaf Rake)
• Tension clips (adjust if necessary so that water flows towards drain)
• Cable and fastener (inspect and adjust if necessary)
b. Please note that your new EZ Drain™ cover system cannot drain if the
pool is frozen. However, as soon as the weather is warm enough to melt
the ice, the drain will automatically start working again.
WARNING:
Many Pools have sharp corners where segments of components join. Pad these sharp edges with any soft material such as
burlap, corrugated chipboard, foam rubber,etc. to avoid wear and cutting of the cover. Failure to do this voids your warranty.
This warranty specifically does not cover damage to the pool cover due to wear caused by sharp instruments or abrasion.
Made in China
8
7
Table of contents
Popular Lighting Equipment manuals by other brands

Dometic
Dometic GLO-A400 operating manual

Home Accents Holiday
Home Accents Holiday Bilt Immortal Werewolf 22SV23409 Easy Assembly and operation instructions

Light Plan
Light Plan LPL2-SS Suspended installation instructions

DS Produkte
DS Produkte 20002 instructions

Robus
Robus VEGAS EXPRESS RVA3K671 instructions

Integratech
Integratech F1 manual