EzyWheel EzyOne 2020 User manual

EzyOne - User Manual
V1.00 ENGLISH

WELCOME!
You finally have your hands on your bike, congratulations!
We can’t express how thankful we are that you joined our community.
For you, it’s the start of a new way to go places, a new way to have fun and a new way
to lessen your ecological impact. You are now part of a mobility revolution and we’re
very happy it’s with us.
In this manual, you will have all the information needed to assemble your EzyOne,
adjust the settings and troubleshoot common issues.
If you have any other questions or remarks, you can reach us by email at
514-570-1370.
Make sure to tag us on social media @ezy_wheel
and use these hashtags : #ezywheel #ezyfamily
And visit our website for all these informations in one place : www.ezywheel.ca
Happy ride and Ezylife !
The founders
Guillaume Martin and Miled Bourourou
By EzyWheel
Version 1.00
04/05/2020
1

Table of Contents
WELCOME! 1
A little about us first 3
The Story of EzyWheel 3
The EzyWheel Experience 4
Our Mission 5
Disclaimers 6
Technical Specifications 7
EzyOne Diagram 8
Included with your purchase 9
Assembly 10
Fix the handlebar 10
Mount the front wheel 11
Mount the front mudguard & headlight 12
Mount the pedals 13
Connect the wires 14
Inflate the tires 14
Get Started on your EzyOne 15
How to use your EzyOne 15
How to charge the battery 15
Display Manual 16
First generation EzyOne display manual 16
Second generation EzyOne display manual 18
EzyOne Trivia 23
Maintenance 23
Social Medias 24
Warranty 24
Return Policy 25
Others 25
By EzyWheel
Version 1.00
04/05/2020
2

A little about us first
The Story of EzyWheel
Ezywheel was born in the middle of winter in Montreal when two friends around a
coffee were talking about their impatience to bike to work as soon as the weather
permitted.
The idea was simple, we wanted an alternative way to move totally free in our city,
without any constraint (licence or insurance), for more than 6 months (in Canada, the
winter lasts 6 months), while respecting our environment. The electrical bike with fat
tires became the solution.
Ezywheel is a company based in Montreal, founded by two friends who are passionate
about biking as are 4.2 million of Quebecors. We want to bring this passion available
all year in this snowy country while respecting and supporting our environment.
Our EzyWheel bikes will let you roam in the streets with an electrical assistance for 60
km. Out of battery? No worries, you can still pedal to your destination!
By EzyWheel
Version 1.00
04/05/2020
3

The EzyWheel Experience
In 2016, the government of Canada consulted the Canadians about the transportation
system. This consultation highlights that Canadians want incentives and regulations
which enable to :
●Reduce carbon pollution
●Get people to use more efficient modes of transport
●Encourage the use of new technologies
●Our aim is to contribute to this national shift by reducing environmental
impacts, especially air pollution, and embracing new technologies.
70% of Canadians use their cars to work within 5 km of their home. And a vast
majority of these commutes are done alone in the vehicle. Think about all that waste
of energy, pollution and money!
Our electric fat bikes would be an excellent alternative for this type of journey, from
an ecological point of view, but also economical. Indeed, EzyWheel bikes will let you
roam in the streets with an electrical assistance for up to 60 km, which is enough to
get you at work for one week with only one charge!
Are you ready to have a big positive impact?
Are you ready to embrace the change with us, all year long, while being ecologically
conscious and in style?
We are. Join us.
By EzyWheel
Version 1.00
04/05/2020
4

Our Mission
Driven by a profound ecological consciousness, our mission is to bring the future of
mobility to Canadians and its neighbours. We believe electric cycling is a great and
effortless alternative to any short commutes and we thrive to give you the most
affordable solution.
Our vision is to democratize the electric fat bike which goes beyond EzyWheel.
Imagine a world where cars are limited to long distance trips!
Join us for an EzyAdventure!
By EzyWheel
Version 1.00
04/05/2020
5

Disclaimers
This manual includes assembly and maintenance work which may need to be done
before a required inspection is due, which needs to be carried out by a specialist dealer.
Never perform work on your EzyOne beyond instructions in this manual. Do NOT ride
your E-Bike if it has been assembled incorrectly. Maintenance beyond what the
Owner’s Manual instructs is to be handled by an E-Bike specialist. Riding an
incorrectly assembled bike can put your own safety at risk as well as others.
If you feel uncertain about proper configuration after assembling your EzyWheel
according to this manual, please contact your specialized retailer or EzyWheel
directly. We will help you willingly.
Please check your country or state’s regulations on electric bikes before riding. There
are variations on age limit, speed, motor wattage and road accessibility.
Your EzyWheel electric bike is designed for the use on roads and paved paths only. You
should therefore never ride on stairs, jump or perform wheelies or similar activities.
EzyWheel electric bikes are not approved for participation in competitions.
Commercial use does not form part of the intended use. Operating, maintenance and
service instructions described in this manual are part of the intended use. No liability
or warranty shall be accepted if the use of the EzyWheel deviates from this intended
use, if safety instructions are not observed, in the event of overloading, or if faults are
not properly rectified. Similarly, no liability and warranty shall be accepted in the case
of assembly errors, willful intent, accidents, and/or if care and maintenance
specifications are not followed. Any modification of the gear transmission ratios and
alterations to the electrical system (tuning) voids all claims under warranty and
guarantees.
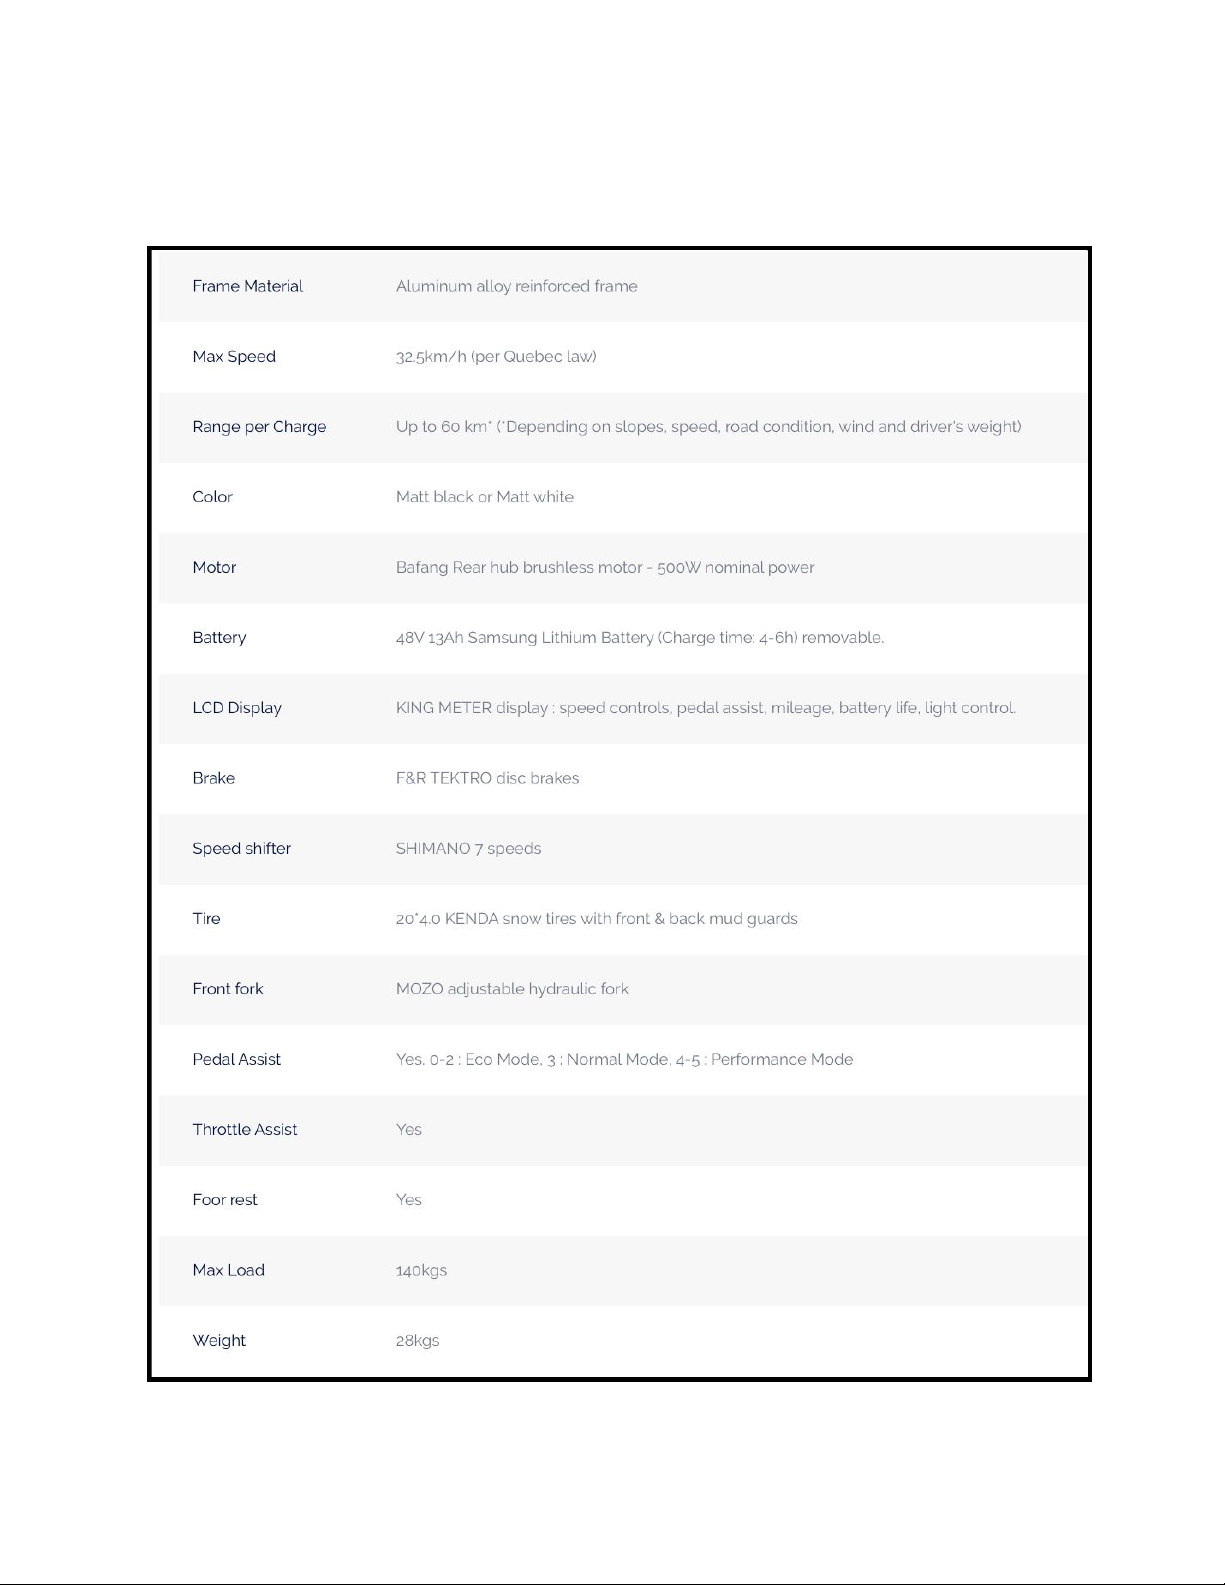
Maximum load capacity is 300 lbs (140 kg).
Any or all modifications to electronics voids all claims to warranty.
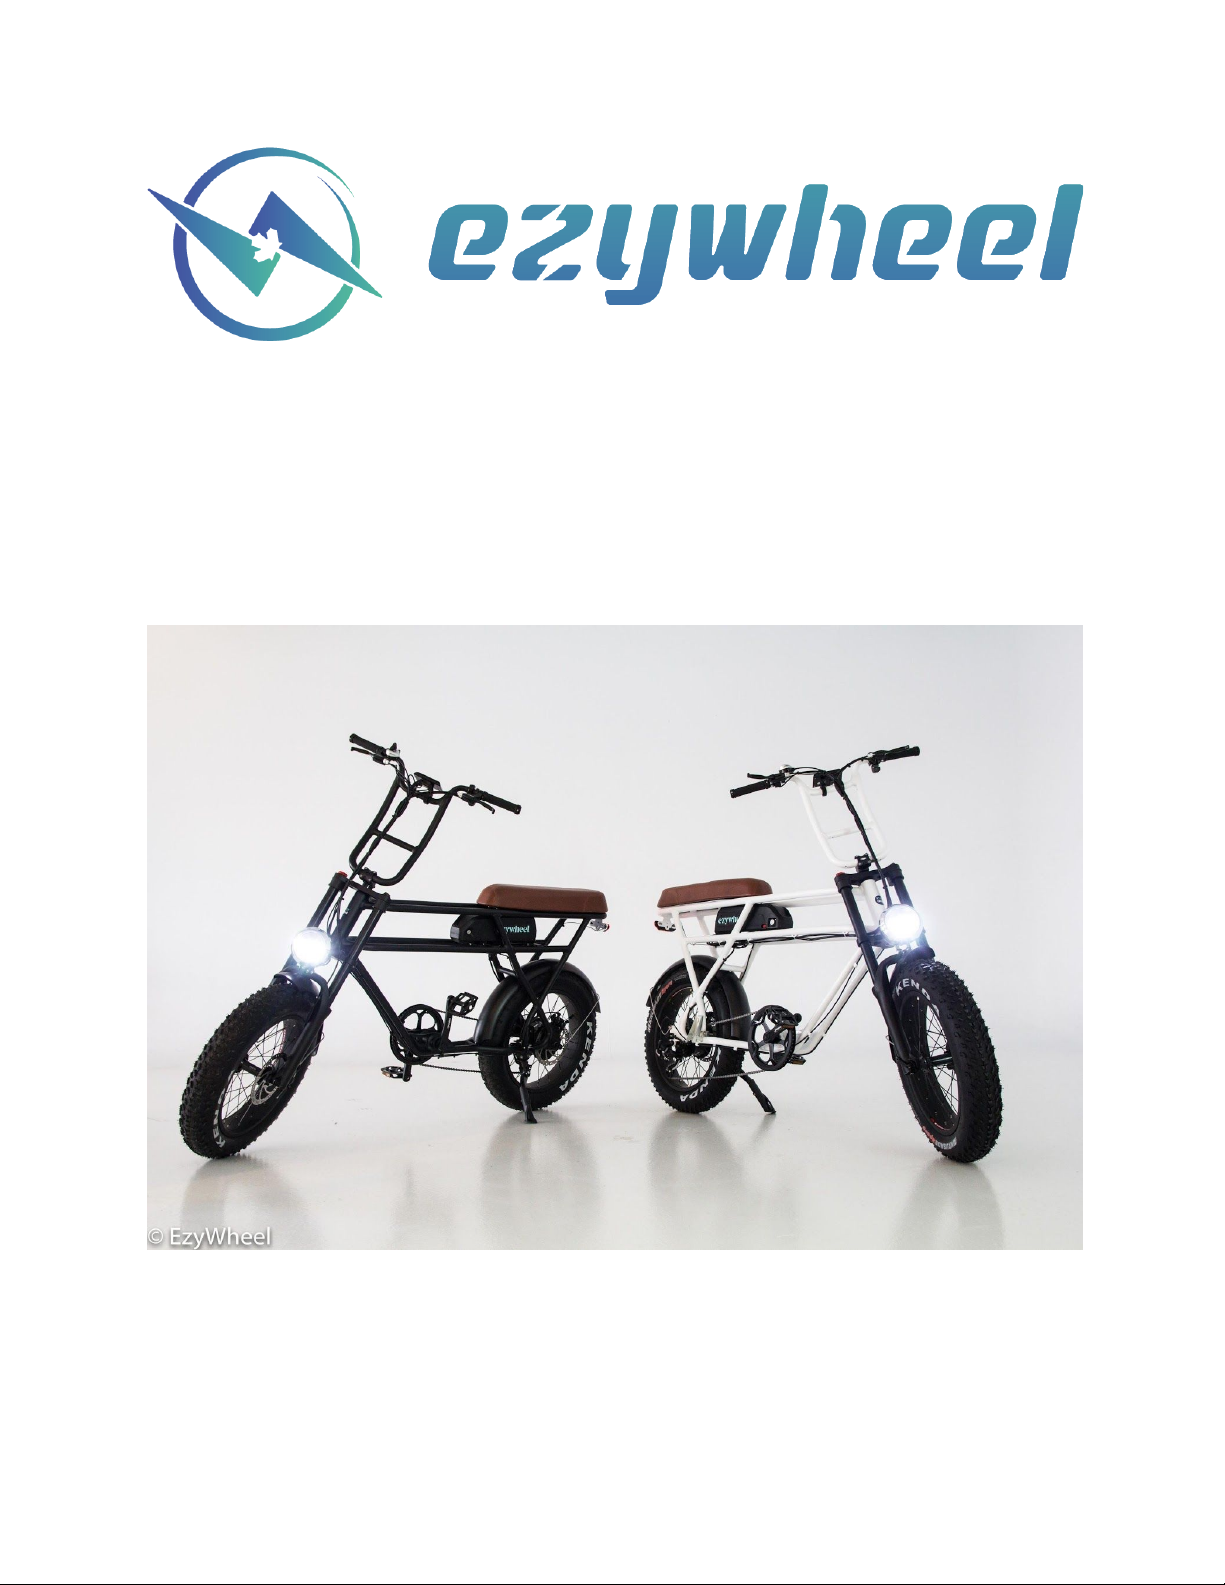
By EzyWheel
Version 1.00
04/05/2020
6

Technical Specifications
By EzyWheel
Version 1.00
04/05/2020
7

EzyOne Diagram
By EzyWheel
Version 1.00
04/05/2020
8

Included with your purchase
1 x Manual
2 x Keys for the battery
1 x Toolkit
1 x Battery Charger
1 x 13Ah Lithium-ion battery
1 x set of pedals
1 x headlight
1 x handlebar
1 x front mudguard
By EzyWheel
Version 1.00
04/05/2020
9

Assembly
The video of EzyOne’s assembly can be found in Youtube, with this title: “EzyOne -
Assembly Guide Explained with Quick Setup“
Once the EzyOne is out of his box, remove all the protections (picture 1).
1. Fix the handlebar
Remove the 4 screws from the handlebar clamp with the toolkit (picture 2).
By EzyWheel
Version 1.00
04/05/2020
10

Then fix the handlebar in the clamp with the screws. Please make sure to have the
handlebar in the middle of the clamp (picture 3 and 4). Do not use the front brake
until the front wheel is not mounted.
2. Mount the front wheel
This step could be done by yourself, but we recommend to do it with the help of
another person. First, insert the bar holder in the wheel (red arrows in picture 5).
Please make sure that the quick release is on the opposite side of the brake disk (black
arrow). Then, mount the front wheel in the fork. Make sure that the brake and the disk
brake are aligned (red arrow in picture 6). Once the wheel and the fork are aligned you
can tighten the screw and lock it with the quick release.
By EzyWheel
Version 1.00
04/05/2020
11

3. Mount the front mudguard & headlight
For this step you will have to use the tool-kit and the Allen key (picture 7). First,
remove the screw from the lower front fork (picture 8).
Then, place the headlight in front (green arrow, pic. 9) and the mudguard in back
(blue arrow, pic. 9). Both will be fixed on the front fork with the same screw (red
arrow, pic.9). Use the tool-kit and the Allen key to tighten the screw (picture 10). Make
sure that the mudguard is aligned and does not touch the wheel.
By EzyWheel
Version 1.00
04/05/2020
12

To complete this step, align the two fixing gears with the holes on the fork (picture 11)
and tighten the screw (picture 12). Make sure that the mudguard is not touching the
wheel.
4. Mount the pedals
Each pedal has a letter molded on it, L for Left and R for Right. Make sure to have the
right side and tighten clockwise the pedal until you can not anymore (picture 13). Then
use the open end wrench from the tool-kit to tighten firmly (picture 14).
By EzyWheel
Version 1.00
04/05/2020
13

5. Connect the wires
Align the embossed arrows together and carefully connect them together (picture 15).
6. Inflate the tires
Tires must be inflated with a pump with a Schrader valve tip with a recommended
pressure of between 20 and 30 psi (1.37 and 2 bars). The maximum pressure is 35 psi /
2.41 bar. Check the condition of the tires and rims for damage, cracks or deformation.
By EzyWheel
Version 1.00
04/05/2020
14

Get Started on your EzyOne
How to use your EzyOne
1. Insert your key to lock/unlock the battery. Please lock the battery while driving
and remove it for charging.
2. Push the red button on the right side of the battery to turn it on/off.
3. Press the bottom button for 2 seconds of your controller to activate/deactivate
the power circuit, electric throttle and LCD display.
4. Use the thumb throttle to accelerate and brake to slow down. Be careful of the
first acceleration as it can be surprising.
5. Use the Shimano speed changer on the right to change speed while pedaling.
This is adjusting the mechanical speed of your bike.
6. Use Up and Down Arrow on your left controller to Increase/Decrease
acceleration help from the electric motor.
How to charge the battery
1. Park your EzyOne in a safe area and turn it off following step 2 above.
2. Using your key, unlock the battery.
3. Pull the battery towards the guidon and slightly up to free it from the frame.
4. Connect the battery charger to a mural plug and connect it to the battery.
5. Please avoid using cable extensions and adapters. This can result in a surcharge
and can damage the battery.
By EzyWheel
Version 1.00
04/05/2020
15

Display Manual
The following is the guide of the first version of our EzyOne sold before May 1st 2020.
If you purchased your EzyOne after May 1st 2020, please use the guide after this one
(page 18).
First generation EzyOne display manual
1. Turning on/off your electric bike
Ok, so this one might be the easiest but there are a few things to consider.
First make sure the battery is correctly in place and LOCKED. If you don't lock it, the
first bump on the road will move the battery and cut the power. We actually spent half
an hour on the EzyOne figuring out why our ebike wasn't turning on again.
Then press the RED button to power up your bike.
Press the MODE button on your controller for 2-3 seconds and the display should turn
on.
To turn it off, simply press the RED button and everything will shut down.
2. Adjusting the parameters of your electric bike
To enter parameter mode, press UP and DOWN buttons for 2,5 seconds. The display
should flash and you'll be able to manually adjust some parameters.
3. Setting the wheel diameter
Press UP and DOWN to choose the correct wheel diameter of your ebike. The EzyOne
standard diameter is 20-inch. The range is from 18-inch to 28-inch.
Press MODE to validate your entry and it goes to the next parameter : Max Speed.
4. Setting the Max Speed
The set maximum speed should be in accordance to your local regulation speed. For
Quebec, the law is 32,5 km/h. See examples for Quebec & Ontario.
Use UP and DOWN buttons to choose your maximum speed.
By EzyWheel
Version 1.00
04/05/2020
16

Press MODE to validate your entry and it goes to the next parameter : Display
Backlight brightness.
5. Setting the LCD display Backlight brightness
At night, you also need to know your battery life, speed and speed assist level. Here
you can choose how bright your display will be.
Use UP and DOWN buttons to choose a brightness level from 1 to 3.
Press MODE to validate your entry and it goes to the next parameter : Choice of display
units.
6. Setting the display units
Press UP and DOWN buttons to choose between the International Metric System KM/H
or the Imperial System MPH
Hold MODE for 3 seconds to validate your entry and exit the parameters selection.
7. Adjusting the distance display
Press MODE to switch from current ride distance (since you powered on your ebike) to
total distance (since you purchased your ebike).
8. Adjusting the assisted power speed
You basically have 3 possibilities to ride your electric fat bike. Either you are motivated
(or out of power) and you pedal like a regular bike. Or you pedal with power assist. Or
you use the thumb throttle and cruise like a champ'.
The good news is you can adjust how much the motor will assist you when pedaling.
Simply press UP or DOWN buttons to adjust. You have the choice between 5 levels,
each increasing the electric power fueling your ride.
Let's just say that at level 5 you get a nice kick in the butt :)
9. Turning the light on/off
One thing that has bugged us for a time was how do we turn ON/OFF the headlight and
light display on the EzyWheel electric bike..
The solution is easy but you have to know it.
Press UP and MODE at the same time for 3 seconds and the magic happens.
By EzyWheel
Version 1.00
04/05/2020
17

You get a nice feeling when the LED headlight turns ON and projects its full spectrum
on the road.
10. Adjusting between average Speed and Max Speed
This feature shows you either your average speed while biking or the max speed of
your current ride. To switch between both, press the UP button for 3 seconds.
Second generation EzyOne display manual
Interface navigation
1. Power On/Off
Hold Mode button for 2 seconds then the display will power on, and the display will
power on the controller. With the display on, hold MODE to turn off the power supply
of the e-bike. With the display off, the display and controller shut Down.
2. Display Interface
After starting up the display, the default view is running speed. Press MODE to change
the indicated information in sequence as below: Running Speed (Km/h) → Average
Speed (Km/h) → Max Speed (Km/h) → Trip Distance (km) → Total Distance (km) →
Travel Time → Running Speed (Km/h).
3. Push Cruise Control
Hold DOWN for 2 seconds to enter the mode of power assistant walk. The e-bike will
go on at a uniform speed of 6 Km/h. PUS shows on the screen.
4. Turn on/off Backlight
Hold UP for 2 seconds to turn on the backlight of the display, the headlight will be
powered on at the same time. Hold UP for 2 seconds again, backlight turned off.
5. PAS Level Selection
Hold UP or DOWN to change the output power of the motor. The power ranges from
level 1 to level 5. Level 1 is the minimum power. Level 5 is the maximum power. The
default value is level 1.
6. Battery Indicator
By EzyWheel
Version 1.00
04/05/2020
18

The 5 battery bars represent the capacity of the battery. When the battery is in low
voltage, the battery frame will flash to notice that the battery needs to be recharged
immediately.
General Setting
Press the MODE button to start the display, then hold both UP and DOWN for 2
seconds to enter the setting menu.
1. Trip Distance and Trip Time Clearance
TC means trip distance clearance. Press UP or DOWN to choose yes or no to clear the
trip distance.
2. Backlight Contrast
BL means backlight. Level 1 is the low brightness. Level 2 is the middle brightness.
Level 3 is high brightness. The default level is 1. Bottom of the screen prompts SET2.
Press UP or DOWN to modify the backlight brightness. Hold MODE to confirm the
modification and exit the general Setting. Pressing UP and DOWN can change the
backlight lighting. Long press MODE is to confirm and quit Setting Mode.
3. Power-on Password Enable/Disable
The character “-P-” on the bottom of the screen means the page of password. Hold
UP and DOWN both up to 2 seconds enter normal setting , while holding both UP and
MODE 2 seconds again will enter power-on password enable/disable page. Press
UP/DOWN to change the number .Press MODE to select digit one by one. After entering
the password 1234, press MODE to confirm then select password enable or disable.
4. Power-on Password Enable
Press UP/DOWN to select Y or N, and press MODE to confirm. Power-on Password
default disable.
y = Power-on Password Enable
n = Power-on Password Disable
By EzyWheel
Version 1.00
04/05/2020
19
Table of contents