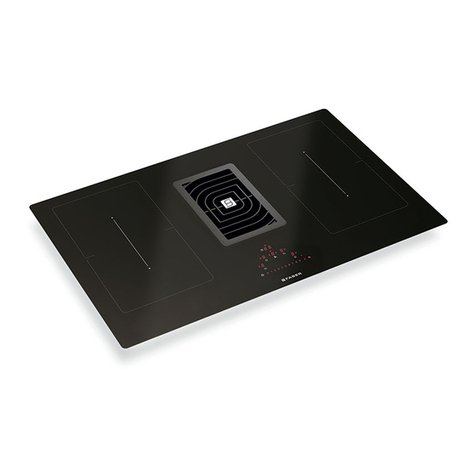
FABER S.p.A. GALILEO BK A830 User manual

EN
USER MANUAL
DE
BEDIENUNGSANLEITUNG
FR
MANUEL D’UTILISATION
IT
MANUALE D’USO
ES
MANUAL DEL USUARIO
PT
MANUAL DO UTILIZADOR
NL
GEBRUIKSHANDLEIDING
DA
BRUGSVEJLEDNING
NO
BRUKERVEILEDNING
SV
ANVÄNDARHANDBOK
FI
KÄYTTÖOPAS
GALILEO BK A830


1
1. SAFETY INFORMATION
For your safety and correct
operation of the appliance,
read this manual carefully be-
fore installation and use. Always
keep these instructions with the
appliance even if you move or
sell it. Users must fully know
the operation and safety fea-
tures of the appliance.
Induction systems of these
hobs meet the requirements of
EMC standards as well as the
EMF Directive and should not
interfere with other electronic
devices. Heart pacemakers
users or other electronic im-
plants users should clarify with
their medical doctor or with the
manufacturer of the implants
whether these devices are suf-
ciently interference resistant.
The wire connection has
to be done by special-
ized technician. Before
proceeding with electrical
connection please refer
to Chapter ELECTRICAL
CONNECTION.
Forapplianceswithsupply cords,
thearrangement ofthe terminals,
or the length of the conductors
between thecordanchorage and
the terminals, shall be such that
the current carrying conductors
become taut before the earthing
conductor if the cord slips out of
the cord anchorage.
•The manufacturer will not be
held liable for any damages
resulting from incorrect or im-
proper installation.
•Check that the mains voltage
corresponds to that indicated
on the rating plate xed to the
inside of the product.
•Means for disconnection must
be incorporated in the xed
wiring in accordance with the
wiring rules.
•For Class I appliances, check
that thedomestic power supply
guaranteesadequateearthing.
•Connect the extractor to the ex-
haust ue through an adequate
pipe. Please refer to the pur-
chasable accessories shown
in the installation manual (if
circularpipe:minimumdiameter
120 mm). The route of the ue
must be as short as possible.
•Connecttheproducttothepower
netbyusinganomnipolarswitch.
•Regulationsconcerningthedis-
charge of air have to be fullled.
•Do not connect the extractor
appliance to exhaust ducts
carrying combustion fumes
(boilers, replaces, etc.).
•If the extractor is used in con-
junction with non-electrical
appliances (e.g. gas burn-
ing appliances), a sucient
degree of aeration must be
guaranteed in the room in or-
der to prevent the backow of
exhaust gas. When the cooker
appliance is used in conjunc-
tion with appliances supplied
with energy other than elec-
EN

2
tric, the negative pressure
in the room must not exceed
0,04 mbar to prevent fumes
being drawnback into theroom
by the cooker appliance.
•The air mustnot be discharged
into a ue that is used for ex-
haustingfumes from applianc-
es burning gas or other fuels.
•If the supply cord is damaged,
it must be replaced from the
manufacturer or its service
agent or similarly qualied per-
son in order to avoid a hazard.
•Connecttheplugtoasocketcom-
plying with current regulations,
located in an accessible place.
•With regards to the technical and
safety measures to be adopted
forfumedischarging itisimportat
to closely follow the regulations
providedbythe local authorities.
WARNING: Before install-
ing the appliance, remove
the protective lms.
•Useonlyscrewsandsmallparts
in support of the appliance.
WARNING: Failure to
install the screws or xing
device in accordance with
these instructions may
result in electrical hazards.
•Do not look directly at the light
throughopticaldevices(binoc-
ulars, magnifying glasses…).
•Cleaning and user mainte-
nance shall not be made by
children without supervision.
•Childrenshouldbe supervised
to ensure that they do not play
with the appliance.
•This appliance is not intended
for use by persons (including
children) with reduced physi-
cal, sensory or mental capa-
bilities, or lack of experience
and knowledge, unless they
have been given supervision
or instruction concerning use
of the appliance by a person
responsible for their safety.
•This appliance can be used
by children aged from 8 years
and above and persons with
reduced physical, sensory or
mental capabilities or lack of
experience and knowledge if
they have been given supervi-
sion or instruction concerning
use of the appliance in a safe
way and understand the haz-
ards involved. Children shall
not play with the appliance.
WARNING: The appliance
and its accessible parts
become hot during use.
Care should be taken to avoid
touching heating elements.
Children less than 8 years of
age shall be kept away unless
continuously supervised.
•Clean and/or replace the Fil-
ters after the specied time
period (Fire hazard). See
paragraphCareand Cleaning.
•There shall be adequate ven-
tilation of the room when the
appliance is used at the same
time asappliances burning gas
or other fuels (notapplicable to
appliances that only discharge
the air back into the room).

3
• WARNING: If the surface is
cracked, switch o the appli-
ance to avoid the possibility
of electric shock.
•Do not switch on a device if the
surface is cracked or there is a
damage to the material thickness.
•Do not touch the appliance
with wet parts of the body.
•To clean the product a steam
cleaner is not to be used.
•Metallic objects such as knives,
forks, spoons and lids should
not be placed on the hob sur-
face since they can get hot.
•After use, switch o the hob
element by its control and do
not rely on the pan detector.
•WARNING:Unattended cook-
ing on a hob with fat or oil
can be dangerous and may
result in re. NEVER try to
extinguish a re with water,
but switch o the appliance
and then cover ame e.g. with
a lid or a re blanket.
• CAUTION: The cooking pro-
cess has to be supervised. A
short term cooking process has
to be supervised continuously.
•The appliance is not intended
to be operated by means of
an external timer or separate
remote-control system.
• WARNING: Danger of re:
do not store items on the
cooking surfaces.
•Ensure that the device is in-
stalled in a way that allows
to disconnect it from the power
supply, with a contact opening
distance (3 mm) that ensures
complete disconnection in cate-
gory III overvoltage conditions.
•Ensure that the device is
not exposed to atmospheric
agents (rain, sun).
•Ensure that the ventilation of the
appliance is in accordance with
the manufacturer‘s instructions.
2. USE
•The extractor appliance has
been designed exclusively
for domestic use to eliminate
kitchen smells.
•Never use the appliance for
purposes other than for which
it has been designed.
•Deep fat fryers must be con-
tinuously monitored during use:
overheated oil can burst.
•Do not operate the appliance
with an external time switch or a
separate remote control system.
•The appliance shall not be in-
stalled behind a decorative door
in order to avoid overheating.
•To avoid damaging the appli-
ance, do not climb onto the
appliance.
•To avoid damaging the silicon
grouting, do not put hot cook-
ware on the frame.
•Do not cut or prepare food
on the surface or drop hard
objects onto it. Do not drag
cookware across the surface.

4
3. CARE AND CLEANING
• The Activated Charcoal odour lter can be re-
generated. Follow the instructions provided on
the Kit itself both for the regeneration method
and for the replacement times.
• Grease lters Z: The lters must be cleaned every
2 months of operation, or more frequently for
particularly heavy usage, and can be washed in a
dishwasher. Do not wash the grid in the dishwasher.
=
General recommendations
• Never use scouring pads, steel wool, muriatic
acid or other products which could scratch or
mark the surface.
• Foods that accidentally fall or settle on the sur-
face, on the functional or aesthetic elements of
the hob must not be eaten.
Cleaning the appliance
• Clean the appliance after every use in order to
prevent food residues from burning on. Cleaning
dried-on and burnt-on dirt requires more eort.
• To clean everyday dirt, use a soft cloth or
sponge with water and a suitable cleaning
agent. Follow the manufacturer‘s advice with
regard to cleaning agents. We recommend
using protective cleaning agents.
• Remove encrusted dirt, e.g. from milk that has
boiled over, with a glass ceramic hob scraper
while the hob is still warm. Please follow the
manufacturer‘s advice with regard to the scraper.
• Remove sugary foods, such as marmalade,
that have boiled over with a glass ceramic hob
scraper while the hob is still warm. Otherwise,
this could damage the glass ceramic surface.
• Remove melted plastic with a glass ceramic hob
scraper while the hob is still warm. Otherwise,
this could damage the glass ceramic surface.
• Remove limescale stains using a small amount
of lime-dissolving solution, e.g. vinegar or lemon
juice, when the hob has cooled down. Then
clean again with a damp cloth.
4. CABINET REQUIREMENTS
• The cooking hob is intended to be built into the
worktop above a kitchen cabinet of 600 mm
width or more.
• If tting in ammable material, the guidelines and
standards for low voltage installations and for the
re protection must be strictly observed.
• For tted units, the components (plastic materials
and veneered wood) must be assembled with
heat-resistant adhesives (min. 100 °C): Unsuitable
materials and adhesives can result in warping
and detachment.
• The kitchen cabinet must allow sucient room
for the electrical connections of the appliance.
Suspended kitchen cabinets above the appliance
must be installed at a distance that provides
enough room for comfortable working process.
• The use of hard wood decorative borders around
the worktop behind the appliance is allowed, in this
case the minimum distance remains as indicated
on the installation illustrations.
• The minimum distance between the built-in
appliance and rear wall is indicated at the illus-
tration for the installation of the built-in appliance
(150 mm for the side wall, 40 mm for the rear
and 500 mm minimum for any cabinets above it).
• To prevent leakage of liquid between the edge of
the hob and the countertop, place the adhesive
seal provided along the entire outer edge of the
hob before assembly.
5. ELECTRICAL CONNECTION
• The wire connection has to be done by spe-
cialized technician.
• This appliance has a Type “Y” attachment and
requires at least a power supply cord Type
H05VV-F. MONO-PHASE, BI-PHASE and
THREE-PHASE connection: min. section of the
conductors: 2,5 mm². External diameter of the
supply cord: min. 7 mm - max. 15 mm.
• Connection terminals are revealed when the
connection box cover is removed.
• Make sure the characteristics of the household
electrical system (voltage, maximum power
and current) are compatible with those of the
appliance.
• Connect the appliance like shown in the dia-
gram (in accordance with the mains voltage
and country standard reference).
• We suggest to use power supply cord
5 x 2.5 mm²H05V2V2-F. In case of use of power
supply cord 5 x 2,5 mm²H05V2V2-F, below
instructions have to be followed: for three-phase
connection separate the 2 wires and remove the
blue sheaths on grey wires.
6. DISPOSAL
• The symbol on the product or on its packaging
indicates that this product may not be treated
as household waste. Instead it shall be handed
over to the applicable collection point for the
recycling of electrical and electronic equipment.
By ensuring this product is disposed of cor-
rectly, you will help prevent potential negative
consequences for the environment and human
health, which could otherwise be caused by
inappropriate waste handling of this product.
For more detailed information about recycling
of this product, please contact your local city
oce, your household waste disposal service
or the shop where you purchased the product.
• The appliance is in accordance with the Di-
rective 2012/19/EU, regarding the reduction
of the hazardous substances used in electrical
and electronic appliances, and waste disposal.
5
ON/OFF of the hob/hood
Press ON. Press again to turn OFF.
By default when turn on the hob/extractor the hood is in automatic
mode and the led will turn on.
Touch (press) the selection bar to deactivate the automatic mode
and work with the extractor fan in manual mode.
The led will turn o.
Activate Timer
Press and hold 5 seconds the button, the hood will be in delay
mode with a preset timer of 15 min.
The delay indicator led on the hood will turn on .
Press and hold 5 seconds the button again in order to deactivate
the delay.
When the timer has nished the countdown, there is an acoustic
signal (for 2 minutes, or it will stop when the On/O button is
pressed), while the display turns o.
The countdown is not visible, the visual feedback is the led .
Stop&Go / Recall
Encrise/Decrease the timer for cooking zone
Press and hold to reset grease lter
Press and hold to reset odour charcoal lter
+ Key Lock.
Touch and simultaneously for few seconds
7.CONTROLS

6
Extractor fan selection
Increase/Decrease extraction speed (power)
Activation/Deactivation of automatic function (by default automatic
mode is active).
When the selection bar of the cooker hood is touched (pressed),
the automatic mode deactivates and works with the extractor fan in
manual mode.
To re-activate the automatic mode press button and the led
will light up to indicate that the hood is working in this mode.
By default the hood is in ducted mode.
Activate charcoal lter
Press for 5 sec the button on the hood the rst time that it is
switched on.
Since that time the lit icon will show when it is necessary to
perform maintenance of the charcoal (odour) lter .
The grease cleaning lter notication through led is always
enabled.
Resetting activated carbon odour lter saturation
After performing maintenance on the lters:
press and hold 5 sec the button - The grease led will turn o,
and the indicator countdown will start again.
press and hold 5 sec the button - The odour led will turn o,
and the indicator countdown will start again.
Set the speed INTENSIVE 1
This speed is timed to run for 10 minutes. At the end of this time,
the system returns automatically to the speed that was set before.
Set the speed INTENSIVE 2
This speed is timed to run for 5 minutes. At the end of this time, the
system returns automatically to the speed that was set before.

7
ON/OFF of the hob/hood
Press ON. Press again to turn OFF.
Select the Cooking zone to set indipendent timer.
It is a countdown, which can be set for each cooking zone, even simultaneously.
At the end of the set period the cooking zones will automatically shut down and
an acoustic signal informs of it.
Activation/Regulation of the hob timer:
Press more time the key to chose the cooking zone you want to activate.
The relative icon on the cooking zone will be lighted on.
When the desired cooking zone is selected, regulate the duration of the timer:
Press the + to increase the automatic shutdown time
Press - to decrease the automatic shutdown time
Setting the time (plus /minus)
Stop&Go / Recall
This function allows to suspend / restart any function active on the hob, bringing
the cooking power to zero. Press to activate, press again and slide completely
the indicated slider from left to right to deactivate.
Note: If after 10 minutes, the Pause function is not deactivated, the hob will turn
o automatically.
This function allows to recover all the hob settings, in case of accidental shutdown.
Activation:
- Turn the hob back on
- Press within 6 seconds
+
Locking/unlocking the hob
Allows to block the settings of the hob to prevent accidental tampering, leaving the
functions that have already been set active. Repeat the operation to deactivate.
Cooking zone position indicator
The cooking zones are able to work in combination, creating a single zone with the
same power level. Front master and back secondary cooking zones. To activate
the Bridge function: touch simultaneously the 2 bar and the symbol lights up.
With the selection bar of the master zone it is possible to select the power level.
To deactivate the bridge function simply repeat the same activation procedure
Cooking zone selection
Increase/Decrease power level
Supplementary power feature which remains active for 10 minutes, after which
the temperature returns to the previously set value.
Touch and scroll along the Selection bar and activate the Power Booster.
The power booster level is shown on the display of the selected zone with the
symbol “P”.
Temperature Manager activation. The display shows .
Cooking / Keep warming at 42°C
Cooking / Keep warming at 74°C
Cooking / Keep warming at 92°C
Bridge zone between two cooking zones activated
Power Booster activated

8
How induction hobs function
Induction hobs function considerably dierently to
conventional hobs or solid plates. The induction
coil under the glass ceramic creates a magnetic
eld that alternates quickly and which directly
heats the magnetisable base of the cookware. The
glass ceramic is only heated by the hot cookware.
If the cookware is removed from the cooking zone,
the power supply is interrupted immediately.
Pan detection
Every cooking zone is equipped with pan detection.
The pan detection recognises cookware with a
magnetisable base that is suitable for use with
induction hobs.
If the cookware is removed during operation or
unsuitable cookware is used, the display near the
bargraph ashes with .
If there is no cookware placed on the cooking
zone during the pan detection time of 10 seconds:
- The cooking zone switches o automatically
after 10 seconds.
- The display of each cooking zone shows .
Cookware
Suitable cookware
Only cookware with a fully magnetisable base is
suitable for cooking on the induction hob.
The magnet adheres to every point on the entire
base of the cookware.
Cookware suitable for use in induction
cooking
Cookware used on the induction cooking surface
must be made of metal, with magnetic properties
and a suciently large base.
Suitable cookware:
- Enamelled steel cookware with thick bases.
- Cast iron cookware with an enamelled base.
- Cookware in multilayer stainless steel, ferritic
stainless steel and aluminium with a special
base.
Unsuitable cookware:
- Copper, stainless steel, aluminium, reproof
glass, wood, ceramic and terracotta cookware.
- To see whether the pan is suitable, bring a
magnet close to the bottom: if it is attracted, the
pan is suitable for induction cooking. If you do not
have a magnet, you can put a small amount of
water in the pan, place it on a cooking zone and
start the cooking zone. If the symbol appears
on the display, it means the pan is not suitable.
Note: Use only cookware with a perfectly at
bottom and suitable for induction cooking zones.
Using cookware with an irregular bottom could
jeopardise the eciency of the heating system
and prevent cookware from being detected on the
cooking zone.
Noise during cooking
Cookware can make noise during cooking. This
does not indicate any malfunction, nor does it
aect the functioning of the appliance in any way.
Noise depends on the cookware used. If the noise
causes considerable disturbance, it can help to
change the cookware.
Advice on energy-saving
- The diameter of the base of the pan must
correspond to the diameter of the cooking zone.
ENERGY
SAVING
ENERGY
SAVING
ENERGY
SAVING
- When buying a pan, check whether the diameter
indicated is that of the base or the top of the pan,
as the top is almost always larger than the base.
- When preparing dishes with long cooking
times, you can save time and energy by using
a pressure cooker, which also makes it possible
to preserve the vitamins in the food.
- Make sure that the pressure cooker contains
enough liquid as, if there is not enough and it
overheats, this may cause damage to both the
pressure cooker and the cooking zone.
- If possible, always cover pans with a suitable lid.
- Choose a pan suitable for the quantity of food
to be cooked. A large, half-empty pan leads to a
waste of energy.

9
Normal operating noises of the cooktop
lnduction technology is based on the creation of
electromagnetic elds. They may generate heat
directly on the bottom of the cookware. Pots and
pans may cause a variety of noises or vibrations
depending on the way they‘ve been manufactured.
These noises are described as follows:
Low humming (like a transformer)
This noise is produced when cooking at a high heat
level. lt is based on the amount of energy transferred
from the cooktop to the cookware. The noise ceases
or quiets down when the heat level is reduced.
Quiet whistling
This noise is produced when the cooking vessel
is empty. lt ceases once water or food is placed in
the vessel.
Crackling
This noise occurs with cookware comprised of
various materials layered one upon the other. lt‘s
caused by the vibrations of the surfaces where
dierent materials meet. The noise occurs on the
cookware and can vary depending on the amount
and method of preparation of the food.
Loud whistling
This noise occurs with cookware comprised of
dierent materials layered one upon the other, and
when they are additionally used at maximum output
and also on two cooking zones. The noise ceases or
quiets down when the heat level is reduced.
Fan noises
For proper operation of the electronic system,
it is necessary to regulate the temperature of
the cooktop. For this purpose, the cooktop is
equipped with a cooling fan, which is activated
to reduce and regulate the temperature of the
electronic system. The fan may also continue to
run after the appliance is turned o if the detected
temperature of the cooktop is stili too hot after
turning it o.
Rhythmic sounds and similar to the hands of
a clock
This noise occurs only when at least three cooking
zones are operating and disappears or weakens
when some of them are switched o.
The noises described are a normal element of the
described induction technology and shouldn‘t be
regarded as defects.
Switching the appliance on
Hold for one second to switch on the appliance.
-„0“ ashes in all power levels displays.
- If there are no further inputs, the appliance
switches o after 10 seconds for safety
reasons.
Selecting a cooking zone
Press the „0“ near the bargraph slider of the
cooking zone and swipe it to set the power level.
Power level Cooking method Use for
1 Melting, gentle warming Butter, chocolate, gelatine, sauces
2 Melting, gentle warming Butter, chocolate, gelatine, sauces
3 Swelling Rice
4 Continued cooking, reducing, stewing Vegetables, potatoes, sauces, fruit, sh
5 Continued cooking, reducing, stewing Vegetables, potatoes, sauces, fruit, sh
6 Continued cooking, braising Pasta, soup, braised meat
7 Gentle frying Rosti (hash brown), omelettes, breaded
fried foods, sausages
8 Frying, deep frying Meat, chips
9 Flash frying Steak
P Fast heating Boiling water
Cooking zone Pan Bottom Remarks
Ø Min. Ø Max.
(recommended)
184 mm x 220 mm (single) 145mm 180 mm
380 mm x 220 mm (double) 110 mm 245 mm with bridging function
(recommended)

10
Temp. level
Cooking method
Use for
Melting Melting butter, chocolate or honey at around 42°C
Keep Warm Sauces, keep food ready for serving at around 74°C
Slow cooking Keep ready-cooked food warm at around 92°C
Switching a cooking zone o
Touch „0“ on the bargraph.
- If there is no further input and the other cooking
zones are switched o, the appliance switches
o after 10 seconds.
Switching the hob o
Touch for a few seconds to switch the hob o.
- If there is no further input on the display and
all the cooking zones are switched o, the
appliance switches o after 10 seconds.
Residual heat indicator
After a cooking zone is switched o and is still
hot, an “H” remains illuminated on the panel as
long as there is a risk of burns.
Defrost, Keep warm and Slow cooking setting
With the defrost function you can defrost food or
gently melt butter, chocolate or honey.
The keep warm setting keeps ready-cooked foods
warm at approx. 74 °C.
The slow cooking setting keeps ready-cooked
foods warm at approx. 92 °C. With the slow
cooking setting you can cook at low temperatures
to preserve the nutritional value of the aliments.
- Select the cooking zone by pressing „0“ near
the bargraph of the cooking zone.
- Press one time.
- To select the setting for „Melting“ (defrosting),
press one more time.
appears.
- To select the setting for „Keep warm“, press
one more time.
appears.
- To select the setting for„Slow cooking“, press
one more time.
appears.
PowerPlus setting
All the cooking zones are equipped with the
PowerPlus booster.
When PowerPlus is switched on, the cooking
zone selected works at extra high power for 10
minutes. PowerPlus can be used, for instance, to
quickly heat a large quantity of water.
- Swipe up on bargraph until a „P“ appears in
the display.
- To end PowerPlus, swipe down on the bargraph
to the desired power level.
Timer
When a timer is set, the cooking zone switches o
after a set time between 1 min and 1 h 59 min.
Setting the timer
- Hob switched on.
- Cooking zone set.
- Press .
- „_00“ ashes in the middle of the display.
- Touch to increase the timer duration, touch
to reduce the time.
When you press for the rst time „1“ is
illuminated in the display.
Changing the timer
-Timer set
- Press the active cooking zone of the timer that
you want to change.
-Press .
-Change the timer duration using and .
Bridging function
The bridging function allows two individual
cooking zones to be switched on to be adjusted
together.
-Press the bargraphs of the two cooking zone.
- The display near the two zones shows „[“ on
one side and „]“ on the other side.
If one of the cooking zones is already running
when the bridging function is switched on, the
power level and operating time of this cooking
zone will be used for both zones. If both cooking
zones are already running, the operating times
are cleared in the power level displays.
In the Bridging function is not possible set the
Boost speed.
Child proof lock
- Appliance switched on
- Touch and simultaneously for few seconds
until an acoustic signal is emitted.
The display is locked. When the display
switches o in this state, the lock function will
still be active once you restart the hob.
- To deactivate the childproof lock, press and
simultaneously for a few seconds.
MODEL GALILEO BK A830
Max Total Power 7,545 kW

11
Error codes
Error code Description Possible cause of error Remedy
ER 03 and
continuous tone
Continuous sensor
activation; TC turn o
after 10 sec
Water or cookware on the glass
over the touch control sensors
Clean the control surface,
remove objects on the
sensors.
ER20 Flash memory – TC error μC- defective Replace TC
ER22 Button evaluation
defective, UI shuts o
after 3.5-7.5 sec
Short or open circuit in the area
of the button sensoric
Replace TC
ER31 Incorrect conguration
data or deviation between
generator and TC
New conguration of the
induction generator required
New conguration (Service
menu)
ER36 NTC value defective on
TC; UI turns o
Short or open circuit of NTC Replace TC
ER47 Communication error
between TC and induction
No or erroneous LIN
communication! (Slave does not
answer to request of master)
Connection cable not correctly
plugged in or defective.
U400 Continuous tone Power
supply on inlet to high
Incorrect connection of the
cooktop
Correct power supply
connection
E/2 Excess temperature of
the induction element
Overload of cooktop or empty
boiled cookware
Let system cool down.
E/A Error on the power board Component failure Replace power board
E/6 Error on power board No power supply or error on
power board
1. check wiring
2. check lter board
3. replace power board
E/8 Incorrect fan speed Error on fan left or right Air exhaust blocked, e.g. by
paper Replace Defective fan
E/9 Defective temperature
sensor on inductor
Replace inductor Replace
power board
8. MAINTENANCE AND REPAIR
- Make sure that maintenance on electrical
components is carried out only by the
manufacturer or the customer service.
- Make sure that damaged cables are changed
only by the manufacturer or the customer service.
When contacting the customer service, please
provide the following information:
- type of fault
- appliance model (Art./Cod.)
- serial number (S.N.)
This information is given on the data plate. The
data plate is attached on the bottom side.
9.TECHNICAL DATA
Product identication
Type: 4300
Model: GALILEO BK A830
Refer to the data plate placed on the bottom side
of the product.
The manufacturer provides continuously product
enhancements. For this reason, the text and
the illustrations in this manual may be changed
without notice.
Further information on technical data is available
on: www.faberspa.com

12
GALILEO BK A830
1
2
4
3
1,2 Flexible zone 1+2 bridged
3,4 Flexible cooking zone 3+4 bridged
Parameter Value Dimensions (mm)
Working dimensions -830 × 520 (W x D)
Power supply voltage /frequency 220-240 V, 50 Hz; 220 V, 60 Hz
3N~ / 2N~ 380-415 V, 50 Hz;
3N~ / 2N~ 380 V, 60 Hz
Power and heating element values
Cooking zone 1,2,3,4 2100 W;
Power Boost: 3700 W
230 x 210
Flexible Cooking zone
1+2, 3+4
3700 W 460 x 210
Parameter Symbol Value Unit of measure
Appliance weight M 26 / 19 kg
Number of cooking zones 4
Heat source induction

15
1. SICHERHEITSHINWEISE
Um Ihre Sicherheit und den
ordnungsgemäßen Betrieb
des Geräts zu gewährleisten,
müssen Sie dieses Handbuch
vor der Installation und dem Ge-
brauch sorgfältig lesen. Bewah-
ren Sie diese Anweisungen im-
mer beim Gerät auf, wenn Sie
umziehen oder es verkaufen.
Benutzer müssen die Bedienung
des Geräts beherrschen und die
Sicherheitsanweisungen kennen.
Die Induktionssysteme dieser
Kochfelder erfüllen sowohl die
Anforderungen der EMV-Stan-
dards als auch die EMF-Richt-
linie und sollten andere elektro-
nische Geräte nicht stören. Be-
nutzer von Herzschrittmachern
oder anderen elektronischen
Implantaten sollten mit ihrem
behandelnden Arzt oder dem
Implantat-Hersteller klären, ob
diese Geräte ausreichend gegen
Störungen abgeschirmt sind.
Die Kabelanschlüsse sind
von einem qualizierten
Elektriker zu verlegen.
Bevor Sie mit dem elek-
trischen Anschluss fort-
fahren, lesen Sie bitte
das Kapitel ELEKTRI-
SCHER ANSCHLUSS.
Bei Geräten mit Netzkabeln
muss die Anordnung der Klem-
men oder die Länge der Leiter
zwischen derDrahtverankerung
und denKlemmen so bemessen
sein, dass die stromführenden
Leiter vor dem Erdungsleiter
gespannt sind, für den Fall,
dass der Draht aus seiner Ver-
ankerung rutschen sollte.
•Der Hersteller haftet nicht für
Schädendurcheinenfehlerhaften
oderunsachgemäßenAnschluss.
•Stellen Sie sicher, dass die
Spannung des Netzanschlus-
sesmitderaufdemTypenschild
des Produkts übereinstimmt.
•Die Trennvorrichtung ist ge-
mäß den Verkabelungsvor-
schriften in die feste Verkabe-
lung einzubinden.
•Kontrollieren Sie bei Geräten
derKlasseI,obdasHausstrom-
netz entsprechend geerdet ist.
•Schließen Sie den Absauger
übereingeeignetesRohranden
Abluftkanal an. Bitte beachten
SiedasinderMontageanleitung
aufgeführteZubehör(beiRund-
rohr: Mindestdurchmesser
120 mm). Das Abluftrohr muss
so kurz wie möglich sein.
•Schließen Sie das Gerät über
einen allpoligen Schalter an
das Stromnetz an.
•DieAbluftentsorgungsvorschrif-
ten müssen erfüllt werden.
•Schließen Sie den Dunstab-
zug nicht an Abluftrohre an,
mit denen Verbrennungsgase
abgeleitet werden (Boiler,
Kamine usw.).
•Wird der Dunstabzug in Ver-
bindung mit nicht-elektrischen
Geräten eingesetzt (z. B. Gas-
herde), ist für eine ausreichen-
DE

16
de Belüftung des Raums zu
sorgen, um einen Rückstrom
der Abluft zu verhindern. Wenn
das Kochgerät in Verbindung
mit Geräten eingesetzt wird,
die über eine nicht-elektrische
Energiezufuhr verfügen, dann
darf der Unterdruck im Raum
0,04 mbar nicht überschreiten,
um zu verhindern, dass durch
das Kochgerät Dämpfe in den
Raumzurückgesogenwerden.
•DieLuftdarf nicht ineinAbgas-
rohr geführtwerden, dasfür die
Ableitung von Dämpfen von
Gas- oder Kraftstobrennern
verwendet wird.
•Ist das Netzkabel beschädigt,
darf es nurvom Hersteller oder
einemServicemitarbeiter aus-
getauscht werden.
•Schließen Sie den Stecker an
eine Buchse an einem gut zu-
gänglichen Ort an, die den ak-
tuellen Vorschriften entspricht.
•Unter Berücksichtigung der an-
zuwendendentechnischen und
sicherheitstechnischen Maß-
nahmen für die Ableitung von
Dämpfen,ist esvon besonderer
Bedeutung,dievondenlokalen
Behörden veröentlichten Vor-
schriften zu befolgen.
WARNUNG: Entfernen Sie
vor der Installation des
Geräts die Schutzfolien.
•Verwenden Sie ausschließlich
diemitdemGerätmitgelieferten
Schrauben und Kleinteile.
WARNUNG: Wenn die
Schrauben oder Befesti-
gungsvorrichtungen nicht
gemäß dieser Anleitun-
gen eingebaut werden,
kann dies zu elektrischen
Gefahren führen.
•Blicken Sie nie durch optische
GerätedirektindieSonne(Fern-
gläser,Vergrößerungsgläser…).
•Unbeaufsichtigte Kinder dür-
fen das Gerät nicht reinigen
oder warten.
•Kinder sind zu beaufsichtigen,
um sicherzugehen, dass sie
nicht mit dem Gerät spielen.
•Dieses Gerät ist nicht für die
Verwendung durch Personen
(einschließlich Kinder) mit
eingeschränkten körperlichen,
sensorischen oder mentalen
Fähigkeiten oder Mangel an
Erfahrung oder Kenntnissen
vorgesehen, sofern sie nicht
beaufsichtigt werden oder im
Gebrauch des Geräts durch
eine Person unterwiesen
wurden, die für ihre Sicherheit
verantwortlich ist.
•Dieses Gerät kann von Kin-
dern ab 8 Jahren und von
Personenmit eingeschränkten
physischen,sensorischen oder
geistigen Fähigkeiten oder
mangelnder Erfahrung oder
Kenntnisse im Umgang mit
dem Gerät benutzt werden,
wenn sie vorher in die sichere
Verwendung des Geräts ein-
gewiesenwurden unddiedamit
verbundenen Gefahren ver-
standen haben. Kinder dürfen
nicht mit dem Gerät spielen.

17
WARNUNG: Das Gerät
und seine erreichbaren
Teile werden während des
Betriebs sehr heiß.
Berühren Sie die Heizelemente
nicht.
Kinder unter 8 Jahren dürfen sich
demGerätnurunterAufsichtnähern.
•Reinigenund/oderersetzenSie
Filter nach der angegebenen
Zeitdauer(Brandgefahr). Siehe
Absatz Pege und Reinigung.
•Der Raum, in dem das Gerät
betrieben wird, muss ausrei-
chend belüftet werden, wenn
dort gleichzeitig Geräte mit
Gasbrennern oder anderen
Kraftstobrennern eingesetzt
werden (nicht bei Geräten an-
wendbar, die lediglich Luft in
den Raum zurückleiten).
• WARNUNG: Weist die Glas-
keramik Sprünge oder Risse
auf, Gerät ausschalten, um ei-
nen Stromschlag zu vermeiden.
•Schalten Sie das Gerät nicht
ein, wenn die Oberäche ge-
brochen oder das Material
beschädigt ist.
•Berühren Sie das Gerät nicht
mit nassen Körperteilen.
•Das Gerät niemals mit einem
Dampfreiniger reinigen.
•Keine Metallgegenstände wie
Messer, Gabeln, Löel oder
Deckel auf das Kochfeld legen,
da diese heiß werden können.
•Schalten Sie das Kochfeld
nach der Benutzung über
die Bedienelemente aus, und
verlassen Sie sich nicht allein
auf die Topferkennung.
•WARNUNG: Unbeaufsich-
tigtes Kochen mit Fett oder
Öl auf einem Herd kann
gefährlich sein und Feuer
verursachen. Versuchen Sie
NIEMALS, ein Feuer mit
Wasser zu löschen. Schal-
ten Sie das Gerät ab und
decken Sie die Flamme z. B.
mit einem Deckel oder einer
Feuerlöschdecke ab.
• ACHTUNG: Das Garverfahren
muss überwacht werden. Ein
kurzzeitiges Garverfahren muss
kontinuierlich überwacht werden.
•Das Gerät ist nicht für den
Betrieb mittels externer Zeit-
schaltuhr oder getrenntem Fern-
bedienungssystem vorgesehen.
• WARNUNG: Feuergefahr: La-
gern Sie nichts auf der Koch-
oberäche.
•Stellen Sie sicher, dass das
Gerät so installiert ist, dass es
vom Stromnetz getrennt wer-
den kann, mit einem Kontak-
tönungsabstand (3 mm), der
eine vollständige Abschaltung
bei Überspannungen der Kate-
gorie III gewährleistet.
•Achten Sie darauf, dass das
Gerät keinen Witterungsein-
üssen (Regen, Sonne) aus-
gesetzt ist.
•Stellen Sie sicher, dass die
Belüftung des Gerätes den
Anweisungen des Herstellers
entspricht.

18
2.
ERWENDUNGSHINWEISE
• Der Dunstabzug wurde aus-
schließlich für den Einsatz in
Haushalten zur Beseitigung von
Küchengerüchen konzipiert.
• Verwenden Sie dieses Gerät
nicht für andere als die an-
gegebenen Zwecke.
• Fritteusen sind während des
Betriebs ständig zu überwachen:
Überhitztes Öl kann heraus-
spritzen oder in Brand geraten.
• Verwenden Sie das Gerät
nicht mit einer externen
Zeitschaltuhr oder einer
separaten Fernbedienung.
• Das Gerät sollte nicht hinter einer
Dekortür installiert werden, um
eine Überhitzung zu vermeiden.
• So vermeiden Sie Schäden
am Gerät, Klettern Sie nicht
auf das Gerät.
• Stellen Sie keine Töpfe oder
Pfannen auf den Rahmen, um
Schäden an den Silikonfugen
zu vermeiden.
• Kochen oder bereiten Sie keine
Speisen direkt auf der Geräte-
oberäche zu oder lassen Sie
keine Gegenstände darauf fallen.
Ziehen Sie Töpfe und Pfannen
nicht über die Geräteoberäche.
3. REINIGUNG UND PFLEGE
• Der Aktivkohle-Geruchslter kann regeneriert
werden. Befolgen Sie die Anweisungen im Kit
sowohl für die Regenerationsmethode als auch
für die Austauschintervalle.
• Fettlter Z: Die Filter sind alle zwei Betriebsmonate
oder, bei besonders intensivem Einsatz, häuger
zu reinigen. Sie können in einem Geschirrspüler
gewaschen werden. Reinigen Sie Topfträger nicht
im Geschirrspüler.
=
Allgemeine Empfehlungen
• Vermeiden Sie unbedingt Scheuerschwämme,
Stahlwolle, Salzsäure oder andere Produkte, die
die Oberäche beschädigen könnten.
• Lebensmittel, die versehentlich auf die Oberäche
bzw. auf die Funktions- oder Dekorelemente des
Kochfelds fallen oder sich dort absetzen, dürfen
nicht verzehrt werden.
Gerät reinigen
• Reinigen Sie das Kochfeld nach jedem Ge-
brauch, damit Speisereste nicht festbrennen.
Angetrockneten oder festgebrannten Schmutz
zu entfernen, erfordert mehr Kraft.
• Verwenden Sie einen weichen Lappen oder
Schwamm mit Wasser und geeignetem Reini-
gungsmittel, um tägliche Verschmutzungen zu
entfernen. Beachten Sie bei den Reinigungs-
mitteln die Hinweise des jeweiligen Herstellers.
Wir empfehlen die Verwendung schonender
Reinigungsmittel.
• Entfernen Sie hartnäckige Verschmutzungen,
z. B. durch übergekochte Milch, mit einem
Glasschaber, solange das Kochfeld noch warm
ist. Bitte beachten Sie bei dem Glasschaber die
Hinweise des Herstellers.
• Entfernen Sie übergekochte zuckerhaltige
Speisen, wie etwa Marmelade, mit einem Glas-
schaber, solange das Kochfeld noch warm ist.
Ansonsten könnte die Glaskeramikoberäche
beschädigt werden.
• Entfernen Sie geschmolzenen Kunststo mit
einem Glasschaber, solange das Kochfeld noch
warm ist. Ansonsten könnte die Glaskeramik-
oberäche beschädigt werden.
• Entfernen Sie Kalkecken mit etwas Kalklöser,
z. B. Essig oder Zitronensaft, wenn das Koch-
feld abgekühlt ist. Reinigen Sie anschließend
mit einem feuchten Tuch nach.

19
4. ANFORDERUNGEN AN DEN
KÜCHENSCHRANK
• Das Kochfeld ist für den Einbau in eine Arbeits-
platte über einem mindestens 600 mm breiten
Küchenschrank bestimmt.
• Bei Einbau in brennbares Material müssen die
Richtlinien und Standards für Niederspannungs-
anlagen und zum Brandschutz unbedingt ein-
gehalten werden.
• Bei montierten Einheiten müssen die Komponen-
ten (Kunststo und Furnierholz) mit hitzebestän-
digem Klebsto (min. 100 °C) montiert werden:
Ungeeignete Materialien und Klebstoe können
zu Verformung und Ablösung führen.
• Hängende Küchenelemente über dem Gerät müs-
sen in einem Abstand installiert sein, der genügend
Raum für angenehme Arbeitsbedingungen bietet.
• Die Verwendung von Abschlussleisten aus Hart-
holz entlang der Arbeitsplatte hinter dem Gerät ist
zulässig, wenn der Mindestabstand entsprechend
den Angaben auf den Installationsabbildungen
eingehalten wird.
• Der Mindestabstand zwischen dem Einbaugerät
und der Rückwand ist auf der Abbildung für die
Installation des Einbaugeräts angegeben (150 mm
für die Seitenwand, 40 mm für die Rückwand
und 500 mm für etwaige Hängeschränke darüber
eingehalten wird).
• Bringen Sie vor dem Zusammenbauen das mitge-
lieferte Klebeband an der gesamten Außenkante an,
um zu verhindern, dass Flüssigkeiten zwischen der
Kante des Kochfelds und derArbeitsplatte eindringen.
5. ELEKTRISCHER ANSCHLUSS
• Die Kabelanschlüsse müssen von einem quali-
zierten Elektriker verlegt werden.
• Dieses Gerät verfügt über einen Anschluss vom
Typ "Y" und benötigt ein Netzkabel mindestens
vom Typ H05VVV-F. Ein-, zwei- und dreiphasi-
ger Anschluss: Mindestquerschnitt der Leiter:
2,5 mm ². Außendurchmesser des Netzkabels:
min. 7 mm - max. 15 mm.
• Die Anschlussklemmen werden sichtbar, wenn
der Deckel des Anschlusskastens entfernt wird.
• Stellen Sie sicher, dass die Eigenschaften des
elektrischen Haussystems (Spannung, maximale
Leistung und maximale Stromstärke) mit denen
des Geräts kompatibel sind.
• Schließen Sie das Gerät wie in der Abbildung
gezeigt an (entsprechend der Netzspannung
und der Landesnorm).
• Wir empfehlen das Netzkabel 5 x 2,5 mm²
H05V2V2-F zu verwenden. Bei Verwendung
des Netzkabels 5 x 2,5 mm²H05V2V2-F sind
die nachfolgenden Hinweise zu beachten: bei
dreiphasigem Anschluss die beiden Adern
trennen und die blauen Hüllen an den grauen
Adern entfernen.
6. ENTSORGUNG
• Das Symbol auf dem Produkt oder seiner Ver-
packung zeigt an, dass dieses Produkt nicht als
Haushaltsmüll entsorgt werden darf. Übergeben
Sie dieses Produkt zugelassenen Fachbetrieben
für das Recycling von Elektro- und Elektronik-
geräten. Durch Ihren Beitrag zur korrekten
Entsorgung dieses Produkts schützen Sie die
Umwelt und die Gesundheit Ihrer Mitmenschen.
Umwelt und Gesundheit werden durch falsche
Entsorgung gefährdet. Für weitere Informationen
über das Recycling dieses Produkts wenden Sie
sich bitte an Ihre örtliche Stadtverwaltung, Ihren
Hausmüllentsorger oder das Geschäft, in dem
Sie das Produkt gekauft haben.
• Das Gerät entspricht der Richtlinie 2012/19/EU
über die Reduzierung der in Elektro- und Elek-
tronikgeräten verwendeten gefährlichen Stoe
und die Abfallentsorgung.

20
EIN-/AUS-Schalten des Kochfelds/Dunstabzugs
Drücken Sie auf EIN. Zum AUS-Schalten erneut drücken.
Beim Einschalten des Kochfelds/Abzugs bendet sich die Haube
standardmäßig im Automatikmodus und die LED schaltet sich ein.
Um den Automatikmodus zu deaktivieren und den Dunstabzugslüfter
manuell zu steuern, berühren (drücken) Sie die Auswahlleiste.
Die LED schaltet sich aus.
Timer aktivieren
Die Taste drücken und 5 Sekunden lang gedrückt halten. Die Haube
schaltet dann in einen Verzögerungsmodus um, die Timereinstellung
ist auf 15 min festgelegt.
Die LED der Verzögerungsanzeige auf der Haube schaltet sich ein .
Taste erneut drücken und 5 Sekunden lang gedrückt halten, um die
Verzögerung zu deaktivieren.
Wenn der Timer abgelaufen ist, ertönt ein akustisches Signal 2 Minuten
lang. Es stoppt, wenn die Taste Ein/Aus gedrückt wird. Das Display
schaltet sich aus.
Der Countdown wird nicht angezeigt, die visuelle Rückmeldung erfolgt
über die LED .
Stop&Go / Erinnerung
Den Timer für die Kochplatte erhöhen/verringern
Fettlter durch Drücken und Halten zurücksetzen
Geruchs-Aktivkohlelter durch Drücken und Halten zurücksetzen
+ Tastensperre.
Tippen Sie gleichzeitig einige Sekunden auf und
7. BEDIENELEMENTE
Table of contents
Languages:
Other FABER S.p.A. Ventilation Hood manuals

FABER S.p.A.
FABER S.p.A. RAY User manual

FABER S.p.A.
FABER S.p.A. STRIP SMART EV8 User manual

FABER S.p.A.
FABER S.p.A. ZOOM User manual

FABER S.p.A.
FABER S.p.A. MAXIMA EV8 LED AM/X A90 User manual

FABER S.p.A.
FABER S.p.A. GALILEO SMART BK GLASS A830 User manual

FABER S.p.A.
FABER S.p.A. SOFT EDGE A80 User manual
Popular Ventilation Hood manuals by other brands

ROSIERES
ROSIERES RT623/1 Instructions for installation and use

IKEA
IKEA IHI8304WS0 Installation Instructions and Use & Care Guide

Candy
Candy CBT625/2X/1 instruction manual

BEST Range Hoods
BEST Range Hoods CC34IQSB instructions

GE
GE Monogram ZV42 owner's manual

Kuppersbusch
Kuppersbusch IKD 12250.0 Instruction booklet