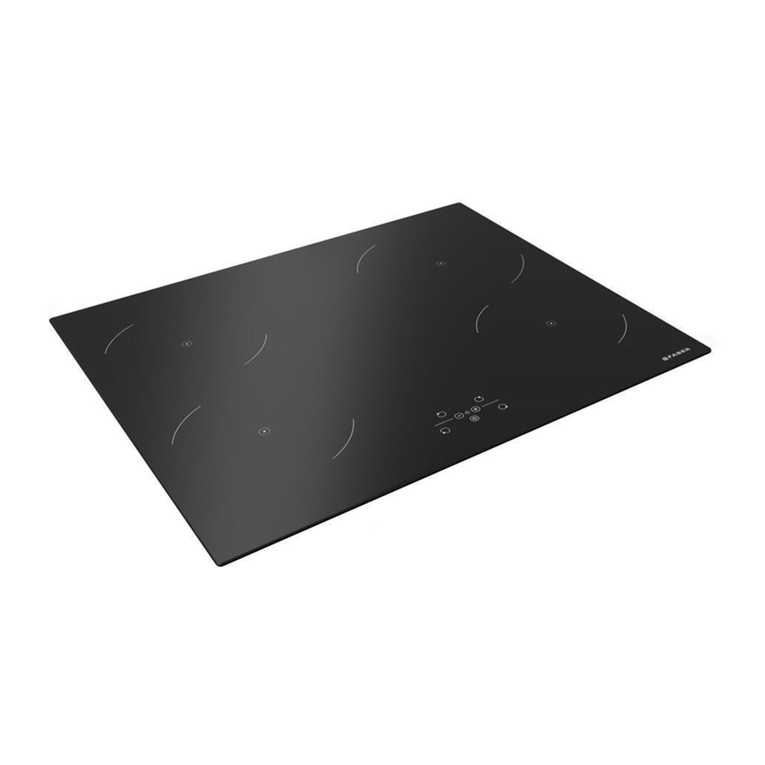
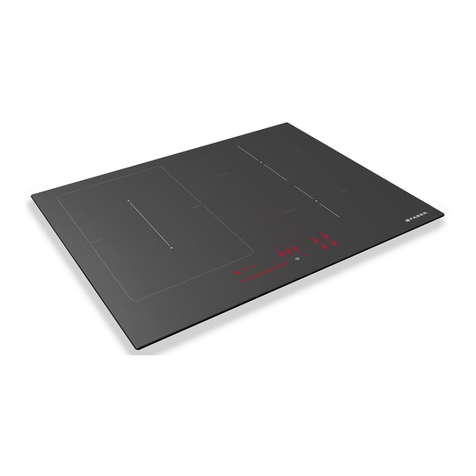
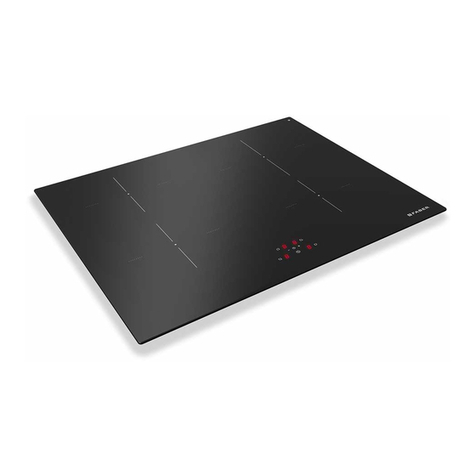
Faber FBH 64 BK User manual

EN
HOB INDUCTION
DE
KOCHFELD INDUKTION
FR
CUISINIÈRE À INDUCTION
NL
INDUCTIEKOOKPLAAT
ES
PLACA DE COCCIÓN POR INDUCCIÓN
PT
PLACA DE INDUÇÃO
IT
PIANO DI COTTURA A INDUZIONE
SV
INDUKTIONSHÄLL
RU
ИНДУКЦИОННАЯВАРОЧНАЯПОВЕРХНОСТЬ
UK
ІНДУКЦІЙНАВАРИЛЬНАПОВЕРХНЯ
FBH 64 BK FCH 63 GR
FBH 84 BK
FCH 84 GR
FBH 83 BK
FCH 83 GR
FBH 32 BK

EN
USER MANUAL .....................................................................................................................3
DE
GEBRAUCHSANLEITUNG..................................................................................................18
FR
MANUEL D’UTILISATION....................................................................................................33
NL
GEBRUIKSAANWIJZING ....................................................................................................48
ES
MANUAL DE USO ...............................................................................................................63
PT
LIVRO DE INSTRUÇÕES PARA UTILIZAÇÃO ...................................................................78
IT
LIBRETTO DI USO ..............................................................................................................93
SV
ANVÄNDNINGSHANDBOK...............................................................................................108
RU
РУКОВОДСТВОПОЭКСПЛУАТАЦИИ ............................................................................123
UK
ІНСТРУКЦІЯЗЕКСПЛУАТАЦІЇ ........................................................................................138

3
EN
About this manual
This user manual applies to several models of
the device. Thus it may be possible that some
of the described features and functions are not
available on your specic model.
Faber reserves the right to make modications
to the product without prior notice. All
information correct at time of issuance.
XCarefully read the user manual before
using the device.
XKeep the user manual.
XUse the device described in this user
manual only according to the intended use.
Symbol Meaning
Warning symbol. Warning against
risks of injury.
Actions in safety and warning notes
to avoid injury or damage.
Action step. Species an action to
be done.
Result. Result of one or more action
steps.
Precondition that has to be fullled
before performing the following
action.
Intended use
The hob was developed exclusively for non-
professional, domestic use in the household.
This hob is designed to offer professional
performance in the household. It is a highly
versatile appliance enabling safe and easy
selection of different cooking methods.
Safety information
XRead the operating instructions before
using the appliance for the rst time.
The manufacturer can not be made liable for
possible damage which may occur due to
incorrect installation and incorrect, improper or
unreasonable use of the device.
To ensure safe and efcient operation of this
electrical device:
ZOnly contact authorised service centres.
ZDo not modify any features of the device.
This appliance is not intended for use
by persons (including children) with
reduced physical, sensory or mental
capabilities, or lack of experience and
knowledge, unless they have been given
supervision or instruction concerning use of
the appliance by a person responsible for their
safety.
Children should be supervised to ensure that
they do not play with the appliance.
This device is not a toy.
ZKeep children away from the device and
the packaging material.
ZDo not leave children near the device
unattended.
ZDo not let children play with the device.
ZDo not allow children to touch the device
or its controls during and immediately after
using it.
Induction systems of these hobs meet the
requirements of EMC standards as well as the
EMF Directive and should not interfere with
other electronic devices.

4
ZHeart pacemakers users or other electronic
implants users should clarify with their
medical doctor or with the manufacturer
of the implants whether these devices are
sufciently interference resistant.
Proper installation and placement
The appliance must be installed and
connected to the electricity supply in
accordance with the separate installation
instructions. Have a qualied tter/ electrician
carry out the necessary work.
The appliance is designed for use in the home
for preparing food. No liability is assumed
for any damage caused by improper use or
incorrect handling.
If the appliance is to be permanently
connected to the power supply:
ZEnsure that the device is installed only
by the customer service, an electrician
or trained personnel with the appropriate
knowledge/education.
ZEnsure that the device is installed in a way
that allows to disconnect it from the power
supply, with a contact opening distance
(3 mm) that ensures complete
disconnection in category III overvoltage
conditions.
ZEnsure that the device is connected
directly to the mains socket.
-Ensure that no adapters, no multi-
sockets and no extension cables are
used to connect the device.
ZEnsure that the supply cord is not damaged.
If damaged, contact customer services.
ZEnsure that the device is not exposed to
atmospheric agents (rain, sun).
ZEnsure that the ventilation of the appliance
is in accordance with the manufacturer‘s
instructions.
Risk of death!
ZKeep pets away from the device.
Packaging materials, e.g. plastic lm and
polystyrene, can be dangerous for children.
ZKeep packaging material away from
children.
Proper use
ZOnly use the device to prepare and cook
food.
ZObserve the manuals of the cooking
devices that are used with the hob when
using the device.
ZDo not place power cables of other electric
appliances on hot parts of the appliance.
ZDo not use ammable liquids near the
appliance.
ZAfter use, switch off the hob by its controls.
Do not rely on the pan detector.
ZDo not operate the appliance with an
external timer switch or a separate remote
control system.
ZThe cooking process has to be supervised.
-A short term cooking process has to be
supervised continuously.
-After use, switch off the hob element
by its control and do not rely on the pan
detector.
ZThe appliance shall not be installed behind a
decorative door in order to avoid overheating.
Risk of burns!
During use the appliance becomes hot. Care
should be taken to avoid touching heating
elements inside the hob.
WARNING: Accessible parts may become hot
during use. Young children should be kept away.

5
ZDo not to touch the heating elements.
ZMetallic objects such as knives, forks,
spoons and lids should not be placed on
the hob surface since they can get hot
Risk of electric shock due to
damaged device!
ZWARNING: If the surface is cracked,
switch off the appliance to avoid the
possibility of electric shock.
ZDo not switch on a device if the surface
is cracked or there is a damage to the
material thickness.
ZDo not touch the appliance with wet parts
of the body.
ZContact the customer service.
Risk of re!
ZDo not store items on the cooking surfaces.
Risk of re!
Unattended cooking on a hob with fat or oil
can be dangerous and may result in re. Hot
oil ignites readily.
ZPrepare food with plenty of fat (such as
fries) only under constant supervision.
ZNever try to extinguish re with water.
ZIn the case of a re, switch off the
appliance and cover ame e.g. with a lid or
with a re blanket.
To avoid damaging the appliance
ZIn the case of thermal failure, switch the
solid plate off and allow to cool down
completely. Do not put any dishes on it.
Do not cool with cold water under any
circumstances.
ZDo not climb onto the appliance.
ZTo avoid damaging the silicon grouting, do
not put hot cookware on the frame.
ZDo not cut or prepare food on the surface
or drop hard objects onto it. Do not drag
cookware across the surface.
ZMake sure than no sugary foods or juices
end up on the hot cooking zones. This can
damage the surface. If sugary foods or
juices do end up on the hot cooking zones,
remove these immediately with a glass
ceramic hob scraper (while the hob is still
hot).
ZDo not leave the appliance unattended
during operation.
Pots with pure copper or aluminium leave
behind traces that can be difcult to clean. If
the traces are not removed immediately after
cooking with a suitable cleaning agent, they
can be permanently burned on and therefore
permanently ruin the visual appearance of the
appliance.
ZDo not use pots with pure copper or
aluminium bases for cooking.
Sliding pots and cookware across the glass
ceramic causes scratches.
ZAvoid scratches by lifting pots and
cookware when putting them into place.
The hob is an item for daily use: signs of
usage such as scratches or visible material
abrasion from pots or cookware are normal.
Intensive use leads to more distinctive signs of
usage. In such cases, the appliance continues
to function perfectly and a complaint is not
justied. Safety is always guaranteed.

6
Maintenance and cleaning
ZDo not use harsh abrasive cleaners or
sharp metal scrapers to clean the hob,
since they can scratch the surface, which
may result in shattering of the glass.
ZDo not use steam cleaners or direct jets of
water.
Risk of electric shock due to
entering liquid!
The device contains electrical components.
ZMake sure that no liquid enters the interior
of the device.
ZDo not use pressurised steam to clean the
device.
Repair
The appliance is manufactured in compliance
with the relevant effective safety standards.
ZDo not allow anyone except qualied
personnel to install or repair the appliance.
ZContact a service centre authorised by the
manufacturer or qualied personnel in the
following cases:
-Immediately after unpacking, in the
event of doubts regarding the integrity
of the device
-During installation (according to the
manufacturer‘s instructions)
-Doubts regarding the correct operation
of the device
-Malfunction or poor operation
-Replacing the power socket if
incompatible with the power plug of the
device
-If the supply cord is damaged, it must
be replaced by the manufacturer, its
service agent or similarly qualied
persons in order to avoid a hazard.
ZUse original spare parts only.
Taking out of service
ZIf the appliance is no longer to be used, call
the service centre or qualied personnel to
disconnect it from the power supply.

7
Overview
FBH 64 BK FCH 63 GR
FBH 84 BK
FCH 84 GR
FBH 83 BK
FCH 83 GR
FBH 32 BK
Electric connection
Buttons and display elements I.e. 4 zone hob
2 21
22
34
1. On / Off
2. Cooking zone position
3. Decrease power level /
Decrease cooking time
4. Increase power level /
Increase cooking time

8
Your appliance
How induction hobs function
Induction hobs function considerably differently to
conventional hobs or solid plates. The induction coil under
the glass ceramic creates a magnetic eld that alternates
quickly and which directly heats the magnetisable base of
the cookware. The glass ceramic is only heated by the hot
cookware. If the cookware is removed from the cooking
zone, the power supply is interrupted immediately.
Pan detection
Every cooking zone is equipped with pan detection. The
pan detection recognises cookware with a magnetisable
base that is suitable for use with induction hobs.
If the cookware is removed during operation or unsuitable
cookware is used, the display near the bargraph ashes
with .
If there is no cookware placed on the cooking zone during
the pan detection time of 10 seconds:
– The cooking zone switches off automatically after 10
seconds.
– The display of each cooking zone shows .
Cookware
Suitable cookware
Only cookware with a fully magnetisable base is suitable for
cooking on the induction hob.
The magnet adheres to every point on the entire base of
the cookware.
Cookware suitable for use in induction cooking
Cookware used on the induction cooking surface must be
made of metal, with magnetic properties and a sufciently
large base.
Suitable cookware:
9Enamelled steel cookware with thick bases.
9Cast iron cookware with an enamelled base.
9Cookware in multilayer stainless steel, ferritic stainless
steel and aluminium with a special base.
Unsuitable cookware:
9Copper, stainless steel, aluminium, reproof glass,
wood, ceramic and terracotta cookware.
XTo see whether the pan is suitable, bring a magnet
close to the bottom: if it is attracted, the pan is suitable
for induction cooking. If you do not have a magnet,
you can put a small amount of water in the pan, place
it on a cooking zone and start the cooking zone. If the
symbol appears on the display, it means the pan is
not suitable.
Note: Use only cookware with a perfectly at bottom and
suitable for induction cooking zones. Using cookware with
an irregular bottom could jeopardise the efciency of the
heating system and prevent cookware from being detected
on the cooking zone.
Noise during cooking
Cookware can make noise during cooking. This does not
indicate any malfunction, nor does it affect the functioning of
the appliance in any way.
Noise depends on the cookware used. If the noise causes
considerable disturbance, it can help to change the
cookware.
Advice on energy-saving
XThe diameter of the base of the pan must correspond
to the diameter of the cooking zone.
ENERGY
SAVING
ENERGY
SAVING
ENERGY
SAVING
XWhen buying a pan, check whether the diameter
indicated is that of the base or the top of the pan, as
the top is almost always larger than the base.
XWhen preparing dishes with long cooking times, you
can save time and energy by using a pressure cooker,
which also makes it possible to preserve the vitamins
in the food.
9
XMake sure that the pressure cooker contains enough
liquid as, if there is not enough and it overheats, this
may cause damage to both the pressure cooker and
the cooking zone.
XIf possible, always cover pans with a suitable lid.
XChoose a pan suitable for the quantity of food to be
cooked. A large, half-empty pan leads to a waste of
energy.
Cooking zone Pan Bottom diameter
Ø Min. Ø Max.
Ø 175 mm Ø 110 mm Ø 175 mm
Ø 215 mm Ø 120 mm Ø 215 mm
Ø 265 mm Ø 145 mm Ø 265 mm
Dual Zone Ø
230 mm / 320 mm Ø 120 mm / 290 mm Ø 230 mm / 320 mm
Normal operating noises of the cooktop
lnduction technology is based on the creation of
electromagnetic elds. They may generate heat directly on
the bottom of the cookware. Pots and pans may cause a
variety of noises or vibrations depending on the way they‘ve
been manufactured.
These noises are described as follows:
Low humming (like a transformer)
This noise is produced when cooking at a high heat level.
lt is based on the amount of energy transferred from the
cooktop to the cookware. The noise ceases or quiets down
when the heat level is reduced.
Quiet whistling
This noise is produced when the cooking vessel is empty. lt
ceases once water or food is placed in the vessel.
Crackling
This noise occurs with cookware comprised of various
materials layered one upon the other. lt‘s caused by the
vibrations of the surfaces where different materials meet.
The noise occurs on the cookware and can vary depending
on the amount and method of preparation of the food.
Loud whistling
This noise occurs with cookware comprised of different
materials layered one upon the other, and when they are
additionally used at maximum output and also on two
cooking zones. The noise ceases or quiets down when the
heat level is reduced.
Fan noises
For proper operation of the electronic system, it is
necessary to regulate the temperature of the cooktop. For
this purpose, the cooktop is equipped with a cooling fan,
which is activated to reduce and regulate the temperature
of the electronic system. The fan may also continue to run
after the appliance is turned off if the detected temperature
of the cooktop is stili too hot after turning it off.
Rhythmic sounds and similar to the hands of a
clock
This noise occurs only when at least three cooking zones
are operating and disappears or weakens when some of
them are switched off.
The noises described are a normal element of the
described induction technology and shouldn‘t be regarded
as defects.

10
Switching on the rst time
During the rst few hours of use, a cooking zone can give off an unpleasant smell. This is normal for brand new appliances.
XEnsure that the room is well ventilated.
Operation
Power levels
Power level Cooking method Use for
1Melting, gentle warming Butter, chocolate, gelatine, sauces
2Melting, gentle warming Butter, chocolate, gelatine, sauces
3Swelling Rice
4Continued cooking, reducing, stewing Vegetables, potatoes, sauces, fruit, sh
5Continued cooking, reducing, stewing Vegetables, potatoes, sauces, fruit, sh
6Continued cooking, braising Pasta, soup, braised meat
7Gentle frying Rosti (hash brown), omelettes, breaded fried
foods, sausages
8Frying, deep frying Meat, chips
9Flash frying Steak
P Fast heating Boiling water

11
Switching on the cooking zone
After switching on the hob:
XSelect the required cooking zone using the appropriate
zone selection keys ( for example: rear left cooking
zone).
XUse the keys and to select the cooking power
from 1 to 9, or else enable the Power function (see
“Power Function”).
Switching off the cooking zone
XSelect the cooking zone you wish to switch off using
the zone selection keys.
XUse the key to bring the power value 0 (zero).
Note: Hold the On/Off key down for at least
2 seconds to switch off all cooking zones at the same time.
Quick selection
This function allows you to quickly set the cooking zones to
maximum power.
After switching on the hob:
XSelect the required cooking zone using the appropriate
zone selection keys ( for example: rear left cooking
zone).
XPress . Power level 9 will be set.
Residual heat
Improper use
Risk of burns!
ZSupervise children carefully as they cannot readily see
the residual heat indicator. The cooking zones remain
hot for a certain period of time even after they have been
turned off. Make sure that children never touch the hob.
Note: If the cooking zone is still hot after being switched off,
the symbol
H
will be displayed on the display. The symbol
clears once the temperature drops below 40°C.
Power Function
This function allows you to use the maximum possible
power for the cooking zone.
After activating the required cooking zone:
XPress the key to bring the power to 9.
XPress the key again; the symbol
P
will be shown
on the display.
XPress the key to deactivate the Power Function.
Note: On the front left and rear right cooking zones only:
the Power Function is available for 5 minutes, after which
the power level drops automatically to 9.
Minute minder timer
This function is used to set a minute minder timer. Abeep will
sound at the end of the pre-set time (from 1 to 99 minutes).
After activating the hob:
XPress the keys and at the same time;
0.0.
will be displayed.
XSet the required time in minutes using the keys and
(hold the keys down to set the time more quickly).
Flashing dots will appear to indicate the count.
Note:
– Using the minute minder does not switch off the
cooking zones but rather informs the user when the
set minutes have run out.
– The timer can be activated while the cooking zones
are on or off.
At the end of the previously set time, the hob will warn the
user with a series of beeps. Press any key to stop the beep.
Note: To deactivate the minute minder timer during the
countdown, zero the set time using the key When the
display shows
0.0.
the timer will be deactivated.
Cooking zone automatic switch-off timer
This function is used to program the automatic switch-off of
each cooking zone at the end of a period of time (from 1 to
99 minutes).
XSelect the required cooking zone using the appropriate
zone selection keys ( for example: rear left cooking
zone).
XUse the keys and to select the cooking power
from 1 to 9, or else enable the Power function
(see “Power Function”).
XWhile the led of that cooking zone is still activated,
press and at the same time.
XPress or to adjust the desired time (hold the
keys down to set the time more quickly).
The timer can be activated on multiple cooking zones at the
same time.

12
If you wish to modify the set time:
XSelect the cooking zone to modify.
XPress the keys and at the same time until the
dot lights up under the corresponding cooking zone.
XPress the keys and to select the new time required.
XSelect the cooking zone to conrm.
XAt the end of the previously set time, the corresponding
display will ash, the hob will deactivate the cooking
zone and warn the user with a series of beeps. Press
any key to stop the beep.
Child lock
After activating the hob:
XPress the keys and at the same time.
XPress the button after the beep.
The controls are now locked and
L
will appear on
the display.
Note: The control lock will not be disabled in the event of a
power failure.
To unlock the controls:
After activating the hob:
XPress the keys and at the same time.
XPress the button after the beep.
Note: The icon shown is the one of 4 cooking zone hobs, for
3 zones and 2 zones hobs the icon is the one on the right.
Power management
Depending on the maximum setting of output power available
(see the next section“Power Limitation Settings“), not all
cooking zones can be adjusted to the desired level or enabled.
In this case, the display blinks a few seconds displaying the
maximum power allowed.
If no adjustments are made to other areas, cooking will
begin at the level displayed.
Power limitation settings
Power limitation setting is possible for all the following
models: FBH 64 BK, FCH 63 GR, FBH 84 BK, FCH 84 GR,
FBH 83 BK, FCH 83 GR.
–Setting is possible only during the rst two
minutes after plug in the appliance.
– The touch has to be unlocked and all heaters have to
be switched off.
– The factory power setting is the maximum level.
– If there is a black out, power level set remains unchanged.
Example of power limitation setting of a four cooking zones
hob (FBH 64 BK / FBH 84 BK / FCH 84 GR):
XPress at the same time all the four cooking zones and
hold it until you can hear a signal.
88
88
XIf you can‘t hear the signal within 10 seconds, repeat
the operation trying to better position the ngers.
XYou can now switch with and between the
power limitation levels (2,8 kW, 3,5 kW and MAX).
28
88
74
88
XPress now at the same time the four cooking zones
and hold it until you can hear a signal for conrmation
of the power set.
28
88
Note: If, after setting the power level, you don‘t proceed to
conrm with the nger touch and the subsequent signal within
60 seconds, the new setting will not be acquired by the hob.
Example of power limitation setting of a three cooking
zones hob: (FCH 63 GR / FBH 83 BK / FCH 83 GR):
XPress at the same time all the three cooking zones
and hold it until you can hear a signal.

13
8
88
8
XIf you can‘t hear the signal within 10 seconds, repeat
the operation trying to better position the ngers.
XYou can now switch with and between the
power limitation levels (2,8 kW, 3,5 kW and MAX).
2
88
8
7
88
4
XPress now at the same time all the three cooking
zones and hold it until you can hear a signal for
conrmation of the power set.
2
88
8
Note: If, after setting the power level, you don‘t proceed
to conrm with the nger touch and the subsequent signal
within 60 seconds, the new setting will not be acquired by
the hob.
MODEL FBH 64 BK FCH 63 GR FBH 84 BK
FCH 84 GR FBH 83 BK
FCH 83 GR FBH 32 BK
DISPLAY
SETTING Max Total
Power Max Total
Power Max Total
Power Max Total
Power Max Total
Power
2,8 2,8 kW 2,8 kW 2,8 kW 2,8 kW
3,4 kW3,5 3,5 kW 3,5 kW 3,5 kW 3,5 kW
7,4 - MAX 6,75 kW 6,9 kW 7,1 kW 6,4 kW
Power in kW @ 230V - 50/60 Hz
Cooker Hood’s Commands
Engine ON/OFF. Pressing this button switches
on the motor at the rst speed.
Pressing this button reduces the motor speed to
reach the rst speed
Pressing this button increases the motor speed
to reach the maximum speed (Booster) which
last for 5 minutes.
Pressing this button the lights switches on and
off.
TIMER: can be activated by pressing the key
after selecting the speed; the hood switches off
completely after 5 minutes.
Note: commands - selected on the remote control - are
displayed on the hob’s glass

14
Cleaning and care
Risk of burns!
ZNon pulire il dispositivo nché non è completamente
freddo.
Before performing any cleaning and care:
ZRead the general safety information about cleaning in
the chapter „Safety information“.
ZTurn the appliance off.
General recommendations
ZDo not use steam cleaners or direct jets of water.
ZDo not use coarse abrasive materials or sharp metal
scrapers to clean the glass parts of the appliance.
They could scratch the surface and cause the glass
to shatter.
ZNever use scouring pads, steel wool, muriatic acid or
other products which could scratch or mark the surface.
Cleaning the appliance
XClean the hob after every use in order to prevent food
residues from burning on. Cleaning dried-on and burnt-
on dirt requires more effort.
XTo clean everyday dirt, use a soft cloth or sponge
with water and a suitable cleaning agent. Follow the
manufacturer‘s advice with regard to cleaning agents.
We recommend using protective cleaning agents.
XRemove encrusted dirt, e.g. from milk that has boiled
over, with a glass ceramic hob scraper while the hob is
still warm. Please follow the manufacturer‘s advice with
regard to the scraper.
XRemove sugary foods, such as marmalade, that have
boiled over with a glass ceramic hob scraper while the
hob is still warm. Otherwise, this could damage the
glass ceramic surface.
XRemove melted plastic with a glass ceramic hob
scraper while the hob is still warm. Otherwise, this
could damage the glass ceramic surface.
XRemove limescale stains using a small amount of
lime-dissolving solution, e.g. vinegar or lemon juice,
when the hob has cooled down. Then clean again with
a damp cloth.
Troubleshooting
The hob does not work:
XMake sure that the hob is connected and that the main
switch is turned on.
XMake sure that there is no power failure.
XMake sure that the fuse has not blown. In this case
replace the fuse.
XMake sure that the circuit breaker of the residential
electrical system has not tripped.
In this case, re-activate the circuit breaker.
The cooking results are unsatisfactory:
XMake sure that the cooking temperature is not too high
or too low.
The hob smokes:
XLet the hob cool down and clean it once cooking is
complete.
XMake sure that the food has not spilled out of the pan
and use a larger cooking vessel, if needed.
The fuses blow or the circuit breaker of the residential
electrical system trips repeatedly.
XCall Technical Support or an electrician.
There are cracks or ssures in the hob:
XTurn off the appliance immediately, disconnect the
power supply and contact Technical Support.
The hob makes noise:
XIn case of noise, refer to paragraph „Normal operating
noises of the cooktop“ (page 9).

15
Error codes
Models: FBH 64 BK
Error code Description Remedy
ER03 and
permanent tone Continuous button actuation; control switches off
after 10 s Clean the user interface.
ER22 Button analysis defective, control switches off after
3.5-7.5 s Contact authorized center for technical assistance
specifying the error code.
ER20 Flash error Contact authorized center for technical assistance
specifying the error code.tecnica e indicare il codice
di errore.
ER47 Lin communication error Connection cable not correctly plugged or defective.
E2 Overtemperature Allow system to cool
E3 1. Pot/pan not suitable
2. Power of cooking zones
permanently exceeded.
Change the pot / pan; if the error persists, contact
authorized center for technical assistance specifying
the error code
E5 Mains voltage error Contact authorized center for technical assistance
specifying the error code.
E6 Mains-Sync-Pulse error Contact authorized center for technical assistance
specifying the error code.
E8 Fan error Contact authorized center for technical assistance
specifying the error code.
E9 Temperature sensor (NTC) on inductor defective Contact authorized center for technical assistance
specifying the error code.
EA Hardware fault Contact authorized center for technical assistance
specifying the error code.
E/H Invariable resistor fault Allow system to cool
U400 Wrong connection/Overvoltage 400 V Contact authorized center for technical assistance
specifying the error code.

16
Models: FBH 84 BK / FCH 84 GR / FBH 83 BK / FCH 83 GR / FBH 32 BK / FCH 63 GR
Error code Description Remedy
CThe cooking zone can be congured. Contact authorized center for technical assistance
specifying the error code.
C/- The cooking zone will be congured.
If „-„ is not displayed check the possible
causes of the E/5.
Contact authorized center for technical assistance
specifying the error code.
EA ashing „E“ on each cooking zone indicates
that all congs will be deleted. Contact authorized center for technical assistance
specifying the error code.
E/2
(error code different
for some UI) Temperature limits are exceeded. System must cool down.
E/3 Unsuitable pot Change the pot / pan; if the error persists, contact
authorized center for technical assistance specifying
the error code.
E/4 Uncongured induction module Contact authorized center for technical assistance
specifying the error code.
E/5 No communication between UI and induction
module Contact authorized center for technical assistance
specifying the error code.
E/6 Main power disturbance Contact authorized center for technical assistance
specifying the error code.
E/7 Contact authorized center for technical assistance
specifying the error code.
E/8 Fan failure Contact authorized center for technical assistance
specifying the error code.tecnica e indicare il codice
di errore.
E/9 Defect ive temperature probe on inductor Contact authorized center for technical assistance
specifying the error code.
E/A Hardware defect of induction module Contact authorized center for technical assistance
specifying the error code.
E/C Conguration failure Contact authorized center for technical assistance
specifying the error code.
E/H Fixed sensor value Allow system to cool.
No functionality and
no displaying Overvoltage on the switch mode power supply
(no functionality)
Disconnect and connect the power line connection;
if the error persists, contact authorized center for
technical assistance specifying the error code.

17
Maintenance and repair
ZMake sure that maintenance on electrical components is
carried out only by the manufacturer or the customer service.
ZMake sure that damaged cables are changed only by
the manufacturer or the customer service.
XWhen contacting the customer service, please provide
the following information:
– type of fault
– appliance model (Art.)
– serial number (S.N.)
This information is given on the data plate. The data plate is
attached on the bottom sind.
You must also have proof of purchase if you‘re still within
the warranty period.
Disposal
Packaging
All packaging materials (cardboard, plastic lm (PE)
and polystyrene (EPS)) are marked and should, if
possible, be collected for recycling and disposed of in an
environmentally friendly way.
Disconnection
XDisconnect the appliance from the mains. With a xed
appliance, this must be carried out by a qualied electrician.
Safety
XDisable the appliance to prevent accidents caused by
improper use, especially through children playing.
Disposal
The symbol on the product or on the packaging
indicates that the device must not be disposed of
in the domestic waste.
By disposing of the device in a proper way you help to
avoid harmful consequences to environment and health.
Further information about recycling the device is available
from the competent authority, the local refuse disposal
service or the vendor of the device.
ZDispose of the device, which is to be discarded, via a
specialised waste collection point for electronic and
electrical devices.
In accordance with the article of Legislative Decree no.
15 dated 25 July, Implementation of Directives 2002/95/
EC,2002/96/EC and 2003/108/EC, regarding the reduction
of the hazardous substances used in in electrical and
electronic appliances, and waste disposal”.
The barred dustbin symbol on the appliance indicates
that at the end of its working life the product must not be
disposed of as household waste.
Consequently, when the appliance has reached the end of
its working life the user must take it to a suitable recycling
centre for electronic and electrotechnical waste, or return
it to the dealer when purchasing a new appliance of
equivalent type.
Proper separate waste collection of the scrapped appliance
for subsequent recycling, treatment and environmentally-
friendly disposal helps prevent a potentially negative impact
on the environment and health and facilitates recycling of
the materials used in appliance construction.
Customer service
XRefer to the contact address for your country on the
back page or on our website:
– www.faberspa.com
Additional information
Product identication
Type: FHSM-B2
Models: FCH 63 GR, FBH 84 BK, FCH 84 GR, FBH 83 BK,
FCH 83 GR, FBH 32 BK
Type: FHSM-B3
Models: FBH 64 BK
XRefer to the data plate placed on the bottom side of
the product.
The manufacturer provides continuously product
enhancements. For this reason, the text and the illustrations
in this manual may be changed without notice.
Further information on technical data is available on:
www.faberspa.com

18
DE
Zu dieser Gebrauchsanleitung
Diese Gebrauchsanleitung bezieht sich auf
die verschiedenen Modelle des Produkts.
Darum kann es möglich sein, dass bestimmte
beschriebene Merkmale und Funktionen an
Ihrem Modell nicht verfügbar sind.
Faber behält sich das Recht vor, Änderungen
am Produkt ohne vorherige Ankündigung
vorzunehmen. Alle Informationen waren zum
Zeitpunkt der Veröffentlichung korrekt.
XGebrauchsanweisung vor der Verwendung
des Produkts aufmerksam lesen.
XGebrauchsanweisung aufbewahren.
XDas in dieser Gebrauchsanweisung
beschriebene Produkt nur gemäß der
bestimmungsgemäßen Verwendung
einsetzen.
Symbol Bedeutung
Warnzeichen. Warnung vor
Verletzungsgefahren.
Maßnahmen in Sicherheits- und
Warnhinweisen zur Vermeidung von
Schäden und Verletzungen.
Handlung. Hier müssen Sie etwas
tun.
Resultat. Ergebnis einer oder
mehrerer Handlungen.
Voraussetzung, die vor dem
Ausführen der folgenden Handlung
erfüllt sein muss.
Bestimmungsgemäße
Verwendung
Das Kochfeld wurde ausschließlich für den
nicht gewerblichen, privaten Gebrauch im
Haushalt entwickelt.
Dieses Kochfeld sorgt für Proleistungen im
Haushalt. Mit diesem äußerst vielseitigen
Gerät lassen sich verschiedene Garmethoden
sicher und einfach auswählen.
Sicherheitshinweise
XGebrauchsanweisung vor dem
erstmaligen Gebrauch des Produkts lesen.
Der Hersteller haftet nicht für etwaige Schäden,
die durch fehlerhafte Installation und falschen,
unsachgemäßen oder unangemessenen
Gebrauch entstehen können.
Für den sicheren und efzienten Betrieb
dieses Elektrogeräts:
ZNur autorisierte Kundendienststellen
kontaktieren.
ZKeine Änderungen an den
Gerätefunktionen vornehmen.
Dieses Gerät ist nicht für die
Verwendung durch Personen
(einschließlich Kinder) mit eingeschränkten
körperlichen, sensorischen oder mentalen
Fähigkeiten oder Mangel an Erfahrung oder
Kenntnissen vorgesehen, sofern sie nicht
beaufsichtigt werden oder im Gebrauch des
Geräts durch eine Person unterwiesen wurden,
die für ihre Sicherheit verantwortlich ist.Kinder
sind zu beaufsichtigen, um sicherzugehen,
dass sie nicht mit dem Gerät spielen.
Das Gerät ist kein Spielzeug.
ZKinder vom Gerät und vom
Verpackungsmaterial fernhalten.
ZKinder in der Nähe des Geräts nicht
unbeaufsichtigt lassen.
ZKinder nicht mit dem Gerät spielen lassen.

19
ZKinder dürfen das Gerät oder die
Bedienelemente während des Betriebs
oder unmittelbar danach nicht berühren.
Die Induktionssysteme dieser Kochfelder erfüllen
die EMV-Richtlinie sowie die EMF-Richtlinie und
verursachen in der Regel keine Interferenzen mit
anderen elektronischen Geräten.
ZPersonen mit Herzschrittmachern oder
anderen elektronischen Implantaten
sollten jedoch mit ihrem Arzt oder mit dem
Hersteller des Implantats abklären, ob
diese Geräte ausreichend störfest sind.
Korrekte Installation und Aufstellung
Das Gerät muss entsprechend der separaten
Installationsanleitung eingebaut und an die
Stromversorgung angeschlossen werden.
Notwendige Arbeiten von einer Installations-/
Elektrofachkraft durchführen lassen.
Das Gerät ist für die Zubereitung von Speisen
im privaten Haushalt bestimmt. Für etwaige
Schäden durch unsachgemäßen Gebrauch
oder falsche Handhabung kann keine Haftung
übernommen werden.
Falls das Gerät permanent mit der Stromquelle
verbunden sein soll:
ZInstallation nur vom Kundendienst, einem
Elektriker oder entsprechend geschultem
Fachpersonal durchführen lassen.
ZDas Gerät muss so eingebaut werden,
dass die vollständige Trennung
von der Stromquelle mit einem
Kontaktöffnungsabstand (3 mm) ermöglicht
wird (gemäß Überspannungskategorie III).
ZDas Gerät muss direkt an die
Netzsteckdose angeschlossen werden.
-Für den Anschluss des Geräts dürfen
keine Adapter, Mehrfachsteckdosen
oder Verlängerungskabel verwendet
werden.
ZDas Netzkabel darf nicht beschädigt sein.
Falls es beschädigt ist, Kundendienst
kontaktieren.
ZDas Gerät muss vor Witterungseinüssen
(Regen, Sonne) geschützt sein.
ZAuf ausreichend Raum zur Luftzirkulation
entsprechend den Herstellerangaben
achten.
Lebensgefahr!
ZHaustiere vom Gerät fernhalten.
Verpackungsmaterialien, z. B. Plastikfolie und
Polystyrol, stellen eine Gefahr für Kinder dar.
ZKinder vom Verpackungsmaterial fernhalten.
Richtige Verwendung
ZDas Gerät nur zum Kochen und
Zubereiten von Speisen verwenden.
ZBeim Gebrauch des Kochfelds die
Bedienungsanleitungen der Kochgeräte
beachten, die zusammen mit dem
Kochfeld verwendet werden.
ZKeine Stromkabel oder anderen elektrischen
Geräte auf heiße Teile des Kochfelds stellen.
ZKeine brennbaren Flüssigkeiten in der
Nähe des Kochfelds verwenden.
ZKochfeld nach Gebrauch über die
Bedienelemente ausschalten. Nicht auf die
Topferkennung vertrauen.
ZGerät nicht mit einer externen
Zeitschaltuhr oder einem separaten
Fernsteuerungssystem betreiben.
ZDer Kochvorgang muss beaufsichtigt
werden.
-Ein kurzzeitiger Kochvorgang muss
ununterbrochen beaufsichtigt werden.
-Das Kochfeld-Heizelement nach
Gebrauch über das Bedienelement
ausschalten und nicht auf die
Topferkennung vertrauen.

20
ZDas Gerät darf nicht hinter einer Dekortür
installiert werden, um Überhitzung zu
vermeiden.
Verbrennungsgefahr!
Während der Verwendung wird das Gerät
heiß. Es sollte sorgfältig vermieden werden,
das Kochfeld zu berühren.
WARNUNG: Die zugänglichen Teile können
während der Verwendung heiß werden. Kleine
Kinder sollten ferngehalten werden.
ZDie Heizelemente nicht berühren.
ZKeine Metallgegenstände wie Messer,
Gabeln, Löffel und Deckel auf dem Kochfeld
ablegen, da sie heiß werden können.
Stromschlaggefahr durch defektes
Gerät!
ZWARNUNG: Weist die Glaskeramik
Sprünge oder Risse auf, Gerät ausschalten,
um einen Stromschlag zu vermeiden.
ZGerät nicht einschalten, wenn die
Glaskeramik Sprünge oder Risse aufweist
oder die Materialstärke beschädigt ist.
ZDas Gerät nicht mit nassen Körperteilen
berühren.
ZKundendienst benachrichtigen.
Brandgefahr!
ZKeine Gegenstände auf den Kochächen
lagern.
Brandgefahr!
Unbeaufsichtigtes Erhitzen von Fett oder Öl
auf einem Kochfeld stellt eine Gefahr dar
und kann Feuer zur Folge haben. Heißes Öl
entzündet sich schnell.
ZZubereitung von Speisen mit viel Fett (wie
etwa Pommes frites) nie unbeaufsichtigt
lassen.
ZNie ein Feuer mit Wasser löschen.
ZIm Falle eines Feuers Gerät ausschalten
und Flammen z. B. mit Deckel oder
Löschdecke ersticken.
Zur Vermeidung von Beschädigungen am
Gerät
ZIm Falle eines thermischen Defekts
Kochplatte ausschalten und vollständig
abkühlen lassen. Kein Geschirr darauf
abstellen. Unter keinen Umständen mit
kaltem Wasser abkühlen.
ZGerät nicht besteigen.
ZUm Schäden an der Silikondichtung zu
vermeiden, kein heißes Kochgeschirr auf
dem Rahmen abstellen.
ZSpeisen nicht auf der Glaskeramik
schneiden oder zubereiten und keine
harten Gegenstände darauf fallen lassen.
Kochgeschirr nicht über die Glaskeramik
ziehen.
ZSicherstellen, dass keine zuckerhaltigen
Speisen oder Säfte auf die heißen
Kochzonen gelangen. Dadurch kann die
Glaskeramik beschädigt werden. Wenn
zuckerhaltige Speisen oder Säfte auf die
heißen Kochzonen gelangen, sofort mit
einem Glasschaber entfernen (solange
das Kochfeld noch heiß ist).
ZGerät während des Betriebs nicht
unbeaufsichtigt lassen.
Töpfe aus Kupfer oder Aluminium hinterlassen
Spuren, die schwierig zu reinigen sind. Wenn
die Spuren nicht unmittelbar nach dem
Kochen mit einem geeigneten
Other manuals for FBH 64 BK
3
This manual suits for next models
6
Table of contents
Languages:
Other Faber Hob manuals

Faber
Faber FCC XERA SF20 Assembly instructions

Faber
Faber FCH 64 BK KL User manual

Faber
Faber FCH32 C User manual

Faber
Faber FCH64 User manual

Faber
Faber FBH 64 BK User manual

Faber
Faber FBH 64 BK User manual

Faber
Faber FCH93 User manual

Faber
Faber Solido FCH 32 User manual

Faber
Faber FBH 64 BK User manual

Faber
Faber Vitro FCC XERA MF30 Assembly instructions