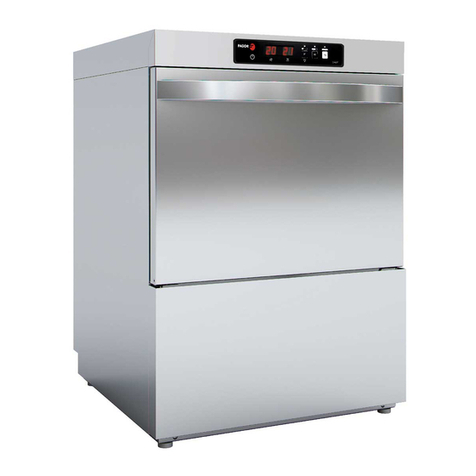
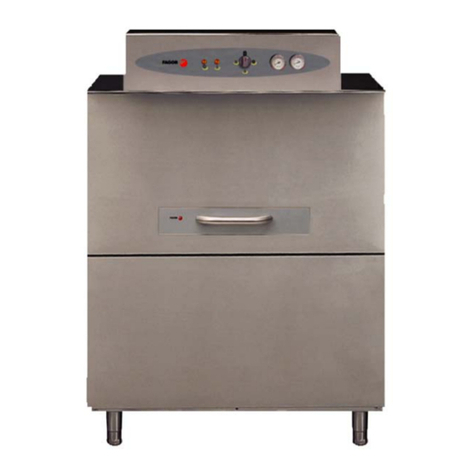
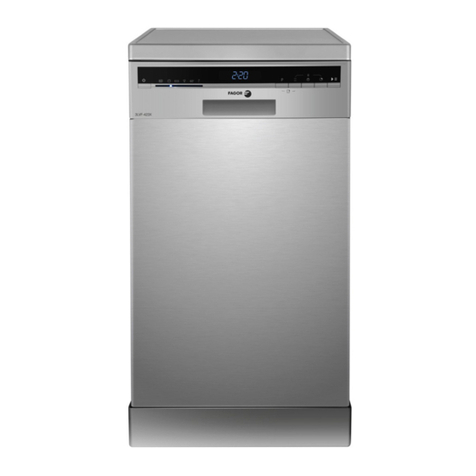
Fagor WC-46 DZ User manual

43 Moonachie Rd.
Hackensack, NJ 07601

ErrorAlarm
6 Dishwashing Programs
Depending on your cleaning needs, youcan choose
any of the 6 cycles to better clean
yourdishes.Choose from Heavy, Normal, Eco,
Rinse,GlassandSpeed.
pre-programmed
Stainless SteelTub
The Stainless Steel tub of the dishwasheris made
of tough and durable steel that isresistant to
staining.
RinseAid Warning Indicator
This allows the start of the program to be delayed
24h.The Time Delay feature allows you to program
the dishwasher at your convenience, savingyou
time and money.
PROGRAMS
6
1
The manufacturer maymakemodifications without giving
priornotice.
The Fagor Model LFA-75IT has several characteristics which separateit from the competition.
TheseAre:
Error codes on thedisplay will inform you of
problemswiththedishwasher.
When the rinse aids in the machine begin to run
low, an alert on the panel will be clearly displayed
informing you to refill them. This will ensure the
unit will operate at optimum performance.
Time Delay feature

2
This appliance must be grounded. In the event
of a malfunction or breakdown, grounding will
reduce the risk of electric shock by providing a
path of less resistance
This appliance is equippedwithan
equipment-grounding conductor and a grounding
plug. The plug must be plugged into an appropriate
outlet that is installed and grounded in accordance
with all local codes and ordinances.
to the electrical currents.
Improper connection of the equipment-
grounding conductor can result in a risk
of electric shock. Check with a qualified
electrician or service representative
the appliance is properly grounded.
Do not modify the plug provided with the
appliance.
to ensure
that
If the plug does not fit the outlet,
contact a qualified electrician to install a proper
outlet.
Keep child away from
child away from the open door of the dishwasher,
there could still be some detergent left inside.
detergents and rinse aids. Keep
Do not abuse, sit on, or stand on the door or dish
rack of the dishwasher.
Do not touch the heating element during or
immediately after use.
Do not wash plastic items unless they are marked
dishwasher safe. For plastic
check the manufactur recommendations.
items not marked,
er's
Use onlydetergent and rinse additives designed
for an automatic dishwasher. Never use soap,
laundry detergent orhand washing detergent
in your dishwasher. Keepthese products out of
reach of children.
During installation, the powersupply must not
beexcessivelyor dangerously bentorflattened.
Thedoor shouldnot be left in the open position
since this could present a tripping hazard.
Do not tamper with internal controls.
Do not operate your dishwasher unless all
enclosure panels are properly in place. Open the
door very carefully if the dishwasher is operating,
there is a risk of water squirting out.
Do not place any heavy objects or stand on the door
when it is open as this could damage the door and
cause the appliance to tip forward.
When loading items to be washed:
1) Locate sharp items so that they are not likely to
damage the doorseal.
2) Load sharp knives with the handles up to reduce
the risk of injuries.
When using your dishwasher, heatingelement.
make sure no plastic
items come in contact with the
If the cord is damaged, it must be
replaced by serviceagentor asimilarly
qualified person.
powersupply
a qualified
Pleasedispose ofpackingmaterials properly.
Use the dishwasher only for its intended function.
When disposing of an old dishwasher, be sure to
remove the door before discarding.
Theapplianceis not intended foruseby young
children orinfirm persons without supervision.
Dishwasher detergents are strongly alkaline,they
can be extremely dangerous if swallowed.Avoid
contact with skin and eyes and keep children away
from the dishwasher when the door is open.
Be sure to keep children away from the dishwasher.
Check that the detergent receptable is empty after
completion of the wash cycle.
To get the best performance from your dishwasher, read all operating instructionsbeforeusing for the first time.
3
1
2
3
4
5
6
7
8
9
10
UpperRack
SprayArms
Lower Rack
Water Softener
Detergent Dispenser
Cutlery Basket
MainFilter
Cup Shelf
5
6
7
8
RinseAid Dispenser
Filter
Inlet Valve
Junction Box
9
10
12
11
3
2
14
11 12
1.Display window
2.Delay button
This option allows you to delaythe start of a wash cycle by up to24 hours.When the dishwasher ison,press the
DELAY
button tochoose the number of hours you wantto delaythe start of the wash cycle.The hourswill
in the display window. be
displayed
Note:To cancel the delayhour option before the wash cyclestarts, repeatedlypress the DELAY button untilthe
display reads“0:00”.
3. OPTIONS
OPTIONS
About the options:
HI TEMP
DRY
Options button
Press the button, “Hi temp” will be selected.
Press the button twice, the “ Dry” will be selected.
When the “HiTemp” option is selected, the temperature of the water will reach max.
Whenthe “ Dry” option is selected, theheater will work during thedry processes.
①
②
140°F (60°C)
Heat
Heat
HEAT
1 2 3 4 5
4. Cycles
Cycles button
When the dishwasher is turned on, you canpress the button to select wash cycle.Alight on the
display will indicate which cycle has been selected. thedesired
5. POWER
Power button
Press the button to turn . The LED when the dishwasher is on.the unit onand begin washing display will turn on
Inthis screen,youwill see the programremaining time, delay time options, the running indicator,the program
indicator, High , heat , rinse aids indicator and error codes.temperature indicator dry indicator

4
For loads,
such as , plates,glasses
and lightly soiled pans.
daily cycle.
pots
normal household
Standard
For lightly soiled loads such
as and
lightly soiled pans.
plates, glasses, bowls
For the
loads such as pots, pans,
casseroledishes and plates
thathavebeen sitting with
dried foodon them for a
while.
heaviestormostsoiled
Ashorter wash for lightly
soiled loads that do not
need drying.
Delicatecycleonlytobeusedfor
dishesand glasses that need to
be rinsedand dried.
For rinsing partialloads that
will be washed later. Donot
use detergent with this cycle.
This cycle does not include
heated dry.
(AHAM)
Pre-Wash
Pre-Wash
Pre-Wash
MainWash (60 )
Rinse
Rinse
Rinse (60 )
Drying
140
140
℃
℃
°F
°F
Pre-Wash
MainWash (50 )
Rinse
Rinse (55 )
Drying
122
131
℃
℃
°F
°F
Pre-Wash
MainWash (50 )
Rinse
Rinse (50 )
Drying
122
122
℃
℃
°F
°F
Pre-Wash
MainWash (50 )
Rinse
Rinse (50 )
Drying
122
122
℃
℃
°F
°F
Pre-Wash
Pre-Wash
MainWash (55 )
Rinse
Rinse (55 )
Drying
131
131
℃
℃
°F
°F
Pre-Wash
Pre-Wash
2:10 6.42
2:10 - 2:20 3.65
1:30 3.70
1:30 3.65
1:20 4.57
0:25 1.93
The inlet water temperature must be120 . If this temperature is not met, the wash performance will be compromised.°F
Yes
Yes

5
To remove hard water try the following steps in this order:
Run dishes througha normal wash program.
Remove allmetal dishware,such ascutlery,pans, etc.,
from the dishwasher.
Do notadd detergent.
Pour two cups of vinegar into a bowl and set the bowl face
up on the lower rackof the dishwasher.
stains,
Useonly detergent specificallymadefor use in dishwashers.
Keep your detergent fresh and dry. Please do not store detergent
indispenser until readyto use.
The rinse aid is released during the final rinse to prevent
water from forming droplets on your dishes that can leave
spots and streaks. It also improves drying by allowing
water to "sheet" off the dishes.
Your dishwashers are designed to use liquid rinse aids.
The rinse aid dispenser is located inside the door next to
the detergent dispenser. Tofill the dispenser, open the
cap and pour the rinse aid into the dispenser until the level
indicator turns completely black.The dispenser holds
about 3.4 oz (100 ml) ml of liquid rinse aid.
Be careful not to overfill the dispenser, as this can
cause over sudsing of the Wipe away
any spills with a damp cloth. Don't forget to replace the
dispenser cap before
you close the dishwasher door.
If your household water is soft, you may not need additional
rinse agents inyour water as it maycause a white film
around your dishes.
detergent in the unit.
To open the dispenser, turn the cap to the "open" (left)
arrow and lift cap up until open.
Pour the rinse aid into thedispenser, being careful
not to overfill.
Return the cap byinserting it aligned with "open"
arrow and turning it to the (right) arrow position."closed"
Button
Indicator
Dispenser cap
Adjustable setting
Adjustable setting
Note: Please use only the recommenced amount of dishwashing liquid when washing your dishes.
The detergent dispenser must be refilled before the startof each wash cycle. Please follow the manual instructions
provided in the" Wash Cycle Table" on page 4.
As a rule of thumb, you generally only need one tablespoon of dishwashing detergent for a normal
more heavily soiled items please refer to the onyour detergent packaging. Please make sure
to add the detergent just before starting the dishwasher.
household wash
load. For instructions
Detergent Usage
Please follow the on the back of the detergent packaging the proper amount of detergent to use for
the type of load you have. The amount of detergent can vary depending on the hardness of your water. To determine
your water consistency, please contact your local water company. Generally, the harder the water, the more
detergent you will need to use.
instructions for
Pleasekeep dishwashingliquidoutof the
reach of children as it isverydangerous
for them to consume.
Ameasured amount of rinse aid is released during the final rinse to assist in rinsing dishes properly,
keeping them residue and streak free.As with detergent, the amount of rinse aid needed for your
dishes depends on the hardness of the water in your area. If you have very soft household water,
you may need to dilute or omit the rinse aid.
The rinse aid dispenser is designed with four begin your wash cycles with the
dispenserset on . If spotsand streaks are evident, increase theamountof rinse aid
dispensed in the machine by removing the dispenser lid and rotating the dial to . If the
dishes still are not drying properly or are spotted, increase the dial to .
settings. Please
setting2 setting 3
setting4

6
As the rinse aid diminishes, the size of the black dot on the rinse
aid level indicator changes, as illustrated below.
Full
3/4full
1/2full
1 / 4 full - Should refill to eliminate spotting
Empty
Indicator
When the dishwasher begins to run out of rinse aid, the rinse aid dispenser indicator will show a decrease in the size
of the black dot.As therinse aid in the dispenser diminishes the size of the black dot diminishes. You should never
let the rinse aid getbelow 1/ 4 full.
Theupper rack is designed to hold more delicateand lighter dishware such as glasses, small plates, small bowls and
shallow pans(as long as they are not too dirty).
Position the dishes and cookware so that they do not get moved by the spray of water.
Theheight of the upper rackcan be changedby changingthe height of the wheelsin the rail.
Pots, serving bowls, etc., must always be placed
Deep potsshould beslanted to allow water to flow out.
The bottom rack features
facing down.
9
6
8
Breadandbutterplates
Cutlery basket
4
Dinner plates
Serving plate
1
Cups
2
Small bowls
3
4
Breadand butter plates
Glasses
5
Saucers
7
Serving bowl
5
Saucers
Use of the Upper Rack
Useof the Lower Rack
We recommend that you place large items which are most difficult to clean on the lower rack: pots, pans, lids, serving
dishesandbowls;as shownin thefigure
servingdishes and lids on the side of the racks in order to avoid blocking the rotation of the
top spray arm.
below.
Werecommendplacing
fold over tine rows that can be used on larger pots and pans.
4

7
Youcan easily add a dish to the washing cycle anytimebefore the detergentcup opensto releasethe detergent.
Please followthe directionsbelow:
Slightlyopenthedishwasher door tostopthe
washing cycle.
Once thewashingspray armsstop moving, youcan
open the dishwasher door completely.
Add additional dishes, glasses or cookware onto
thedishwashingrack.
Close the dishwasher door, the washer will continue
its cycle after 10 seconds.
4
3
2
1
1. Make sure the plug is inserted into the
2. Make sure water supply is turned onto full pressure.
3.
4.
5. Press the he will turn on.
6. Press button toselect a (
select or program.
7. Close the door, the machine will after 10 seconds.
of the dishwasher proper wall outlet.
Load dishes, bowls, glasses and/or pots into the dishwasher. Please see the "Loading Dishwasher"
section in the manual for loading and arrangement details.
Pour in suggested amount of detergent (see Detergent and RinseAid sections for suggestions).
button.T
the Cycles washing program. If you are using an all-in-one dishwashing pod,
please Heavy, Normal Eco
beginworking
Power Power indicator light
the machine will working after 10 seconds.continue
If you openthe door , the machine will pause. When you close the door,during a wash cycle
1Once the dishwasher has begun its cycle, it can only be changed ifthe dishwashing detergenthas not
yet been released. If it has been released, follow the below instructions.
2Press button 3 seconds toSlightly open the door to stop the wash cycle. and hold the "Cycle" for
cancel the running cycle. Once the current wash cycle has been fully deprogrammed, refill your
detergent dispenser and select your new wash cycle(See the section entitled " Starting a Wash Cycle" ).
Operating the Dishwasher
Changinga Washing Program
Once the washing cycle is complete and the dishwasher has stopped, an alarm will go off for about 8secondsinforming
youofcyclecompletion.Atthat moment,thedishwasher willgointo stand-by mode,in whichtheunitis stillon with no
program running. We recommend that you manually shut the unit off and wait about 15 minutes before unloading your
dishes,giving timefor the dishesto cool off and fullydry.
Please take cautionwhen openingthe dishwasher while in washing mode, the water is extremely
hot and may burn you. Pleasekeepkids away from thedishwasher while in washing mode.
WARNING!

8
Coarse filter
Larger items, such aspieces of bone or glass, thatcould clog thedrain aretrapped
in the coarse filter. To remove anitem caught in this filter,gently squeeze the tabs
on top of this filter and lift it out.
For your convenience, we have placed the drain pump and filtering system within easy reach inside the tub.
There are three componentsof the filtering system: the mainfilter, the coarsefilter, and the fine filter.
2
2
Fine filter
This filter holds food residue in the sump area preventing it from being
redeposited onto the dishes during a cycle.
Mainfilter
Food particles trapped by this filter are broken down by a special jet on
the lower sprayarm and washed down the drain.
1
3
3
1
Step Turn the filter and lift it up.
:
1
counterclockwise
Step Liftthe Mainfilterup:
2
Step Liftthe Fine filter up:
3
2
13
ProtectingAgainst Frozen Pump Damage
1. Cut off the electrical power to the dishwasher.
2. Turn off thewater supply and disconnect the water inlet pipe from the water valve.
3. Drain the water from the inlet pipe and water valve. (Use a pan to catch the water)
4. Reconnectthe water inlet pipe to thewatervalve.
5. Remove the filter atthe bottom of thetubanduse asponge tosoak upwaterin the sump.
Cleaning the SprayArms
If your dishwasher does not work because of ice,
please contact professional service persons.
It is necessary to clean the spray arms regularly in order to prevent
the clogging of the jets andbearings from hard water chemicals.
To remove the upper spray arm, turn the nut clockwise and
removethearm.
To remove thelower spray arm, pull it upward.
Wash thearms in soapywarm wateranduse a soft brushto
clean the jets. Replace them after rinsing them thoroughly.
Please follow steps 1 through 3 in order to remove the filter system. In order to reinstall,
please the steps in reverse order.perform
It is important to protect your pumps from frozen water damage caused by the drop ofinternal home temperature.
If your home temperaturegoes below 34 fora long periodof time,youcan have ice build inthelines and around
the motors. Have yourplumber follow the belowsteps ifyou water pipes
°F freeze.

9
Never usea spray cleaner to clean the door panel as it could damage the door lock and electrical components.
Toclean the use a soft, damp rag
prevent
edges of the dishwasher door, to wipe
around the unit.
Be sure to the water from seeping into the door and onto any of the electrical
components. It is best not to use spray cleaners on the dishwasher.
It is also best not to use abrasive cleaners or scouring pads on the outer
surface of the dishwasher asthey tend to scratch and leave marks.
Afterevery wash, leave the door slightly ajar so
moistureandodors are not trapped insidethewasher.
Prior to any cleaning ormaintenance to the dishwasher,
it is recommenced that you disconnecttheunit from the
electrical for safety.outlet
When cleaning
we recommendthatyoudo not use
the exterior and rubber parts of the
dishwasher, use
solvents or abrasive cleaning products, use only a cloth
andwarm soapywater. To remove spots or stains from
thesurfaceof theinterior, use aclothdampenedwith
water and alittlewhite vinegar, or a cleaning product
made specifically for dishwashers.
If you should goon vacation, we recommend that you
follow the below procedure to keep the unit inits best
shape. Run outlet.
a wash cycle with the dishwasherempty
and then remove theplugfrom the Turn offthe
water supply and leave the door of the appliance
slightly ajar. This will help the seals last longer and
prevent odors from forming within the appliance.
If the be moved, try to keep in
the vertical position. If absolutely necessary, it can
be positioned on itsback.
dishwasher needsto it
One of the manyfactors which can seals
of the dishwasher.
cause odors to
forminthe dishwasher isfood trapped in the
Periodic cleaning witha damp
sponge willprevent this fromoccurring.
This dishwasher is designed for operation on an adequately wired individual 120VAC,60Hz. Use
copper wireonly. Timedelay fuses or circuit provide
circuit servingonly this appliance.
recommended 15
amp fuses and breakers are recommended as they aseparate
When installingthe dishwasher, be sure not to install it directly in front of the
outlet itwill beplugged into asthiswillblock access toit. Pleaserefer totheinstallationmanual.
After making sure the voltageandthe frequencyvalues for the current inthe home
correspond to those on the rating plate and that the electrical systemis sized tor the maximum
voltage on therating plate, insert the plug into
If the electrical the plug, replace the using
adaptors as they could cause overheating and burns.
a properly grounded electrical outlet.
outletis notsuitedfor outletinsteadof
Keepingyourdishwasherinprimecondition

10
Before you call for service
Problem Possible Causes What To Do
Noise Some of the sounds you’ll Detergent cup opening.
hear are normal The motor starting during the drying period.
Water draining out of the tub immediately after you
start the dishwasher.
Utensils are not secure in the Make sure everything is secured in dishwasher.
rack or something small has
dropped into the rack
Motor hums
Detergentleftin Dishes block the
Reposition the dishes.
dispenser cups Detergent dispenser
Water will not pump Drain is clogged
outofthetub
Suds in the tub
Rinse agent was spilled Always wipe up rinse agent spills immediately.
Stained dishwasher
parts Detergent with Some detergents contain colorant (pigment or dyes) that
small colorant was used willdiscolor the with extended use.interior of the tub
Check the detergent cup for signs of any discoloration.
If cup is discolored, change to a detergent without any
colorant.
Some tomato-based
Use of theRINSE ONLY cycleafteraddingthedishtothe
foods can stain
load can decrease the of staining.chances
Dishes and flatware Low inlet water temperature
Make sure inlet water temperature is correct
(120 F).
not clean Water pressure is temporarily
low Check your water pressure by turning on your faucet,
if the water runsout slowly, please waitfor the water to
return to a normal pressure before dishwasher use.
Air gap is clogged
Clean the airgap.
Improper rack loading
Make sure large dishware does notblock the detergent
dispenser or the wash arms.
Belowaresome troubleshootingtipswhich can save youtimeand money. Please reviewthe
chartson thefollowing pages.
You may not need to call for service.
Correct detergent was not used
Dishwasher has not been used on a basis.
If you do not use your dishwasher for
run the shortest wash
program once every week. This will help keep the seal
moist
consistent
long periods of time,
we recommended that you at least
and help avoid the motor from making noises.
Check if your kitchen sink is draining . If not,
please properly
call a plumber.
Use only thespecial dishwasher detergentto suds.
If this occurs, open the dishwasher and let suds
evaporate. Add 1 gallon of cold water to the tub.
Close the dishwasher cycle to
drain out the water. Repeat if necessary.
avoid
an overaccumulation and overflowing of soap
and start the wash
Checkthe filter
(See section titled )"Cleaning The Filter"
Check drain hose.

11
•

The installation of the pipes
and electrical equipments
should be doneby
a professional.
Electrical Shock Hazard
Disconnect electrical power
before installing dishwasher.
Failuretodoso resultinmay
electric shock or possible death.
The installation ofthedishwashershould be near theexisting hosesandpower cord.
One side of the cabinet sink shouldbe chosen tofacilitate the connectionof drainhoses ofthe dishwasher.
location inlet, drain
Installation preparation
Note: Please check the accompanying installation accessories (hook for aesthetic panel, screw)
●
【】Figure 2
【】Figure 1
Top of Counter
Top of
Dishwasher
Opened
dishwasher
door
Minimum space of 1.97" (50mm).
When installingyour
dishwasher, be sure to
leave 0.2" (5mm) of space
or less between the top
of thedishwasher,
including the closed door,
and the countertop.
90 °
90 °
(825-850mm)
22.83"
(580mm)
Space between cabinet
bottom and floor
Electrical, drain and
water supply line
entrances
12
32.48" - 33.46"
If your dishwasher is to be installed
next to a wall or counter, be sure that
there is a minimum space of 1.97" (50mm)
between the opened dishwasher
doorand the adjacent wall or counter.
3.94" (100mm)
3.15" (80mm)
23.62" (600mm)

1. The panel be according to Figure 3.custom should designed the measurements in
The panel should
be
inaccordancewith the
custom
designed and measured
dimensions illustrated in
Figure 3.
【】Figure 3
Units: Inches (Millimeters)
23.38"(594mm)
22.36" (568mm)
10" (254mm)
21.25" (540mm)
0.59"(15mm)
9.84" (250mm)
Installation ofcustom panel
【】Figure 4a
2. Install the hook on the custom panel andput the hook into the slot of theouter door
of dishwasher (see figure 4a). After positioning thepanel,attach the panel onto the
outer doorusing screws and bolts (See figure 4b).
Hop hook
St4 countersunk
head screw
Lower hook
13
1.5" (38mm)

Installation of custom panel
【】Figure 4b
1. thecover
2. the screw
3. thecover
Remove
Attach
Replace
Custom
door
Hook for doorcustom
Outerdoorof
dishwasher
Spacer for door
Cover
4X18 screw
14

【Figure4b】
14
Installation du panneau esthétique en bois
1.Otez le capuchon
2.Plantez la vis
3.Retournez le capuchon
vis 4x18
Couvercle
Espacement pour porte du meuble
Crochet pour porte esthétique
Porte extérieure
du lave-vaisselle Porte de meubles

【Figure3】
【Figure4a】
13
·Dimensions et installation de panneau esthétique
1.Le panneau esthétique en bois pourrait être traité conformément à la figure 3.
Le panneau esthétique doit
être traité en conformité avec
les dimensions illustrées
(Unité : mm)
2.Installez le crochet sur le panneau esthétique en bois et de mettre le crochet dans la fente de la porte
extérieure du lave-vaisselle (voir la Figure 4a). Après l'avoir positionné, fixez le panneau sur la porte
extérieure avec des vis et des boulons (voir Figure 4b).
Installation du panneau esthétique
Crochet Hop
Vis à tête fraisée plate St4
Crochet inférieur
12- φ2
Hole deep 10
23.38"(594mm)
22.36"(568mm )
10"(254mm)
1.5"(38mm)
1.18"(30mm)
21.25"(540mm) 0.59"(15mm)
26.77"(680mm)
19.65"(499mm)
9.84"(250mm )
2.56"(65mm)
6.8"(172.5mm)

【Figure2】
【Figure1】
12
Instructions d'installation
À l'attention de:
L'installation des conduites et des
équipements électriques doit être
effectuée par un professionnel.
MISE EN GARDE
Risque de choc électrique
Coupez l'alimentation électrique
avant d'installer le lave-vaisselle.
Ne pas le faire peut entraîner la mort
ou un choc électrique.
·Préparation de l'installation
La position d'installation du lave-vaisselle doit se trouver près des tuyaux d'arrivée d'eau et de vidange
et du cordon d'alimentation existants.
Un côté de l'évier de l'armoire doit être choisi pour faciliter le raccordement des tuyaux de vidange du
lave-vaisselle.
Remarque : Veuillez vérifier les accessoires d'installation joints (crochet pour panneau esthétique, vis)
Dimensions de l'armoire
Moins de 0,2 po (5 mm)
entre le haut du lave-
vaisselle et l'armoire, et la
porte extérieure alignée su
l'armoire.
Espace minimum lorsque
la porte est ouverte
Lave-
vaisselle
Porte du
lave-vaisselle
Espace minimum de 50 mm (1,97 po)
Enceinte
90 °90 °
23.62"( )600mm
(825-850mm)
(
22.83"
580mm)
32.48" - 33.46" Arrivée des
conduites
électriques, de
vidange et d'eau
Espace entre le bas
de l'armoire et le sol
3.15"(80mm)
3.94"(100mm)

11
Avant d'appeler le service
Problème Causes possibles Que faire
Traces et films
sur les verres
et les couverts
Eau très calcaire
Basse température de
l'arrivée d'eau
Surcharge du lave-vaisselle
Mauvais chargement
Détergent en poudre vieux
ou humide
Distributeur de produit de
rinçage vide
Trop peu de détergent
Utiliser un produit d'aide au rinçage pour enlever les taches et
prévenir une nouvelle accumulation de film. Pour enlever les
taches tenaces et un film pré- existante de la verrerie :
1. Enlevez tous les ustensiles métalliques du lave-vaisselle.
2. N'ajoutez pas de détergent.
3. Lancez votre lave-vaisselle et commencez le cycle de
lavage. Le cycle prend environ 30 minutes pour arriver à sa
portion de lavage fort (le lavage principal). C'est le meilleur
moment pour ajouter le détergent.
4. Ouvrez la porte du lave-vaisselle et versez 2 tasses (500
ml) de vinaigre blanc dans le fond du lave-vaisselle.
Fermez la porte et laissez le lave-vaisselle terminer le cycle.
Si le rinçage au vinaigre n'a pas d'effet : Répéter la séquence
ci-dessus, mais utilisez ¼ de tasse (60 ml) de cristaux d'acide
citrique au lieu du vinaigre
Des nuages
sur la
verrerie
Combinaisons d'eau douce
et de trop de détergent
Lorsque cela se produit, les taches seront gravées à jamais
dans votre verrerie. Pour éviter cela, utiliser moins de
détergent si votre eau est adoucie. Lavez la verrerie dans le
cycle de lavage le plus court.
La température d'arrivée
d'eaudu lave-vaisselle est
supérieure à 150 °F
Baissez la température du chauffe-eau.
Marques noires
ou grises sur la
vaisselle
Des ustensiles en aluminium
se sont frottés à la vaisselle Enlever les marques avec un nettoyant abrasif doux.
Pellicule jaune ou
brune sur les
surfaces internes
ou vos tasses
Taches de thé ou de café
Un film jaune ou brun global
peut provenir de dépôts
de fer dans l'eau
Retirez la tache à la main, en utilisant une solution contenant
½ tasse d'eau de Javel et 3 tasses d'eau chaude.
Un filtre spécial dans la conduite d'arrivée d'eau est la seule
façon de résoudre ce problème. Contactez une entreprise
d'adoucisseur d'eau.
Un film blanc sur
les surfaces
internes
La vaisselle n'est
pas bien sèche
Le lave-vaisselle
ne fonctionne pas
Vapeur
Des minéraux provenant
d'une eau dure
Basse température de
l'arrivée d'eau
Le distributeur du produit
de rinçage est vide
Le fusible est grillé ou le
disjoncteur s'est déclenché
Ceci est normal
Pour nettoyer l'intérieur du lave-vaisselle, appliquez un
détergent pour lave-vaisselle avec une éponge humide.
Enfilez des gants en caoutchouc. N'utilisez pas un nettoyant
quelconque autre que du détergent pour lave-vaisselle car
cela pourrait provoquer une mousse excessive.
ATTENTION
Avant de nettoyer l'intérieur, attendez au moins 20 minutes
après un cycle que la température baisse. Ne pas le faire peut
entraîner brûlures.
Assurez-vous que la température d'arrivée d'eau est correcte
(voir page 4).
Vérifiez le distributeur de produit d'aide au rinçage.
Remplacer le fusible ou ré-enclencher le disjoncteur. Retirez
tous les autres appareils du circuit.
De la vapeur sort par l'évent pendant le lavage, le séchage
et lorsque l'eau est pompée.

10
Avant d'appeler le service
Voici quelques conseils de dépannage qui peuvent vous faire économiser du temps et de
l'argent. Veuillez examiner les tableaux des pages suivantes.
Vous pouvez ne pas avoir besoin d'appeler le service.
Problème Causes possibles Que faire
Bruit Certains bruits que vous
entendrez sont normaux
Les ustensiles se déplacent
dans les paniers ou un petit
quelque chose a chuté dans le
panier
Le moteur ronronne
Ouverture du réservoir à détergent.
Le démarrage du moteur au cours de la période de
séchage.
L'eau qui s'écoule de la cuve immédiatement après le
démarrage du lave-vaisselle.
Assurez-vous que tout est arrimé dans le lave-vaisselle.
Lave-vaisselle n'a pas été utilisé régulièrement.
Si vous n'utilisez pas votre lave-vaisselle pendant de
longtemps, il est recommandé de lancer le programme
de lavage le plus court une fois par semaine. Cela
permet aux joints de rester humide et d'éviter des bruits
de moteur du lave-vaisselle.
Reste de détergent
dans le distributeur
Des plats bloquent le
couvercle du détergent
Repositionnez les plats.
L'eau n'est pas
pompée hors de
la cuve
Le drain est bouché
Vérifier le tuyau de vidange.
Vérifiez le filtre (voir la section intitulée « Nettoyage du filtre »)
Vérifiez si votre évier de cuisine se vide correctement.
Si non, appelez un plombier.
Savonnée dans
la cuve
Le bon détergent n'a
pas été utilisé
Utilisez uniquement le détergent spécial pour lave-
vaisselle pour éviter un débordement de mousse de
savon. Si cela se produit, ouvrez le lave-vaisselle et
laissez la mousse retomber. Ajouter 1 gallon (4 litres)
d'eau froide dans la cuve. Fermez et verrouillez le lave-
vaisselle, puis Lancez le cycle de lavage pour évacuer
l'eau. Répétez si nécessaire.
Du produit de rinçage
s'est renversé
Toujours essuyer immédiatement l'agent de rinçage
renversé.
Des parties du
lave- vaisselle
sont tachées
Un détergent contenant
un colorant a été utilisé
Certains aliments à base de
tomates peuvent tacher
Certains détergents contiennent des colorants (pigments
ou teintures) qui décolore l'intérieur de la cuve lors d'une
utilisation prolongée. Vérifiez si le réservoir à détergent
présente des signes de décoloration. Si le réservoir est
décoloré, utilisez un détergent sans colorant.
Utilisation du cycle RINSE ONLY (rinçage seulement)
après l'ajout de plat à la charge peut diminuer le niveau
de coloration.
Assiettes et
couverts pas
propres
Basse température de
l'arrivée d'eau
La pression d'eau est
temporairement basse
L'arrivée d'air est bouchée
Mauvaise chargement du
panier
Assurez-vous que la température d'arrivée d'eau est
correcte (voir page 4).
Vérifiez la pression de l'eau en ouvrant le robinet,
si l'eau s'écoule lentement, attendez qu'une pression
normale de l'eau revienne avant d'utiliser le lave-vaisselle.
Nettoyez l'arrivée d'air.
Assurez-vous que les grand ustensiles ne bloquent pas
le distributeur de détergent ou les bras gicleurs.
This manual suits for next models
2
Table of contents
Other Fagor Dishwasher manuals

Fagor
Fagor 3LVF-638ADIT User manual

Fagor
Fagor 3LVF-623 User manual

Fagor
Fagor IX LFA-013 SS Manual

Fagor
Fagor HDWF-CL User manual

Fagor
Fagor CX-1 User manual

Fagor
Fagor 3LVF-435 User manual

Fagor
Fagor 3LVF-624IT User manual

Fagor
Fagor LFU-073IT User manual

Fagor
Fagor LFA-75IT User manual

Fagor
Fagor Dishwasher User manual

Fagor
Fagor LF73DWITU User manual

Fagor
Fagor LFA086XL User manual

Fagor
Fagor LF 073M User manual

Fagor
Fagor LF-020S Service manual

Fagor
Fagor IO-DWS-1497 User manual

Fagor
Fagor 1VF-65 Technical specifications

Fagor
Fagor 3LVF-622I User manual

Fagor
Fagor evoCONCEPT Quick start guide

Fagor
Fagor AD-48BDD User manual

Fagor
Fagor Evo COP-174W Parts list manual