8
EN 4 / PROGRAMMING YOUR MACHINE
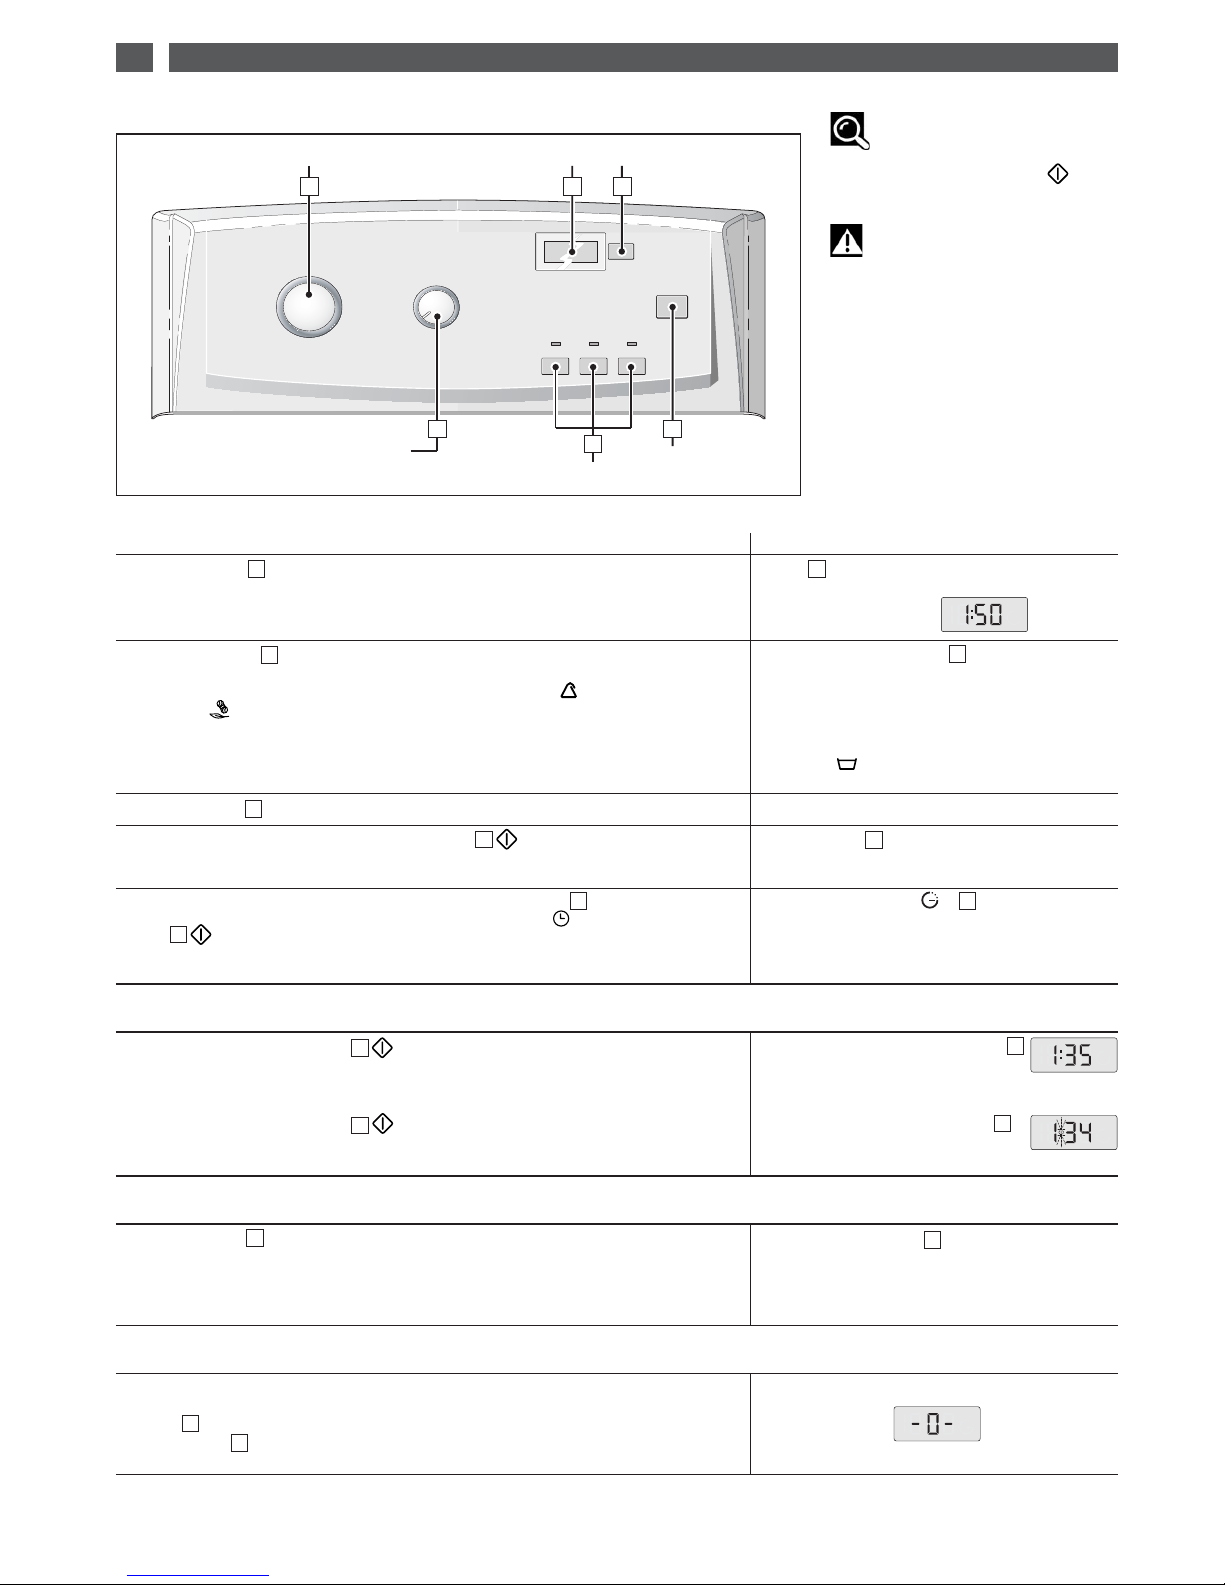
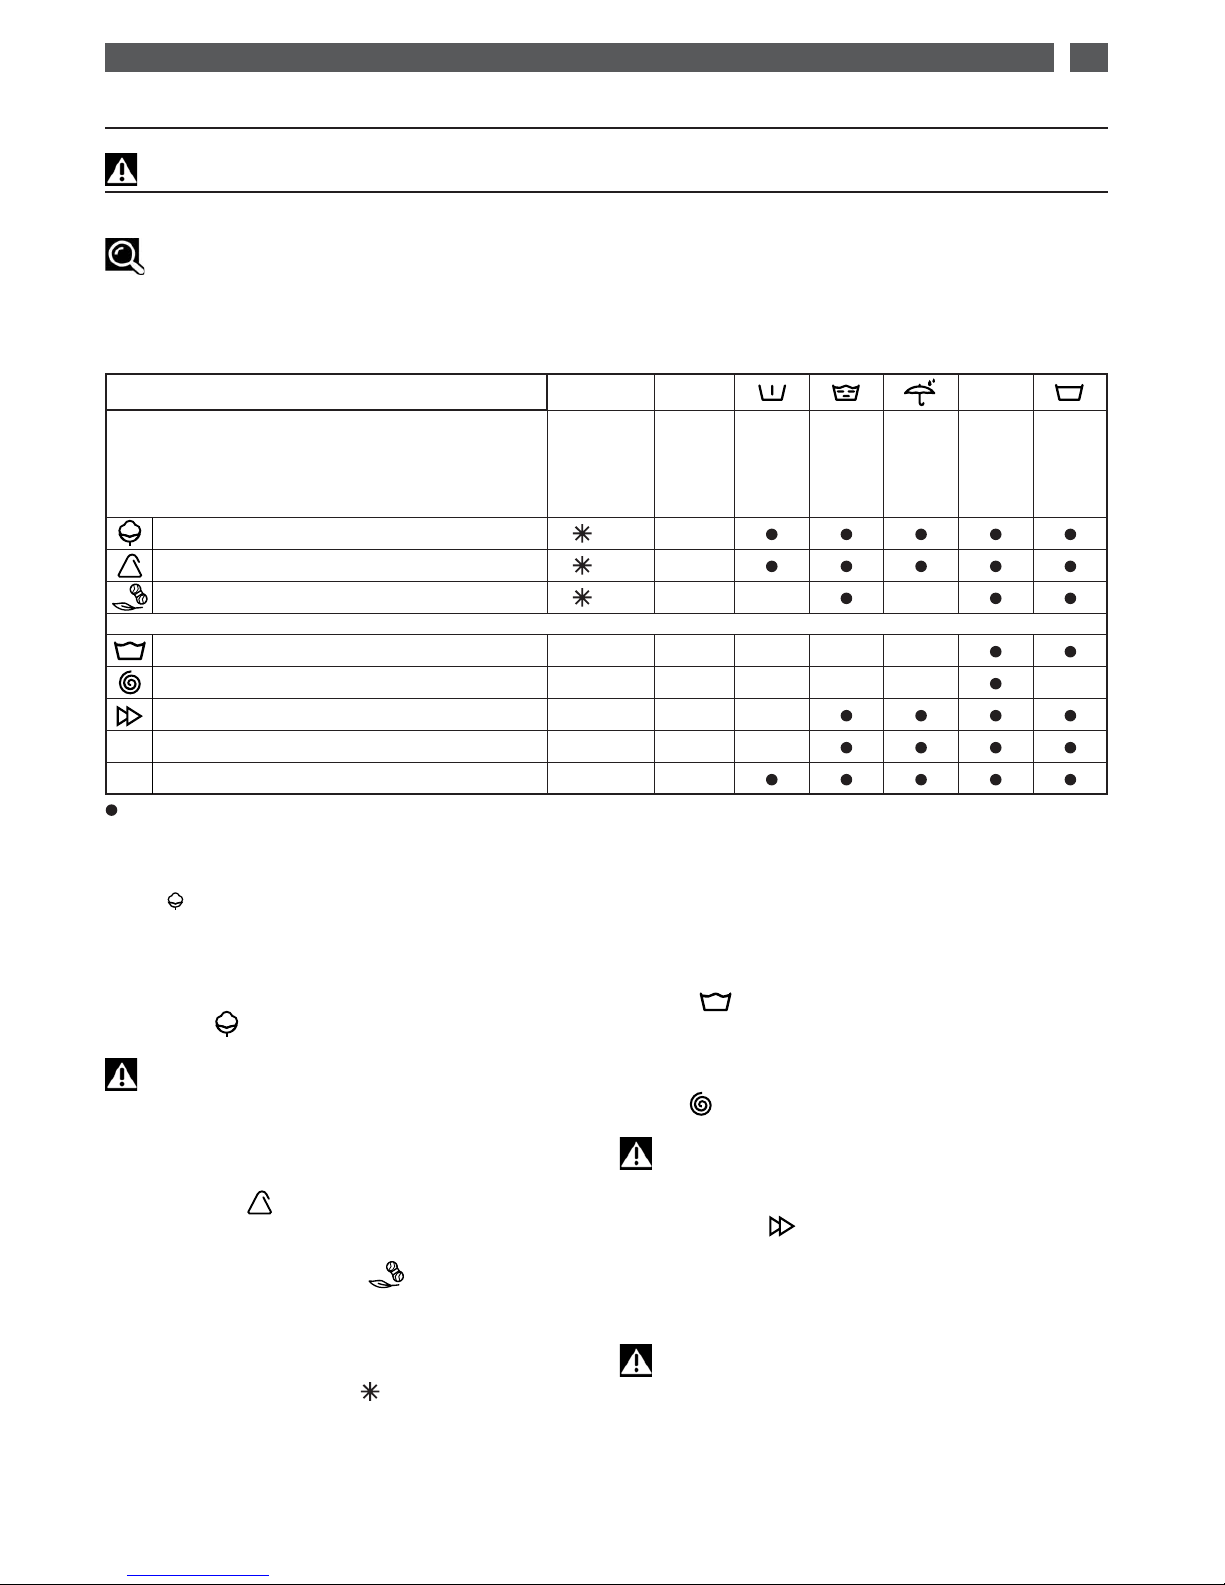
•DETAILS OF THE OPTIONS
•Prewash
Specially designed for heavily soiled washing (mud, blood, etc.).
A specific initial agitation in cold water precedes a phase of heating to 30°C.
This agitation phase in cold water enables the particles soiling the washing
to be removed before the water is heated.
Important:
Detergent must be placed in the
""
container in the products box.
•Extra rinse
"Especially for sensitive and allergic skin": adds an extra rinse to the
washing cycle.
•Waterproofing
This option can be used to waterproof or re-waterproof the following
textiles: cotton, mixed, fleece, technical textiles, stretch.
— If you are doing a wash combined with waterproofing:
- choose a wash cycle suitable for the type of laundry using your normal
detergents,
- select the «Waterproofing» option,
- pour the required dose of the waterproofing agent into the
appropriate compartment of the container ( ),
- start the cycle by pressing ”Start/Pause”.
Advice:
It is advisable, in this case, to use a liquid detergent.
Important:
o not use fabric softener with the «Waterproofing» option.
— If you just want to waterproof garments
(for clean, dry laundry
only)
:
- select the «Rapid 30 min» programme without using detergent,
- then, as before, select the «Waterproofing» option, put the
waterproofing agent in the compartment and start the cycle.
•Drip Dry
(spin speed ”100”)
This function, for very delicate linen,
enables you
to remove spinning and
to pass directly to the draining of the washing machine.
•Full drum stop
This function enables you to remove the washing from your machine
before the spin phase or to delay this phase with you washing remaining
in water to prevent creasing.
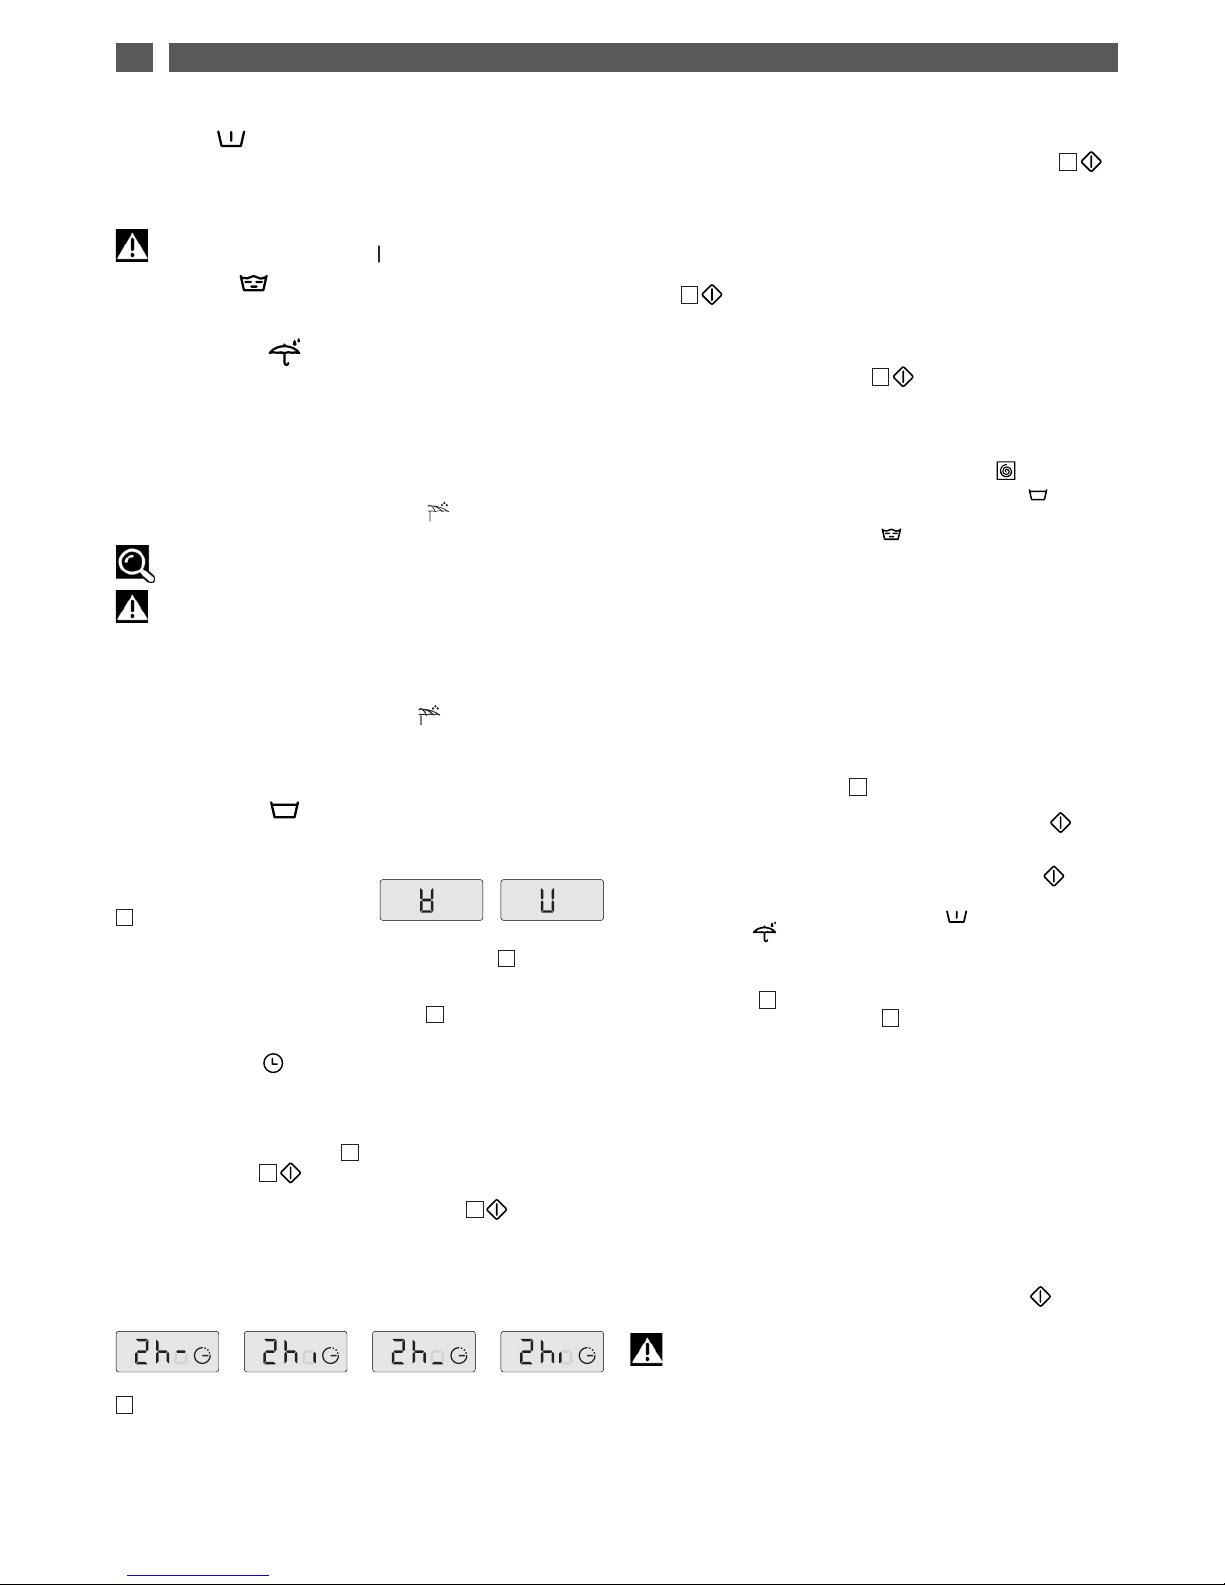
NB : When the machine is stopped
with the tub full of water, the display
shows alternately:
Then:
— If you want to drain after spinning, use the selector to choose a
suitable spin speed for your type of washing.
The programme will end automatically.
— If you just want to drain, turn the selector to “Drip Dry” (position
”100”).
•Delayed start
You can delay the start of your programme by 1 to 19 hours so that
you can benefit from cheap rate electricity or to have the cycle finish
at a desired time.
To do this, select the time that must pass before the cycle starts by
pressing successively on button (this is done hour by hour) and then
press ”Start/Pause” .
NB:
- Even if you forget to press the “Start/Pause” button after selecting
this option, your choice will still be accepted after a few seconds.
- The time remaining before the start of the cycle is counted down hour
by hour from 19 hours to 1 hour and then minute by minute from 59
minutes to 1 minute.
- Throughout the whole waiting period, the delayed start symbol is
displayed and the four elements light up in succession.
- At the end of the waiting period, the programme starts and the display
shows the duration of the selected cycle.
•MODIFYING A WASHING PROGRAMME
•During programming:
Anything can be changed before the “Start/Pause” button is
pressed.
•After the cycle has started:
You can change the type of textile (for example, switch from “COTTON”
to “SYNTHETICS”, etc.). In this case, check that the options you previously
selected are still there.
You must confirm your new selection by pressing the “Start/Pause”
button .
The machine may then possibly drain off some of its water.
•Throughout the cycle:
Depending on your model, the following changes are possible without
pressing the “Start/Pause” button .
— You can change the temperature for the same type of textile.
NB: If the temperature achieved by the washing cycle is higher than your
new selection, heating the water stops immediately and the cycle
continues.
— You can alter the spin speed throughout the cycle .
— You can select “Drip Dry” (100) and “Full drum stop” ( )
throughout the washing phase.
— You can activate the “Extra rinse” option until rinsing starts.
— You can deactivate all the options throughout the cycle provided
that their action has not already finished.
•During delayed start:
— Any kind of programme modification is accepted during a delayed
start’s waiting period.
— You can alter the length of a delayed start throughout the waiting
period before the cycle effectively starts.
NB :
- During this period, selecting a new time cancels out the previous
selection. The new period selected is accepted based on the last selection
made.
- If you want to cancel the delayed start completely during this period,
first display
“19h”
using button .
Then press the button again and briefly press ”Start/Pause„ .
The cycle will start immediately.
- If you want to reduce the length of time of the delayed start, proceed
in the same way but do not press the ”Start/Pause” button .
Your machine is then ready for a new setting.
— You can activate or amend the ”Prewash” ( ) and
”Waterproofing” ( ) options for the whole of the delayed
start’s waiting period.
•When the cycle is over:
When the screen shows “- 0 -”, you can programme a new cycle
without having to reset the selector to the “O” position.
For this, all you have to do is turn one of the selectors or press one of
the buttons.
The screen shows the duration of the programme selected.
The machine is then ready to be reprogrammed.
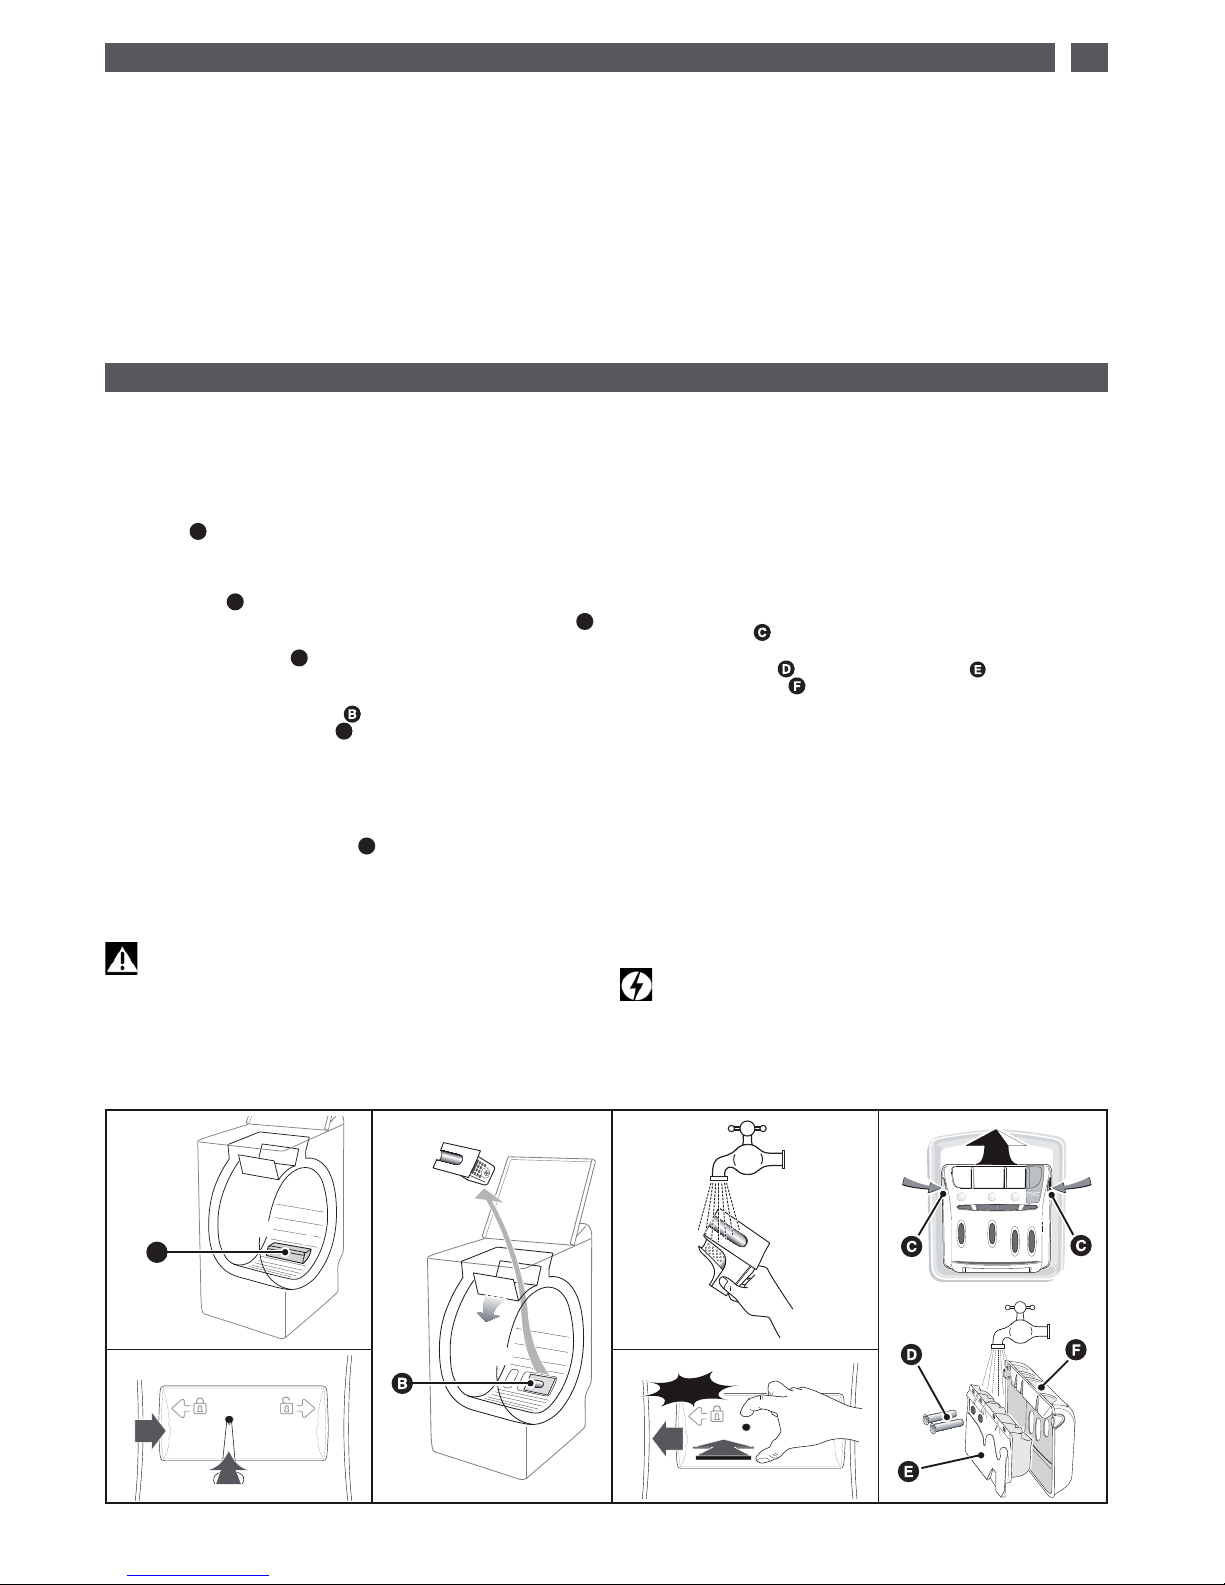
•AUTOMATIC SAFETY SYSTEMS
•Lid opening safety system:
As soon as washing commences, the lid on your machine is locked.
When the cycle is finished or when the machine has stopped with the
drum full of water, the lid unlocks.
If you have programmed a "Delayed start", the lid is not locked until
the waiting period is over and the cycle starts.
If you wish to open the lid during the cycle, press button briefly
and wait 1-2 minutes for the safety system to unlock the lid.
Important :
Depending on when you wish to open the lid during the cycle,
this time delay may be a little longer because a cooling down period
may also have to be included.
In fact, to avoid your being severely burnt, the lid safety system will
not open during the cycle unless the temperature inside the machine
is below a certain threshold.
1
A
3
5
5
5
A
5
5
3
2
2
A