manuals.online logo
Brands
  1. Home
  2. •
  3. Brands
  4. •
  5. Faller
  6. •
  7. Toy
  8. •
  9. Faller 120232 User manual

Faller 120232 User manual

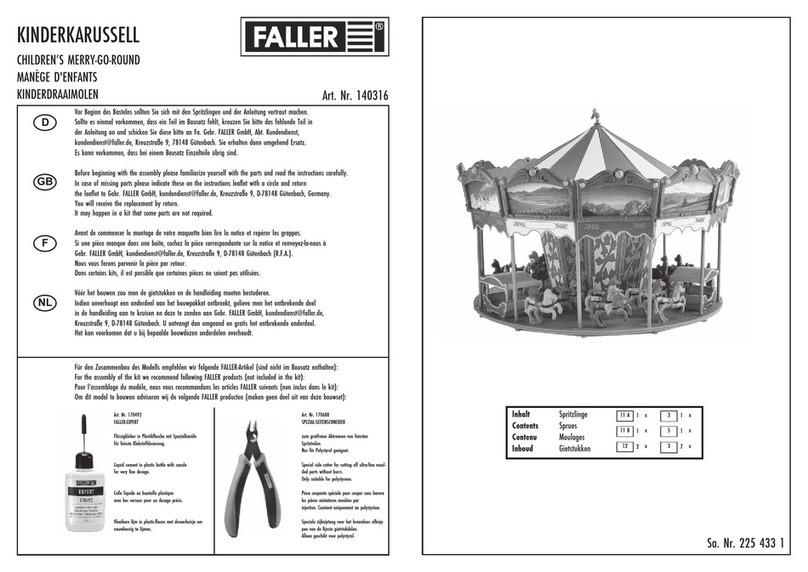
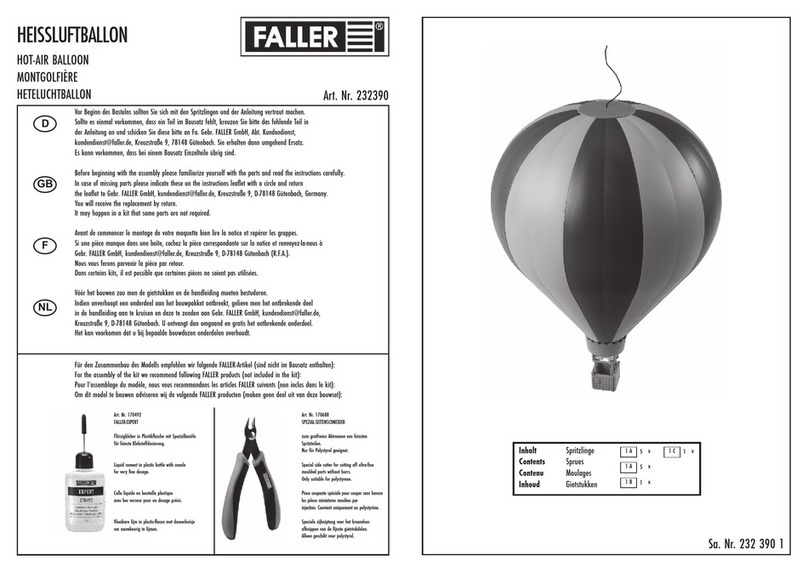
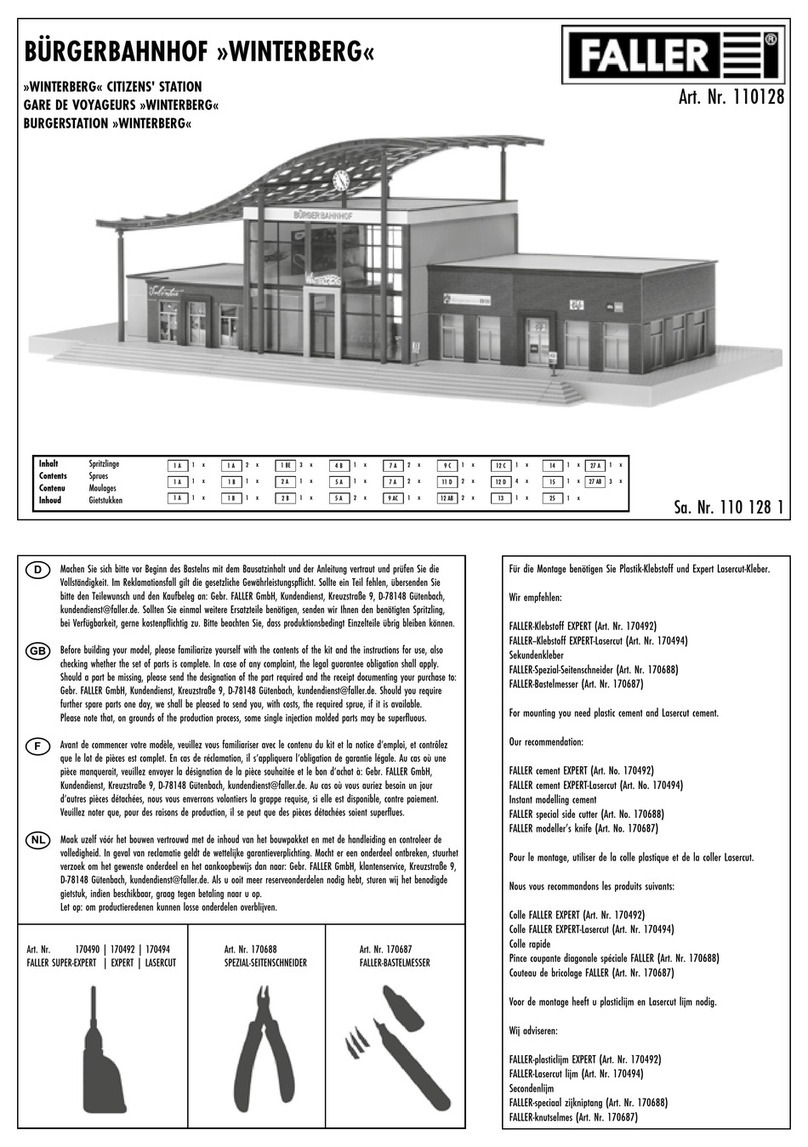
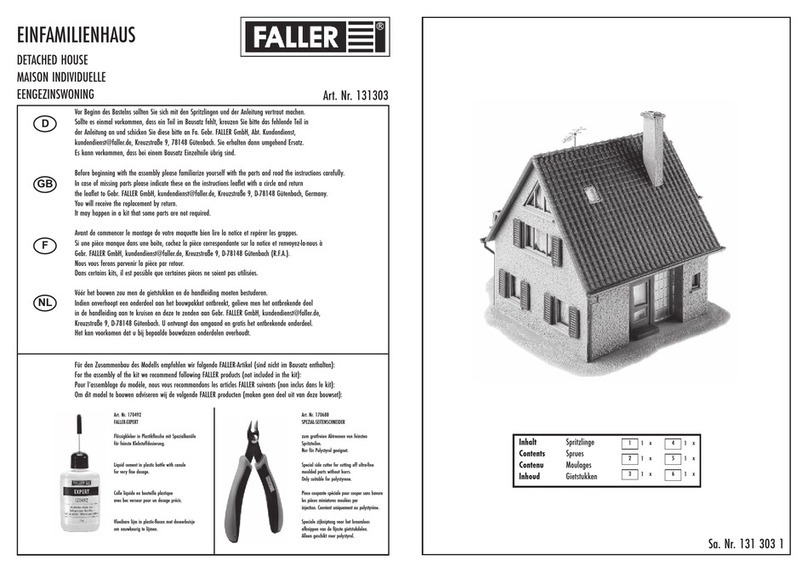
DA PFKRAN
STEA CRANE
GRUE À VAPEUR
STOO KRAAN Art. Nr. 120232
Sa. Nr. 120 232 1
Vor Beginn des Bastelns sollten Sie sich mit den Teilerahmen und der Anleitung vertraut machen. Sollte es einmal
vorkommen, dass ein Teil im Bausatz fehlt, kreuzen Sie bitte das fehlende Teil in der Anleitung an und schicken Sie
diese bitte an Fa. Gebr. FALLER GmbH, Abt. Kundendienst, [email protected], Kreuzstraße 9,
78148 Gütenbach. Sie erhalten dann umgehend Ersatz. Es kann vorkommen, dass bei einem Bausatz Einzelteile übrig
sind. Bitte behandeln Sie die Holz- und Kartonteile äußerst vorsichtig und sorgfältig. Die Teile sind stoß- und
feuchtigkeitsempfindlich. Kontrollieren Sie den Bausatz vor Beginn auf Vollständigkeit und Unversehrtheit der Teile.
Trennen Sie die einzelnen Teile vorsichtig mit einem scharfen Bastelmesser aus dem Teilerahmen.
Beachten Sie, dass die Teile bereits nach kurzer Zeit gut aneinander haften und nur schwer wieder voneinander getrennt
werden können.
Before you start you should familiarize yourself with the parts frame and the instruction manual. If a part
should be missing then please mark the missing part in the instruction manual and send it to Gebr. FALLER GmbH,
Abt. Kundendienst , [email protected], Kreuzstrasse 9, D-78148 Gütenbach. You will then immediately
receive a replacement part. It may happen, that in a kit single parts are not being used. Please treat the parts
very carefully and accurately. The parts are shock-sensitive and moisture-sensitive. Check the kit for completeness of
contents and intactness of parts. Carefully separate the parts with a hobby knife from the parts frame.
Kindly note , that the parts already stick together after short time and that they can hardly be separated again.
Avant de commencer le montage, veuillez vérifier les grappes de pièces et consulter la notice de montage.
Si une des pièces est manquante, marquez la d’une croix dans la notice de montage et renvoyez nous cett
dernière avec vos coordonnées à Fa. Gebr. FALLER GmbH, Abt. Kundendienst, Kreuzstraße 9, D-78148 Gütenbach
ou par e-mail à [email protected]. Nous vous ferons parvenir une pièce de remplacement.
Dans certains kits, il est possible que certaines pièces ne soient pas utilisées. Veuillez manipuler les pièces e
bois et carton avec prudence et soin. Les pièces sont sensibles aux chocs et à l’humidité.
Avant de commencer l’assemblage, vérifiez que toutes les pièces sont présentes et en bon état.
Prélevez soigneusement les pièces du cadre, une par une, avec un couteau de modéliste à lame acérée.
Notez que les pièces assemblées deviennent rapidement solidaires et qu’il est difficile de les séparer par la suite.
Vérifiez bien la justesse des assemblages !
Voordat u met het bouwen van start gaat adviseren wij u de onderdelen te controleren en de bouwbeschrijving te
bestuderen. Als het onverhoopt voorkomt dat een onderdeel in de bouwdoos mist of beschadigd is, kruis dan het
desbetreffende onderdeel op de handleiding aan en stuur deze naar: Gebr. Faller GmbH, afd. Kundendienst,
Kreuzstrasse 9, D-78148 Gütenbach. ailen kan ook: [email protected]. U ontvangt het gewenste onderdeel per
omgaande. Het kan voorkomen dat u bij bepaalde bouwdozen onderdelen overhoudt. Behandel de houten en kartonnen
onderdelen s.v.p. voorzichtig en zorgvuldig. De onderdelen kunnen makkelijk beschadigd raken en zijn gevoelig voor
vocht. Snijd de onderdelen voorzichtig met een scherp mes uit het onderdelen raamwerk.
Houd er s.v.p. rekening mee dat de onderdelen al na korte tijd vast aan elkaar hechten en moeilijk weer van elkaar
gescheiden kunnen worden.
D
F
GB
NL
Art. Nr. 170687
FALLER-BASTEL ESSER
wie es die Profi- odellbauer für ihre Arbeit
verwenden. Komplett mit 3 Ersatzklingen.
Weitere Ersatzklingen erhalten Sie direkt über
den FALLER-Kundendienst.
like the professional modellers use for their work.
Complete with 3 spare blades. You can order
additional spare blades directly via the FALLER
customer service.
tout comme les constructeurs de modèles
professionnels l’utilisent pour leur travail.
Complet avec 3 lames de remplacement.
D’autres lames de remplacement sont disponibles
directement chez le service de clientèle de FALLER.
oals het de profi-modelbouwers voor hun werk
gebruiken. Compleet met 3 reservemesjes.
Verdere reservemesjes verkrijgt u direct via
de FALLER-klantenservice.
Für den Zusammenbau des odells empfehlen wir folgende FALLER-Artikel: Art. Nr. 170494 + 170687 (liegen nicht bei).
For the assembly of the kit we recommend following FALLER products: Art. Nr. 170494 + 170687 (not included).
Pour l’assemblage du modèle, nous vous recommandons les articles FALLER suivants: Art. Nr. 170494 + 170687 (non jointe).
Om dit model te bouwen adviseren wij de volgende FALLER producten: Art. Nr. 170494 + 170687 (niet bijgevoegd).
Art. Nr. 170494
FALLER-EXPERT LASERCUT
Dieser Klebstoff verbindet Holz-, Karton-, Styropor-
und Decorflexteile miteinander.
Ideal für den Bau von Laser-Cut- odellen geeignet.
This glue joins wood, cardboard, Styrofoam,
and decorating parts.
Ideal for building Laser-Cut- odels.
Cette colle relie les pièces en bois, carton,
polystyrène deco-flex.
Idéal pour la construction de modèles laser-cut.
Deze lijm verbindt houten, kartonnen,
piepschuimen en decorflex delen met elkaar.
Ideaal geschikt voor het bouwen van laser cut modellen.
Inhalt Spritzlinge
Contents Sprues
Contenu oulages
Inhoud Gietstukken
11x
21x
31x
41x
51x
61x
71x
9 C 1x
2
A
1/17 1/10
2/1 2/4
2/2
2/3
1/14 1/12
1/2
1/3
1/13 1/11
B
C D
A
B C
Vorsichtig biegen!
Bend cautiously!
Plier prudemment!
Voorzichtig buigen!
3
M1:1
Fensterfolie
Die beiliegende Fensterfolie entsprechend der benötigten Größe ausschneiden und vorsichtig
mit wenig Klebstoff auf die Rückseite der Fensterrahmen aufkleben.
Window foil
Cut the attached window foil according the illustrations and glue it carefully with a little glue
to the rear side of the window frames.
Feuillet transparent pour fenêtres
Découper le feuillet transparent pour fenêtres inclus d’après l’illustration. Coller proprement
avec un peu de colle sur la face arrière du cadre des fenêtres.
Vensterfolie
De meegeleverde vensterfolie conform de afbeeldingen uitknippen of uitsnijden en voorzichtig
met een beetje lijm op de achterzijde van het raam plakken.
Das odell so lange gespannt lassen, bis der Kleber am odell vollständig abgetrocknet ist,
da sonst ist die Haftung der gebogenen Wand (2/4) nicht gewährleistet ist.
Leave the model stretched until the glue has completely dried up on the model,
otherwise the adherence of the curved wall (2/4) will not be perfect.
Laisser le modèle tendu jusqu’à ce que la colle ait complètement séché sur le modèle,
sinon l’adhérence de la paroi courbée (2/4) ne sera pas parfaite.
Het model zolang klemmen tot de lijm van het model volledig is uitgehard,
omdat anders de gebogen wand (2/4) niet voldoende vast zit.
Fensterfolie 9,5 x 18,5 mm
Window foil
Feuillet transparent
Vensterfolie
Fensterfolie 6,5 x 12,5 mm
Window foil
Feuillet transparent
Vensterfolie
Gummiring, liegt nicht bei
Rubber ring, not included
Élastique, non jointe
Rubber ring, niet bijgevoegd
E
F
D
E
1/17
M1:1
Fensterfolie 6,5 x 8,5 mm
Window foil
Feuillet transparent
Vensterfolie
M1:1
4
G
H
IG
H
4/2 3/2
3/6
3/1
3/6
3/4
4/12
4/11
nicht kleben
do not glue
ne pas coller
niet lijmen
5
F
Faden, 400 mm
Thread
Fil
Garen
4/7
4/9
2/5
2/6 2/6
4/7
I
J
K L
nicht kleben
do not glue
ne pas coller
niet lijmen
nicht kleben
do not glue
ne pas coller
niet lijmen
Nur an dieser Stelle kleben.
Only apply glue to this point.
Coller exclusivement cet emplacement.
Alleen op deze plaats lijmen.
Nur an dieser Stelle kleben.
Only apply glue to this point.
Coller exclusivement cet emplacement.
Alleen op deze plaats lijmen.
Nur an dieser Stelle kleben.
Only apply glue to this point.
Coller exclusivement cet emplacement.
Alleen op deze plaats lijmen.
J
6
KL
M
N
OP
M
O
Faden verknoten und den Knoten
mit Sekundenkleber fixieren!
Knot the thread and fix the thread
with instant cement!
Nouer le fil et renforcer le noed
avec une goutte de colle rapide!
Garen vastknopen en de knoop met
secondenlijm fixeren!
4/10
4/3
1/4
5/4
5/4
7
5/5
4/5
4/5
6/1
5/3
9/2
4/5
4/5
5/3
N
P
Q R
S
T
U
Q
R
S
T
Vorsichtig knicken!
Bend carefully!
Soigneusement coude !
Voorzichtig buigen!
8
2 x
b
cd
bc
3/3
4/1
7/1
7/1
9
1/7
5/2
1/1
4/8
4/6
4/6
4/4
3/5
5/1
d
efg
hi
jk
ef
g
h
i
j
4 x
10 U
l
m
k
l
nicht kleben
do not glue
ne pas coller
niet lijmen
11
1/6
no
p q
n
o
p
1/9
1/8
1/8
1/9 1/51/15
1/16
1/16
1. Das Zahnrad des icro Servos (Art. Nr. 180726) darf nicht von Hand bewegt werden!
The toothed wheel of the icro Servo (Art. no. 180726) must not be moved by hand!
On ne doit pas faire tourner à la main la roue dentée du Servomoteur iniature (Réf. 180726) !
Het tandwiel van de micro servo’s (art. nr. 180726) mag niet met de hand worden bewogen!
2. Den Servo mittels Steuerung 180725 gegen den Uhrzeigersinn bis zum Anschlag (1. Halteposition) drehen. Dann die 2. Halteposition programmieren.
ake the Servo rotate counterclockwise, using Control 180725, up to the limit stop (1st hold position). After that, programme the 2nd hold position.
Faire tourner le servomoteur, au moyen de la commande 180725, dans le sens antihoraire jusqu’à la butée (1ère position d’arrêt). Ensuite, programmer la 2ème position d’arrêt.
De servo met behuulp van de besturing 180725 tegen de wijzers van de klok in tot de aanslag (eerste stoppositie) draaien. Dan de 2e stoppositie programmeren.
3. Durch Umstecken von Teil 9/6 kann die Position des Bewegungsfeld geändert werden.
By changing the plugging position of part 9/6, you can change the position of the rotation range.
En changeant l’emboîtement de la pièce 9/6, on peut changer la position de la zone de déplacement.
Door het omsteken van deel 9/6 kan de positie van de bewegingsuitslag worden gewijzigd.
Servosteuerung kann gesteuert werden mit:
- Schalter/Reedsensoren/Kontaktgleis
(mit/ohne automatischer Rückstellung)
- Digitalzentrale
- Automatik (Dauerlauf)
- CS 3.0 Erweiterungsmodul
The servo control can be triggered using:
- Switch/Dry-reed sensors/Switching track
(with or without automatic return)
- Digital control unit
- Automation (Permanent working)
- CS 3.0 Extension module
La commande du servomoteur peut s’actionner au moyen de:
- Interrupteur/Capteurs à lames souples/Voie à commutation
(avec ou sans rappel automatique)
- Centrale numérique
- Automatisme (Fonctionnement permanent)
- odule d’extension CS 3.0
De servo regeling kan aangestuurd worden met:
- Schakelaars / reedcontacten / contact rails
(met /zonder automatische terugstelling)
- Digitale centrale
- Automatisch (continu bedrijf)
- CS 3.0 uitbreidingsmodule
12
Art.-Nr. 180725 liegt nicht bei
not included
non jointe
niet bijgevoegd
Bewegungsfeld
Rotation range
Zone de déplacement
Bewegingsuitslag
9/6 9/6
Art.-Nr. 180726 liegt nicht bei
not included
non jointe
niet bijgevoegd
1. Halteposition
1st Hold position
1ère position d’arrêt
1. Stoppositie
2. Halteposition
2nd Hold position
2ème position d’arrêt
2. Stoppositie
Art.-Nr. 180726 liegt nicht bei
not included
non jointe
niet bijgevoegd
Bewegungsfeld
Rotation range
Zone de déplacement
Bewegingsuitslag
nicht kleben
do not glue
ne pas coller
niet lijmen
braun
brown
brun
bruin
nicht kleben
do not glue
ne pas coller
niet lijmen
13
r
Art.-Nr. 180726 liegt nicht bei
not included
non jointe
niet bijgevoegd
14
sq
r
15
U
k
ts
Einbaumaß: 20 x 35 mm
Fitting dimensions: 20 x 35 mm
Cotes de montage: 20 x 35 mm
Inbouwmaat: 20 x 35 mm
M1:1
16
ut

Other Faller Toy manuals

Faller SCHWABENTOR TOWN HOUSE User manual

Faller

Faller SCHWABENTOR TOWN HOUSE User manual

Faller 282743 User manual

Faller

Faller 282743 User manual

Faller 180607 User manual

Faller

Faller 180607 User manual

Faller 191724/3 User manual

Faller

Faller 191724/3 User manual

Faller ENGINE HOUSE User manual

Faller

Faller ENGINE HOUSE User manual

Faller 453 User manual

Faller

Faller 453 User manual

Faller 190138/1 User manual

Faller

Faller 190138/1 User manual

Faller 222207 User manual

Faller

Faller 222207 User manual

Faller 141072 User manual

Faller

Faller 141072 User manual

Faller DAV ROCK-CLIMBING CENTRE User manual

Faller

Faller DAV ROCK-CLIMBING CENTRE User manual

Faller Urban dwelling house User manual

Faller

Faller Urban dwelling house User manual

Faller 120209 User manual

Faller

Faller 120209 User manual

Faller 190143/2 User manual

Faller

Faller 190143/2 User manual

Faller 222205 User manual

Faller

Faller 222205 User manual

Faller FALKENECK HUNTER'S LODGE User manual

Faller

Faller FALKENECK HUNTER'S LODGE User manual

Faller BUILDING SITE DECORATION User manual

Faller

Faller BUILDING SITE DECORATION User manual

Faller 120216 User manual

Faller

Faller 120216 User manual

Faller 191793 User manual

Faller

Faller 191793 User manual

Faller 180615 User manual

Faller

Faller 180615 User manual

Faller STABLE INTERIOR EQUIPMENT 130525 User manual

Faller

Faller STABLE INTERIOR EQUIPMENT 130525 User manual

Faller 282760 User manual

Faller

Faller 282760 User manual

Faller Car Center User manual

Faller

Faller Car Center User manual

Faller OLD STONE-CRUSHING PLANT User manual

Faller

Faller OLD STONE-CRUSHING PLANT User manual

Faller Ornamental Fountain 130232 User manual

Faller

Faller Ornamental Fountain 130232 User manual

Popular Toy manuals by other brands

Seagull Models Little Bunnt P-47D Assembly manual

Seagull Models

Seagull Models Little Bunnt P-47D Assembly manual

marklin Oberleitung user guide

marklin

marklin Oberleitung user guide

Hongda USA Star Takoyaki instruction manual

Hongda USA

Hongda USA Star Takoyaki instruction manual

iKarus SHOCK FLYER Sukhoi SU 27 xxl Building instructions

iKarus

iKarus SHOCK FLYER Sukhoi SU 27 xxl Building instructions

Mattel Shannen&Scooch B7458 instructions

Mattel

Mattel Shannen&Scooch B7458 instructions

Carf-Models Extra 330sc instructions

Carf-Models

Carf-Models Extra 330sc instructions

Mattel Barbie FRH73 instructions

Mattel

Mattel Barbie FRH73 instructions

Seagull Models CAP 232 Assembly manual

Seagull Models

Seagull Models CAP 232 Assembly manual

Marvel 7HEL078N1 instructions

Marvel

Marvel 7HEL078N1 instructions

Mega Bloks Call of Duty 06855 instructions

Mega Bloks

Mega Bloks Call of Duty 06855 instructions

Lionel Truss Bridge with Flasher and Piers owner's manual

Lionel

Lionel Truss Bridge with Flasher and Piers owner's manual

VQ Model VQA138SW Building instructions

VQ Model

VQ Model VQA138SW Building instructions

Trix BR 120.1 manual

Trix

Trix BR 120.1 manual

Bresser Junior The Magic lamp instruction manual

Bresser Junior

Bresser Junior The Magic lamp instruction manual

Durafly Messerschmitt BF.109E-4 instruction manual

Durafly

Durafly Messerschmitt BF.109E-4 instruction manual

marklin 74460 instruction manual

marklin

marklin 74460 instruction manual

HC-HOBBY Mosquito Assembly instructions

HC-HOBBY

HC-HOBBY Mosquito Assembly instructions

Fisher-Price LittlePeople DYP 25 quick start guide

Fisher-Price

Fisher-Price LittlePeople DYP 25 quick start guide

manuals.online logo
manuals.online logoBrands
  • About & Mission
  • Contact us
  • Privacy Policy
  • Terms and Conditions

Copyright 2025 Manuals.Online. All Rights Reserved.