manuals.online logo
Brands
  1. Home
  2. •
  3. Brands
  4. •
  5. Fantasea
  6. •
  7. Camera Accessories
  8. •
  9. Fantasea CP-6 User manual

Fantasea CP-6 User manual

Fantasea CP-6 Camera Housings
For Nikon Coolpix 4600 & Coolpix 5600 Digital Cameras
General Introduction:
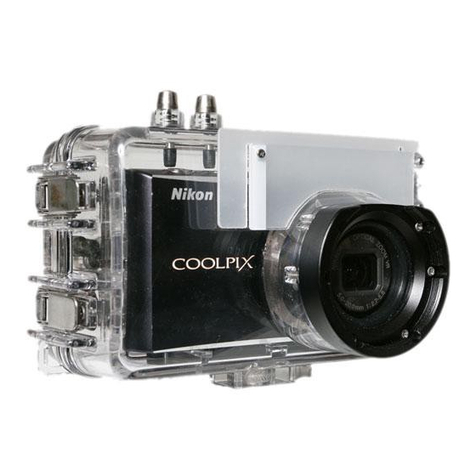
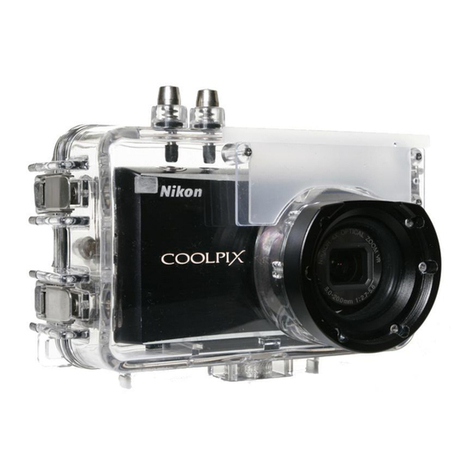
The Fantasea CP-6 housing is specifically designed for the Nikon Coolpix 4600
and 5600 digital cameras. The housing is dedicated to these two cameras, which
are physically identical, to insure the most compact design for easy handling and
accurate access to camera functions through the critical placement of push-button
controls.
The CP-6 housing provides access to the cameras shutter release, zoom control,
flash mode, focus mode and quick review functions. Other camera functions and
features that are desirable, should be made in advance of closing the housing and
using it. This housing is ideal for outdoor and underwater photographers who prefer
to use the camera s automatic exposure features for capturing fast action pictures
easily and creatively.
Fantasea CP-6 Uses:
The Fantasea CP-6 housing is designed as an underwater/outdoor camera housing.
It has a working depth of 130 feet/40 meters. Underwater photographers can dive
or snorkel and capture all the excitement of this fascinating world, while outdoor
photographers also have the option of capturing the action of such activities as
white water and paddle sports, sailing and boating, surfing, fishing and hunting,
backpacking and camping, and for family activities around the swimming pool or
at the beach. The CP-6 will protect the Coolpix camera from water, sand, dust, and
other damaging elements.
General Camera Description:
The Nikon Coolpix 4600 is a 4 megapixel camera and the Coolpix 5600 is a 5
megapixel camera. With this resolution and the outstanding quality of other Nikon
features, such as optical performance, you will be able to produce high quality
images of the thrilling outdoor activities in which you participate. These cameras
were selected as the basis for the housing design due to the combination of image
quality and consumer value. For specific features of each camera you should
reference your camera s instruction manual or obtain product technical information
from Nikon or their dealers.
Housing Orientation & Nomenclature:
Front View: (45 degree angle showing latch on side)
Shutter Release Flash Diffuser
Latch Safety
Lock Release
7
Lanyard
Eyelet
Tripod Socket
Tempered Glass
Lens Port & Ring
Latch Buckle
1
2
4
5
3
6
Rear View: (Angled View)
Shutter Release
1
Rear Door
Hinge
6
LCD Viewing
Monitor
5
LCD Ambient
Light Shade
4
Zoom Lens in/out
Controls (2)
2
3Quick Review control
Using the CP-6 Housing:
Opening Housing:
Using two hands, pinch the Black Latch Buckle Release together to unlock the safety
device. While holding the release in this position, pull the Red latch open in a front
to back direction. The latch is hinged on the front half of the clamshell. Pulling the
latch toward the rear of the housing will unclip the latching buckle and allow it to
swing free, for opening.
Inserting Camera:
Since the CP-6 was specifically designed for the Coolpix 4600 and 5600 digital
cameras, insertion is a simple matter of placing the camera in the housing. Make sure
the camera lens is properly aligned with the port and that the camera is perfectly flat.
There are no screws or mounts to worry about or any other alignments once the
camera is properly inserted.
Note: It is necessary to make some camera settings prior to inserting into the housing.
Please refer to the Coolpix owners manual for menu options and personal preferences
to choose from, that are not accessible through the housing push-button controls.
Turn the camera on before inserting in housing.
Underwater photographers will probably want to set the flash mode to the Anytime
setting to insure they always have a flash with every exposure. It is also wise to set
the focus mode to allow the lens to focus in the macro range for capturing great
images of the tiny and exotic subjects that you can find underwater.
Checking the Gasket:
Each time the housing is opened, the gasket seal should be visually inspected. If there
is any debris present, including dirt, sand, dust, grease or other matter, it must be
cleaned to insure a proper water-tight seal. Cleaning the gasket is a simple matter of
wiping it with a damp, soft cloth to remove any foreign matter. Be careful the cloth
you use does not leave any of its own material behind as this can also affect the
effectiveness of the gasket. It is not necessary to remove the gasket for cleaning unless
visual inspection determines that there is foreign matter underneath the gasket as well.
If this occurs, be sure the surface of the housing is also clean and wiped free of any
debris.
Since the gasket in the CP-6 is a face-to-face/compression seal, and is not subject
to friction as it is closed, there is no need to lubricate it. Grease or any other form
of lubrication does not help seal the housing. It only reduces friction, which is
commonly present if the housing has an O-ring seal. Lubricating the gasket before
use could cause it to slip out of its groove, and not form a proper seal.
The gasket should also be checked visually for any cracks or perforations. If any part
of the gasket shows signs of wear or damage, it is imperative that it be changed before
going into the water.
If the gasket is removed from the channel groove it sets in, be sure to get it completely
back into place so it is properly seated. Starting at one corner, press the gasket with
your finger and feel it seat into its channel groove. Then continue this procedure
continuously in one direction, round its perimeter, until the entire gasket has been
pressed flat into place. Go over it a second time to be sure it is properly in place. Then
you are ready to clean it, give it a final visual inspection, and close the housing.
Closing the Housing:
Make sure the camera is flat and that the back door of the housing closes easily without
interference. Take special care not to get the lanyard caught in the closure. Once the door
is closed, latch the buckle behind the ridge on the back half of the housing. (If the camera
is not flat, the door will not lie closed, and the latching buckle will have a hard time
catching the ridge on the back door. In this case, open the back door and reposition the
camera until it is flat and the door closes correctly.) With the latch behind the ridge on
the back door, push the latch buckle forward until it lies flat against the front half of the
housing and the safety release snaps into place.
Viewing the Subject:
Underwater photographers and outdoor photographers will appreciate the large LCD
viewing monitor for composing photographs. The LCD monitor will allow you to see
your subject in sharp focus and framed properly. Hold the camera housing in your
outstretched arm at a position that is both comfortable and also allows you to easily see
the LCD monitor, for best compositional options. The anti glare LCD shade will assist
your viewing in high ambient light.
Taking the Picture:
Once you have composed your scene or subject in the LCD monitor, depress the shutter
release button to take the picture. A half depress will activate the live viewing ability of
the LCD monitor, and a full depression of the button will take the picture.You may notice
a pre-flash and slight delay in the shutter release. This is to allow the camera to make its
final focus and exposure calculations before taking the picture. With a little practice, you
will become used to this and taking pictures of moving subjects will become easier.
Image Files:
There are several image file options to choose from that offer different resolution and
file sizes. This determination must be made prior to camera insertion from menu options.
Please refer to the Coolpix instruction manual for details on setting these preferences.
Battery Life:
The Coolpix 4600 and 5600 cameras come with two LR6AAalkaline batteries, and will
lasts for more than enough time for a typical photo dive. However, there are certain things
that users can control to help with battery life. The most important is to set the camera
to turn the LCD off after a short time, during periods of non-use. It can then be automatically
turned back on if you depress the shutter release control half way. Please refer to the
Coolpix instruction manual for details on how to make this adjustment setting. It is always
wise to have backup batteries in case you do run out of power. Other battery options
include two EN-MH1 rechargeable batteries, two ZR-6AANickel Manganese batteries,
or two FR-6 AA Lithium batteries. Rechargeable batteries usually increase overall
performance and offer an economical and environmentally aware alternative to one-use
disposable batteries. Check the users manual of the camera for confirmation of compatibility
with other batteries.
Using Flash:
The Coolpix has a built-in flash, which will illuminate nearby underwater subjects. For
subjects that are farther away, an accessory slave strobe is recommended. (See Below.)
Due to the presence of suspended particles in the water, a built-in external flash diffuser
is supplied. It will widen and soften the light, providing more coverage and less likelihood
of backscatter , the unattractive snowstorm affect of the flash reflecting off the suspended
particles. Further reduction of backscatter can be achieved by using an accessory off-
camera slave flash. See below for more details.
Underwater photographers, needing artificial light to restore color in nearly all pictures,
should set the flash mode to Anytime flash. This will insure the flash fires on every
exposure regardless of the ambient light conditions. (Please refer to the camera s instruction
manual for more details.)
Outdoor photographers do not have this same concern. There is no backscatter to be
concerned about, and due to the ability of the flash to travel farther and more effectively
in air as compared to in water, there is normally not a need for an accessory flash to
provide proper illumination for most subjects.
Accessory Slave Strobes:
Using the Coolpix built-in flash as the master, you can trigger a second slave strobe to
provide more artificial light when needed. To do this, you must use an accessory strobe
that has a slave feature built in. The flash from the Coolpix must be aimed or bounced
toward the accessory strobe s slave sensor, or other fiber optic sensor. This will trigger
the slave to fire in sync with the master flash. Be sure to use a slave strobe that has the
ability to ignore the built-in pre-flash in digital cameras, and synchronizes with the
shutter release.
Other Fantasea Camera Accessories manuals

Fantasea Nano Ray Lighting Sets User manual

Fantasea

Fantasea Nano Ray Lighting Sets User manual

Fantasea FP-5000 User manual

Fantasea

Fantasea FP-5000 User manual

Fantasea BigEye User manual

Fantasea

Fantasea BigEye User manual

Fantasea Nano Flash Guide

Fantasea

Fantasea Nano Flash Guide

Fantasea FP7100 User manual

Fantasea

Fantasea FP7100 User manual

Fantasea Cool flash nano User manual

Fantasea

Fantasea Cool flash nano User manual

Fantasea FP-1 User manual

Fantasea

Fantasea FP-1 User manual

Fantasea FS500 User manual

Fantasea

Fantasea FS500 User manual

Fantasea CP 8 User manual

Fantasea

Fantasea CP 8 User manual

Fantasea BlueRay Action User manual

Fantasea

Fantasea BlueRay Action User manual

Fantasea FL-19 User manual

Fantasea

Fantasea FL-19 User manual

Fantasea LED 360 Light User manual

Fantasea

Fantasea LED 360 Light User manual

Fantasea FS51 User manual

Fantasea

Fantasea FS51 User manual

Fantasea CP-5 User manual

Fantasea

Fantasea CP-5 User manual

Fantasea Fiber Optic Cable Guide

Fantasea

Fantasea Fiber Optic Cable Guide

Fantasea F400D User manual

Fantasea

Fantasea F400D User manual

Fantasea FSD-1100 User manual

Fantasea

Fantasea FSD-1100 User manual

Fantasea EyeGrabber MPK Series User manual

Fantasea

Fantasea EyeGrabber MPK Series User manual

Fantasea EyeDaptor G9 User manual

Fantasea

Fantasea EyeDaptor G9 User manual

Fantasea F400D User manual

Fantasea

Fantasea F400D User manual

Fantasea FP7100 Installation guide

Fantasea

Fantasea FP7100 Installation guide

Fantasea FD-40X User manual

Fantasea

Fantasea FD-40X User manual

Fantasea FG16 User manual

Fantasea

Fantasea FG16 User manual

Fantasea EyeDaptor S90 User manual

Fantasea

Fantasea EyeDaptor S90 User manual

Popular Camera Accessories manuals by other brands

CamRanger CamRanger user manual

CamRanger

CamRanger CamRanger user manual

Custom Brackets HDV CAGE KIT Instructions for use

Custom Brackets

Custom Brackets HDV CAGE KIT Instructions for use

Aegis ABL052010P user manual

Aegis

Aegis ABL052010P user manual

Saft SRA Series Installation and operating instructions

Saft

Saft SRA Series Installation and operating instructions

Kodak TIB5200 technical information

Kodak

Kodak TIB5200 technical information

Videotec HEG instruction manual

Videotec

Videotec HEG instruction manual

Ikelite 6171.11 manual

Ikelite

Ikelite 6171.11 manual

Pentax Auto Bellows Slide Copier K user manual

Pentax

Pentax Auto Bellows Slide Copier K user manual

Nikon UT-1 user manual

Nikon

Nikon UT-1 user manual

dji RONIN 4D quick start guide

dji

dji RONIN 4D quick start guide

SLIK ABLE 300DX user manual

SLIK

SLIK ABLE 300DX user manual

Rebelcell 36V70 user manual

Rebelcell

Rebelcell 36V70 user manual

Trojan GC2 48V quick start guide

Trojan

Trojan GC2 48V quick start guide

Calumet 7100 Series CK7114 operating instructions

Calumet

Calumet 7100 Series CK7114 operating instructions

Ropox 4Single Series User manual and installation instructions

Ropox

Ropox 4Single Series User manual and installation instructions

Cambo Wide DS Digital Series Main operating instructions

Cambo

Cambo Wide DS Digital Series Main operating instructions

Samsung SHG-120 Specification sheet

Samsung

Samsung SHG-120 Specification sheet

Ryobi BPL-1820 Owner's operating manual

Ryobi

Ryobi BPL-1820 Owner's operating manual

manuals.online logo
manuals.online logoBrands
  • About & Mission
  • Contact us
  • Privacy Policy
  • Terms and Conditions

Copyright 2025 Manuals.Online. All Rights Reserved.