manuals.online logo
Brands
  1. Home
  2. •
  3. Brands
  4. •
  5. Farberware
  6. •
  7. Griddle
  8. •
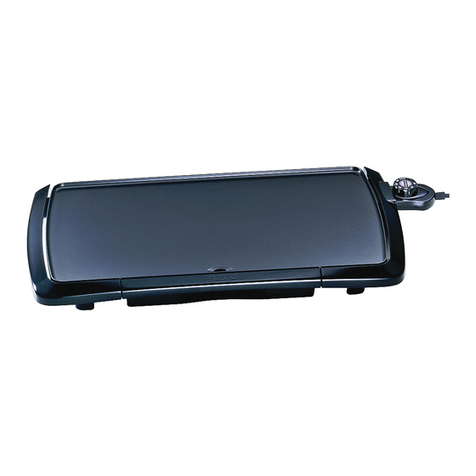
  9. Farberware 201795 User manual

Farberware 201795 User manual

Popular Griddle manuals by other brands

Magikitch'n MKG24 Installation & operation manual

Magikitch'n

Magikitch'n MKG24 Installation & operation manual

Proctor-Silex 25340 manual

Proctor-Silex

Proctor-Silex 25340 manual

New House Kitchen NH33-C user guide

New House Kitchen

New House Kitchen NH33-C user guide

Magikitch'n 24 Installation and operation instructions

Magikitch'n

Magikitch'n 24 Installation and operation instructions

Anvil FTA7116 Specifications

Anvil

Anvil FTA7116 Specifications

Pit Boss PB2BGT1 Instruction guide

Pit Boss

Pit Boss PB2BGT1 Instruction guide

Dyna-Glo DGL260SNP manual

Dyna-Glo

Dyna-Glo DGL260SNP manual

Char-Broil 19952085 Product guide

Char-Broil

Char-Broil 19952085 Product guide

APW Wyott HMG-2424 Installation and operating instructions

APW Wyott

APW Wyott HMG-2424 Installation and operating instructions

Pit Boss Ultimate Griddle PB2BGD2 Assembly guide

Pit Boss

Pit Boss Ultimate Griddle PB2BGD2 Assembly guide

Airxcel Suburban Elite SOP-1005A Operation guide

Airxcel

Airxcel Suburban Elite SOP-1005A Operation guide

Hobart GGO36S instruction manual

Hobart

Hobart GGO36S instruction manual

Delta Heat DHTG32 Installation, use & care manual

Delta Heat

Delta Heat DHTG32 Installation, use & care manual

Broil King USG-10 use and care manual

Broil King

Broil King USG-10 use and care manual

AccuTemp Accu-Steam GG24A Installation & operator's manual

AccuTemp

AccuTemp Accu-Steam GG24A Installation & operator's manual

croydon GR2G instruction manual

croydon

croydon GR2G instruction manual

Barbecook THERMICORE user guide

Barbecook

Barbecook THERMICORE user guide

Proctor-Silex 38513 use & care

Proctor-Silex

Proctor-Silex 38513 use & care

manuals.online logo
manuals.online logoBrands
  • About & Mission
  • Contact us
  • Privacy Policy
  • Terms and Conditions

Copyright 2025 Manuals.Online. All Rights Reserved.

GRIDDLE
Model Number: 201795
UPC: 655772-01795-6
Customer Assistance
1-855-451-2897 (US)
Please consider the option to recycle the packaging material.
Griddle_ _IM_US_V4_ .indd 1  10:38 AM
2
When using electrical appliances, basic safety precautions should always
be followed, including the following:
t Read all instructions before use.
t Do not touch hot surfaces. Use handles or knobs.
t WARNING – to protect against electric shock, re and personal injury:
-do not immerse cord, plug in water or other liquids;
-do not immerse the appliance or any electrical components in water
or any other liquids;
-always switch o and unplug the appliance before cleaning.
t Close supervision is necessary when any appliance is used by or near
children.
t Unplug from wall outlet when the appliance is not in use, before putting
on or taking o parts, and before cleaning. Allow to cool before handling,
putting on or taking o parts, and before cleaning the appliance.
t Do not operate any appliance with a damaged cord or plug, or after the
appliance malfunctions or has been damaged in any manner. Call our
toll-free customer assistance number for information on examination,
repair, or adjustment.
t The use of accessory attachments not recommended by the appliance
manufacturer may result in re, electric shock or injuries to persons.
t Do not use outdoors or in a damp area.
t Do not place the appliance close to the edge of the countertop.
t Do not let power cord hang over edge of table or counter, or touch hot
surfaces.
t Do not place on or near a hot gas or electric burner, or in a heated oven.
t Extreme caution must be used when moving an appliance containing
hot oil or other hot liquids.
t Do not use appliance for other than intended use.
t This appliance is not intended for deep frying foods.
t A re may occur if the appliance is covered or touching ammable
material, including curtains, draperies, walls, and the like, when in
operation. Do not store any item on top of the appliance when in
operation.
t Do not clean with metal scouring pads. Pieces can break o the pad and
touch electrical parts involving a risk of electric shock.
SAVE THESE INSTRUCTIONS
IMPORTANT SAFEGUARDS
Griddle__IM_US_V4_.indd 2  10:38 AM
3
IMPORTANT SAFEGUARDS
t Never leave the appliance unattended during operation.
t Ensure a minimum distance around the appliance of 6-8 inches to other
objects, cupboards and walls.
t Use extreme caution when disposing of hot grease.
t Do not cover any part of the appliance with metal foil. This will cause
overheating of the appliance.
t Always attach temperature control probe to appliance rst, then connect
plug to a wall outlet. To switch o and disconnect, turn the temperature
control knob to the OFF position, then remove plug from wall outlet.
t Never pull on the cord to disconnect the appliance from the wall outlet;
instead, grasp the plug and pull on the plug.
t Let the appliance cool completely before putting away or storing.
t It is recommended to use a heat-resistant trivet or cutting board
underneath this appliance to avoid possible heat damage to the
countertop.
SAVE THESE INSTRUCTIONS
Griddle__IM_US_V4_.indd 3 10:38 AM
4
ADDITIONAL SAFEGUARDS
This appliance is for HOUSEHOLD USE ONLY.
WARNING:
-DO NOT OPERATE APPLIANCE IF THE LINE CORD SHOWS ANY
DAMAGE OR IF APPLIANCE WORKS INTERMITTENTLY OR STOPS
WORKING ENTIRELY.
Notes for extension cord
t A short power-supply cord (or detachable power-supply cord) is to be
provided to reduce the risk resulting from becoming entangled in or
tripping over a longer;
t Longer detachable power-supply cords or extension cords are available
and may be used if care is exercised in their use.
t If a long detachable power-supply cord or extension cord is used:
-The marked electrical rating of the cord or extension cord should be
at least as great as the electrical rating of the appliance;
-The longer cord should be arranged so that it does not drape over
the countertop or table top where it can be pulled on by children or
tripped over unintentionally.
Polarized plug
t This appliance has a polarized plug (one blade is wider than the other).
To reduce the risk of electric shock, this plug is intended to t into a
polarized outlet only one way. If the plug does not t fully into the outlet,
reverse the plug. If it still does not t, contact a qualied electrician. Do
not attempt to modify the plug in any way.
t Do not let children handle or put the electrical cord into their mouths.
SAVE THESE INSTRUCTIONS
Griddle__IM_US_V4_.indd 4 10:38 AM
5
PARTS
1. Probe receptacle
2. Temperature control probe
3. Power cord with plug
4. Feet
5. Drip tray (removable)
6. Drain
7. Frame
8. Nonstick cooking surface
9. Temperature control knob
10. POWER indicator (BLUE)
11. Probe
Griddle_ _IM_US_V4_ .indd 5  10:38 AM
132
465
8
7
9
10
11
6 - 8
inches
6 - 8
inches
6 - 8
inches
2.
1.
6
ILLUSTRATIONS
abc
def
ghi
jkl
Griddle_ _IM_US_V4_ .indd 6  10:38 AM
7
ILLUSTRATIONS
m n
OPERATION
t RemovFBMMQBDkBgJOHNBterJBMTBOEPSPUIFSUrBOTQPrtBUJPONFBOT.
t $IFDLQBDkBHFDontenttoverifyitJTDPNQMFteBOEVOEBNBHFE.DonotPQFrBtF
UIF BQQMJBODeif UIF Dontent JT inDPNQMFteor BQQFBST EBNBHFE.Return JU
JNNFEJBtFMZtoWBMNBrt.
-PBDkBgingmBterJBMTBrenottoyT.AMwByTLFFQQMBTUJD CBHT,fPJMTBOEfPBN
QBrUT BwByfrom CBCJFT BOE DIJMEren.PBDkBgingmBterJBM DPVME CMPDL
BJrwByTBOEQrevenUCreBUIJOg.
NOTE:
-TIFBQQMJBODemByQrPEVDeBOPEPSBOEPSemitTNPLFXIFOTXJtDIFEPO
TIJTJTOPrNBMBOEEPFTOPUJOEJDBtFBEFfeDUPSIB[BrE.
-
forBtMFBTU8minutFTonUIFIJHIFTUTFUUJOH(0QFrBtion),unUJMnoPEPSPS
TNPLFJTQrFTFntDurJOHVTeFOTVrFBNQMFvenUJMBtion.
-LFUUIFBQQMJBODFDPPMDPNQMFtFMy.
-$MFBOUIFBQQMJBODF $MFBOJOHBOEMBJntFOBODe).
Griddle_ _IM_US_V4_ .indd 7  10:38 AM
1.
2.
8
OPERATION
Using the appliance
This appliance can be used to saute food and is not intended for any other use.
NOTE:
-The appliance has a rated power of 1200W. Before plugging it into the
wall outlet, ensure that the electrical circuit is not overloaded with other
appliances. This appliance should always be operated on a separate
120V / 60Hz wall outlet.
-Always preheat the appliance before use.
t
distance around the appliance of at least 6 - 8 inches to other objects, cupboards
and walls (ill. a).
t Place the drip tray (5) onto the rails (ill. b). Ensure it is fully inserted.
WARNING:
-Never use the appliance without the drip tray (5) in place.
-Always ensure the drain (6) is free of residue.
-Empty the drip tray (5) regularly to avoid spills. Handle with care.
-Always ensure the appliance is completely dry before attaching the probe
portion of the temperature control probe (2) into the probe receptacle (1)
of the griddle.
-Only use the control probe model +)-0" with this appliance.
t Set the temperature control knob (9) the OFF position before connecting the
temperature control probe (2) to the probe receptacle (1) (ill. c).
t Align the temperature control probe (2) with the probe receptacle (1) of the
griddle. Gently slide the temperature control probe (2) in until it is completely
engaged. Then insert the plug (3) into a wall outlet (ill. d).
WARNING:
-Never let the power cord (3)come in contact with the heating plate of
appliance during use (ill. e).
-Never use your bare hand to touch the nonstick cooking surface (8) or
frame (7) when it is plugged in and switched on (ill. f).
t To preheat, set the temperature control knob (9) to the required temperature
(ill. g) ( Recommended cooking times and temperatures). The POWER
indicator (10) will turn on.
Griddle_ _IM_US_V4_ .indd 8  10:38 AM
the
9
OPERATION
NOTE:
-Once the set temperature has been reached, the POWER indicator (10) will
switch o.
-During use, the POWER indicator will turn on and o several times,
indicating the appliance is heating and to ensure a consistent cooking
temperature.
t Carefully place the food onto the nonstick cooking surface (8) (ill. i).
WARNING:
-Do not use excessive oil or any other liquids with the appliance (ill. h).
Only apply liquid condiments in small amounts for seasoning.
-Do not overll the appliance (ill. j).
-Do not place foods on, or remove foods from the nonstick cooking
surface (8) using bare hands, always use a suitable non-metal utensil (ill. k
, l).
-Never leave the appliance unattended during operation.
t Set the temperature control knob (9) to the required temperature.
Danger of burns!
-Always use caution when inserting or removing the drip tray from the
griddle.
-Always use caution when adding food to the griddle, turning food or
moving food. Never use your bare hand to remove, turn or move food.
-Never touch the nonstick cooking surface or housing when the appliance is
plugged in and switched on (ill. k).
-Steam is hot and can cause burns. Always use caution when adding or
removing food, turning food or moving food as well as when inserting or
removing the drip tray.
NOTE:
-Once the foods are cooked, it is recommended to remove them promptly
to prevent them from drying out or becoming burnt. If food is left on the
nonstick cooking surface, it is recommended to reduce the temperature.
-Alternatively, you can set the temperature control knob (9) to WARM, in
order to keep cooked food warm until consumption (e. g. pancakes).
Griddle__IM_US_V4_.indd 9  10:38 AM
10
RECOMMENDED COOKING TIMES
AND TEMPERATURES
FOOD TEMPERATURE
°F
APPROXIMATE COOKING
TIME IN MINUTES
Bacon 325° - 350° 5 - 8
Canadian Bacon 325° - 350° 3 - 4
Fish 325° - 375° 5 - 10
Fried Eggs 275° - 300° 3 - 5
Grilled Cheese Sandwich 325° - 350° 5 - 10
Burgers, beef (½”thick) MEDIUM 325° - 375° 8 - 12
Pancakes 350° - 420° 2 - 3
Pork Chops (½” thick) 325° - 375° 15 - 20
Pork Chops (¾” thick) 325° - 375° 20 - 25
Potatoes 300° - 350° 10 - 12
Sausage Links 325° - 350° 20 - 30
Sausage (precooked) 325° - 350° 10 - 12
Steak, beef (1” thick) MEDIUM 350° - 420° 10 - 12
Steak, beef (1 ½” thick) MEDIUM 350° - 420° 18 - 20
Switching the appliance o
-To switch the appliance o, set the temperature control knob (9) to the
OFF position and disconnect the plug (3) from the wall outlet. Remove the
temperature control probe (2) from the probe receptacle (1) (ill. m).
-Allow appliance to cool down completely before handling or cleaning it
(Cleaning and Maintenance). Clean after every use.
Griddle__IM_US_V4_.indd 10  10:38 AM