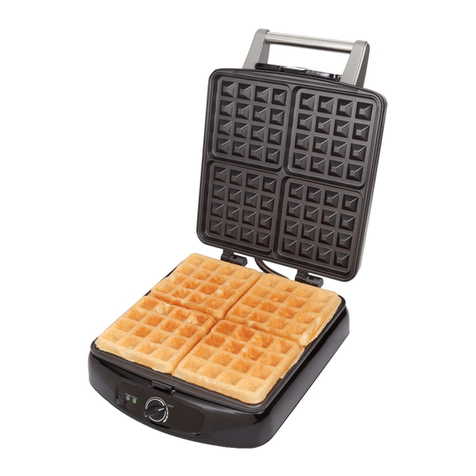
Farberware 201597 User manual

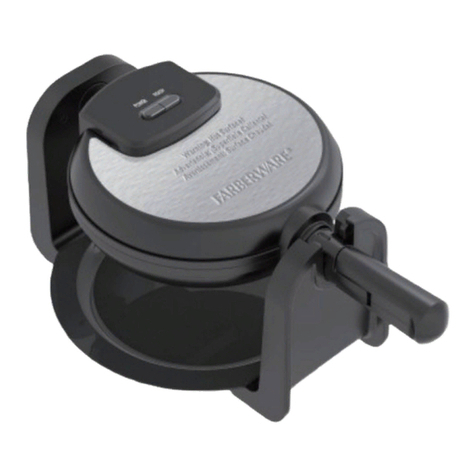
DOUBLE FLIP WAFFLE MAKER
Model Number: 201597
UPC: 65577201597-6
Customer Assistance
1-855-451-2897 (US)
Please consider the option to recycle the packaging material.
Waffle Maker_201597_IM_US_V5_170208.indd 1 2/8/17 10:15 AM

IMPORTANT SAFEGUARDS
SAVE THESE INSTRUCTIONS!
2 3
When using electrical appliances, basic safety precautions should always be
followed, including the following:
• Read all instructions before use.
• Do not touch hot surfaces. Use handles or knobs.
• WARNING - to protect against electric shock, fire and personal injury:
-do not immerse cord or plug in water or other liquids;
-do not immerse the appliance or any electrical components in water or any
other liquids;
-always switch off and unplug the appliance before cleaning.
• Close supervision is necessary when any appliance is used around children.
Do not allow children to operate this appliance.
• Unplug from wall outlet when not in use and before cleaning. Allow to cool
before cleaning the appliance. Do not use water or other liquids to clean this
appliance.
• Do not operate any appliance with a damaged cord or plug, or after the
appliance malfunctions or has been damaged in any manner. Call our toll-
free customer assistance number for information on examination, repair, or
electrical or mechanical adjustment.
• The use of attachments not recommended by the appliance manufacturer
may result in fire, electric shock or injuries to persons. Always check
attachments before use. Do not use damaged attachments.
• Do not use outdoors or in a damp area.
• Do not place the appliance close to the edge of the countertop.
• Do not let power cord hang over edge of table or counter, or touch hot
surfaces.
• Do not place on or near a hot gas or electric burner or in a heated oven.
• Extreme caution must be used when moving an appliance containing hot oil
or other hot liquids. A fire may occur if the appliance is covered or touches
flammable material, including curtains, draperies, walls, and the like, when in
operation. Do not store any item on top of the appliance when in operation.
• When using this appliance, provide 6 - 8 inches of air space above, behind
and on both sides for air circulation.
• It is recommended that you use an insulated hot pad underneath the
appliance to avoid any heat damage to your counter or furniture.
• Do not use the appliance with open waffle plates.
• To disconnect, place the power switch in the OFF position and then remove
the plug from the wall outlet.
• Never pull on the power cord to disconnect the appliance from the wall
outlet; instead, grasp the plug and pull on the plug.
Waffle Maker_201597_IM_US_V5_170208.indd 2 2/8/17 10:15 AM
IMPORTANT SAFEGUARDS
SAVE THESE INSTRUCTIONS! SAVE THESE INSTRUCTIONS!
2 3
• Do not use appliance for other than intended use.
• Do not clean with metal scouring pads. Pieces can break off the pad and
touch electrical parts involving a risk of electric shock.
• Let the appliance cool completely before putting away or storing.
• Never leave the appliance unattended during use.
ADDITIONAL SAFEGUARDS
This appliance is for HOUSEHOLD USE ONLY.
WARNING:
-DO NOT OPERATE THIS APPLIANCE, IF THE POWER CORD SHOWS DAMAGE
OR IF APPLIANCE WORKS INTERMITTENTLY OR STOPSWORKING ENTIRELY.
• A short power-supply cord is provided to reduce the risk resulting from becoming
entangled in or tripping over a longer cord.
• Extension cords are available and may be used if care is exercised in their use.
• If an extension cord is used:
-The marked electrical rating of the extension cord should be at least as great as
the electrical rating of the appliance.
-If the appliance is of the grounded type, the extension cord should be a
grounding 3-wire cord; and
-The longer cord should be arranged so that it does not drape over the
countertop or table top where it can be pulled on by children or tripped over.
Polarized plug
• This appliance has a polarized plug (one blade is wider than the other). As a
safety feature, this plug will t in a polarized outlet only one way. If the plug does
not t fully in the outlet, reverse the plug. If it still does not t, contact a qualied
electrician. Do not attempt to defeat this safety feature.
• Do not let children handle or put the electrical cord into their mouths.
Waffle Maker_201597_IM_US_V5_170208.indd 3 2/8/17 10:15 AM

PARTS
4 5
OFF
ON
LIGHT
DARK
TURN
1
8
7
6
5
2
3
4
OFF
ON
LIGHT
DARK
9
10
11
1. Upper lid
2. Lower lid
3. Power cord with plug
4. ON/OFF power switch with
indicator (blue)
5. Browning level control dial
(LIGHT DARK)
6. Handle
7. Locking latch
8. Ready indicator light
(green) (x2)
9. Upper waffle plate
10. Lower waffle plate
11. Measuring cup
Waffle Maker_201597_IM_US_V5_170208.indd 4 2/8/17 10:15 AM

ILLUSTRATIONS
4 5
OFF
ON
LIGHT
DARK
TURN
a
6-8 inches6-8 inches
6-8 inches
b
OFF
ON
LIGHT
DARK
TURN
OFF
ON
LIGHT
DARK
TURN
OFF
ON
c
d
ON
LIGHT
DARK
OFF
ON
LIGHT
DARK
TURN
OFF
ON
LIGHT
DARK
TURN
OFF
ON
LIGHT
DARK
ef
TURN
OFF
ON
LIGHT
DARK
gh
TURN
i
OFF
ON
LIGHT
DARK
TURN
j
OFF
ON
LIGHT
DARK
TURN
OFF
ON
1.
2.
k
OFF
ON
LIGHT
DARK
TURN
Waffle Maker_201597_IM_US_V5_170208.indd 5 2/8/17 10:15 AM

OPERATION
6 7
Before rst use
• Remove all packaging materials and / or other transportation means.
• Check package content to verify it is complete and undamaged. Do not operate
the appliance if the content is incomplete or appears damaged. Return it
immediately to Walmart.
Danger of suocation!
-Packaging materials are not toys. Always keep plastic bags, foils and foam parts
away from babies and children. Packaging material could block airways and
prevent breathing.
• Clean your appliance and all accessories thoroughly before using for the first time
( Cleaning and Maintenance).
• When using the appliance for the first time, it is recommended to operate it for
at least 5 minutes ( Operation), until no odor or smoke is present. During use,
ensure ample ventilation.
• Let the appliance cool completely.
• Clean the appliance ( Cleaning and Maintenance).
NOTE:
• The appliance may produce an odor and emit smoke when switched on for the
first time, as residues from the production process are eliminated. This is normal
and does not indicate a defect or hazard.
Using the appliance
This appliance is designed for making waes and is not intended for any other use.
NOTE:
-The appliance has a rated power of 1400W. Before plugging it into the wall
outlet, ensure that the electrical circuit is not overloaded with other appliances.
This appliance should always be operated on a separate 120V ~ 60Hz wall
outlet.
-Make sure the lids (1, 2) are closed and the latch (7) is locked in place before
connecting the appliance into the wall outlet and / or rotating the handle (6)
and waffle plates (9, 10).
• Place the appliance on a clean, flat and heat-resistant surface. Ensure a minimum
distance around the appliance of at least 6 - 8 inches to other objects, cupboards
and walls (ill. a).
• Connect the plug (3) into a wall outlet (ill. b).
Waffle Maker_201597_IM_US_V5_170208.indd 6 2/8/17 10:15 AM

OPERATION
6 7
• Place the power switch (4) in the ON position (ill. c). The power switch indicator
will turn on and the ready indicator lights (8) will blink once.
• Turn the browning level control dial (5) to the desired level (ill. d), between
LIGHT and DARK. The appliance will heat up to operating temperature of the set
browning level. Once the operating temperature has been reached, the appliance
will beep 6 times and the ready indicator lights (8) will turn on. The heat-up time
will take about 3 - 5 minutes.
NOTE:
-Leave the lids (1, 2) closed to reduce heat-up time.
-The lids (1, 2) are working independently. The appliance will beep 6 times
and the ready indicator light (8) will turn on for each lid, once they reach the
operating temperature.
Danger of burns!
-Do not touch the wae plates (9, 10) and / or the lids (1, 2) surface (ill. e).
Baking waes
• Unlock the latch (7) by pulling it towards you (ill. f) and lift the lid (1) by the
handle (6) placing it in a vertical position (fully opened) (ill. g). Apply cooking
spray or spray butter on the waffle plates (9, 10).
• Using the measuring cup (11), pour one full cup of batter onto the lower waffle
plate (10).
NOTE:
-Do not overfill the lower waffle plate (10), as any excess batter may leak out of
the appliance.
• Close the lid (1) by the handle (6) and lock the latch (7) by pushing it towards the
appliance (ill. h). Make sure the waffle plates (9, 10) cannot be opened.
• Rotate the handle (6) and waffle plates (9, 10) counterclockwise to place the
lower lid (2) on top (ill. i). The ready indicator light (8) will turn off and the unit
starts baking waffle of top plate. Unlock the latch (7) and lift the lower lid (2) by
the handle (6). Apply cooking spray or spray butter on the waffle plates (9, 10).
• Using the measuring cup (11), pour one full cup of batter onto the lower waffle
plate (10).
• Close the lid (2) by the handle (6) and lock the latch (7) by pushing it towards the
appliance. Make sure the wae plates (9, 10) cannot be opened.
• Rotate the handle (6) and wae plates (9, 10) clockwise to place the lower lid (2)
at the bottom. The ready indicator light (8) will turn o and the unit starts baking
wae of lower plate.
Waffle Maker_201597_IM_US_V5_170208.indd 7 2/8/17 10:15 AM

OPERATION
8 9
NOTE:
-During the cooking process, the ready indicator lights (8) will keep off.
-Waffles take about 3 - 6 minutes, depending on recipe, or once no more steam
is being emitted.
-When the waffle is ready, the ready indicator light (8) will turn on and the
appliance will beep 3 times.
• Carefully lift the lid on top, as previously described, and remove the waffle using a
plastic or wooden utensil.
• Once locked, rotate the handle (6) and waffle plates (9, 10) to place the other lid
on top. Repeat previous step.
NOTE:
-Never use metal utensils, as these will damage the nonstick coating.
• After removing the waes, repeat previous steps to bake more waes.
• Once you have nished using the appliance, turn the browning level control
dial (5) to its lowest level and place the power switch (4) in the OFF position. The
power switch indicator (4) and ready indicator lights (8) will switch o.
• Disconnect the plug (3) from the wall outlet (ill. j).
• Allow the appliance to cool down completely before handling again.
Waffle Maker_201597_IM_US_V5_170208.indd 8 2/8/17 10:15 AM

8 9
RECIPES
Basic Waes (for 4 ½ cups of batter, 1.125L)
2 cups our
2 tablespoons sugar
1 tablespoon baking powder
1 teaspoon salt
1 ¾ cups milk
⁄ cup vegetable oil
2 eggs
• Combine flour, sugar, baking powder and salt.
• Whisk together milk, oil and eggs.
• Gradually add milk mixture to the dry ingredients
• Whisk until batter is even and smooth.
Basic Blueberry Waes
• Follow the instructions for Basic Waffles.
• After pouring batter onto waffle plate (10), sprinkle fresh blueberries over batter,
then close the lid (1, 2).
Whole wheat & Belgian waes
1 cup whole wheat ower
⁄ cup sugar
4 teaspoon baking powder
¼ teaspoon salt
1 egg
1 cup milk
¼ cup vegetable oil
½ teaspoon vanilla extract
• In one bowl combine flour, sugar, baking powder, salt and vanilla extract.
• In another bowl combine milk, vegetable oil and eggs.
• Gradually add the liquid ingredients to the flour mixture. Whisk until even and
smooth.
Waffle Maker_201597_IM_US_V5_170208.indd 9 2/8/17 10:15 AM

11
HINTS AND TIPS
10
• Most waffle batter can be poured directly onto the nonstick waffle plates (10).
Use a cooking spray for dessert waffles or any recipe with a lot of sugar. If your
waffles start to stick, the waffle plates (9, 10) may need to be scrubbed with a
nylon brush to remove any cooked-on food particles.
• To store waffles, let them cool and then pack into an airtight container. Store in a
refrigerator or freezer. Waffles can be reheated in a microwave oven or regular oven.
• Most waffles are done in about 3 - 6 minutes. Recipes made from scratch may
take longer. Check if waffles are done after about 5 minutes or once no more
steam is being emitted. If the appliance does not open easily, allow waffles to
cook for another minute before checking again.
• It is recommended to clean all accessories after each use.
CLEANING AND MAINTENANCE
Proper maintenance will ensure many years of service from your appliance. Clean
the appliance after every use. The appliance contains no user serviceable parts and
requires little maintenance. Leave any servicing or repairs to qualied personnel.
WARNING:
-Always place the power switch (4) in the OFF position and disconnect the
plug (3) from the wall outlet before cleaning. Allow all parts of the appliance to
cool down completely.
NOTE:
-Do not immerse the power cord with plug (3) or appliance into water or any
other liquids. Do not use abrasive cleaners, steel wool or scouring pads (ill. k).
Dry all parts thoroughly after cleaning, before using or storing the appliance.
Ensure that no water enters the appliance housing.
• Wash the measuring cup (11) with hot soapy water. Rinse and dry carefully.
• Wipe the appliance housing, lids (1, 2) and waffle plates (9, 10) with a damp
cloth. Rinse cloth and wipe all parts again.
NOTE:
-Dry all parts and surfaces thoroughly before use. Make sure that all parts and
surfaces are completely dry before connecting the appliance to a wall outlet.
Storage
• Before storage, always make sure the appliance is completely cool, clean and dry.
• It is recommended to store the appliance in a dry place.
• Store the appliance on a stable shelf or in a cupboard. To avoid accidents, ensure
that both the appliance and its power cord are beyond reach of children or pets.
Waffle Maker_201597_IM_US_V5_170208.indd 10 2/8/17 10:15 AM

TROUBLESHOOTING
1110
Problem Cause Solution
The appliance is not
working
Appliance not
plugged in
Insert the plug into the wall outlet
Wall outlet not
energized
Check fuses and circuit breaker
Appliance not
switched on
Place the power switch in the ON
position
Overheated
appliance
Place the power switch in the OFF
position, unplug the appliance from
the wall outlet and allow to cool
down before using it again
Malfunctioning
appliance
Place the power switch in the OFF
position, unplug the appliance
from the wall outlet and contact
qualied personnel to check and
repair the appliance
The power switch is in
the ON position but
the appliance does not
heat up
Preheat time too
short
Let the appliance preheat for a
longer time
Malfunctioning
appliance
Place the power switch in the OFF
position, unplug the appliance
from the wall outlet and contact
qualied personnel to check and
repair the appliance
The appliance heats up
but the power switch is
in the OFF position
Malfunctioning
appliance
Unplug the appliance from the
wall outlet and contact qualied
personnel to check and repair the
appliance
The appliance does
not beep upon
reaching the operating
temperature
Malfunctioning
appliance
Place the power switch in the OFF
position, unplug the appliance
from the wall outlet and contact
qualied personnel to check and
repair the appliance
The appliance beeps
upon reaching the
operating temperature
but ready indicators
lights do not turn on
Malfunctioning
appliance
Place the power switch in the OFF
position, unplug the appliance
from the wall outlet and contact
qualied personnel to check and
repair the appliance
Waffle Maker_201597_IM_US_V5_170208.indd 11 2/8/17 10:15 AM

© 2017 Farberware Licensing Company, LLC. All Rights Reserved.
Copyrights and Trademarks of Farberware Licensing Company,
LLC, including FARBERWARE®, are used under license from
Farberware Licensing Company, LLC.
TROUBLESHOOTING
12
Problem Cause Solution
Batter is spilling over Wae plates
overlled
Reduce amount of batter used per
serving
Wae batter too
liquid
Add some our to the batter
Wae is not fully
cooked
Browning level
control dial is not set
to the desired level
(between LIGHT and
DARK)
Reset the browning level control
dial to the desired level (between
LIGHT and DARK) and cook till
the ready indicator light turns on
again
If additional assistance is needed, please contact our Customer Assistance at
1-855-451-2897 (US).
TECHNICAL DATA
Rated voltage: 120V ~ 60Hz Rated power input: 1400W
Rated current: 11.7A
Waffle Maker_201597_IM_US_V5_170208.indd 12 2/8/17 10:15 AM
© 2017 Farberware Licensing Company, LLC. All Rights Reserved.
Copyrights and Trademarks of Farberware Licensing Company,
LLC, including FARBERWARE®, are used under license from
Farberware Licensing Company, LLC.
CUSTOMER ASSISTANCE
If you have a claim under this warranty, please call our Customer Assistance
Number. For faster service, please have the model number and product name ready
for the operator to assist you. This number can be found on the bottom of your
appliance and on the front page of this manual.
Model Number: __________________ Product Name: __________________
Customer Assistance Number 1-855-451-2897
Keep these numbers for future reference!
Two-year limited warranty
What does your warranty cover?
• Anydefectinmaterialorworkmanship.
For how long after the original purchase?
• Twoyears.
What will we do?
• Provideyouwithanewone.
• Forthoseitemsstillunderwarrantybutno
longer available, WAL-MART reserves the
right to replace with a similar FARBERWARE
branded product of equal or greater value.
How do you make a warranty claim?
•Save your receipt.
• Properlypackyourunit.Werecommend
using the original carton and packing
materials.
• Returntheproducttoyournearest
Walmart store or call Customer Assistance
at 1-855-451-2897.
What does your warranty not cover?
• Parts subject to wear, including, without
limitation, glass parts, glass containers,
cutter/strainer, blades, seals, gaskets,
clutches, motor brushes, and/or agitators,
etc.
• Commercialuseoranyotherusenotfound
in printed directions.
• Damagefrommisuse,abuse,orneglect,
including failure to clean product regularly
in accordance with manufacturer's
instructions.
How does state law relate to this
warranty?
• This warranty gives you specic legal
rights, and you may also have other rights
which vary from state to state or province
to province.
• Thiswarrantyisinlieuofanyother
warranty or condition, whether express or
implied, written or oral, including, without
limitation, any statutory warranty or
condition of merchantability or tness for a
particular purpose.
• WAL-MART,FARBERWAREandtheproduct
manufacturer expressly disclaim all
responsibility for special, incidental, and
consequential damages or losses caused
by use of this appliance. Any liability is
expressly limited to an amount equal to
the purchase price paid whether a claim,
however instituted, is based on contract,
indemnity, warranty, tort (including
negligence), strict liability, or otherwise.
Some states or provinces do not allow
this exclusion or limitation of incidental
or consequential losses, so the foregoing
disclaimer may not apply to you.
What if you encounter a problem with this
product while using it outside the country
of purchase?
• Thewarrantyisvalidonlyinthecountry
of purchase and if you follow the warranty
claim procedure as noted.
12
Problem Cause Solution
Batter is spilling over Wae plates
overlled
Reduce amount of batter used per
serving
Wae batter too
liquid
Add some our to the batter
Wae is not fully
cooked
Browning level
control dial is not set
to the desired level
(between LIGHT and
DARK)
Reset the browning level control
dial to the desired level (between
LIGHT and DARK) and cook till
the ready indicator light turns on
again
If additional assistance is needed, please contact our Customer Assistance at
1-855-451-2897 (US).
TECHNICAL DATA
Rated voltage: 120V ~ 60Hz Rated power input: 1400W
Rated current: 11.7A
Waffle Maker_201597_IM_US_V5_170208.indd 13 2/8/17 10:15 AM

GOFRERA DOBLE
Número de modelo: 201597
UPC: 65577201597-6
Atención al cliente
1-855-451-2897 (US)
Por favor, considere la opción de reciclar el material de embalaje.
Waffle Maker_201597_IM_ES_V2_170208.indd 1 2/8/17 10:21 AM

MEDIDAS DE SEGURIDAD
IMPORTANTES
!GUARDE ESTAS
INSTRUCCIONES!
2 3
Cuando se utilizan aparatos eléctricos, se deben seguir las precauciones básicas
de seguridad, incluyendo las siguientes:
• Lea todas las instrucciones antes de usar.
• No toque la superficie caliente. Utilice las asas o las perillas.
• ADVERTENCIA - para proteger contra descargas eléctricas, incendios y
lesiones personales:
-no sumerja el cable o el enchufe en agua u otros líquidos;
-no sumerja el aparato o los componentes eléctricos en agua o en cualquier
otro líquido;
-siempre apague y desenchufe el aparato antes de limpiarlo.
• Este aparato se debe tener cuidado al utilizarlo cerca de niños. Este aparato
no debe ser utilizado por niños.
• Desenchufe del tomacorriente cuando el aparato no esté en uso y antes de
limpiarlo. Deje que se enfríe antes de limpiar el aparato. No utilice agua u
otros líquidos para limpiar el aparato.
• No utilice ningún aparato con cable o enchufe dañado, después de un mal
funcionamiento, o si ha sufrido algún tipo de daño. Llame a nuestro número
de atención al cliente gratuito para obtener información sobre su revisión,
reparación o ajuste.
• El uso de accesorios no recomendados por el fabricante del aparato puede
ocasionar incendios, descargas eléctricas o lesiones a las personas. Compruebe
siempre los accesorios antes de usarlos. No utilice accesorios dañados.
• No utilice en exteriores o en un lugar húmedo.
• No coloque el aparato cerca del borde de la encimera.
• No permita que el cable de alimentación cuelgue del borde de la mesa o
mostrador, ni que toque superficies calientes.
• No lo coloque sobre o cerca de una hornilla de gas o eléctrica o en un horno
caliente.
• Hay que tener mucho cuidado al mover un aparato que contiene aceite
caliente u otros líquidos calientes. Puede ocurrir un incendio si el aparato
está cubierto o en contacto con material inflamable, incluyendo cortinas,
telas, paredes y similares, cuando está en funcionamiento. No almacene
ningún elemento en la parte superior del aparato cuando esté en uso.
• Cuando utilice este aparato, deje de 6 a 8 pulgadas de espacio de aire por
encima, detrás y a ambos lados para que pueda circular el aire.
• Se recomienda el uso de una almohadilla aislante caliente debajo del aparato
para evitar daños por calor en su mostrador o muebles.
• No utilice el aparato con las placas de la gofrera abiertas.
Waffle Maker_201597_IM_ES_V2_170208.indd 2 2/8/17 10:21 AM

MEDIDAS DE SEGURIDAD
IMPORTANTES
!GUARDE ESTAS
INSTRUCCIONES! !GUARDE ESTAS
INSTRUCCIONES!
2 3
• Para apagar el aparato, coloque el interruptor de encendido en la posición
OFF y desconecte el enchufe del tomacorriente.
• Nunca tire del cable para desconectar el aparato de la toma de corriente;
sujete el enchufe y tire del enchufe.
• No utilice el aparato para usos distintos de aquellos a los que esté destinado.
• No limpie con estropajos de metal. Las piezas metálicas podrían
desprenderse de la almohadilla y tocar las partes eléctricas implicando un
riesgo de descarga eléctrica.
• Deje que el aparato se enfríe completamente antes de apartarlo o guardarlo.
• Nunca deje el aparato desatendido durante el funcionamiento.
MEDIDAS ADICIONALES
Este producto está destinado EXCLUSIVAMENTE A UN USO DOMÉSTICO.
PRECAUCIÓN:
-NO UTILICE ESTE APARATO SI EL CABLE DE ALIMENTACIÓN PRESENTA
DAÑOS O SI EL APARATO FUNCIONA DE MANERA INTERMITENTE O DEJA
DE FUNCIONAR COMPLETAMENTE.
• Se incluye un cable de alimentación eléctrica corto para reducir el riesgo de
lesión resultante de enredarse en o tropezar con un cable largo.
• Hay disponibles extensiones más largas que pueden ser utilizadas con el cuidado
correspondiente.
• Si se utiliza un cable de alimentación eléctrica:
-La potencia nominal indicada del cable o de la extensión debe ser al menos
igual a la del aparato.
-Si el aparato es del tipo con conexión a tierra, la extensión debe ser un cable de
3 conductores; y
-El cable más largo debe ser colocado de modo que no pase sobre el borde de
la encimera o la mesa donde pueda ser jalado por los niños o donde se pueda
tropezar sobre ellos sin intención.
Enchufe polarizado
• Este aparato tiene un enchufe polarizado (una hoja es más ancha que la otra).
Como medida de seguridad, este enchufe encaja sólo en un toma corriente
polarizado de una sola forma. Si el conector no cabe completamente en el
enchufe hembra, gire el conector. Si aún así no entra, contacte a un electricista
calicado. No intente anular esta medida de seguridad.
• No deje que los niños manipulen el cable eléctrico o se lo pongan en la boca.
Waffle Maker_201597_IM_ES_V2_170208.indd 3 2/8/17 10:21 AM

PARTES
4 5
OFF
ON
LIGHT
DARK
TURN
1
8
7
6
5
2
3
4
OFF
ON
LIGHT
DARK
9
10
11
1. Tapa superior
2. Tapa inferior
3. Cable de alimentación con enchufe
4. ON/OFF interruptor de encendido
con indicador (azul)
5. Perilla de control del nivel de tostado
(LIGHT (claro) DARK (oscuro))
6. Asa
7. Pestillo
8. Luz indicadora de“listo” (verde)
(x2)
9. Placa superior de la gofrera
10. Placa inferior de la gofrera
11. Taza medidor
Waffle Maker_201597_IM_ES_V2_170208.indd 4 2/8/17 10:21 AM

ILUSTRACIONES
4 5
OFF
ON
LIGHT
DARK
TURN
a
6-8
pulgadas
6-8
pulgadas
6-8
pulgadas
b
OFF
ON
LIGHT
DARK
TURN
OFF
ON
LIGHT
DARK
TURN
OFF
ON
c
d
ON
LIGHT
DARK
OFF
ON
LIGHT
DARK
TURN
OFF
ON
LIGHT
DARK
TURN
OFF
ON
LIGHT
DARK
ef
TURN
OFF
ON
LIGHT
DARK
gh
TURN
i
OFF
ON
LIGHT
DARK
TURN
j
OFF
ON
LIGHT
DARK
TURN
OFF
ON
1.
2.
k
OFF
ON
LIGHT
DARK
TURN
Waffle Maker_201597_IM_ES_V2_170208.indd 5 2/8/17 10:21 AM

FUNCIONAMIENTO
6 7
Antes del primer uso
• Retire todos los materiales de embalaje y / u otros elementos de transporte.
• Compruebe que el contenido del paquete esté completo y que no haya daños.
No utilice el aparato si el contenido del paquete incompleto o parece estar
dañado. Lleve la unidad inmediatamente al Walmart.
¡Peligro de asxia!
-Los embalajes no son juguetes. Siempre mantenga las bolsas de plástico,
láminas y piezas de espuma de poliestireno lejos de los bebés y los niños.
El material de embalaje podría bloquear las vías respiratorias e impedir la
respiración.
• Limpie el aparato y accesorios a fondo antes de usarlo por primera vez
( Limpieza y mantenimiento).
• Cuando utilice el aparato por primera vez, se recomienda hacerlo funcionar por lo
menos 5 minutos ( Operación), hasta que no haya olor o humo. Durante su uso,
asegure una ventilación suficiente.
• Deje que el aparato se enfríe completamente.
• Limpie el aparato ( Limpieza y mantenimiento).
NOTA:
• El aparato puede producir olor y emitir humo cuando se enciende por primera
vez, ya que los residuos del proceso de producción se eliminan. Esto es normal y
no indica un defecto o peligro.
Uso del aparato
Este aparato se puede utilizar para hacer gofres. No utilice el aparato para usos
distintos de aquellos a los que esté destinado.
NOTA:
-El aparato tiene una potencia de 1400W. Antes de conectarlo a la toma de
corriente, asegúrese de que el circuito eléctrico no esté sobrecargado con otros
aparatos. Este electrodoméstico siempre debe ser operado en una toma de
coriente de 120V ~ 60Hz aparte.
-Asegúrese de que las tapas (1, 2) estén cerradas y el pestillo (7) esté bloqueado
en su lugar antes de conectar el aparato a la toma de corriente y / o girando el
asa (6) y las placas de la gofrera (9, 10).
• Coloque el aparato sobre una superficie limpia, plana y resistente al calor.
Garantice una distancia mínima, respecto de otros objetos, armarios y paredes
alrededor del aparato de al menos 6 - 8 pulgadas (Fig. a).
• Inserte el enchufe (3) en una toma de corriente (Fig. b).
• Coloque el interruptor de encendido (4) en la posición ON (Fig. c). El indicador
del interruptor de encendido se encenderá y las luces indicadoras de “listo” (8)
parpadearán una vez.
Waffle Maker_201597_IM_ES_V2_170208.indd 6 2/8/17 10:21 AM
Table of contents
Languages:
Other Farberware Waffle Maker manuals

Farberware
Farberware 104553 User manual

Farberware
Farberware WM 43981 User manual

Farberware
Farberware Millennium FWM700P Quick reference guide

Farberware
Farberware Rotating Waffle Maker 104553 User manual

Farberware
Farberware FWB275 Quick reference guide

Farberware
Farberware FWM800P Installation guide

Farberware
Farberware FWM85B Preferred Quick reference guide

Farberware
Farberware 103739 User manual

Farberware
Farberware FW45394 User manual