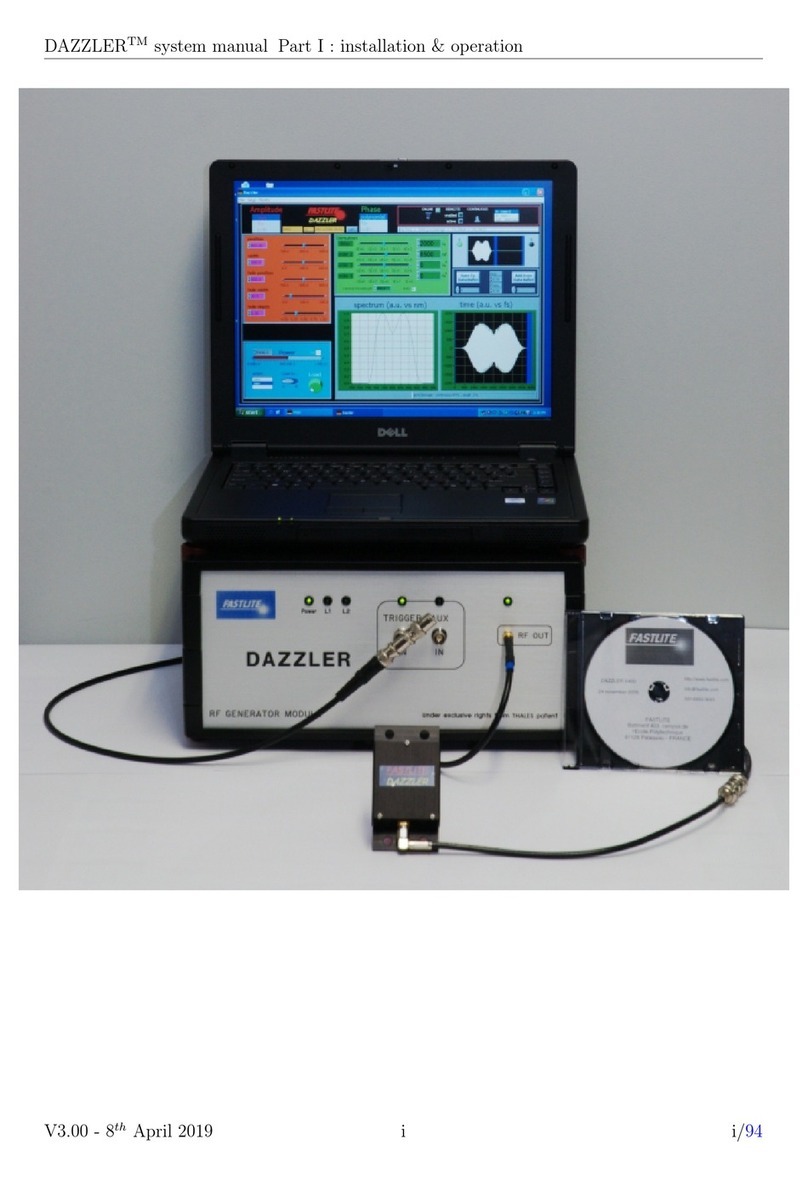
FASTLITE DazScope all User manual

CONTENTS
1 Introduction 3
1.1 What the DazScope is .................................. 3
1.2 What the DazScope is not ................................ 4
2 Installation 5
2.1 Software .......................................... 5
2.2 Dazzler setup ....................................... 6
2.2.1 Beam Orientations ................................ 6
2.2.2 RF Generator Triggering ............................. 6
2.2.3 Getting Ready to Operate the DazScope .................... 7
2.3 DazScope setup ...................................... 9
2.3.1 Hardware ..................................... 9
2.3.2 Alignment ..................................... 10
3 Software overview 13
3.1 Quick start ........................................ 13
3.2 Software description ................................... 15
3.2.1 Menu bar ..................................... 15
3.2.2 Control area .................................... 16
3.2.3 Display area .................................... 16
3.3 Setting up a measurement ................................ 16
3.3.1 Configuring the spectrometer .......................... 16
3.3.2 Configuring the ChirpScan algorithm ...................... 17
3.3.3 Editing the reference waveform ......................... 19
3.3.4 Selecting and starting a measurement ...................... 21
4 Optimizing the pulse duration using ChirpScan 22
4.1 Optimization ....................................... 22
4.2 When to stop? ...................................... 23
1

DazScope
manual
5 Theory 25
5.1 Principle .......................................... 25
5.2 Examples ......................................... 26
5.3 More about the key formula ............................... 30
A Dazzler installation / upgrade 32
A.1 Purpose .......................................... 32
A.2 Principles ......................................... 32
A.3 Actions .......................................... 33
A.3.1 Keyspan
driver ................................. 33
A.3.2 LabView
run-time support ........................... 33
A.3.3 GPIB driver and IEEE-488-2 support ...................... 34
A.3.4 Utilities ...................................... 34
A.3.5 Dazzler application software ........................... 34
A.4 E-mail reports ....................................... 35
A.4.1 Screen captures .................................. 35
A.4.2 Parameters .................................... 35
B Dazzler parameters 36
B.1 Purpose .......................................... 36
B.2 Parameters Files ..................................... 36
B.2.1 Location and Names of Files ........................... 36
B.2.2 DazMain.txt .................................... 37
B.2.3 DazCurrent.txt .................................. 37
B.2.4 wave.txt ...................................... 37
B.2.5 Other Files .................................... 37
B.3 Changing Location of Parameters Files ......................... 38
B.4 Troubleshooting ...................................... 39
B.4.1 Missing parameters ................................ 39
B.4.2 E-mail reports ................................... 39
B.4.3 Screen captures .................................. 39
C Dazzler alignment and calibration 40
C.1 Alignment ......................................... 40
C.2 Frequency Calibration .................................. 41
C.3 Diffraction efficiency ................................... 42
FASTLITE-9 september 2008 Table of contents 2/42

CHAPTER
1
INTRODUCTION
1.1 What the DazScope is
The DazScope is a pulse controller system primarily designed to optimize the pulse duration of
ultra-short (<100fs) laser systems. It comprises a pulse shaper, a simplified pulse characterizing
device and a feedback algorithm providing closed-loop measurement and manipulation of ultrafast
pulses. Unlike pulse measurement techniques such as Frequency-Resolved Optical Gating (FROG)
techniques or Spectral Phase Interference for Direct Phase Reconstruction (SPIDER) techniques,
the method used to characterize the pulse is a phase-only method. Consequently, the pulse shaper
may be safely inserted at any stage within the laser chain (see figure 1.1 for a typical architecture).
The DazScope is based on the pulse-shaping device commercialized by FASTLITE under the
trademark Dazzler, and can be provided both as a an add-on for existing Dazzlers or as a stand-
alone system. The main part of this system is a complex software that remotely controls the
Dazzler pulse shaper in order to optimize the spectral phase.
Oscillator Stretcher Dazzler Amplifiers Compressor
DzScope
Compressor
Beam transport
Experiment
Close-loop feedback
Oscillator Stretcher Dazzler Amplifiers Compressor
DzScope
Compressor
Beam transport
Experiment
Close-loop feedback
Figure 1.1: CPA configuration
3

DazScope
manual Chapter 1 : Introduction
1.2 What the DazScope is not
Although the DazScope was designed and developed to be as user-friendly as possible, it cannot
fully replace an intelligent operator. More precisely, the DazScope cannot be expected to correct
spectral phases which exceed the pulse shaping capabilities of the Dazzler used in conjunction with
the DazScope. This is why the optimization procedure is semi-automatic and requires, in the basic
mode, a few operations from the user.
The DazScope is based on a characterization technique described in chapter 5. It must be
underlined that as any phase-only method, this algorithm is not a pulse measurement technique
comparable with the FROG or SPIDER techniques: the DazScope is only relevant for pulses
with sufficiently regular spectra and sufficiently smooth spectral phases. The pulses delivered by
chirped pulse amplification (CPA) laser systems typically verify such specifications. However, a
double pulse structure, for example, will not be correctly measured nor corrected.
FASTLITE-9 september 2008 Table of contents 4/42

CHAPTER
2
INSTALLATION
To install from scratch, please follow the instructions given in section 2.1,section 2.2 and sec-
tion 2.3. To install the DazScope on a laser system already including a Dazzler, the reader may
go directly to section 2.3.
2.1 Software
The DazScope software is a LabView 8.5 executable file. To run correctly, it requires both a Lab-
view 8.5 runtime engine and a correctly installed Dazzler software (version v4xx required). To
install or update the DazScope software, please follow the steps indicated below 1:
1. Install or re-install the Keyspan driver, the Labview run-time support drivers and the Dazzler
software (see appendix chapter A).
2. Install the spectrometer driver (CDROM:\spectro-drivers\AvaSoft_7.x.x USB2.zip - this
file must be first unzipped.)
3. In case the DazScope was previously installed, use the uninstall option of the DazScope
program group (Start>All Programs>DzScope>unistall DzScope).
4. Install the DazScope Software (CDROM:\#Installer_DzScope\setup-DzScope-xxx-exe.exe)
5. Check that a ”DS” directory is present in the parameters directory related to the Dazzler
system (to learn more about the Dazzler parameters directory see the dedicated notice chap-
ter B).
1This section complements the readme file located on the CDROM in the installer directory.
5

DazScope
manual Chapter 2 : Installation
6. In case this folder is missing, copy and paste in this directory the appropriate ”DS” directory.
The ”DS” directory contains all the custom parameters required by the DazScope software.
To date, there are two sets of standards DazScope parameters, DS-HR800 and DS-WB800
which are located at CDROM:\parameters_hoard\StandardParameters\DzScope. Do not
forget to rename the suitable directory into DS.
7. Start the Dazzler software, and update the paths (In the Dazzler software: Monitor >
maintenance >set paths).
8. Edit the file C:\dazzler\paths.txt and add a new line containing the text params = fol-
lowed by the path of the Dazzler parameters directory.
Exemple: params = E:\DZSOFT\parameters_hoard\DB00-99\WB\db08wm29-v415. Save the
file C:\dazzler\paths.txt.
The software is protected by a USB dongle. If the DazScope program is started without the
dongle, you get the message: ”SG-Lock not found, Program will stop. This is a FATAL error!
Program will exit.”
2.2 Dazzler setup
2.2.1 Beam Orientations
The angles indicated refer to the WB models. Note that the polarization and the direction of the
diffracted beam are different from the input beam. Make sure that the output polarization fits
your laser setup.
Input Optical Beam
Reflection on
the input face
Reflection on
the ouput face
14° 3.6°
1°
Diffracted
Beam
Direct
Beam
Acoustic
Wave
e02
Crystal
ransducer
Adaptation
Circuitry
SMA Plug
Figure 2.1: Top View (laser pulse propagation from left to right). Input polarization is orthogonal
to figure plane. Diffracted beam is polarized in the diffraction plane (figure plane).
2.2.2 RF Generator Triggering
To trigger properly the Dazzler, you need to feed a TTL signal from the laser, with a rising edge
occurring before the laser pulse to be amplified enters the Dazzler crystal. This time interval must
correspond at least to the acoustic propagation time inside the crystal2. The triggering config-
uration varies with the experimental setup (10Hz, kHz lasers). Operational details are described
2The acoustic propagation time depends on the crystal cut. For 25mm crystals, this is 31.6µs for the WB cut,
and 40.6µs for the HR cut.
FASTLITE-9 september 2008 Table of contents 6/42

DazScope
manual Chapter 2 : Installation
in the note ”trig mode settings”, while more technical details can be found in the note ”Trigger”
(both files can be found on the CD-ROM).
2.2.3 Getting Ready to Operate the DazScope
Connecting the Unit and Starting the Program
1. Connect the USB cable to the host computer
2. Connect the RF output to the crystal unit.
3. Turn on the power switch on the rear panel of the RF generator. The waveform memory is
zeroed at power on: no RF output.
4. Double click on the Dazzler icon on the desktop. The program is automatically started.
5. Connect the trigger signal (less than the acoustic travel time before laser pulse - see subsec-
tion 2.2.2) to the Trigger Laser input on the front panel.
6. Check that the second diode on front panel lits.
7. Use the menu ”Setup >trig and mode” to set the proper trigger delay (starts the panel).
Alignment and Calibration of the Dazzler
Please refer to appendix C.
Power and Duration Parameters (blue area)
1. Set the power level to 0.5.
2. Uncheck the CG box (no constant gain).
3. Select the new option in the action listbox.
4. Select Load In...A with the button switch.
5. Set the add waveform button to off
Amplitude parameters (red area)
1. Select the dials item in the listbox located just below the red Amplitude label.
2. Set the central wavelength (position) to a value appropriate to the laser source : ideally,
this value should be equal to the central wavelength of the input pulses. When the Dazzler
is placed before the laser amplifier(s), this value may significantly differ from the central
wavelength of the amplified pulses, especially when strong spectral gain narrowing or red-
shift effects are present in the amplification stage3.
3It is not unusual to set ”position = 800” and to measure amplified pulses at 810-815nm.
FASTLITE-9 september 2008 Table of contents 7/42

DazScope
manual Chapter 2 : Installation
3. Set the width control to 2 or 3 times4the FWHM spectral width of the input or amplified
pulses plus the value of the potential redshift5.
4. Set the hole depth control to 0.
Phase parameters (green area)
1. Select the dials item in the listbox located just below the green Phase label.
2. If the central wavelength of the amplified pulse (λ0) is close to the value of the position
control, check the Auto checkbox located at the bottom of the phase control (green panel)
area. If this is not the case, uncheck this checkbox and enter manually the value of λ0in the
Central wavelength control. This will ensure that the spectral phase coefficients will refer
to the right central wavelength6.
3. Set the delay dial to a value corresponding to half of the maximum crystal delay (for example,
1700fs for 25mm WB-800), verify that the mean position on the time display is in the middle
of the window.
4. Press the SelfC button which is located on the left of the Phase listbox. This will automat-
ically set the phase coefficients to compensate for the dispersion of the Dazzler crystal.
5. Check that the spectrum graph does not show separate red and black curves. If so, check
maximum delay and reduce second order parameter (order 2) if necessary.
Trigger parameters
Since all laser systems have different synchronization managements, it is difficult to specify a
universal process to set up the trigger parameters. Here is however, the most common way to
proceed:
1. Click in the Setup menu, select Trig and mode : this will open the corresponding panel.
2. In the Trigger mode listbox select External Source.
3. Check that the displayed repetition rate is correctly measured by the generator. If the
displayed repetition rate is wrong, check the trigger signal (see subsection 2.2.2).
4. In the Delay Mode listbox select Programmable Trigger Delay. This will activate the delay
generator module of the RF generator.
5. Check that the Trigger on previous checkbox is not checked.
6. In the Trigger to Laser control, enter the delay between the trigger signal (TTL rising
edge) and the laser pulse7.
4This is a rule of the thumb.
5E.g.: for an amplified spectral width of 30nm with a red-shift of 10nm, the width control must be set to 100nm
6The phase coefficients (second order, third order etc) refer to a Taylor expansion of the spectral phase around
λ0. If ”auto = 1”, λ0is assumed to be equal to the ”position” amplitude control
7with a microsecond accuracy at least
FASTLITE-9 september 2008 Table of contents 8/42

DazScope
manual Chapter 2 : Installation
Figure 2.2: Example of correct setup.
7. Press the OPT button: the software will then compute the exact required delay to optimize
the synchronization between the acoustic and optical waves.
8. Close the Trig and mode panel.
Coarse pulse compression
1. Press the LOAD (launch acoustic wave) button in the blue area.
2. Check that ”A : mem 0” is selected on the display mode selector in the machine control area.
3. Check that the host LED of the RF generator pulses more rapidly for a short time after the
button is pressed. The RF ON Led will be lit if power is above 12%.
4. Check that a waveform appears in the left hand side display of the ”Loaded Waveform”
display (right-hand top corner of the Dazzler software window).
Once this is done, the pulses are ready to be amplified. Before going to the next step, the
amplified pulses must be compressed. Some basic nonlinear effects (SHG, continuum generation
in air. . . ) or simple pulse characterization devices (single-shot autocorrelator. . . ) must be used at
this point to optimize roughly the pulse compression.
2.3 DazScope setup
2.3.1 Hardware
The DazScope hardware is the simplest hardware for pulse characterization. It consists of a lens
focusing the beam onto a second harmonic generator (typically a 20µm BBO crystal), a refocussing
lens and a high-resolution spectrometer (read through a USB link). This optical part is directly
FASTLITE-9 september 2008 Table of contents 9/42

DazScope
manual Chapter 2 : Installation
Figure 2.3: Assembling the optical module of the DazScope
Repetition rate Focusing lens Fluence per pulse
10Hz no 0.1-1mJ/cm2
10Hz yes 0.1-1µJ/cm2
kHz no 30-300µJ/cm2
kHz yes 30-300nJ/cm2
Table 2.1: Recommended operating conditions.
mounted onto the spectrometer and looks like an objective, as shown in the figure 2.3. Depending
on the incident pulse intensity, the first focusing lens may be removed.
The alignment of the system only requires to optimize the blue generation by properly focussing
the beam onto the non linear crystal. Please be aware of dispersion artifacts that can occur at the
focal spot depending on spatial and spatio-temporal quality of the beam. For a large beam, pay
particular attention to the ”edge” effects of the lens which has a 25mm focal length. For very short
pulses (<50fs) it is easier to send directly the beam unfocussed onto the non linear crystal. A blue
filter is supplied with the DazScope: it can be inserted after the nonlinear crystal and might be
useful to attenuate residual fundamental light.
A cable is supplied to trigger the spectrometer at a suitable repetition rate. The trigger signal
must be a TTL 0-5V pulse. Various trigger and acquisition options can be chosen from the DazS-
cope software in the spectrometer configuration panel.
Connect the spectrometer to the computer via the A-B USB cable (a green LED lights up on
the front panel of the spectrometer) and connect the Dazzler RF generator to the same computer8.
2.3.2 Alignment
Before starting the DazScope software, please be sure that the USB dongle provided with the
DazScope CD-ROM is plugged in the computer. Start the Dazzler software and in the setup
menu, check remote enable. Check that the Dazzler is correctly triggered. Eventually, start the
8Remote connection though a network is also possible - contact [email protected] for more information.
FASTLITE-9 september 2008 Table of contents 10/42

DazScope
manual Chapter 2 : Installation
DAZZLER
USB cable USB cable
SMA/BNC/SMA
cable
DazScope
Dazzler
Laptop
RF generator
BNC trigger cable
Sub D-25-BNC trigger cable
DAZZLER
USB cable USB cable
SMA/BNC/SMA
cable
DazScope
Dazzler
Laptop
RF generator
BNC trigger cable
Sub D-25-BNC trigger cable
Figure 2.4: Wiring sketch. The power supply cable of the RF generator are not shown.
DazScope software.
In the Spectrometer menu, select Configure... and configure the acquisition parameters of
the spectrometer: wavelength range of interest, trigger mode, integration time and number of
averages per spectrum. Close the panel, select the Spectrum in the algorithm listbox, click on the
Run button and tweak the input beam direction until the SHG spectral intensity is maximized.
Tweak then integration time, and Dazzler diffracted power in order to get typically ∼10000 counts
at maximum in the spectrum.
If no second harmonic spectrum is found...
If the spectrometer has an octave spanning spectral range (e.g. the spectral range of the spec-
trometer is 350-900nm):
1. Uncheck the Run button
2. Remove the blue filter
3. In the Spectrometer menu, go to Configure Spectrometer... and change the spectral
range so that the fundamental spectrum can be displayed
4. Check the Run button
5. Tweak the input beam direction to maximize the signal
6. Go back to the initial configuration: the SHG signal shouldn’t be difficult to find from here
If the spectrometer works on the second order of diffraction (e.g. the spectral range of the
spectrometer is 700-900nm):
1. Uncheck the Run button
2. Remove the blue filter
3. Check the Run button
FASTLITE-9 september 2008 Table of contents 11/42

CHAPTER
3
SOFTWARE OVERVIEW
The main part of the DazScope system is an elaborate software that remotely controls the Dazzler
pulse shaper to optimize the spectral phase (i.e. make it linear with frequency).
3.1 Quick start
This section gives a rapid overview to be able to carry a first optimization as explained in the next
chapter.
At startup, an initialization window of the spectrometer opens (figure 3.1). If the spectrometer
is not connected, the software will automatically switch to the simulation mode. Otherwise, the
spectrometer reference number will be displayed in the initialization window.
The spectrometer settings can be modified by clicking on the Spectrometer menu and selecting
the Configure item. This will open a configuration window (figure 3.2). Adjust the spectral range
to the spectral width of the pulses to be characterized1. When the Advanced Mode checkbox is
checked, an extended window appears. The trigger settings can be modified from this window.
When finished, click on ok.
The SHG spectrum can now be recorded directly from the main window: select the Spectrum
item in the algorithm list and click on the run button. The recorded spectrum is shown in the top
graph. A chart of past SHG levels is displayed in the bottom figure. Optimize the second harmonic
spectrum level by properly aligning the optical setup. To stop the spectrum measurement click on
the Run button once again.
Then start the first optimization: select the ChirpScan item in the Algorithm list and click
on Run
At the end of each chirp scan, a window indicating the result of the measurement will appear.
1Three to four times the FWHM spectral width is a good rule of thumb.
13

DazScope
manual Chapter 3 : Software overview
3.2 Software description
The DazScope front panel contains three distinct areas (figure 3.3):
•the menu bar
•the control area (the yellow area)
•the display area (two display areas)
Figure 3.3: ChirpScan acquisition.
3.2.1 Menu bar
File menu
From this menu the current experimental results can be saved to a proprietary file format. The
user can also launch a data browser software to read the previously saved files and export the
experimental data and/or experimental parameters to ASCII and XML files.
Figure 3.4: Content of the ”File” menu.
Save Measurement Results as... : saves the last completely acquired data to a binary file
format.
FASTLITE-9 september 2008 Table of contents 15/42

DazScope
manual Chapter 3 : Software overview
Automatically save all results: when used, this option will save all the acquired data in
a specific folder.
Launch Measurement Results Xplorer... : opens the corresponding software in a new
window.
Close: closes the DazScope software.
Spectrometer menu
Figure 3.5: Content of the ”Spectrometer” menu.
This menu is divided in two parts : a list of all available spectrometers and a link to the
configuration panel of the active spectrometer. The active spectrometer is indicated by a check
symbol in the spectrometer list.
3.2.2 Control area
This area contains all the implemented measurements and/or algorithms and a the RUN button.
To date there are only two possible ”algorithm”: Spectrum, which is just a live record of the SHG
spectrum and ChirpScan which is a phase optimization algorithm. To launch one of these two
actions, the user must first select the appropriate item in the algorithm list and then press the RUN
button. To stop the algorithm while running, uncheck this button.
3.2.3 Display area
This area displays the name of the current measurement and the experimental data.
3.3 Setting up a measurement
3.3.1 Configuring the spectrometer
From the menu bar, select the Spectrometer menu and click on the Configure spectrometer...
item. This launches a window displaying the currently used parameters. Depending on the spec-
trometer model, several parameters can be set and displayed. If the Advanced checkbox is checked,
all the spectrometer parameters and options are displayed. When this checkbox is unchecked, the
software displays only a minimal set of parameters.
FASTLITE-9 september 2008 Table of contents 16/42

DazScope
manual Chapter 3 : Software overview
Figure 3.6: Content of the spectrometer configuration panel.
Integration time: integration time of the spectrometer expressed in the units indicated on
the right on the numeric control.
Average: number of spectra to acquire for a given acoustic wave. The displayed spectrum is
the average of all acquired spectra.
Lambda Min: lowest wavelength to acquire (expressed in the units specified on the right
side of the numeric control)
Lambda Max: highest wavelength to acquire (expressed in the units specified on the right
side of the numeric control)
Open From File...: loads the parameters from an XML file.
Save To File... : save the current parameters to an XML file.
Reset To Default: resets the parameters to their default values.
Make Default: sets the current parameters as default parameters.
3.3.2 Configuring the ChirpScan algorithm
Double-click on the ChirpScan item of the Algorithm listbox. The configuration panel of the
ChirpScan panel opens (figure 3.7).
During the chirp scan successive waveforms are defined and sent into the Dazzler and the
corresponding SHG spectra are recorded and displayed. All waveforms are strictly identical, but
for the chirp value which is scanned over a given interval. This interval is defined as a variation
FASTLITE-9 september 2008 Table of contents 17/42

DazScope
manual Chapter 3 : Software overview
Figure 3.7: Content of the ChirpScan configuration panel (simplified panel).
Pulse bandwidth (nm) Order 2 min (fs2) Order 2 max (fs2)
10 -20 000 +20 000
20 -5 000 +5 000
30 -3 000 +3 000
40 -2 000 +2 000
50 -2 000 +2 000
60 -2 000 +2 000
Table 3.1: Recommended minimum values for the ChirpScan algorithm as a function of the am-
plified pulse bandwidth at 800nm. A rule of thumb is to choose 2 or 3 times the square of the
FWHM duration of the corresponding Fourier-transform-limited pulse. Larger values may be used
if the spectral phase to correct for is particularly high.
around the current reference waveform order2 (see subsection 3.3.3). More precisely the scanned
second orders are given by formula 3.1:
ϕ2,k =ϕ2,ref +ϕ2,min + (ϕ2,max −ϕ2,min) (k−1)/(N−1) for k= 1..N (3.1)
where ϕ2,ref is the second order phase coefficient of the reference waveform, ϕ2,min is the value of
the Order2 Min control and ϕ2,max is the value of the Order2 Max control. Nis the number of
discrete chirp values scanned over the range defined by the former second order values. Units are
in fs2.
Some optional settings of the ChirpScan algorithm can also be defined. The ChirpScan algo-
rithm was basically specified and designed to correct polynomial spectral phase up to the fourth
order only. However, it has, in principle, the ability to detect more complex phase aberrations.
The measured spectral phase is therefore divided into:
•a fourth order polynomial phase
•a residual phase
Depending on the settings of the ChirpScan algorithm, the DazScope can correct for either the
polynomial phase only or the full spectral phase.
Residual phase mode: indicates which curves are displayed on top of the experimental data
picture and if the user is allowed to correct for the residual phase.
•Do not correct: displays only the polynomial correction (white curve). No residual phase
correction allowed.
FASTLITE-9 september 2008 Table of contents 18/42

DazScope
manual Chapter 3 : Software overview
•Compute only: same as ”Do not correct”. No residual phase correction allowed. For debug-
ging purposes only.
•Compute and Display: displays both the measured local second order phase (white curve)
and the polynomial correction (black curve). No residual phase correction allowed.
•Compute, Display and Ask to Apply: displays both the measured phase function (white
curve) and the polynomial correction (black curve), enables to ge beyond the polynomial
correction.
Recommended mode is ”Compute and Display”.
Mean filter half width (Advanced): this option allows to smooth the measured SHG
spectra before running the ChirpScan algorithm.
Threshold (%) (Advanced): Experimental data points under this threshold value (ex-
pressed in fraction of the experimental maximum count number) are ignored by the ChirpScan
algorithm. Recommended value is 10-30% depending on the signal-to-noise ratio.
3.3.3 Editing the reference waveform
From the menu bar, select the Reference WF menu and the Edit current Ref.WF... item. This
opens a window displaying the current reference waveform. In the DazScope, the reference wave-
form refers to the acoustic wave used when no optimizing algorithm is running. It is the waveform
displayed on the Dazzler panel when the Spectrum measurement is running. The user must
be aware that when the DazScope software starts, the reference waveform is
loaded from a configuration file which is different from the one used by the Daz-
zler software. What is more, modifications of the front panel of the Dazzler
software will NOT affect the reference waveform. The reference waveform
can only be edited through the DazScope software ”Ref. WF” menu.
WaveForm name: customizable name of the waveform.
Amplitude mode: defines how the modulus of the complex transfer function of the Dazzler
(referred to as amplitude) is calculated. If several boxes are selected the amplitude is equal to the
product of each individually defined amplitude functions.
•Dials: supergaussian or gaussian function defined by the displayed dials.
•Formula (Advanced mode): analytical formula.
•Numerical Amp: ASCII text file.
FASTLITE-9 september 2008 Table of contents 19/42
This manual suits for next models
1
Other FASTLITE Measuring Instrument manuals


