10
Por favor lea cuidadosamente las
instrucciones do servicio y preste
especial atención a las indicaciones
de seguridad. Guarde las instruc-
ciones de servicio junto con la lija-
dora vibratoria.
Datos técnicos
Tensión 230 Volt
Consumo de energía 135 Watt
Superficie de lijado 180 x 85
Tamaño del papel abrasivo 225 x 85
Vibraciones por minuto 20.000
Nivel de presión acútica LPA 73 dB(A)
Nivel de potencia acústica
LWA 83 dB(A)
Vibration aw6 m/s2
Peso 1,4 kg
Aislamiento protector
Volumen de suministros
VIS 135,
Empalme para aspiradora ø 32, ø 36,
Instrucciones de servicio,
3 x papel abrasivo
Indicaciones generales de
seguridad
– ¡Antes de todo trabajo en la
máquina (limpieza, cambio de papel
abrasivo, etc.) se debe desconectar
de la red!
– Desconecte el cable de red de la
toma de corriente, tirando siempre
del enchufe.
– ¡Utilice en trabajos de lijado una
máscara contra el polvo así como
gafas de protección, en bien de su
salud!
– El puesto de trabajo debe ser limpio
y bien iluminado.
– Cuido de que la pieza a trabajar
esté bien fija.
– Mantenga alejados los niños del
lugar de trabajo.
– En interés propio, mantenga siem-
pre la máquina limpia y después de
los trabajos efectúe un control res-
pecto a posibles deterioros.
– Asegurese que al conectar la
máquina a la red el interruptor esté
desconectado.
– Cuide de un apoyo firme, ante todo
en escaleras y andamios.
– Si determina deterioros, en base a
los dibujos de montaje desarmado
así como la lista de piezas, defina
exactamente los repuestos y solicí-
telos al servicio postventa.
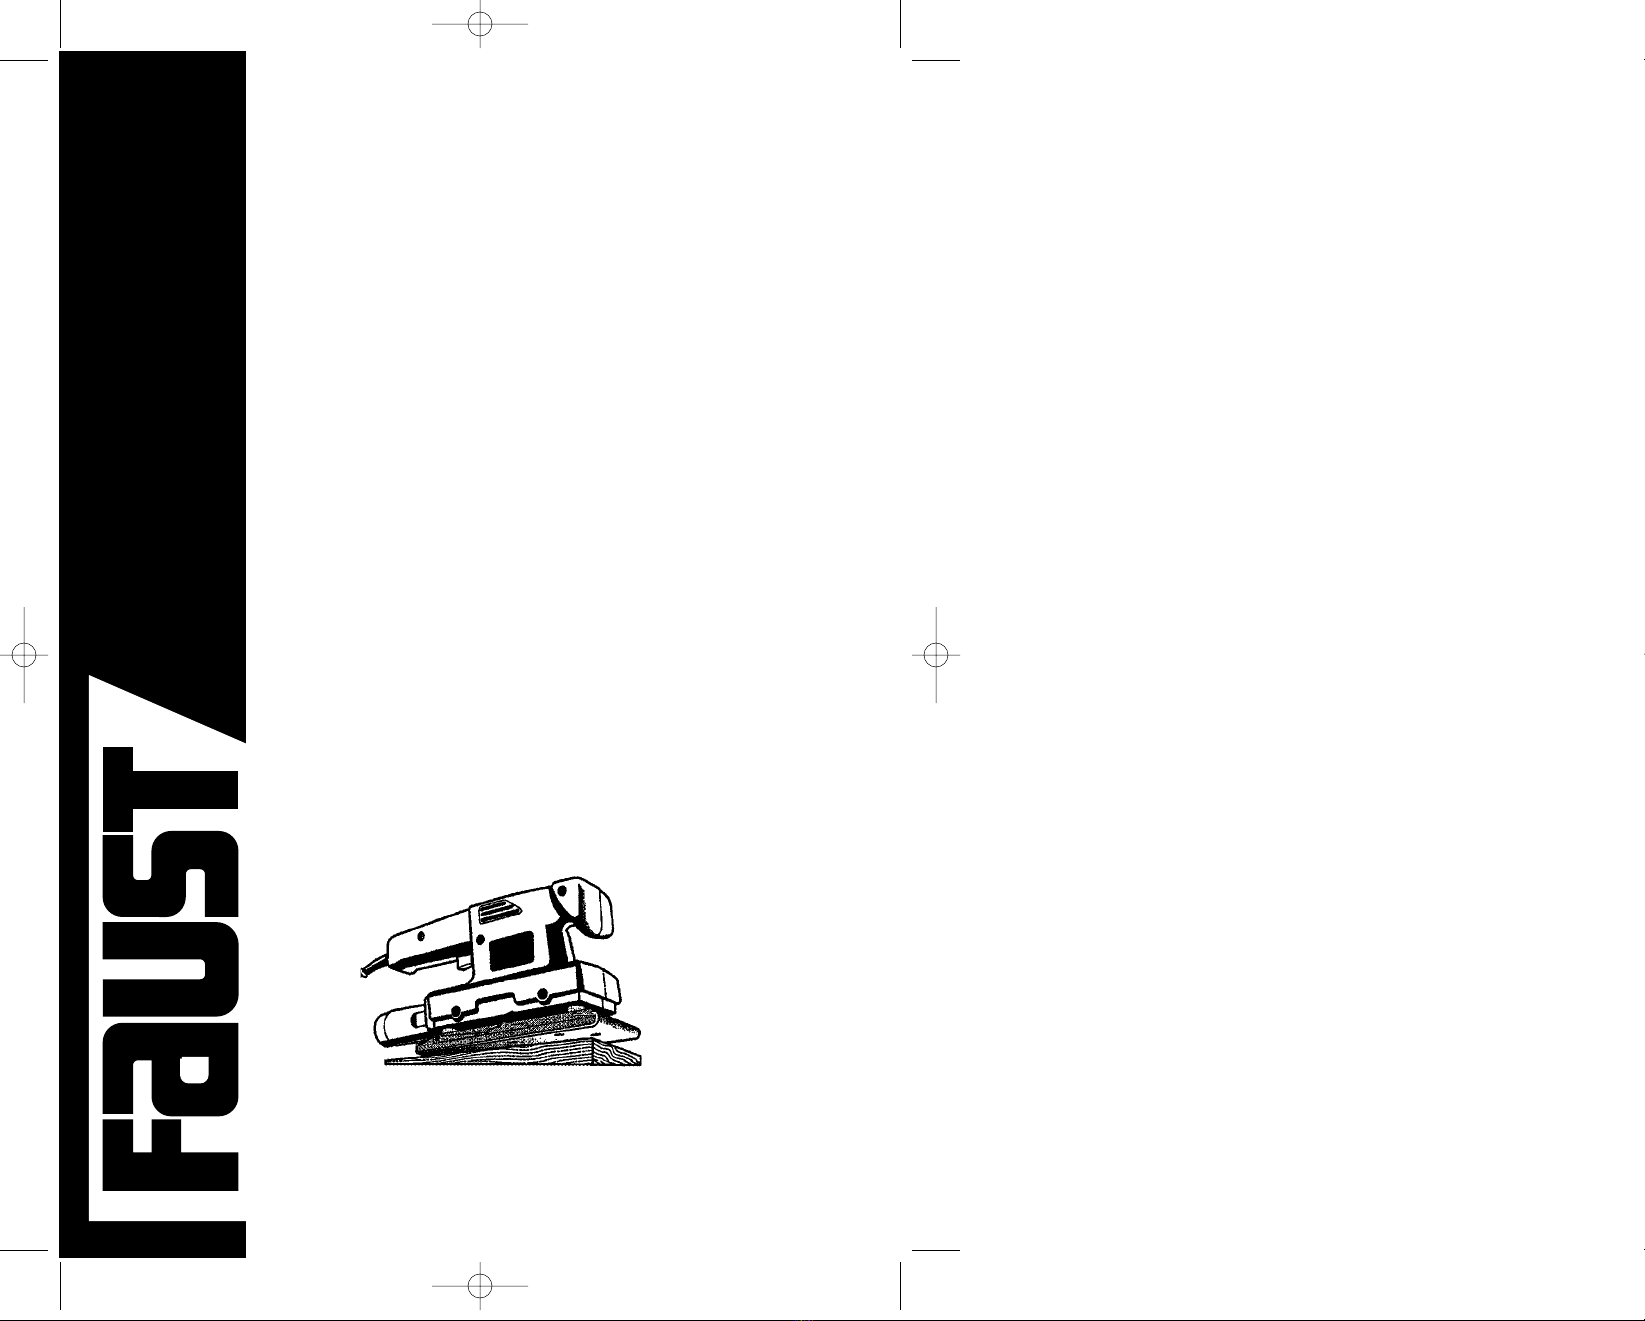
1 Asidero frontal
2 Placa de tipo
3 Interruptor de
encendido ON/OFF
4 Botón de retención
5 Asidero
6 Papel abrasivo
7 Placa vibratoria
8 Dispositivo de fijación
9 Empalme para aspira
dora
10 Cable de red
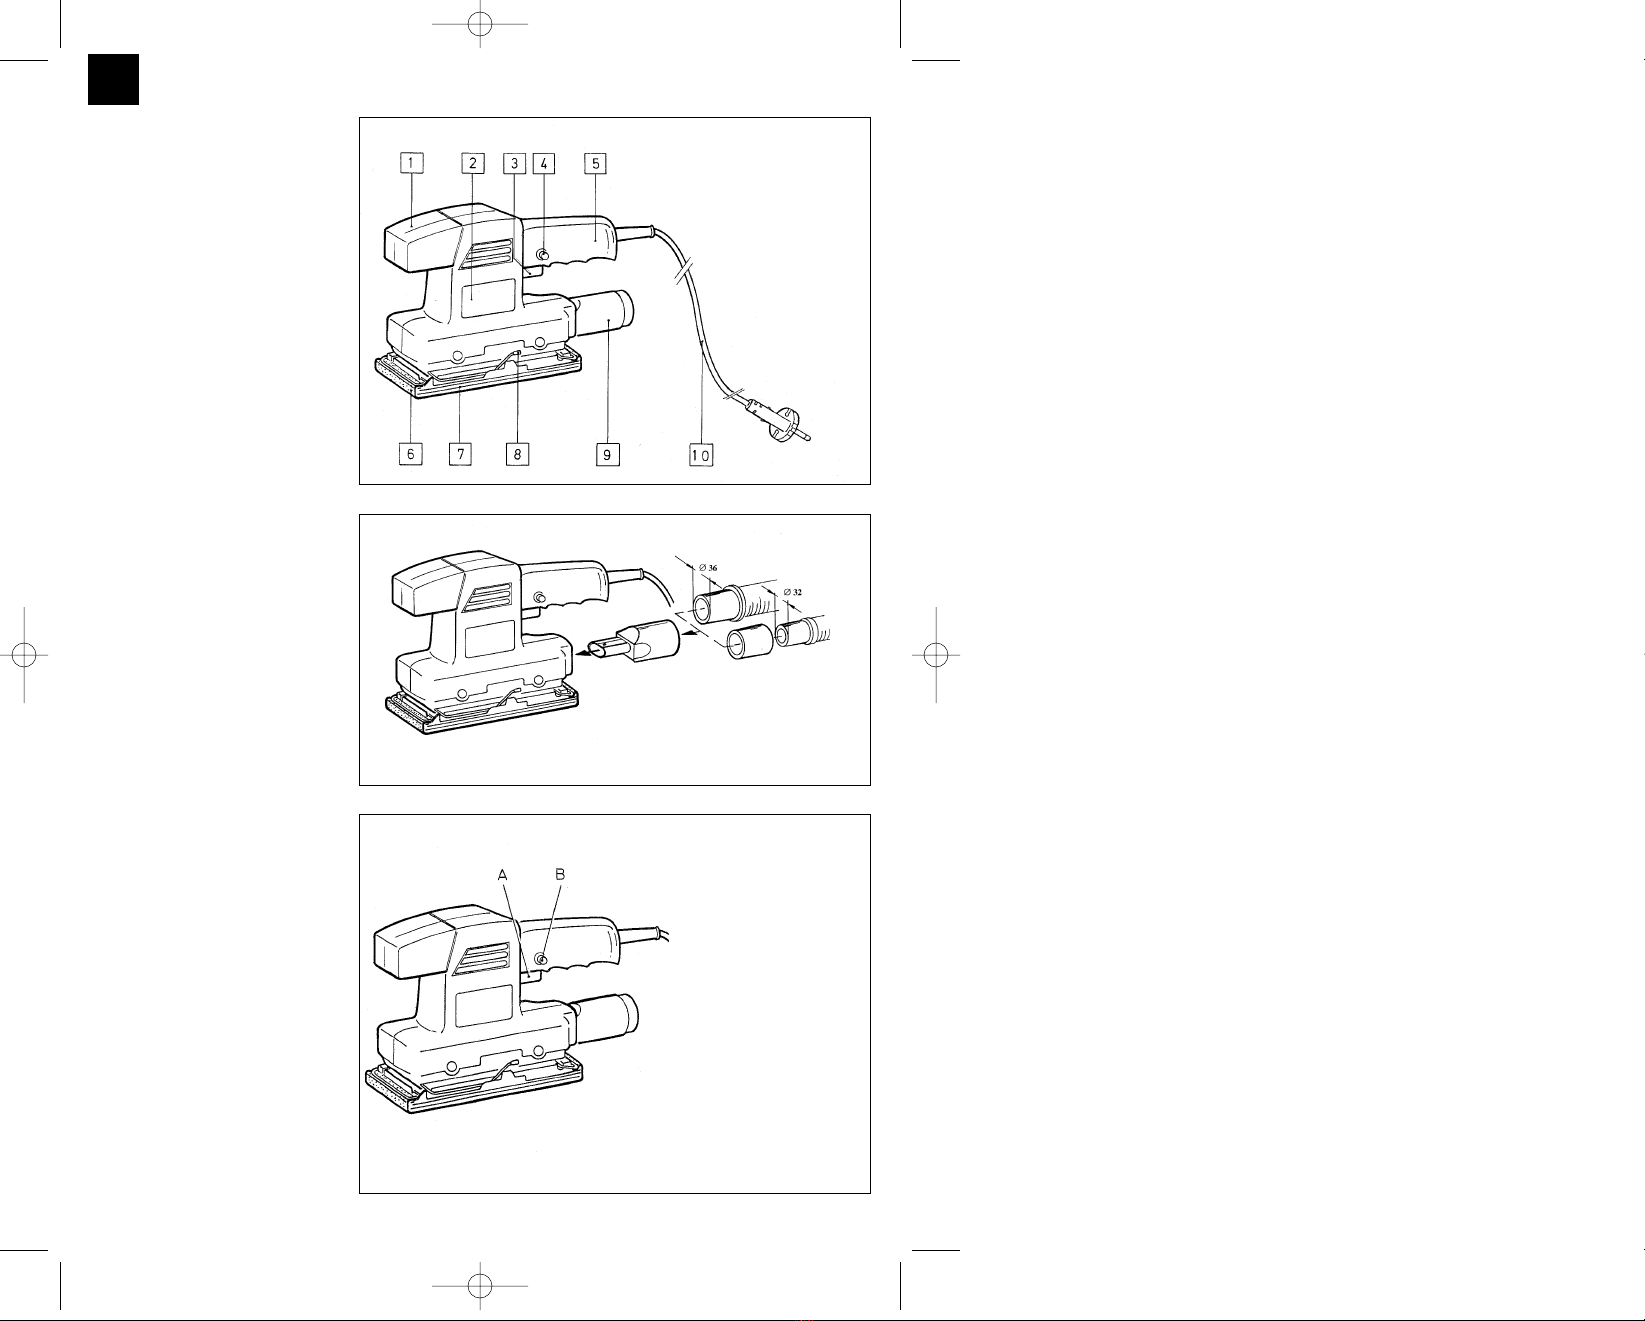
Montaje del empalme para aspiradora.
¡Atención!
La utilización del empalme para aspira-
dora es necesario de forma incondicional
por razones de salud.
¡Nota importante!
– La lijadora vibratoria no es
apropiada para rectificación en
húmedo.
– En caso de usar un tambor de
cable, desenrollar el cable com-
pletamente (sección de conduc-
tores 1 mm2, como mínimo).
– Después de terminar el trabajo,
retirer el enchufe de red.
– Si se presenta un defecto en el
equipo, consultar a una taller
especializado.
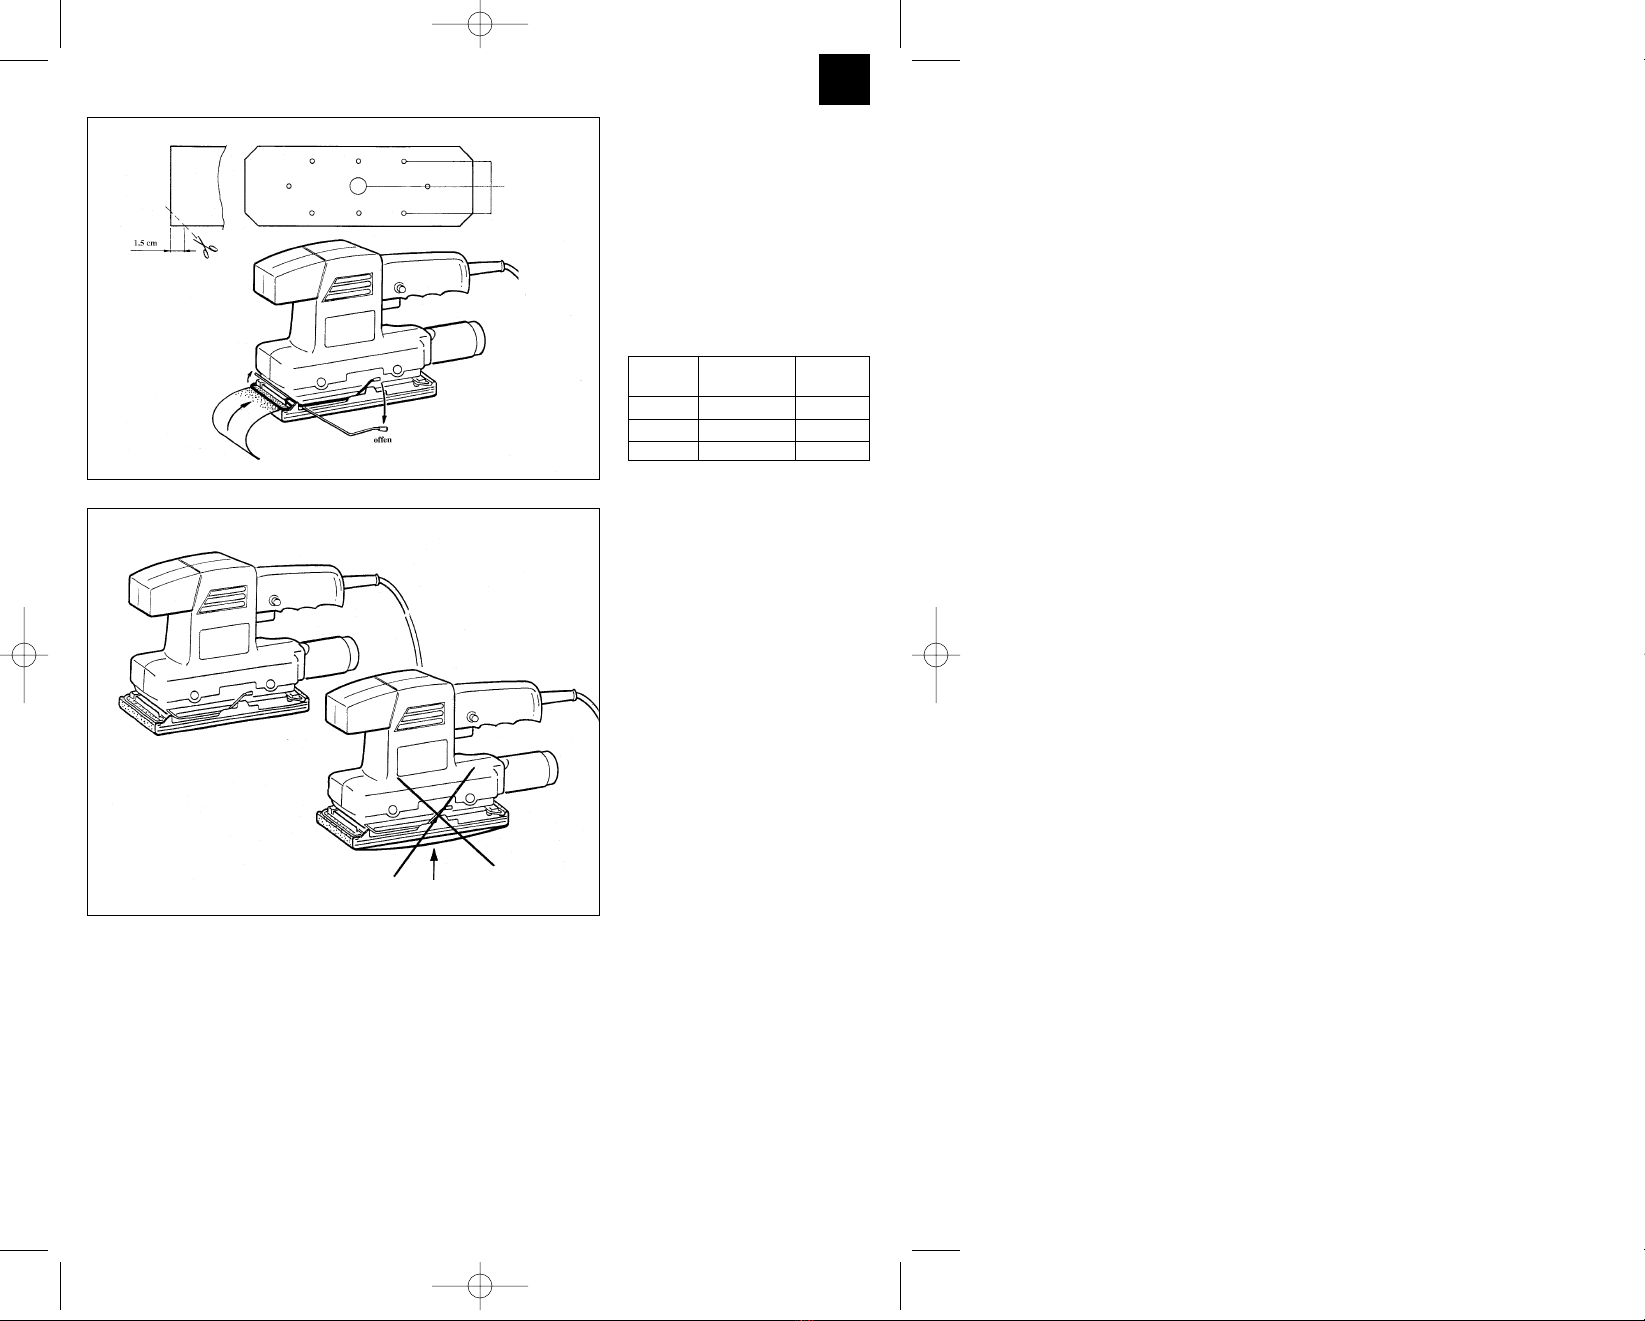
Interruptor
Conectar: Apretar el interruptor A
Servicio Retener el interruptor A en
permanente: la posición apretada con el
botón B
Desconectar: Apretar brevemente el
interruptor A
E
Anleitung VIS 135 Faust 08.11.2001 10:49 Uhr Seite 10