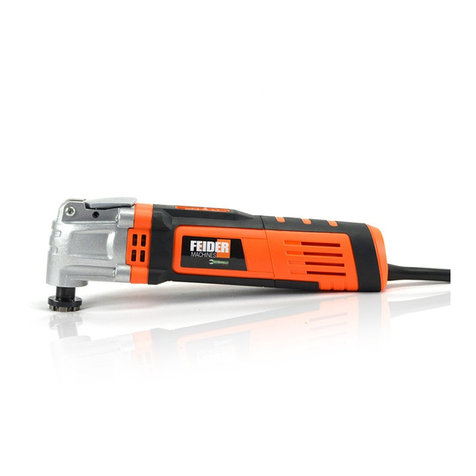
Feider Machines FMO130-210 User manual

ORIGINAL INSTRUCTIONS > EN
FMO130-210
INSTRUCTION MANUAL
CAUTION Read the instructions before using the machine.
MULTI-FUNCTION ROTARY TOOL

ORIGINAL INSTRUCTIONS > EN
CONTENT
2. SYMBOLS 7
6. TECHNICAL DATA 11
8. OPERATIONS 12
12. WARRANTY 16
14. WARRANTY EXCLUSIONS 18
3. INTENDED USE 7
4. TECHNICAL DATA 8
11. DECLARATION OF CONFORMITY 15
1. SAFETY INSTRUCTIONS 3
13. PRODUCT FAILURE 17
5. CONTENTS OF PACKING 8
7. ASSEMBLY 11
10. DISPOSAL 15
9. CLEANING AND MAINTENANCE 14

ORIGINAL INSTRUCTIONS > EN
1. SAFETY INSTRUCTIONS
1.1 GENERAL POWER TOOL SAFETY WARNINGS
WARNING Read all safety warnings and all instructions. Failure to follow the warnings and
instructions may result in electric shock, fire and/or serious injury.
Save all warnings and instructions for future reference.
The term "power tool" in the warnings refers to your mains-operated (corded) power tool or battery-operated
(cordless) power tool.
1) Work area safety
a) Keep work area clean and well lit.Cluttered or dark areas invite accidents.
b) Do not operate power tools in explosive atmospheres, such as in the presence of flammable
liquids, gases or dust. Power tools create sparks which may ignite the dust or fumes.
c) Keep children and bystanders away while operating a power tool. Distractions can cause you to lose
control.
2) Electrical safety
a) Power tool plugs must match the outlet. Never modify the plug in any way. Do not use any adapter
plugs with earthed (grounded) power tools. Unmodified plugs and matching outlets will reduce risk of
electric shock.
b) Avoid body contact with earthed or grounded surfaces, such as pipes, radiators, ranges and
refrigerators. There is an increased risk of electric shock if your body is earthed or grounded.
c) Do not expose power tools to rain or wet conditions. Water entering a power tool will increase the risk
of electric shock.
d) Do not abuse the cord. Never use the cord for carrying, pulling or unplugging the power tool. Keep
cord away from heat, oil, sharp edges or moving parts. Damaged or entangled cords increase the risk of
electric shock.
e) When operating a power tool outdoors, use an extension cord suitable for outdoor use. Use of a
cord suitable for outdoor use reduces the risk of electric shock.
f) If operating a power tool in a damp location is unavoidable, use a residual current device (RCD)
protected supply. Use of an RCD reduces the risk of electric shock.
NOTE The term “residual current device (RCD)” may be replaced by the term “ground fault circuit interrupter
(GFCI)” or “earth leakage circuit breaker (ELCB)”.
3) Personal safety
a) Stay alert, watch what you are doing and use common sense when operating a power tool. Do not
use a power tool while you are tired or under the influence of drugs, alcohol or medication. A moment
of inattention while operating power tools may result in serious personal injury.
b) Use personal protective equipment. Always wear eye protection. Protective equipment such as dust
mask, non-skid safety shoes, hard hat, or hearing protection used for appropriate conditions will reduce
personal injuries.
c) Prevent unintentional starting. Ensure the switch is in the off-position before connecting to power
source and/or battery pack, picking up or carrying the tool. Carrying power tools with your finger on the
switch or energising power tools that have the switch on invites accidents.
d) Remove any adjusting key or wrench before turning the power tool on. A wrench or a key left
attached to a rotating part of the power tool may result in personal injury.
e) Do not overreach. Keep proper footing and balance at all times. This enables better control of the
power tool in unexpected situations.
3

ORIGINAL INSTRUCTIONS > EN
f) Dress properly. Do not wear loose clothing or jewellery. Keep your hair, clothing and gloves away
from moving parts. Loose clothes, jewellery or long hair can be caught in moving parts.
g) If devices are provided for the connection of dust extraction and collection facilities, ensure these
are connected and properly used. Use of dust collection can reduce dust-related hazards.
4) Power tool use and care
a) Do not force the power tool. Use the correct power tool for your application. The correct power tool
will do the job better and safer at the rate for which it was designed.
b) Do not use the power tool if the switch does not turn it on and off. Any power tool that cannot be
controlled with the switch is dangerous and must be repaired.
c) Disconnect the plug from the power source and/or the battery pack from the power tool before
making any adjustments, changing accessories, or storing power tools. Such preventive safety
measures reduce the risk of starting the power tool accidentally.
d) Store idle power tools out of the reach of children and do not allow persons unfamiliar with the
power tool or these instructions to operate the power tool. Power tools are dangerous in the hands of
untrained users.
e) Maintain power tools. Check for misalignment or binding of moving parts, breakage of parts and
any other condition that may affect the power tool’s operation. If damaged, have the power tool
repaired before use. Many accidents are caused by poorly maintained power tools.
f) Keep cutting tools sharp and clean. Properly maintained cutting tools with sharp cutting edges are less
likely to bind and are easier to control.
g) Use the power tool, accessories and tool bits etc. in accordance with these instructions, taking
into account the working conditions and the work to be performed. Use of the power tool for operations
different from those intended could result in a hazardous situation.
5) Service
a) Have your power tool serviced by a qualified repair person using only identical replacement parts.
This will ensure that the safety of the power tool is maintained.
1.2 SAFETY INSTRUCTIONS FOR ALL OPERATIONS
Safety warnings common for grinding, sanding, wire brushing, polishing, carving or abrasive
cutting-off operations:
a) This power tool is intended to function as a grinder, sander, wire brush, polisher, carving or
cut-off tool. Read all safety warnings, instructions, illustrations and specifications provided with this
power tool. Failure to follow all instructions listed below may result in electric shock, fire and/or serious
injury.
b) Do not use accessories which are not specifically designed and recommended by the tool
manufacturer. Just because the accessory can be attached to your power tool, it does not assure safe
operation.
c) The rated speed of the grinding accessories must be at least equal to the maximum speed marked
on the power tool. Grinding accessories running faster than their rated speed can break and fly apart.
d) The outside diameter and the thickness of your accessory must be within the capacity rating of
your power tool. Incorrectly sized accessories cannot be adequately controlled.
e) The arbour size of wheels, sanding drums or any other accessory must properly fit the spindle or
collet of the power tool. Accessories that do not match the mounting hardware of the power tool will run
out of balance, vibrate excessively and may cause loss of control.
4

ORIGINAL INSTRUCTIONS > EN
f) Mandrel mounted wheels, sanding drums, cutters or other accessories must be fully inserted into
the collet or chuck. If the mandrel is insufficiently held and/or the overhang of the wheel is too long, the
mounted wheel may become loose and be ejected at high velocity.
g) Do not use a damaged accessory. Before each use inspect the accessory such as abrasive wheels
for chips and cracks, sanding drum for cracks, tear or excess wear, wire brush for loose or cracked
wires. If power tool or accessory is dropped, inspect for damage or install an undamaged accessory.
After inspecting and installing an accessory, position yourself and bystanders away from the plane
of the rotating accessory and run the power tool at maximum no-load speed for one minute.
Damaged accessories will normally break apart during this test time.
h) Wear personal protective equipment. Depending on application, use face shield, safety goggles or
safety glasses. As appropriate, wear dust mask, hearing protectors, gloves and workshop apron
capable of stopping small abrasive or workpiece fragments. The eye protection must be capable of
stopping flying debris generated by various operations. The dust mask or respirator must be capable of
filtrating particles generated by your operation. Prolonged exposure to high intensity noise may cause
hearing loss.
i) Keep bystanders a safe distance away from work area. Anyone entering the work area must wear
personal protective equipment. Fragments of workpiece or of a broken accessory may fly away and cause
injury beyond immediate area of operation.
j) Hold power tool by insulated gripping surfaces only, when performing an operation where the
cutting accessory may contact hidden wiring or its own cord. Cutting accessory contacting a "live" wire
may make exposed metal parts of the power tool "live" and could give the operator an electric shock.
k) Always hold the tool firmly in your hand(s) during the start-up. The reaction torque of the motor, as it
accelerates to full speed, can cause the tool to twist.
l) Use clamps to support workpiece whenever practical. Never hold a small workpiece in one hand
and the tool in the other hand while in use. Clamping a small workpiece allows you to use your hand(s) to
control the tool. Round material such as dowel rods, pipes or tubing have a tendency to roll while being cut,
and may cause the bit to bind or jump toward you.
m) Position the cord clear of the spinning accessory. If you lose control, the cord may be cut or snagged
and your hand or arm may be pulled into the spinning accessory.
n) Never lay the power tool down until the accessory has come to a complete stop. The spinning
accessory may grab the surface and pull the power tool out of your control.
o) After changing the bits or making any adjustments, make sure the collet nut, chuck or any other
adjustment devices are securely tightened. Loose adjustment devices can unexpectedly shift, causing
loss of control, loose rotating components will be violently thrown.
p) Do not run the power tool while carrying it at your side. Accidental contact with the spinning
accessory could snag your clothing, pulling the accessory into your body.
q) Regularly clean the power tool’s air vents. The motor’s fan will draw the dust inside the housing and
excessive accumulation of powdered metal may cause electrical hazards.
r) Do not operate the power tool near flammable materials. Sparks could ignite these materials.
s) Do not use accessories that require liquid coolants. Using water or other liquid coolants may result in
electrocution or shock.
1.3 FURTHER SAFETY INSTRUCTIONS FOR ALL OPERATIONS
Kickback and related warnings
Kickback is a sudden reaction to a pinched or snagged rotating wheel, sanding band, brush or any other
accessory. Pinching or snagging causes rapid stalling of the rotating accessory which in turn causes the
uncontrolled power tool to be forced in the direction opposite of the accessory’s rotation.
5

ORIGINAL INSTRUCTIONS > EN
For example, if an abrasive wheel is snagged or pinched by the workpiece, the edge of the wheel that is
entering into the pinch point can dig into the surface of the material causing the wheel to climb out or kick out.
The wheel may either jump toward or away from the operator, depending on direction of the wheel’s
movement at the point of pinching. Abrasive wheels may also break under these conditions.
Kickback is the result of power tool misuse and/or incorrect operating procedures or conditions and can be
avoided by taking proper precautions as given below.
a) Maintain a firm grip on the power tool and position your body and arm to allow you to resist
kickback forces. The operator can control kickback forces, if proper precautions are taken.
b) Use special care when working corners, sharp edges etc. Avoid bouncing and snagging the
accessory. Corners, sharp edges or bouncing have a tendency to snag the rotating accessory and cause
loss of control or kickback.
c) Do not attach a toothed saw blade. Such blades create frequent kickback and loss of control.
d) Always feed the bit into the material in the same direction as the cutting edge is exiting from the
material (which is the same direction as the chips are thrown). Feeding the tool in the wrong direction
causes the cutting edge of the bit to climb out of the work and pull the tool in the direction of this feed.
e) When using rotary files, cut-off wheels, high-speed cutters or tungsten carbide cutters, always
have the work securely clamped. These wheels will grab if they become slightly canted in the groove, and
can kickback. When a cut-off wheel grabs, the wheel itself usually breaks. When a rotary file, high-speed
cutter or tungsten carbide cutter grabs, it may jump from the groove and you could lose control of the tool.
1.4 ADDITIONAL SAFETY INSTRUCTIONS FOR GRINDING AND
CUTTING-OFF OPERATIONS
Safety warnings specific for grinding and abrasive cutting-off operations:
a) Use only wheel types that are recommended for your power tool and only for recommended
applications. For example: do not grind with the side of a cut-off wheel. Abrasive cut-off wheels are
intended for peripheral grinding, side forces applied to these wheels may cause them to shatter.
b) For threaded abrasive cones and plugs use only undamaged wheel mandrels with an unrelieved
shoulder flange that are of correct size and length. Proper mandrels will reduce the possibility of
breakage.
c) Do not “jam” a cut-off wheel or apply excessive pressure. Do not attempt to make an excessive
depth of cut. Overstressing the wheel increases the loading and susceptibility to twisting or snagging of the
wheel in the cut and the possibility of kickback or wheel breakage.
d) Do not position your hand in line with and behind the rotating wheel. When the wheel, at the point of
operation, is moving away from your hand, the possible kickback may propel the spinning wheel and the
power tool directly at you.
e) When wheel is pinched, snagged or when interrupting a cut for any reason, switch off the power
tool and hold the power tool motionless until the wheel comes to a complete stop. Never attempt to
remove the cut-off wheel from the cut while the wheel is in motion otherwise kickback may occur.
Investigate and take corrective action to eliminate the cause of wheel pinching or snagging.
f) Do not restart the cutting operation in the workpiece. Let the wheel reach full speed and carefully
re-enter the cut. The wheel may bind, walk up or kickback if the power tool is restarted in the workpiece.
g) Support panels or any oversized workpiece to minimize the risk of wheel pinching and kickback.
Large workpieces tend to sag under their own weight. Supports must be placed under the workpiece near
the line of cut and near the edge of the workpiece on both sides of the wheel.
6

ORIGINAL INSTRUCTIONS > EN
h) Use extra caution when making a “pocket cut” into existing walls or other blind areas. The
protruding wheel may cut gas or water pipes, electrical wiring or objects that can cause kickback.
1.5 ADDITIONAL SAFETY INSTRUCTIONS FOR WIRE BRUSHING
OPERATIONS
Safety warnings specific for wire brushing operations:
a) Be aware that wire bristles are thrown by the brush even during ordinary operation.
Do not overstress the wires by applying excessive load to the brush. The wire bristles can easily
penetrate light clothing and/or skin.
b) Allow brushes to run at operating speed for at least one minute before using them. During this
time no one is to stand in front or in line with the brush. Loose bristles or wires will be discharged during
the run-in time.
c) Direct the discharge of the spinning wire brush away from you. Small particles and tiny wire
fragments may be discharged at high velocity during the use of these brushes and may become imbedded in
your skin.
The maximum recommended diameter of mounted wheels, threaded cones and plugs shall not exceed 55
mm and the maximum recommended diameter of sanding accessories shall not exceed 80 mm.
2. SYMBOLS
WARNING-To reduce the risk of injury, user must read instruction manual.
Always wear goggles and ear protection
Class II product
In accordance with essential applicable safety standards of European directives
3. INTENDED USE
This machine is intended for grinding, sanding, polishing, wire brushing or cutting on metals, glass, wood
and ceramics with the appropriate attachments. Do not use machine attachments for works other than those
for which they are designed for! All other applications are expressly ruled out.
7

ORIGINAL INSTRUCTIONS > EN
4. DESCRIPTION
1. On/Off switch
2. Speed selector
3. Collet nut
4. Spindle lock button
5. Carbon brush cap
5. CONTENTS OF PACKING
Picture
Name
Quantity
Grinding Stones with shank
10
Diamond bit
7
Collets
4
Sanding bands
10
Sanding bands
10
8

ORIGINAL INSTRUCTIONS > EN
Mandrel for cut-off wheel
2
Mandrel for felt wheel
2
Sanding shanks
2
Grinding wheels
12
Wet stone
1
Cut off wheels fiberglass
5
Rubber emery wheel
1
Wrench
1
Polishing compound
2
9

ORIGINAL INSTRUCTIONS > EN
Cut off wheels regular
20
Felt wheels
1
Felt wheels
4
Felt wheel pointed
1
Drill bits
6
Brush
6
L pin
1
10
Sanding paper 102

ORIGINAL INSTRUCTIONS > EN
6. TECHNICAL DATA
Power supply 220-240V~; 50Hz
Power input 135W
No load speed 8000-33000/min
Collet capacity (max) :Ø3.2mm
Grinding disc (max): Ø35mm
Mandrel length (max): 35mm
LPA (Sound pressure level): 68 dB(A) K=3 dB
LWA (Sound power level): 79 dB(A) K=3 dB
Vibration level ah: 1.42 m/s2K=1.5m/s2
Weight: 0.6 kg
Information:
− That the declared vibration total value has been measured in accordance with a standard test method and
may be used for comparing one tool with another;
− The declared vibration total value may also be used in a preliminary assessment of exposure.
Warning:
− The vibration emission during actual use of the power tool can differ from the declared total value
depending on the ways in which the tool is used; and
− Need to identify safety measures to protect the operator that are based on an estimation of exposure in the
actual conditions of use (taking account of all parts of the operating cycle such as the times when the tool is
switched off and when it is running idle in addition to the trigger time).
Suggestion: 1) Wear glove during operation
2) Limit operating time and shorten trigger time
7. ASSEMBLY
7.1 INSTALLING AND CHANGING A TOOL
NOTE: the tool must not be plugged to a power socket during this
operation.
Wear glove during this operation to avoid injury which is caused by
accessories.
Press and maintain the spindle lock button (B); rotate the collet nut
(D) slowly until it is loosen. You can use the wrench (E) to do this
operation.
Insert the shaft of the accessory into the collet (C). Always select
the appropriate sized collet for the bit being inserted. Ensure all
tools are fully inserted and the mandrels do not exceed the collet
more than 25mm, to reduce the risk of bending an accessory, or
excessive vibrations.
Press and maintain the locking button (B); turn it clockwise to
lightly tighten the collet nut (D).
11

ORIGINAL INSTRUCTIONS > EN
NOTE: Never press the locking pin while the tool is running.
7.2 INSTALLING DISC/WHEELS ACCESSORIES
NOTE:
-The tool must not be plugged to a power socket during this
operation.
-Wear gloves during this operation to avoid injury which is
caused by accessories.
Press and maintain the spindle lock button (B); rotate the collet nut
(D) slowly until it is loosen. You can use the wrench (E) to do this operation.
Use the corresponding mandrel supplied. Unscrew the mandrel and remove the small screw. Install the
wished disc on the mandrel and then screw it.
Insert the mandrel (Ensure all tools are fully inserted and the mandrels do not exceed the collet more
than 25mm.) into the collet (C).
Press the locking button (B), and turn clockwise to lightly tighten the collet nut (D).
Note:
If you want to use the sanding band, this accessory shall be inserted on the sanding shank.
Ensure that the size of the band corresponds to the shank.
Flexible shaft
NOTE: the tool must not be plugged to a power socket during this operation.
Wear glove during this operation to avoid injury which is caused by accessories.
Unscrew the big bolt (localized on the head of the tool) to remove it.
Press and maintain the spindle lock button. Rotate the collet nut slowly until it is loosen. You can use the
wrench to do this operation.
Place the flexible shaft on the tool: the pin must be inserted into the collet; and then screw the collet nut.
screw the flexible shaft in place
You can install an accessory on the flexible shaft by following the same procedure than explained above.
Before use, be sure that the accessory is well installed and fixed on the flexible shaft.
Collet
Collets with various sizes are provided with this tool. They can be used according the size of the
accessory which will be used.
To change the collet, switch off and unplug the tool. Unscrew the collet nut (on the tool or on the flexible
shaft), remove the current collet and install another one. Then, reinstall the collet nut on it.
8. OPERATION
Before using the tool, ensure the work area is clean and well lit.
Before switching on, set the speed dial to the slowest setting.
Best performance is achieved by using the correct speed and not high pressure. As a guide use slow
speeds for the larger tools, and high speeds for the small tools. Use slow speeds on wood and plastics, or
12

ORIGINAL INSTRUCTIONS > EN
when using polishing and brushing accessories.
For milling or engraving hold the tool like a pen, and keep the ventilation slots clear. For heavier work
hold the tool like a hammer.
For cutting disks hold the tool in both hands and use high speeds. This accessory is brittle and should
only be used for straight cuts. Do not sand or curved holes.
If the tool slows down or over-heats you may be applying too much pressure.
The tool is most effective with clean sharp tools. If more pressure is needed try cleaning or replacing the
accessory.
Some accessories are brittle. Use the tools speed and not pressure to do the work.
It is recommended it is run for 15 minutes of normal use. The tools should then be allowed to cool for 30
minutes. Heavy use may give less than 15 minutes continuous use.
The mini grinder has a variable speed control mechanism designed to allow the operator control and
adjustment of speed. The speed can be increased or decreased by the rotation of speed selector.
Picture
Name
Suggested
working
speed
Max speed
level
Grinding Stones with shank
9000~35000
6
Diamond bit
18000~35000
6
Collet
N/A
Sanding bands
4500~26000
4
Mandrel for cut-off wheel
N/A
Mandrel for felt wheel
N/A
Sanding shanks
N/A
Grinding wheels
9000~35000
6
Whet stone
N/A
Cut off wheels fiberglass
4500~35000
6
Rubber emery wheel
4500~11000
1
Wrench
N/A
Polishing compound
N/A
Cut off wheels
4500~35000
6
Sanding paper
4500~20000
3
Felt wheels
4000~20000
3
13

ORIGINAL INSTRUCTIONS > EN
Felt wheel pointed
4000~20000
3
Flap wheel
4000~20000
3
HSS cutters
9000~35000
6
Drill bits
4500~35000
6
Brush
4000~15000
2
L pin
N/A
To switch on, push the ON/OFF switch to “I” position.
To switch off, push the ON/OFF button to the “0” position.
9. CLEANING AND MAINTENANCE
9.1 MAINTENANCE
Always disconnect the device before performing any adjustment or maintenance operation.
Disconnect from the power supply immediately if the supply cord is damaged.
Take care not to expose this tool to the rain.
If the carbon brushes need to be replaced, have this done by a qualified repair person (always replace the
two brushes at the same time).
Regularly inspect the accessory, ensure the accessories are free of crack and surface defects. Replace the
accessory when it has worn out.
If the supply cord of this power tool is damaged, it must be replaced by a specially prepared cord available
through the service organization
9.2 CLEANING
This tool does not require any special maintenance. Regularly clean the ventilation slots. Avoid using
solvents when cleaning plastic parts. Most plastic parts are susceptible to damage from various types of
commercial solvents and may be damaged by their use. Use clean cloths to remove dirt, carbon dust, etc.
9.3 LUBRICATION
All the bearings in this tool are lubricated with a sufficient amount of high grade lubricant for the life of the
unit under normal operating conditions; therefore no further lubrication is required.
9.4 STORAGE
Place the tool and all the accessories on the box. The box shall be stored in a dry place, out of reach of
children.
14

ORIGINAL INSTRUCTIONS > EN
10. DISPOSAL
Electric power tools, as well as their accessories and packaging, must each be able to follow an
appropriate recycling pathway. Only for the countries of the European Union:
Do not throw away your electrical appliance with the household waste! In accordance with the
European Directive 2012/19/EU on waste electrical and electronic equipment and its implementation in
national laws, power tools that can no longer be used must be separated and follow an appropriate
recycling pathway.
11. DECLARATION OF CONFORMITY
Declaration of conformity
BUILDER SAS
ZI, 32 rue Aristide Bergès - 31270 Cugnaux - France
Declare that the Product named below:
130 Watt Multi-Function Rotary Tool
Model: FMO130-210
Serial number: 20210617208-20210619207
Meets the requirements of the Council Directives:
Machine Directive 2006/42 / EC
Electromagnetic Compatibility Directive 2014/30 / EU
RoHS Directive (RoHS) 2011/65 / EU+ (UE)2015/863
And in conformity to the standards:
EN 60745-1: 2009 + A11: 2010
EN 60745-2-23: 2013
EN 55014-1: 2017
EN 55014-2: 2015
EN 61000-3-2: 2014
EN61000-3-3: 2013
IEC62321: 2008
Cugnaux on 20/02/2021
Philippe MARIE / PDG
15

WARRANTY
The manufacturer guarantees the product against defects in material and workmanship for a period of 2
years from the date of the original purchase. The warranty only applies if the product is for household use.
The warranty does not cover breakdowns due to normal wear and tear.
The manufacturer agrees to replace parts identifed as defective by the designated distributor. The
manufacturer does not accept responsibility for the replacement of the machine, in whole or in part , and/or
ensuing damage.
The warranty does not cover breakdowns due to:
• insufcient maintenance.
• abnormal assembly, adjustment or operations of the product.
• parts subject to normal wear and tear.
The warranty does not extend to:
• shipping and packaging costs.
• using the tool for a purpose other than that for which it was designed.
• the use and maintenance of the machine done in a manner not described in the user manual.
Due to our policy of continuous product improvement, we reserve the right to alter or change specifcations
without notice. Consequently, the product may be diferent from the information contained therein, but a
modifcation will be undertaken without notice if it is recognized as an improvement of the preceding
characteristic.
READ THE MANUAL CAREFULLY BEFORE USING THE MACHINE.
When ordering spare parts, please indicate the part number or code, you can fnd this in the spare parts list
in this manual. Keep the purchase receipt; without it, the warranty is invalid. To help you with your product,
we invite you to contact us by phone or via our website:
• +33 (0)9.70.75.30.30
• https://services.swap-europe.com/contact
You must create a "ticket" via the web platform.
• Register or create your account.
• Indicate the reference of the tool.
• Choose the subject of your request.
• Describe your problem.
• Attach these fles: invoice or sales receipt, photo
of the identifcation plate (serial number), photo
of the part you need (for example: pins on the
transformer plug which are broken).
12. WARRANTY
16

WHAT TO DO IF MY MACHINE BREAKS DOWN?
the repairer will refuse the machine.
Go to the store with the complete machine and with the receipt or invoice.
the repairer will refuse the machine.
c) Create a SWAP-Europe service ticket on the site: https://services.swap-europe.com When making the
request on SWAP-Europe, you must attach the invoice and the photo of the nameplate (serial number).
d) Contact the repair station to make sure it is available before dropping of the machine.
Go to the repair station with the complete machine packed, accompanied by the purchase invoice and the
station support sheet downloadable after the service request is completed on the SWAP-Europe site
For machines with engine failure from manufacturers BRIGGS & STRATTON, HONDA and RATO, please
refer to the following instructions.
Repairs will be done by approved engine manufacturers of these manufacturers, see their site:
• http://www.briggsandstratton.com/eu/fr
• http://www.honda-engines-eu.com/fr/service-network-page;jsessionid=5EE8456CF39CD572AA2AEEDFD
290CDAE
• https://www.rato-europe.com/it/service-network
Please keep your original packaging to allow for after-sales service returns or pack your machine
with a similar cardboard box of the same dimensions.
For any question concerning our after-sales service you can make a request on our website https://
services.swap-europe.com
Our hotline remains available at +33 (9) 70 75 30 30.
If you bought your product on a website:
a) Empty the fuel tank if your product has one.
b) Make sure that your machine is complete with all accessories supplied, and clean! If this is not the case,
If you bought your product in a store:
a) Empty the fuel tank if your product has one.
b) Make sure that your machine is complete with all accessories supplied, and clean! If this is not the case,
13. PRODUCT FAILURE
17

THE WARRANTY DOES NOT COVER:
• Start-up and setting up of the product.
• Damage resulting from normal wear and tear of the product.
• Damage resulting from improper use of the product.
• Damage resulting from assembly or start-up not in accordance with the user manual.
• Breakdowns related to carburetion beyond 90 days and fouling of carburetors.
• Periodic and standard maintenance events.
• Actions of modifcation and dismantling that directly void the warranty.
• Products whose original authentication marking (brand, serial number) has been degraded, altered or
withdrawn.
• Replacement of consumables.
• The use of non-original parts.
• Breakage of parts following impacts or projections.
• Accessories breakdowns.
• Defects and their consequences linked to any external cause.
• Loss of components and loss due to insufcient screwing.
• Cutting components and any damage related to the loosening of parts.
• Overload or overheating.
• Poor power supply quality: faulty voltage, voltage error, etc.
• Damages resulting from the deprivation of enjoyment of the product during the time necessary for repairs
and more generally the costs related to the immobilization of the product.
• The costs of a second opinion established by a third party following an estimate by a SWAP-Europe repair
station
• The use of a product which would show a defect or a breakage which was not the subject of an immediate
report and/or repair with the services of SWAP-Europe.
• Deterioration linked to transport and storage*.
• Launchers beyond 90 days.
• Oil, petrol, grease.
• Damages related to the use of non-compliant fuels or lubricants.
* In accordance with transport legislation, damage related to transport must be declared to carriers within 48
hours maximum after observation by registered letter with acknowledgement of receipt.
This document is a supplement to your notice, a non-exhaustive list.
Attention: all orders must be checked in the presence of the delivery person. In case of refusal by the
delivery person, it you must simply refuse the delivery and notify your refusal.
Reminder: the reserves do not exclude the notifcation by registered letter with acknowledgement within 72
hours.
Information:
Thermal devices must be wintered each season (service available on the SWAP-Europe site). Batteries must
be charged before being stored.
14. WARRANTY EXCLUSIONS
18

NOTES

BUILDER SAS
32, rue Aristide Bergès - ZI 31270 Cugnaux - France
MADE IN PRC 2021
19
Table of contents
Other Feider Machines Power Tools manuals
