Feider Machines FHAEP1820 User manual

Original Instructions
Cordless Wet & Dry Vacuum
FHAEP1820
FEIDER FRANCE
32 Rue Aristide Bergès, 31270 CUGNAUX - FRANCE
Made in PRC 2020
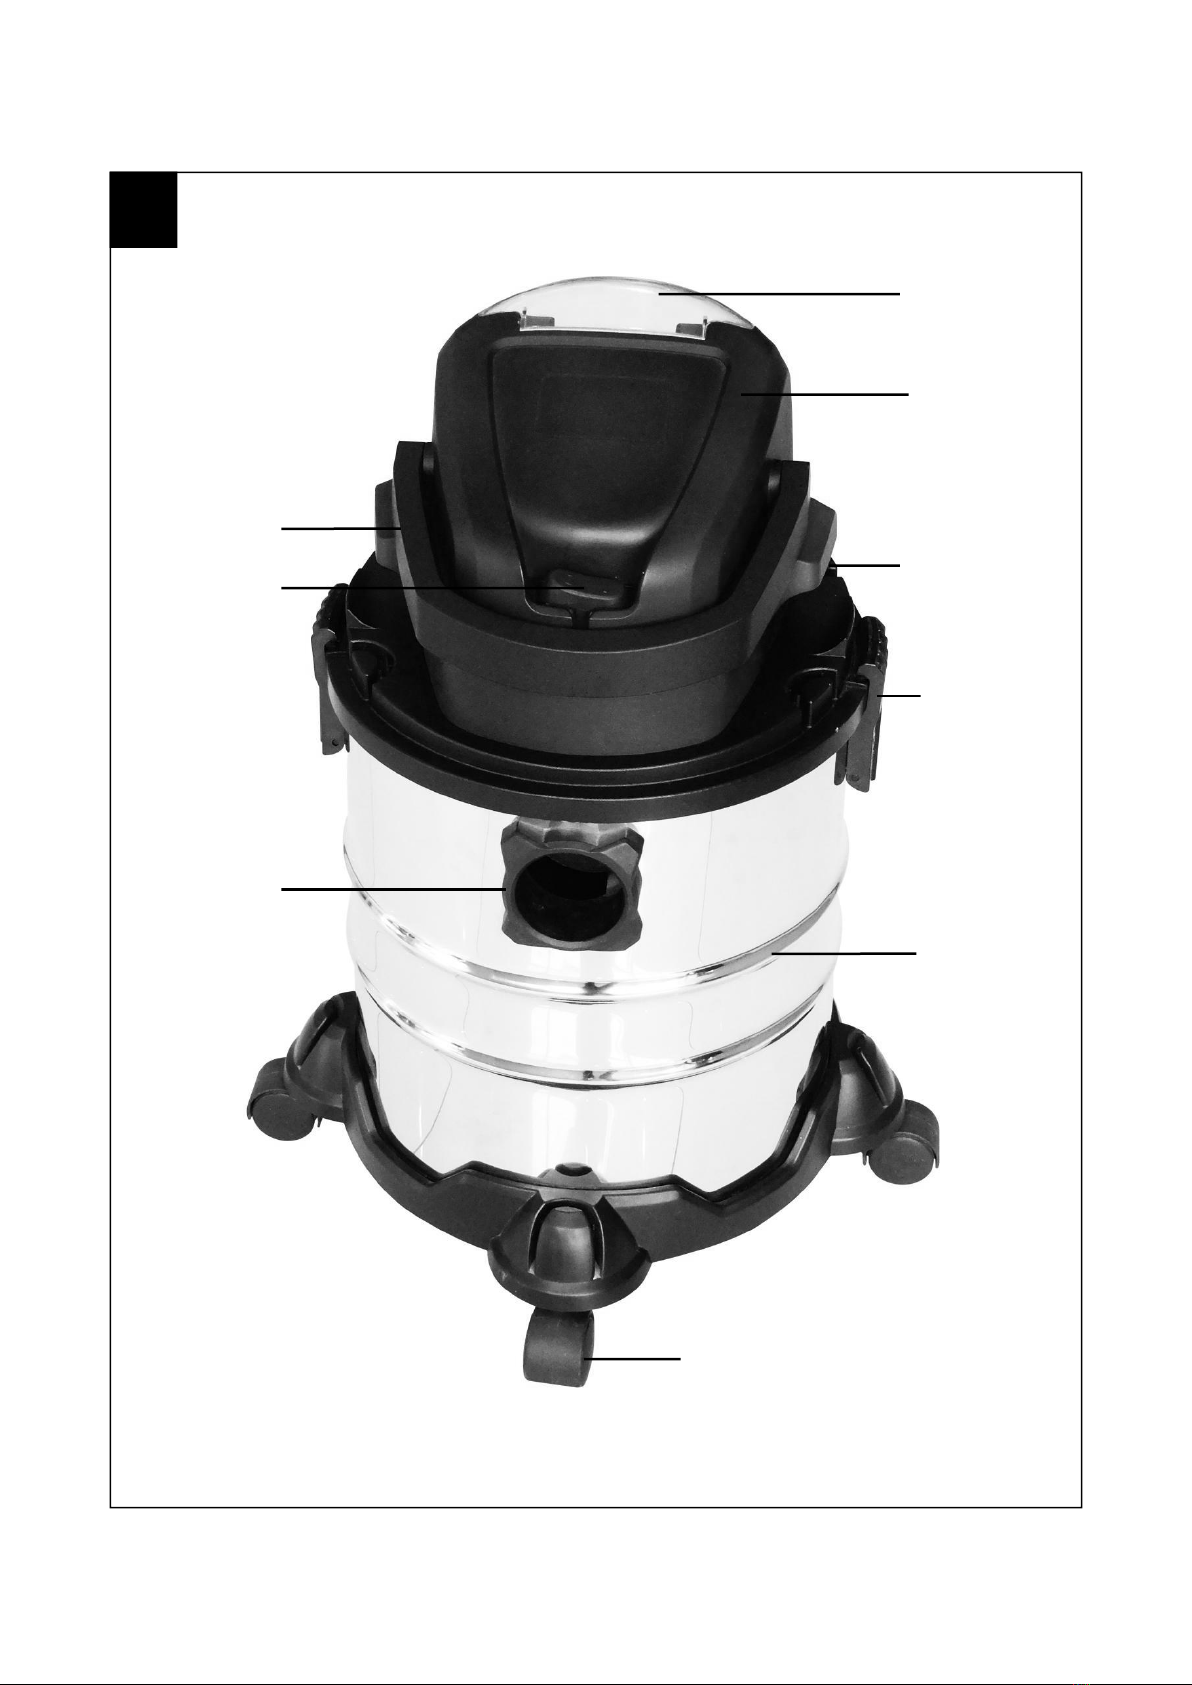
1
13
8
2
3
21
6
7
1
17

4
3
5
4
9
3
2
13
10
15
16
14
12
11
17

8
7
6
5
15
8
10
7
13
7
14
9a
9b
10
11
11
16
9c
10
12
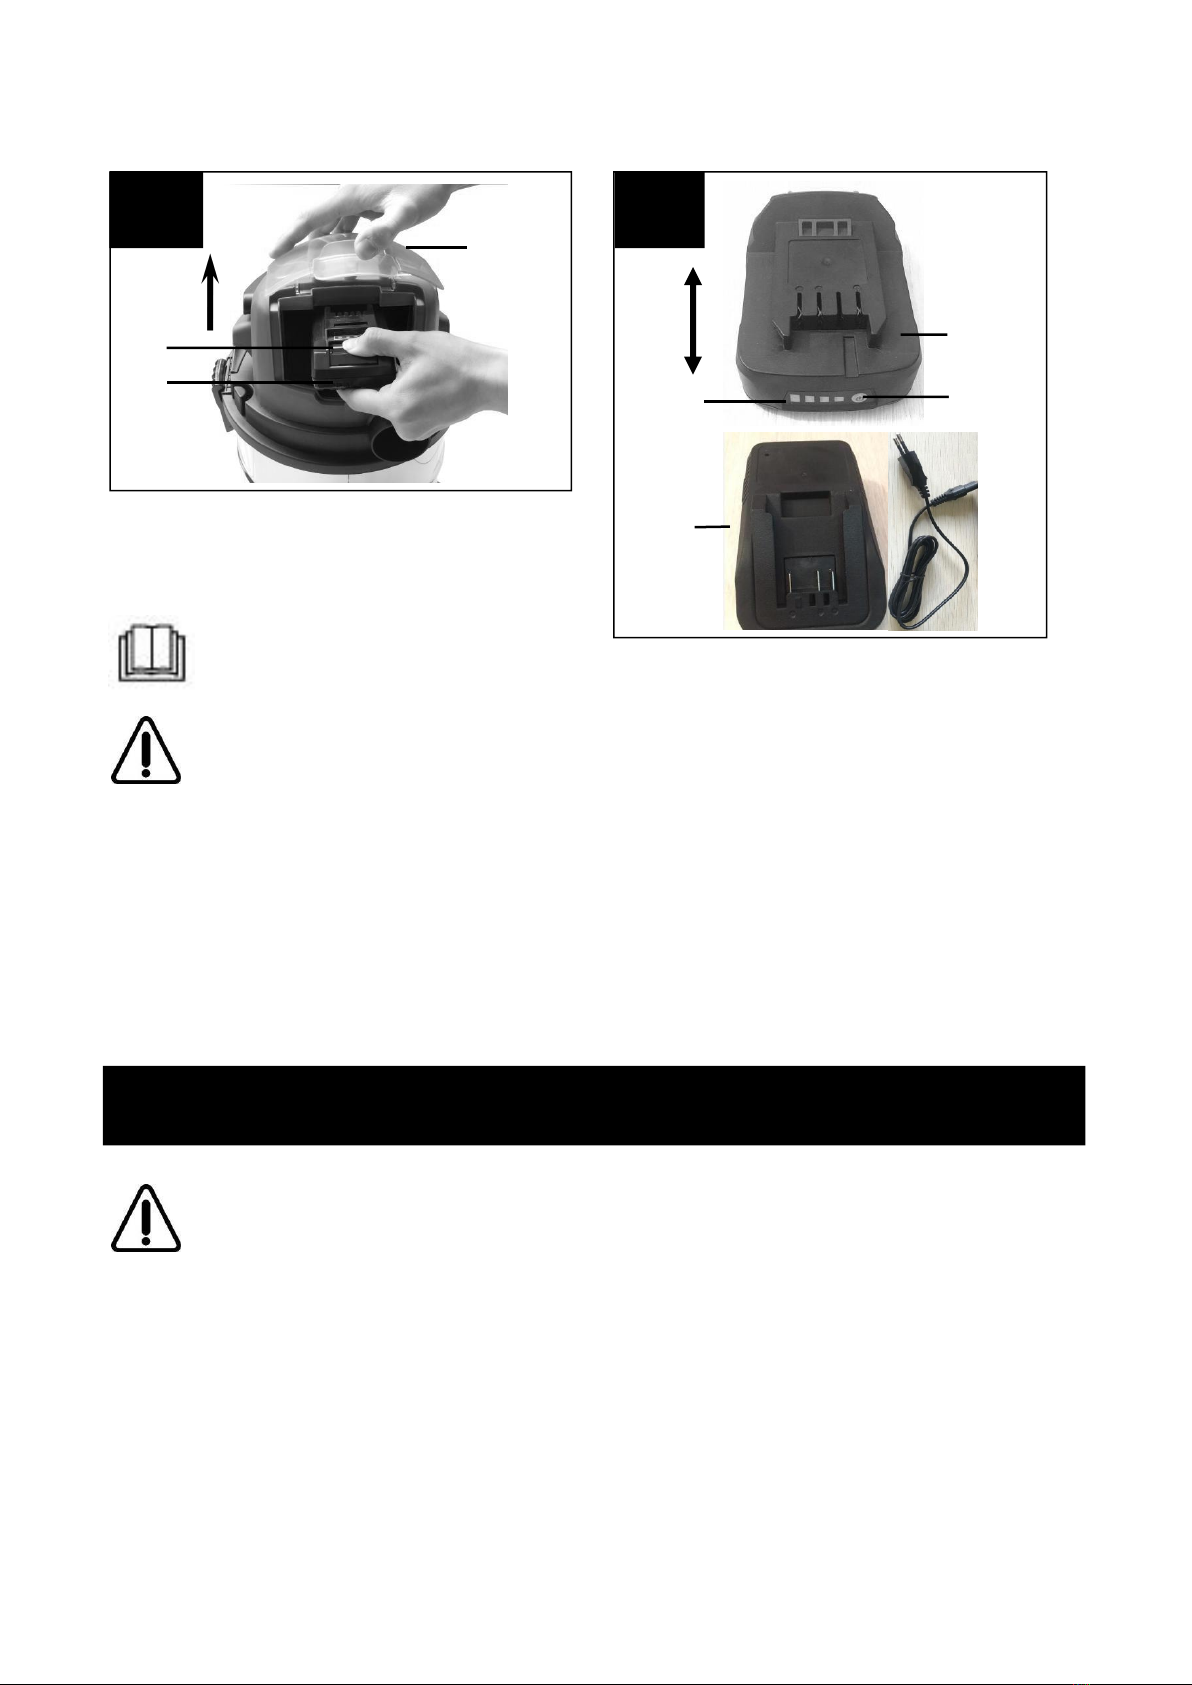
Caution! - Read the operating instructions to reduce the risk of inquiry.
Danger!
When using the equipment, a few safety precautions must be observed to avoid injuries and
damage. Please read the complete operating instructions and safety regulations with due
care. Keep this manual in a safe place, so that the information is available at all times. If you
give the equipment to any other person, hand over these operating instructions and safety
regulations as well. We cannot accept any liability for damage or accidents which arise due
to a failure to follow these instructions and the safety instructions.
1. Safety regulations
Danger!
Read all safety regulations and instructions.
Any errors made in following the safety regulations and instructions may result in an electric
shock, fire and/or serious injury.
Keep all safety regulations and instructions in a safe place for future use.
Important: read the operating instructions before assembling and using the appliance for
the first time.
Never clean the appliance with solvents.
Never leave the appliance unattended when operational.
11
10
20
17
18
19
D
C
19
GENERAL POWER TOOL SAFETY WARNINGS
Table of contents
Other Feider Machines Vacuum Cleaner manuals

Feider Machines
Feider Machines ONYX User manual

Feider Machines
Feider Machines FAP1440 User manual

Feider Machines
Feider Machines FHAEP120015L User manual

Feider Machines
Feider Machines FHAR28 User manual

Feider Machines
Feider Machines FHAEP1430L User manual

Feider Machines
Feider Machines FAP1630 User manual

Feider Machines
Feider Machines FVC12L User manual

Feider Machines
Feider Machines FAP1430 User manual

Feider Machines
Feider Machines VULCANO User manual


