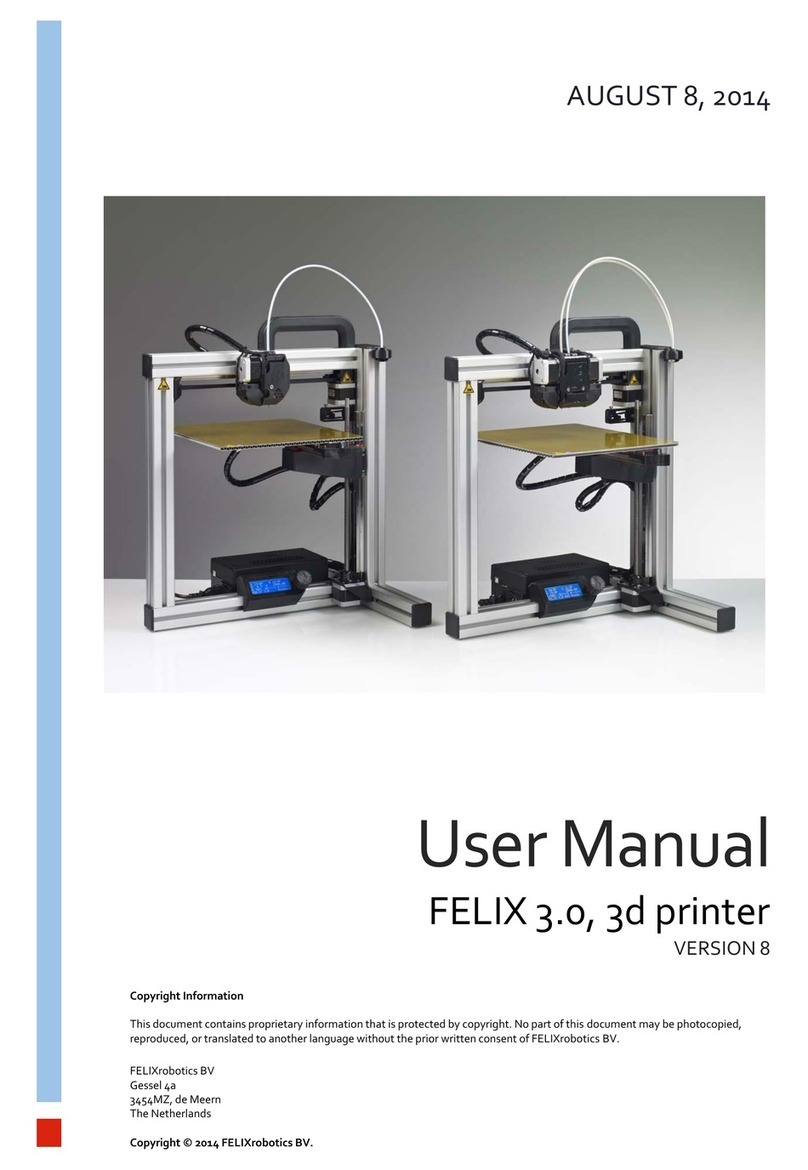
FELIXrobotics FELIX 3.0 User manual

User Manual
FELIX 3.0, 3d printer
VERSION 4
Copyright Information
This document contains proprietary information that is protected by copyright. No part of this document may be photocopied,
reproduced, or translated to another language without the prior written consent of FELIXrobotics.
FELIXrobotics BV
Gessel 4a
3454MZ, de Meern
The Netherlands
Copyright © 2014 FELIXrobotics BV.
JANUARY 25, 2014

Page1
support@FELIXprinters.com
www.FELIXprinters.com
User manual FELIX 3.0 3d printer
Contents
CONTENTS _______________________________________________________________________ 1
1INTRODUCTION_______________________________________________________________ 2
2SPECIFICATIONS ______________________________________________________________ 3
3MECHANICAL SETUP __________________________________________________________ 4
3.1 Calibration of table ___________________________________________________________________________ 4
3.1.1 Step 1_____________________________________________________________________________________ 4
3.1.2 Step 2 ____________________________________________________________________________________ 5
3.2 Extra calibration for dual extrusion printers_______________________________________________________ 6
4SOFTWARE INSTALLATION –MICROSOFT WINDOWS _____________________________ 7
4.1 Microsoft Windows ___________________________________________________________________________ 7
4.1.1 Driver Installation ___________________________________________________________________________ 7
4.1.2 Firmware installation –Arduino________________________________________________________________ 8
4.1.3 Printer Software –Repetier-Host ______________________________________________________________ 9
4.2 Software Installation –Mac OS ________________________________________________________________ 11
4.3 Calibrate the Z-Direction/Connect to printer _____________________________________________________ 14
5PREPARE CAD FILE FOR PRINTING - SLICING ____________________________________ 16
6YOUR FIRST PRINT ___________________________________________________________ 19
7DUAL HEAD PRINTING ________________________________________________________ 21
7.1 Kisslicer ____________________________________________________________________________________ 24
7.2 SLIC3R –Coming soon________________________________________________________________________ 26
8PRINTER CONTROL WITH OPTIONAL DISPLAY UNIT _____________________________ 27
8.1 Workflow to start a print. _____________________________________________________________________ 28
8.2 Switch filament. _____________________________________________________________________________ 28
8.3 Menu description ____________________________________________________________________________ 29
9PRINTER ACCESSORIES _______________________________________________________ 30
9.1 Filament cleaner mechanism.__________________________________________________________________ 30
9.2 Filament roll off mechanism ___________________________________________________________________ 31
10 FAQ ________________________________________________________________________ 32
11 MAINTENANCE/OPTIMAL OPERATIONAL TIPS __________________________________ 33
11.1 General tips for optimal operation______________________________________________________________ 33
11.2 Cleaning____________________________________________________________________________________ 33
11.3 Regular maintainance ________________________________________________________________________ 33
12 TROUBLESHOOTING _________________________________________________________ 34
13 SAFETY _____________________________________________________________________ 37
14 APPENDIX: EXTRA CHECKS AFTER ASSEMBLING DIY KIT FOR OPTIMAL OPERATION 38
15 APPENDIX: ELECTRONICAL SCHEMATICS _______________________________________ 40
16 APPENDIX: MATERIAL DATA SAFETY SHEET ____________________________________ 41
16.1 PLA________________________________________________________________________________________ 41
16.2 ABS _______________________________________________________________________________________ 43
17 APPENDIX: SYMBOL- AND INDICATORLIGHTS EXPLANATION_____________________ 45
18 APPENDIX: TERMS OF SERVICE ________________________________________________ 46

Page2
support@FELIXprinters.com
www.FELIXprinters.com
User manual FELIX 3.0 3d printer
1Introduction
First of all, thank you choosing FELIXprinters! To get your Felix printer up and running as fast and
painlessly as possible please follow this manual carefully. Don’t compare this product with a television,
where a user manual is normally not required to get it working properly.
Please follow the instructions carefully and take your time to get familiar with the product. Please don’t
take any shortcuts unless you know what you’re doing. It’s better to spend a few minutes extra on
reading, than to wait a week for new parts.
When things are unclear or if you have any remarks or tips, please contact us at
support@FELIXprinters.com. We also recommend looking on our forum and getting yourself a forum
account. You will benefit from the ability to get downloadable and printable upgrades for your printer.
Also it is a great source to obtain and share knowledge about your 3d printer and 3d printing in general.

Page3
support@FELIXprinters.com
www.FELIXprinters.com
User manual FELIX 3.0 3d printer
2Specifications
Printing
Electrical
Print Technology
Fused Filament Fabrication
AC input:
100-240V, 50-60 Hz
Build Volume
25.5 x 20.5 x 22 cm
Power Requirements
12V DC, 15 Amps
Print Quality
Low
Normal
High
Very High
Extreme
250 microns
200 microns
150 microns
100 microns
50 microns
Connectivity
USB
Postioning Resolution
XY: 13 microns
Z: 0.4 microns
Power Usage
Max 250W
Filament Diameter
1.75 mm
Nozzle Diameter
0.35 mm
Mechanical
Chassis
Aluminum profiles
Software
Build platform
Aluminum sandwich plate
Software Bundle:
RepetierHost +
Skeinforge/SFACT
XY Bearings
Linear ball bearings
File Types:
.STL
Z bearing
Linear ball bearings
Supports:
Windows, XP and newer
Stepper Motors
1.8 deg angle
1/16 micro-stepping
Linux (Ubuntu 12.04+)
Mac OS X [10.6/10.7/10.8]
Physical Dimensions
Weight
8.7kg single, 9kg dual head
Shipping Weight
11 kg
Shipping Box
50x30x30 cm, DIY kit
58.4x50.8x55.5 cm,
Assembled unit
Temperature
Ambient operating
temperature
15-32 ˚C [60 – 90 ˚F]
Storage temperature
0 –32 ˚C
Warmup time
Heated bed (60 degC)
3 min
Nozzle (200degC)
1 min

Page4
support@FELIXprinters.com
www.FELIXprinters.com
User manual FELIX 3.0 3d printer
3Mechanical Setup
3.1 Calibration of table
For a successful print it is important that the table is properly calibrated. The distance between the nozzle and table should
be the same at every x,y position. The leveling mechanism of the table can be adjusted by turning the 3 M4 nuts underneath
the heated bed. For the assembled units the calibration should be good right of the box, but due to shipment it could be
that the calibration is slightly off. Therefore it is important to check it first.
IMPORTANT NOTES:
!!The leveling should be done by moving the axes by hand, not via computer interface!!
!!Never move the axis at a high rate by hand, because the motors could act like a generator (similar to your bicycle and
potentially damage the electronics of the board.)!!
3.1.1 Step 1
Calibrate the table in the y-direction.
1. Move the X-axis carriage (extruder) close to the homing sensor as shown above, and move the table up until
approximately 1 mm from the hot-end.
2. Move the Y-axis (heated bed) back and forth slowly. While doing this check the distance between the tip and bed. It
should be the same over the whole movement.
If it is not, turn the 2 nuts underneath the bed as indicated in the picture below.
3. Move the table a little closer to the hot-end and repeat the previous step to more precisely determine the distance
between the hot-end and the table over the whole length.
Start with approx.
1mm distance
Adjustment nuts

Page5
support@FELIXprinters.com
www.FELIXprinters.com
User manual FELIX 3.0 3d printer
3.1.2 Step 2
Calibration in x-direction
4. Move the table to the middle of its movement range slowly.
5. Move the X-axis carriage over its movement range slowly. While moving check the distance between the hot-end and
bed. If the distance is not even, adjust it with the nut which supports the middle of the table.
6. Move the table a little closer to the hot-end and repeat the previous step to more precisely determine the distance
between the hot-end and the table over the whole length.
You have successfully calibrated the table.
Adjustment nut

Page6
support@FELIXprinters.com
www.FELIXprinters.com
User manual FELIX 3.0 3d printer
3.2 Extra calibration for dual extrusion printers
NOTE:
This step is only intended for people who bought a dual head DIY kit. Otherwise skip to next
subchapter.
This subchapter guides you to mechanically calibrate your DUAL head setup. The following checks make sure
the hot-ends will have the same height with respect to the just leveled heated bed.
1. Make sure the heated bed is leveled correctly.
2. Make sure the hot-ends are from the same version. Otherwise mechanical adjustment might be required.
3. Make sure the bottom bolts are gently fastened with an equal amount of torque.
4. Is the height of both hot-ends equal? If not, do the following checks to see what could be the cause.
If the hot-end tips have a different height, it could be that during assembly of the hot-ends itself the parts
of the hot-end are not fastened with an equal amount of torque or that the tolerances are out of spec
with one of the two hot-ends. Please check with the steps 1 to 4 where the difference lies and you are
able to slightly adjust the length by applying more torque to the parts of the hot-end.
1. Check if edge of top hot-end part
touches the bottom
2. Check of peek parts are equally high
3. Check if heater barrels have the
same height
4. Check of tips have the same height.

Page7
support@FELIXprinters.com
www.FELIXprinters.com
User manual FELIX 3.0 3d printer
4Software Installation –Microsoft Windows
4.1 Microsoft Windows
NOTE: Mac users should go to chapter 4.2
This chapter describes the steps how to make the printer communicate with your PC.
- Driver installation
- Firmware installation
- Repetier-host
4.1.1 Driver Installation
1. Plug in the power supply cable.
NOTE: The electronics board is NOT USB powered, so without the power cable the
electronics won’t work. It needs the voltage of the purple wire to drive the logic of the board.
The power to the rest of the board is controlled by the CPU when needed.
2. Plug the USB cable into the computer
3. Your operating system should find the correct drivers automatically, or download them automatically with
Windows update.
a. If the drivers are not found automatically, then download drivers from here:
http://www.ftdichip.com/Drivers/VCP.htm.
4. Windows 7: Right-click on "Computer" in the Start Menu, then select "Properties". In the left pane, click
"Device Manager". On Windows 8 the Device Manager is accessible directly from the Windows menu.
Note what COM-port is present. If there are more than one COM ports available unplug the USB cable of
the printer, and re-plug it again. Check what port number is appearing and disappearing. This port number
will be used for the next step.
NOTE: Sometimes windows is still not able to find the port. To fix this follow this tutorial:
http://forum.arduino.cc/index.php/topic,107098.0.html

Page8
support@FELIXprinters.com
www.FELIXprinters.com
User manual FELIX 3.0 3d printer
4.1.2 Firmware installation –Arduino
NOTE: Only continue with this subchapter if:
1. You have just assembled your DIY kit DUAL extruder 3d printer or
2. You want to update the firmware of your printer because there is new firmware
available.
This chapter explains how to update the firmware on the electronics board of your printer.
This step requires the following software:
-Arduino, http://arduino.cc/en/Main/Software platform to upload firmware to the printer.
-FELIXprinter firmware (check the revision of the printer). Contains printer settings for correct
operation of your FELIXprinter.
Steps to upload new firmware to the control board
1. Download the latest firmware here:
http://www.felixprinters.com/downloads/index.php?path=firmware/
Be sure to download the printer firmware that matches your printer version.
Extract the firmware .zip file.
2. Install the Arduino software, and run it.
3. Open the firmware file from the extracted firmware folder.
In this case it is Repetier.ino, it could also be Marlin.ino.
4. Select the correct platform:
5. Select the correct Serial (COM) Port, which you noted earlier.

Page9
support@FELIXprinters.com
www.FELIXprinters.com
User manual FELIX 3.0 3d printer
6. Press the upload button, and wait till the upload is complete. This normally takes between 1 to 2 minutes.
The new firmware is now on your printer.
4.1.3 Printer Software –Repetier-Host
Repetier-Host provides the following functions:
-Control your printer, move axes and set temperatures, monitoring etc.
-Process your CAD files (STL files) and make them printable.
To install Repetier-Host on your PC take the following steps:
1. Download latest version of Repetier-Host from www.FELIXprinters.com/downloads
Navigate to software folder and download setupRepetierHostFELIXprinters*.exe
2. Run the setupRepetierHostFELIXprinters*.exe file and follow the installation instructions.
3. Make sure the power cable and USB cable of the printer are connected.
4. Start Repetier-Host.
5. Go to Config -> Printer settings.

Page10
support@FELIXprinters.com
www.FELIXprinters.com
User manual FELIX 3.0 3d printer
In the configuration window press the Refresh Ports button.
Choose the COM-port which belongs to your printer. This is the same COM-port obtained from previous
chapter.
6. If you have two extruders, select the PRINTER tab and change the number of extruders.

Page11
support@FELIXprinters.com
www.FELIXprinters.com
User manual FELIX 3.0 3d printer
4.2 Software Installation –Mac OS
1. Plug in the power supply cable.
NOTE: The electronics board is NOT USB powered, so without the power cable the
electronics won’t work. It needs the voltage of the purple wire to drive the logic of the board.
The power to the rest of the board is controlled by the CPU when needed.
2. Plug in the USB cable into the computer
3. Download Mac-drivers from: http://www.ftdichip.com/Drivers/VCP.htm.
4. Download repetier software (.dmg file) from: http://www.repetier.com/download/ or from
http://shop.felixprinters.com/downloads/index.php?path=software/
5. Open .dmg file and copy Repetier-Host.app to your Application folder
6. Download latest printer profiles from
http://shop.felixprinters.com/downloads/index.php?path=software%2Fsfact+slicing+profiles/
7. Extract sfact.zip file (containing 1 folder with 2 subfolders: “sfact” and “sfact_profiles”
8. Copy sub-folder “sfact_profiles” to Macintosh H
9. Copy the “sfact” sub-folder to Applications folder (where the Repetier-Host.app is as well)

Page12
support@FELIXprinters.com
www.FELIXprinters.com
User manual FELIX 3.0 3d printer
10. Open the Repetier-Host Mac Application and go to Printer Settings
11. Configure printer settings:

Page13
support@FELIXprinters.com
www.FELIXprinters.com
User manual FELIX 3.0 3d printer
12. Configure Skeinforge settings under Preferences -> Slicer -> Skeinforge
13. Click “Browse” to direct to the correct files
Application: /Applications/sfact/sfact.py
Craft Utility: /Applications/sfact/skeinforge_application/skeinforge_utilities/skeinforge_craft.py
Python Interpreter: /usr/bin/pythonw
Python Interpreter: /Applications/Repetier-Host Mac.app/Contents/Resources/pypy.app/bin/pypy
Profiles Directory: /sfact_profiles/profiles

Page14
support@FELIXprinters.com
www.FELIXprinters.com
User manual FELIX 3.0 3d printer
4.3 Calibrate the Z-Direction/Connect to printer
To obtain good quality prints it is essential that the heated bed is level and that the distance between the hot-
end and the bed is close enough when printing the first layer.
The leveling was done prior to the software installation. So now it is time to calibrate the z-axis height with the
z-axis limit switch vane.
1. Connect to the printer. (The connect button should turn green)
Other checks to see if the printer is connected properly:
On the bottom of the repetier host program the following should be displayed
If you see … commands waiting, press the reset button, which is on the side of the electronics case next
to the SD-card and USB sockets.
2. Go to the manual control tab. (this looks different on the Mac)
3. Now it is time to calibrate the z-height:
When doing the following steps, hold your hands on powerswitch of the powersupply. Flip the switch
if something goes wrong.
-Press the Power button. This will turn on the power circuit of the electronics board.
If you have built a DIY kit: Do the following checks to ensure you have connected the wires correctly.
Home X, Y and Z
button
Home All axes
button

Page15
support@FELIXprinters.com
www.FELIXprinters.com
User manual FELIX 3.0 3d printer
oMake sure the fan which blows air on top of the hot-end is spinning
oMake sure the leds of the opto-sensors on the electronics board are reacting. Make sure the
lights of these opto-sensors go out when they are triggered. So if the switching vanes go into
the limit-switch, the light should turn off.
-Make sure the bed is at least 5 cm from the hot-end, to give you enough reaction time to respond if
something goes wrong.
-Press Home X, then move the x axis back and forth.
-Press Home Y, move the y axis back and forth.
-Press Home Z
-The distance between the table and hot-end is probably too large.
-Turn the screw in such a way that the flexible vane mechanism goes downwards. Do this approx. till ¾
of the possible stroke. Move the complete part a little bit up and press Home Z again.
-Repeat this until the table is approx. 3 mm from the nozzle. Now fix the bracket to the frame and start
homing again. Now repeat this procedure to get the nozzle closer and closer by turning the little screw
as shown in the picture above.
-Do this a couple of times until the distance is less than the thickness of a piece of normal paper.
Scroll down the manual control window.
-Check if the switchable fan mounted to the airduct is working.
Move the slider to 100% and press the fan button
1. Rough adjustment
2. Fine adjustment

Page16
support@FELIXprinters.com
www.FELIXprinters.com
User manual FELIX 3.0 3d printer
5Prepare CAD file for printing - Slicing
This chapter will prepare a CAD file for printing. It basically converts a STL file to a gcode file. This process is
called slicing.
To keep things simple for your first print we recommend you get the test file from here:
http://shop.FELIXprinters.com/downloads/index.php?path=print_files%2Ftest_print_files/ .
Choose the file. _40x10.STL.
Go to the Slicer tab. You’ll see two type of slicers. The first one is SFACT, and the second one is Slice3r. SFACT
is the preferred choice and has optimized profiles for the FELIXprinter. Slice3r is a faster slicer, but is at the
time of writing less reliable than SFACT, which means that some models don’t get sliced correctly.
There is a large choice of slicing profiles. For the first test it is recommended to choose the
2_1_Normal_Quality profile.
Short explanation of the slicing profiles:
Profile 1_1 to 3_4: are profiles setup for everyday printing.
Profile 4_1 to 4_5: are profiles optimized for our production parts. These are the profiles used to produce the
printed parts of your printer. When printer upgrades are provided, these are recommended to use for slicing
the parts.
Profile 5_1 to 5_2: are used for specific cases
Profile 6_1 and further: are used for testing purposes.
The structure of the profiles 1 to 4 is done like this:
X_1_No support,
No support material is
generated. Part is
printed as imported.
In this example not
recommended.
X_2_Exterior support
Automatic support
material generated
outside of the object
X_4_Full support + raft
Automatic support
material generated
outside and inside of
the object + a raft to
ensure good contact
with the heated bed.
X_3_Full support
Automatic support
material generated
outside and inside of the
object
-Printed part
-Support material
-Raft
-Heated bed

Page17
support@FELIXprinters.com
www.FELIXprinters.com
User manual FELIX 3.0 3d printer
The profiles are easy to adjust and tweak yourself for further improvement. To do this just click the configure
button
This will show a very large number of settings to tweak. Don’t worry: every setting is well documented. If you
are interested in knowing more just click the question mark button as indicated in the figure below.
1. Now back in the repetier main interface make sure the SFACT slicer is activated and select one of the
profiles.
2. Now it is time to slice our first object.

Page18
support@FELIXprinters.com
www.FELIXprinters.com
User manual FELIX 3.0 3d printer
Press the Load button or in the Object placement tab, Add Object button.
Then navigate to the folder where you downloaded the _40x10.STL file or any other STL file.
3. Slice this file and prepare it to print. Press the Slice with SFACT button
When the program is done after slicing the interface should look like this:
You have now sliced your first object and are ready to go to the next step.

Page19
support@FELIXprinters.com
www.FELIXprinters.com
User manual FELIX 3.0 3d printer
6Your first print
After all the hard work of the assembly and setting up the machine it is time to get some reward with of your
first successful print.
In the manual control window do the following.
-In case of dual extrusion, select the extruder of choice.
-Heat up the extruder to 195 degC
-Heat up the heated bed to 55 degC
-Move the table down 10mm
If the extruder and heated bed are warmed up, check or make sure that the following is true:
-Printer axes can move without obstructions
-Remove all plastic residues on the heated bed, preferably with the supplied tweezers
-The heated bed surface is clean and degreased.
-When all axes are homed, the hot-end is not touching the table.
Make sure the table is moved at least 10mm away from the extruder tip and insert the supplied PLA filament in
the extruder.
Run the extruder until a steady flow of plastic comes out.
NOTE: When there is not a continuous flow coming out of the nozzle, make sure the
extruder arm is properly tensioned. Turn the m4 bolt COUNTER CLOCKWISE to put more
tension on the filament, so the filament will be pulled into the hot-end better. But watch out,
too tight and the motor will have a hard time turning, and in the worst case the filament
might be squashed so wide that it gets clogged into the hot-end.
WARNING:EXTRUDER AND
HEATED BED GET HOT.WEAR
GLOVES WHEN OPERATING
YOUR FELIXPRINTER.
Other manuals for FELIX 3.0
1
Table of contents
Other FELIXrobotics 3D Printer manuals
Popular 3D Printer manuals by other brands
AmazonBasics
AmazonBasics B08895Y2CP manual

Stratasys
Stratasys J3 Series user guide
TRAK
TRAK Airwolf EVO-T Installation, Printing, Maintenance & Troubleshooting Manual
Dreve
Dreve phrozen Sonic XL 4K 2022 user manual
Creality 3D
Creality 3D Ender-3 Pro Instructions for assembly
Shining 3D
Shining 3D AccuFab-L4D user manual
